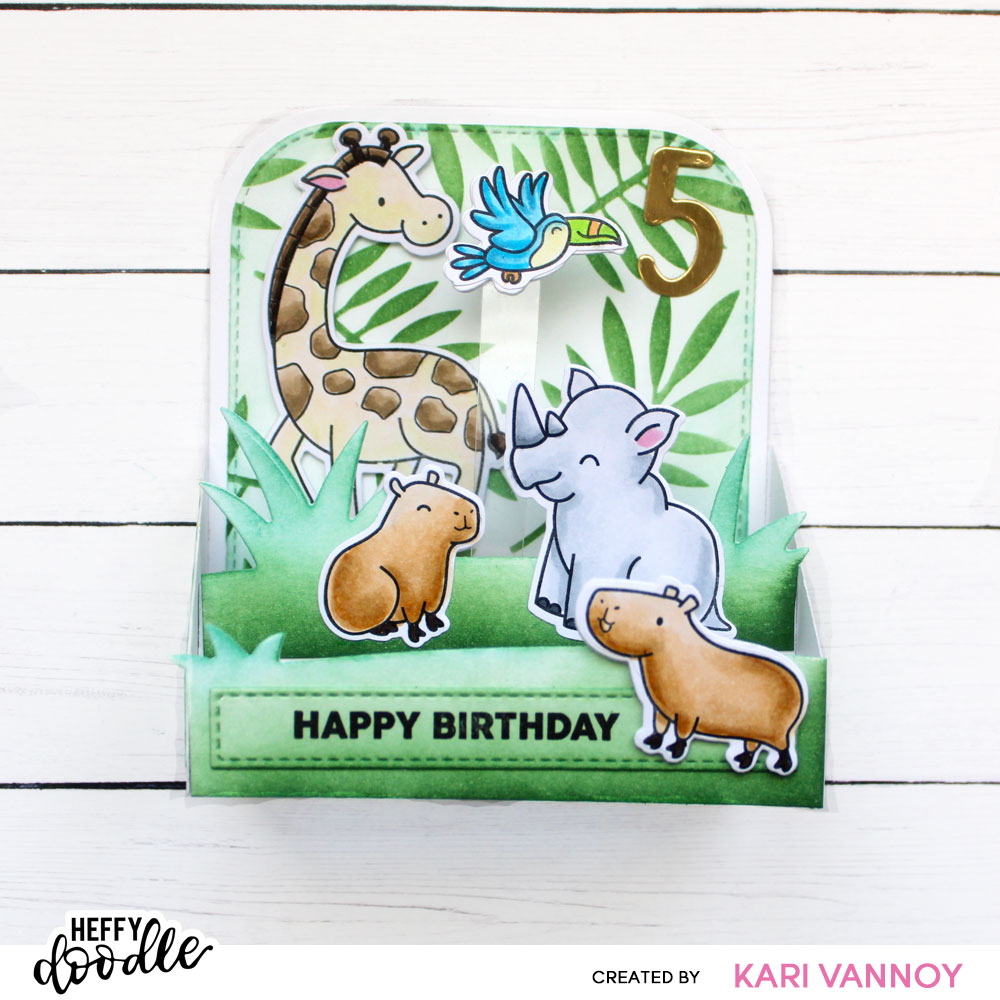
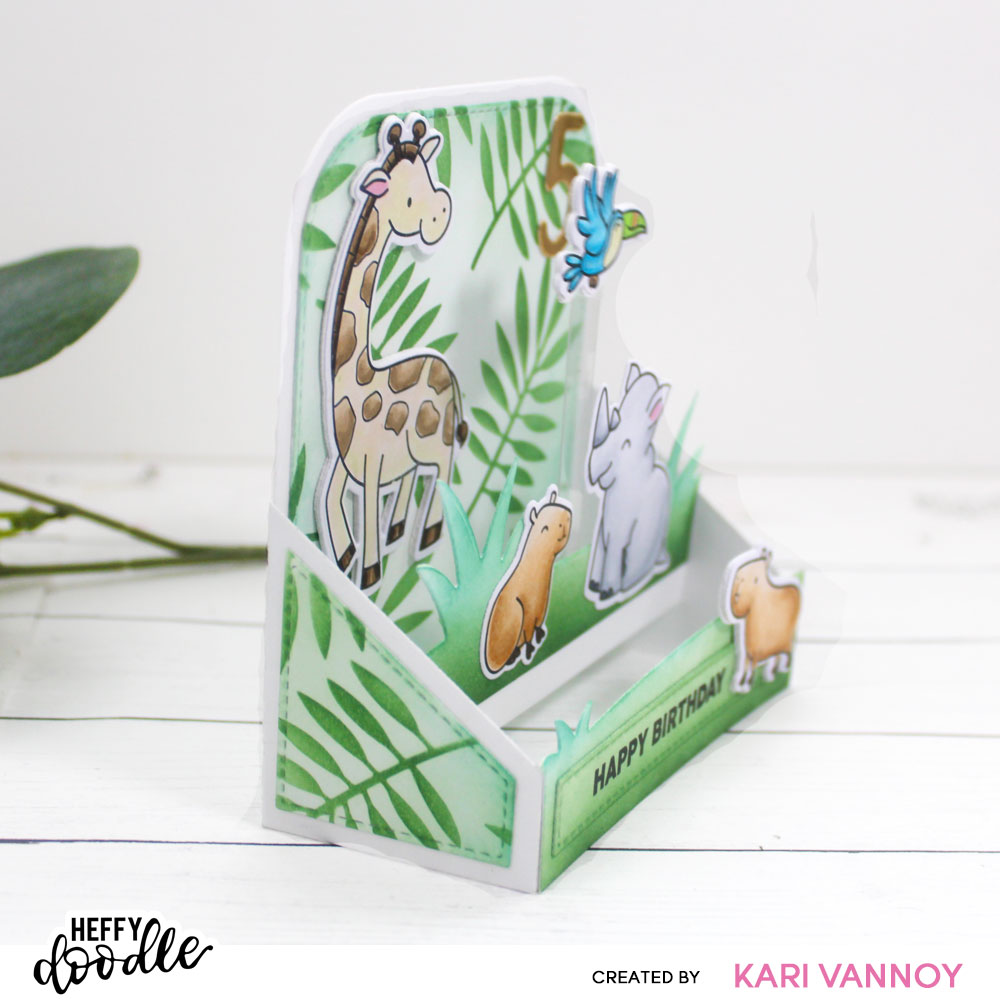
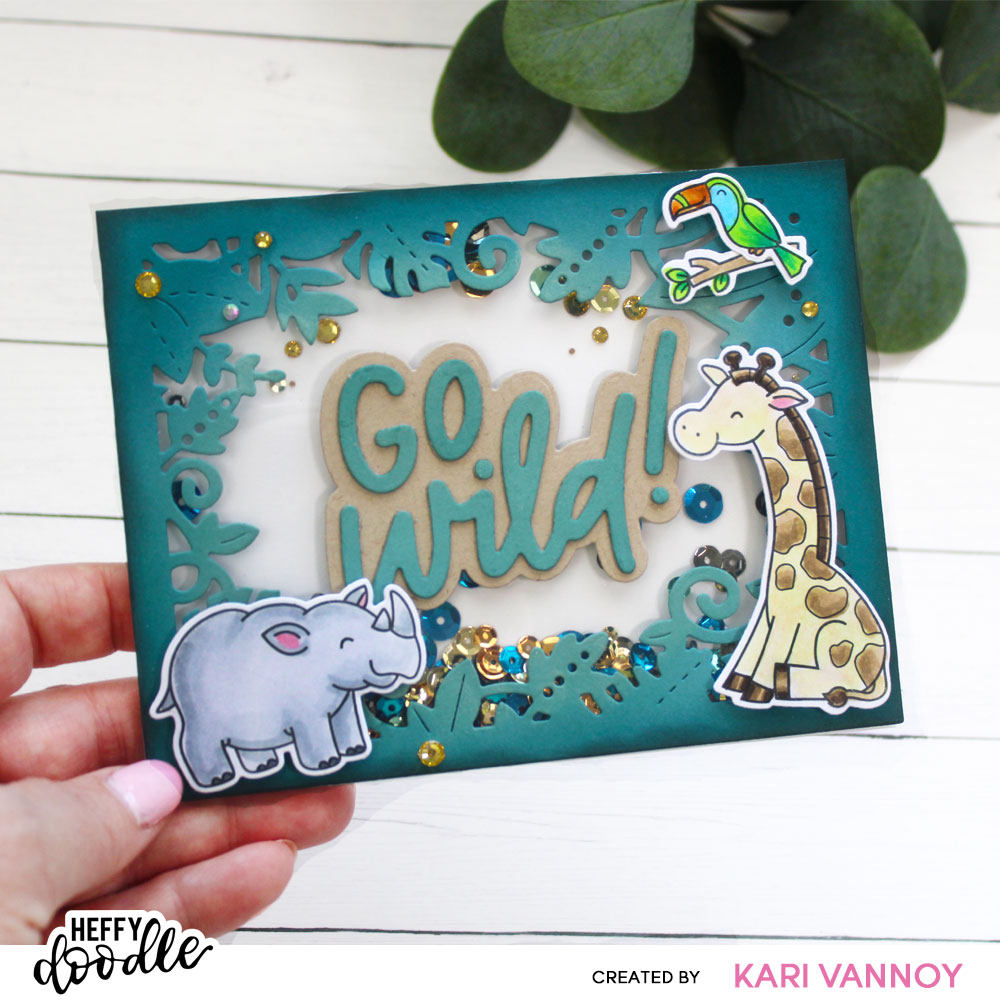
Hello! Today I have a new Safari Shaker card and video to share. I’m sharing a very easy way to create a shaker card.
Watch the video below or in HD on YouTube:
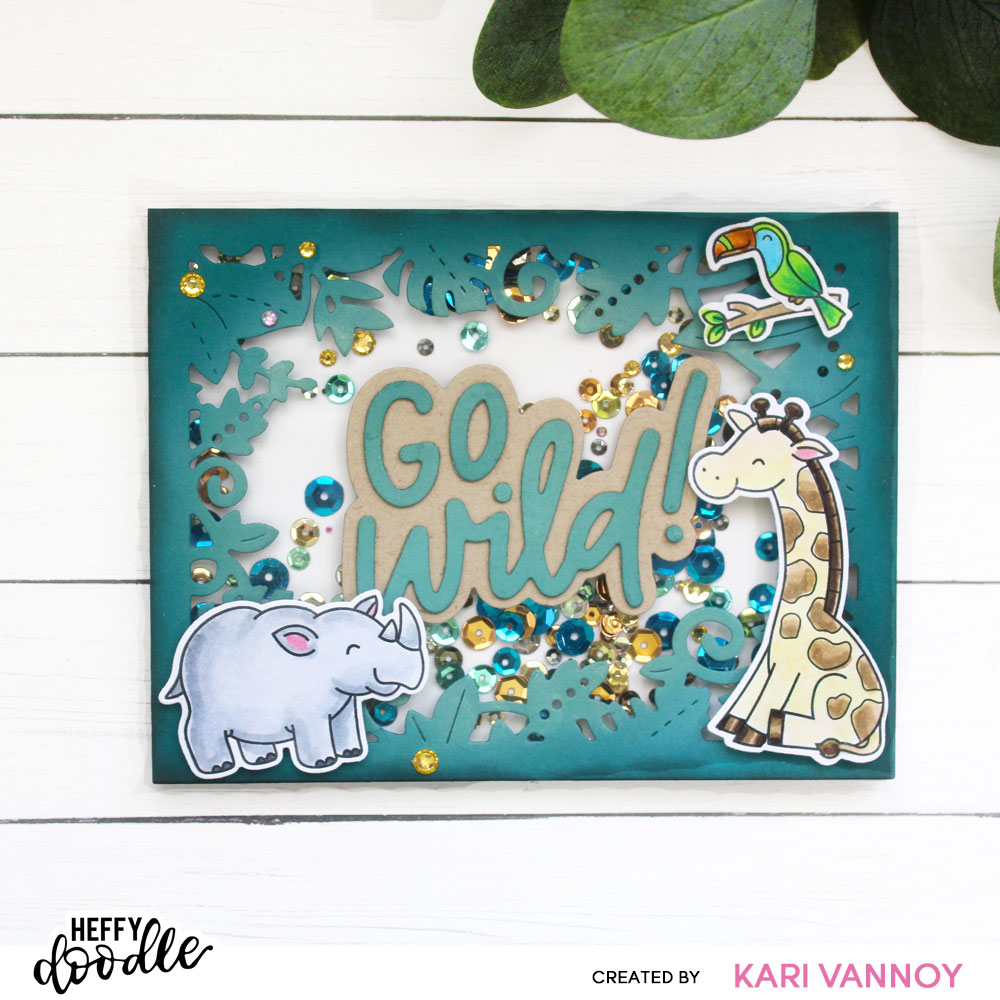
I just think these Safari animals are so cute! This is a great shaker technique…and I started out with the Go Wild A2 Frame Die, added some acetate and double-thick foam to create this shaker front.
The Sparkle Mixes from Heffy Doodle are absolutely my favorite because they not only have sequins, but they also have gems! I saved some of the gems to add to the front of the panel. Watch the video to see how easy this shaker is to create!
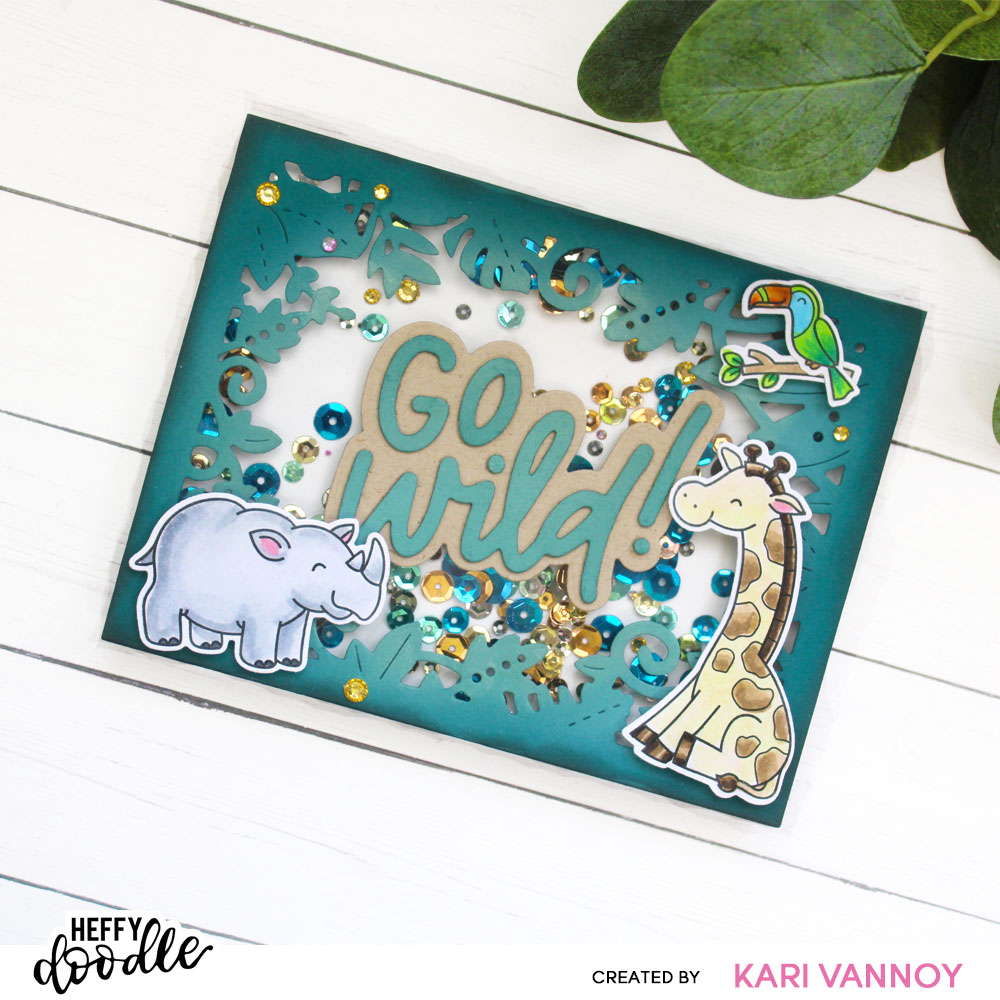
Creating the sentiment with Kraft cardstock shadow and green letters really reminds me of a safari! That is what helped me to choose these colors.
I’m often asked what supplies I use to make my cards and projects, so I’ve put together a list using affiliate links when possible. If you make a purchase with these links I may receive a small commission. These help me to keep up with blog costs and continue bringing you fun projects. Thank you so much for your support!
I hope you enjoyed this shaker safari card today! I’ll be back with more cards to share soon.