Tag Archives | Video tutorial
SUNSHINE-all-6-cards-crooked

Altenew Bursting With Creativity Stand-alone Dies Release Blog Hop + Giveaway

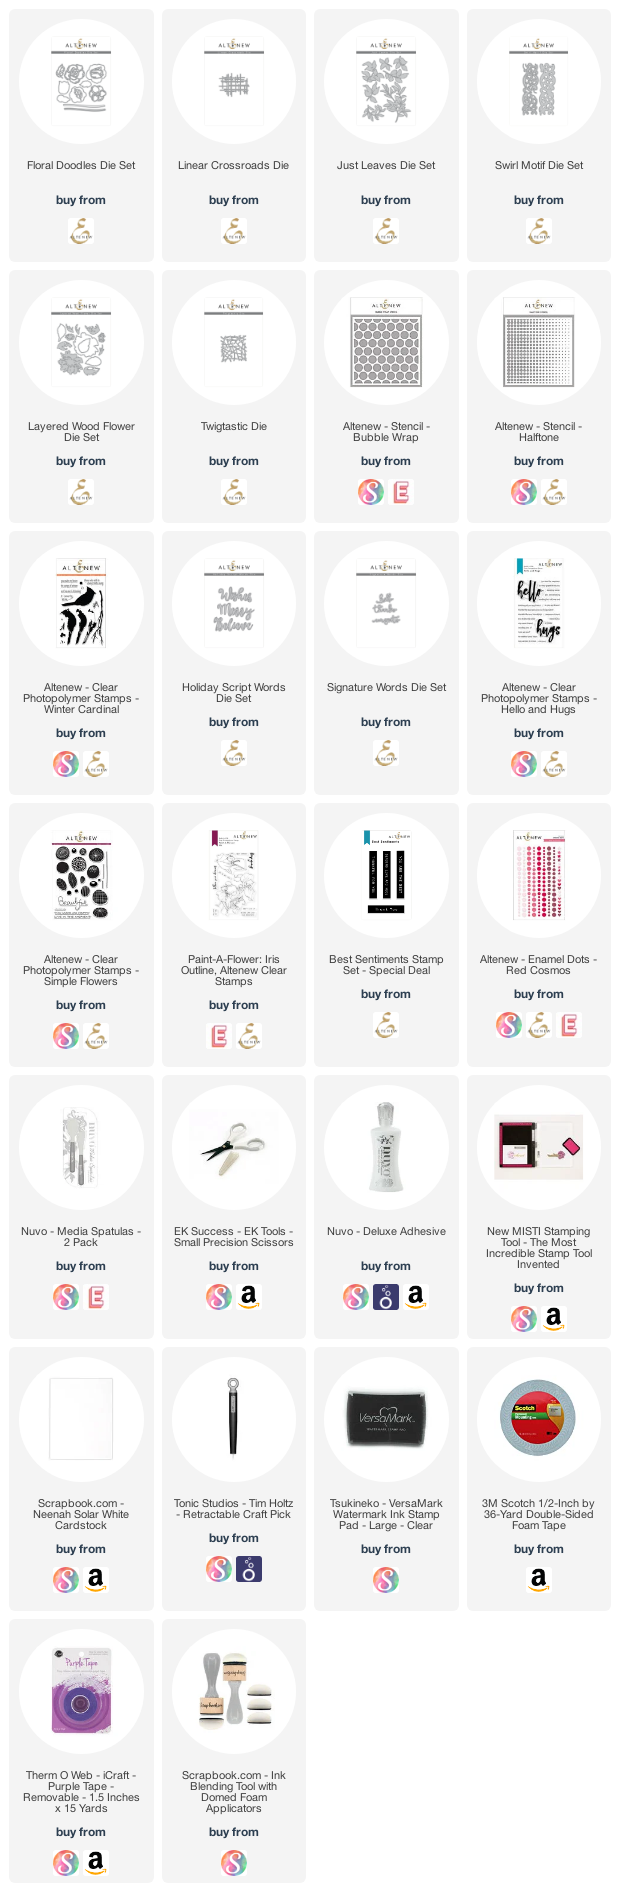
Hello! I’m delighted to be a part of the Altenew Bursting With Creativity Stand-alone Dies Release Blog Hop + Giveaway today!!

There are so many BEAUTIFUL new dies, and today I’m making SEVEN cards to share featuring many of the new release dies. Be sure to comment and follow along the blog hop to be eligible to WIN! The more you comment, the better your chances are.

I have a video showing all the cards and my featured dies, watch it below or in HD on YouTube:

The first die I created a card with is the Twigtastic die. I paired it with the Winter Cardinal to make a winter-feel card.

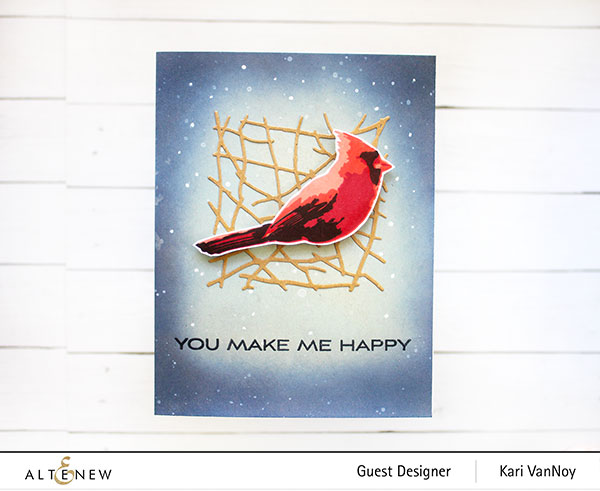
I thought this die is perfect for a “nest” for my favorite winter bird! I love how it looks together.

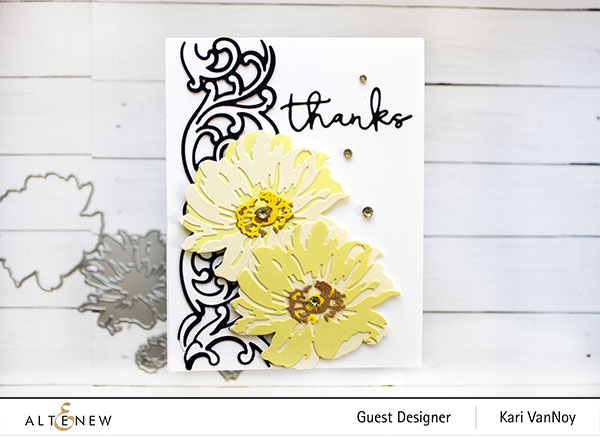
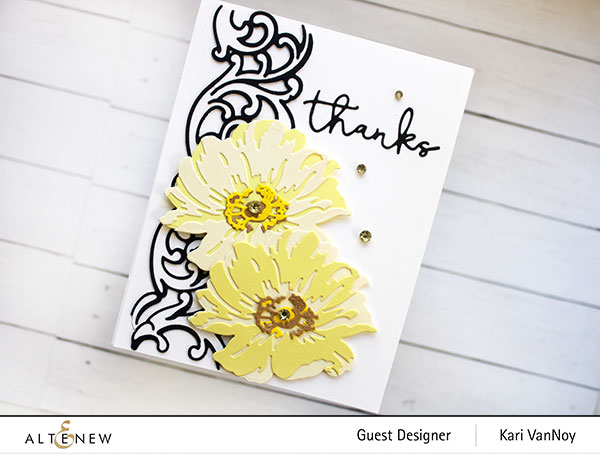
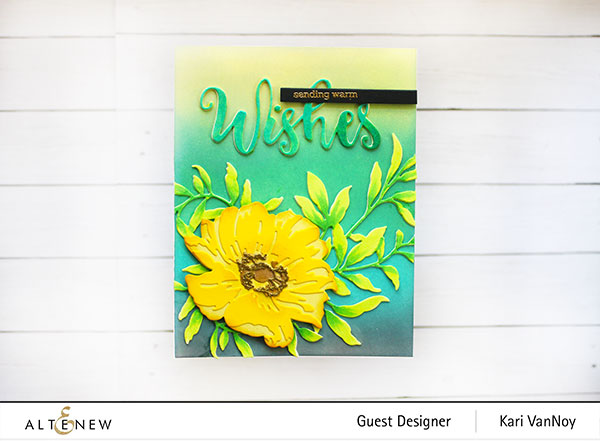
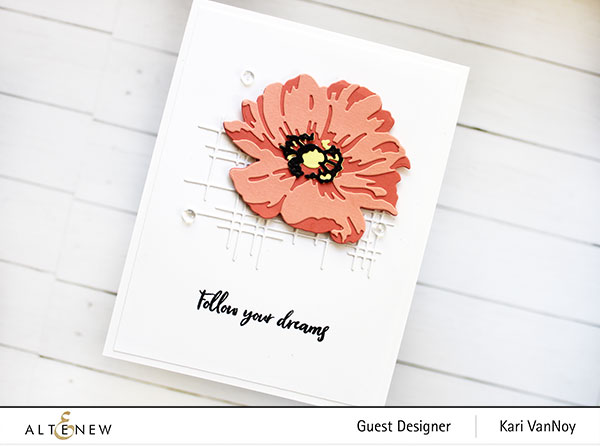
The next die is an absolute favorite of mine: the Layered Wood Flower Die Set. This layering flower die is gorgeous and I used it on many of my cards today (because I just couldn’t resist!)

For this card, I combined it with the new Swirl Motif Die Set as a dramatic touch in black and white.

Beautiful flowers, beautiful Swirl Motif Die

I die cut this flower in so many colors, and I had to make a red and green card, too (I’ve got the holidays on my mind)! I created the background with Altenew embossing paste and spray to make the mint green background. How gorgeous is this flower in RED?! Love it.

Next, I die cut the beautiful Just Leaves Die Set. I can see this being a die that I reach for over and over again!! I think it’s a must have! I colored these up with just two green Copic markers and added a sentiment and the bright yellow flower for this card.

And because I loved those leaves so much, I created a second card with only the leaves! Add just a few red enamel dots to give it a holiday vibe.

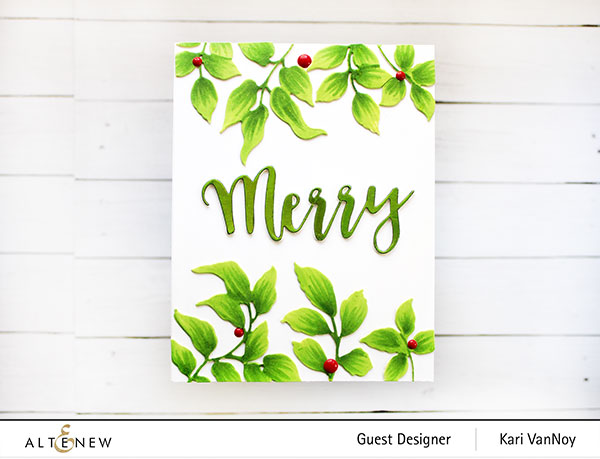
That “Merry” sentiment is foiled in a lime green color and it works so well with my Copic-colored leaves.

Next up is the Linear Crossroads Die, which is a beautiful die for added texture in the background on this next card.

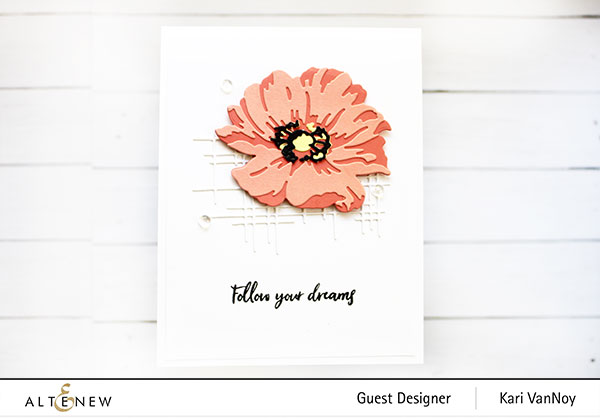
My last card today features the Floral Doodles Die Set, which is a layering flower die. It has the background AND a lined outline of each flower.

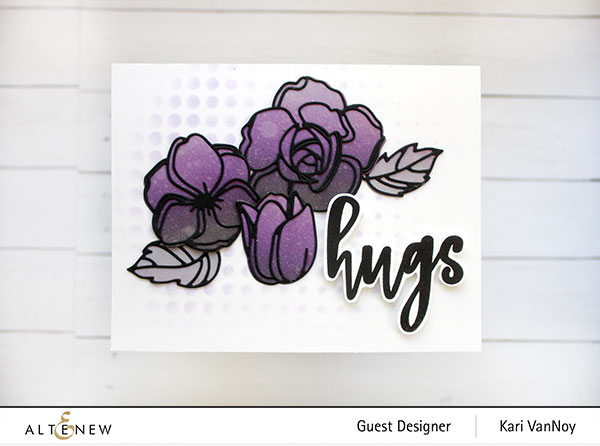
I inked up the background of these flowers with Distress Oxides and then added a black outline over the top of each of the flowers and leaves. A simple inked background makes it pop off the card.

I hope you enjoyed this look at the new release stand-alone dies! Leave a comment and let me know your favorite one.

Giveaway Prizes:

$250 in total prizes! To celebrate this release, Altenew is giving away a $50 gift certificate to 2 lucky winners and a $15 gift certificate to 10 winners! Please leave a comment on the Altenew Card Blog and/or each designer’s blog post on the blog hop list below by 12/23/2020 for a chance to win. Altenew will draw 12 random winners from the comments and announce the winners on the Altenew Winners Page on 12/25/2020.

Freebies:

Here are TWO ways to get a FREEBIE to kickstart your creativity! 

  • Get a FREE brand new Bursting With Creativity Stand-alone Dies Release Inspiration Guide (worth $5.99) with every order of high-value Bursting With Creativity release bundles. Shop HERE!
  • Get a FREE brand new Bursting With Creativity Stand-alone Dies Release Mini Inspiration Guide with every order from 12/17/2020 through 12/19/2020. Shop HERE!

Blog Hop Order:
Here is the blog hop list:

Thanks for stopping by today! I will have a list of all the supplies below for you, if you are interested in checking out the new dies.

I’m often asked what supplies I use to make my cards and projects, so I’ve put together a list using affiliate links when possible. If you make a purchase with these links I may receive a small commission. These help me to keep up with blog costs and continue bringing you fun projects. Thank you so much for your support!

Comments { 50 }
SUNSHINE-both-cards-2

Who Wants a Hippopotamus for Christmas?

Hello! Today I am turning some regular hippos into Christmas hippos and making TWO cards! These cute hippos are from Miss Ink Stamps, and I’ll bet you can guess the song that inspired me to make these cards.

I have a video on the process and I’m sharing some more tips on stretching stencils and stamps to create more with your supplies! Watch the video below or in HD on YouTube:

Aren’t these hippos cute! I’ll bet you would never guess that the red ribbon is really seaweed from that set. Lol. Another great trick to stretch your stamp sets!

I colored up so many of the hippos that I decided to make a slimline card, too!

That glitter is the beautiful Dazzle Dust from Miss Ink that changes colors in the light! This one is blue and it has a green shift to it. So pretty!

Well, I really hope I didn’t cause that song to run through your head (like it did for mine the entire time I was making this card). But really, if the hippos are as cute as these stamps, count me in for having one on my wish list!

Happy Holidays! I’ll be back soon with more cards.

I’m often asked what supplies I use to make my cards and projects, so I’ve put together a list using affiliate links when possible. If you make a purchase with these links I may receive a small commission. These help me to keep up with blog costs and continue bringing you fun projects. Thank you so much for your support!

Comments { 0 }
SUNSHINE-both-cards-1

Foiled Paper and Marshmallow Paste

Hello! Today I am sharing my new FAVORITE black and white paper pack! This is not just any paper pack…it can be used with FOIL!! Can you tell I am excited about this? I have two cards with this foiled paper and I add Marshmallow Paste for even more drama.

To start, I cut down a piece of the striped paper and added red foil to it using the Minc Machine. You can also use a lamintor to add the foil. Then I cut out an oval of the middle so I could make two cards.

Card 1

For this first card, I colored up the tree with Copics. Then I added some Nuvo drops to the tree and Glitter drops to the lightning bugs. I white heat embossed the sentiment on black cardstock. I thought “All is calm, all is bright” worked great with the glow bugs!

I have a video below showing you the foiling and putting both cards together, and how to apply Marshmallow paste! Watch it below or in HD on YouTube:

Card 2

For the snail card, I used the same Copic colors to color up the snail image but I added one extra lighter yellow green color (YG01). I die cut some snowflakes for the background.

For the hat fur, I used a palette knife to add a generous amount of Marshmallow paste. Then I used the heat tool to heat it up for a few seconds until it popped up. It looks so fuzzy!

I’m often asked what supplies I use to make my cards and projects, so I’ve put together a list using affiliate links when possible. If you make a purchase with these links I may receive a small commission. These help me to keep up with blog costs and continue bringing you fun projects. Thank you so much for your support!

I hope you enjoyed these projects today and meeting my new favorite black and white paper. If you think about it, you can change the black and white into any color foil you’d like!

Thanks for stopping by!

Comments { 0 }
SUNSHINE-sleigh-with-all-supplies-1

Wood U Bend Ornament

Hello! Today I’m up at the Hedgehog Hollow blog sharing this holiday ornament project using Wood U Bend. This is a unique product that is made out of wood, and when you heat it, you can bend it to the shape you want!

Visit the blog for all the details! I also have a video showing all the tips and surprises I found out about this product, watch it below or in HD on YouTube:

I loved making this project, so I hope you’ll take a look and tell me what YOU think about the Wood U Bend. (this was a sample I got in the November Hedgehog Hollow Box).

I’m often asked what supplies I use to make my cards and projects, so I’ve put together a list using affiliate links when possible. If you make a purchase with these links I may receive a small commission. These help me to keep up with blog costs and continue bringing you fun projects. Thank you so much for your support!


Comments { 0 }
SUNSHINE-poinsettia-card-1-with-supplies

Quick Watercolor Poinsettia Cards

Hello! Do you ever need a quick and easy Holiday card? Today I have two EASY watercolor cards using Kaleidoscope powder! I’m using the Poinsettia stamp set from Maker Forte. This set is beautiful on it’s own, but add a little watercoloring and you get some gorgeous cards!

I created a similar card design and stamped the poinsettias in the same spot both on the Tiptree Jam (pink) cardstock, and on watercolor paper. Then I heat embossed using some of my favorite Liquid Platinum embossing powder.

For the pink card, I “painted” on some Kaleidoscope powder in three shades: Aurora, Hubble, and Shooting Star. These are glittery and sparkly and they shine so pretty in the light. Here’s a picture you may be able to see the sparkle a little better:

For the watercolor cardstock, I used the Kaleidoscope powder on the first layer (underpainting) and then added some bright watercolors on top of that.

To see the how-to, watch the short video below or in HD on YouTube:

These cards were so fun to make and so QUICK! I think they took me under 20 minutes for BOTH cards. That’s a bonus in my book, especially for Holiday cards!

I’m often asked what supplies I use to make my cards and projects, so I’ve put together a list using affiliate links when possible. If you make a purchase with these links I may receive a small commission. These help me to keep up with blog costs and continue bringing you fun projects. Thank you so much for your support!

I hope you enjoyed these cards today! I’ll be back soon with more card making inspiration!

Comments { 0 }