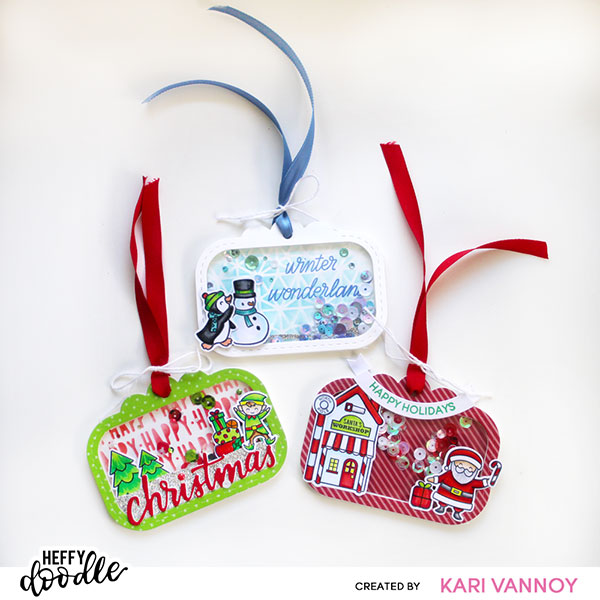
Hello! Today I have 3 holiday shaker tags to share along with a video on how to put them together! When you have beautiful products like this Tag Along die from Heffy Doodle, it’s easy to build a shaker tag.
Watch the video below or on YouTube:
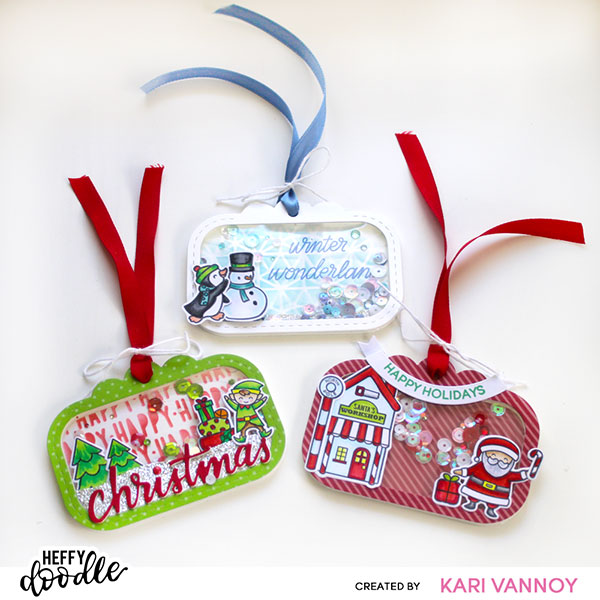
These tags were all made with some new favorites of mine from Heffy Doodle!
Tag 1: Happy Christmas Elf
For the first tag, I stenciled the Happy stencil on the background with red ink. Then I cut out the Tag Along die using the Tinsel Town paper from Heffy Doodle. (This was a part of their Mega Day sale, and I hope they have in their shop available soon!)
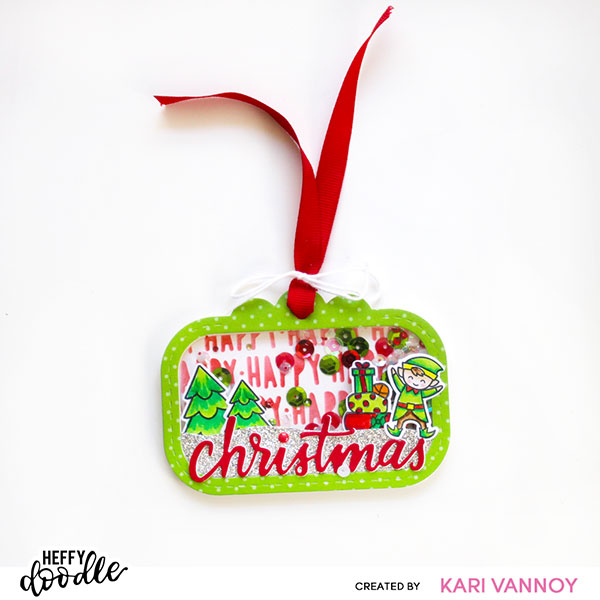
The images, including that happy elf are from Santa’s Village stamp set! I love it with the Christmas die as well. Watch the video to see how to assemble these tags with the shaker Sparkle Mix elements inside!
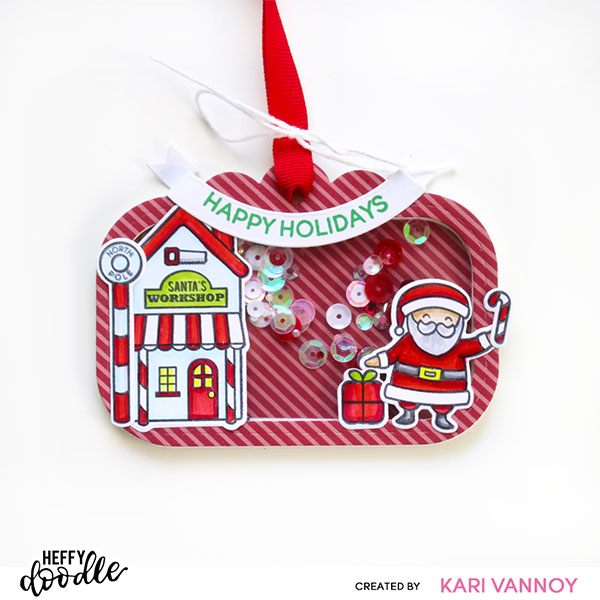
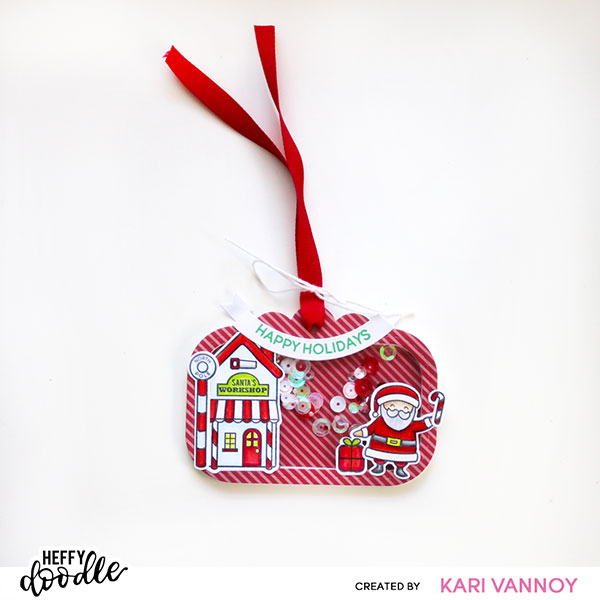
Tag 2: Santa’s workshop
For this one I changed up the color of the paper, but the images are all from Santa’s Village again. I added a candy cane to Santa’s hand…isn’t that perfect?
Tag 3: Winter Wonderland
The color scheme changed to blue & white for this tag. I love the happy penguin and snowman from the Wanna Build a Snowman stamp set!
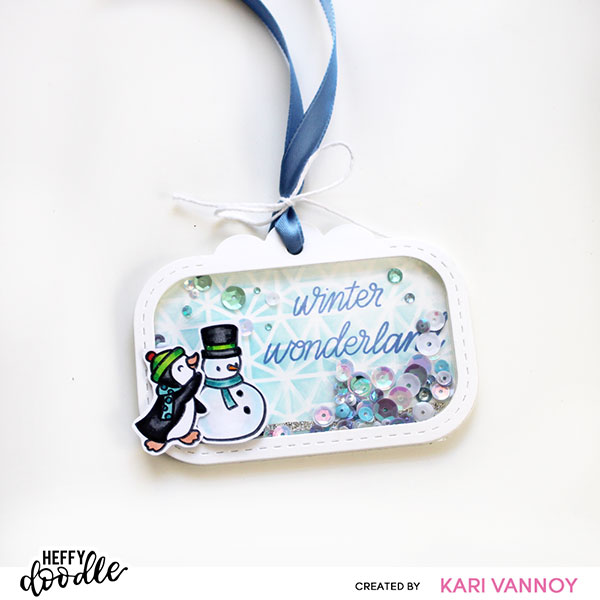
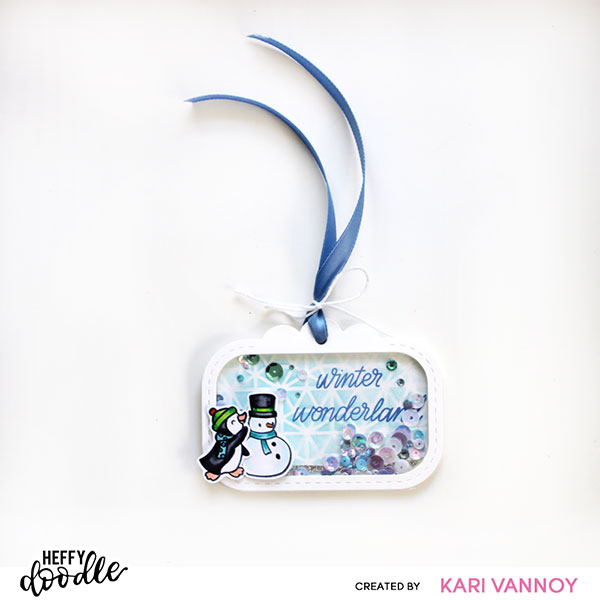
The background is the Notre Dame stencil inked up with a light blue ink. Then I stamped on the winter wonderland in blue ink.
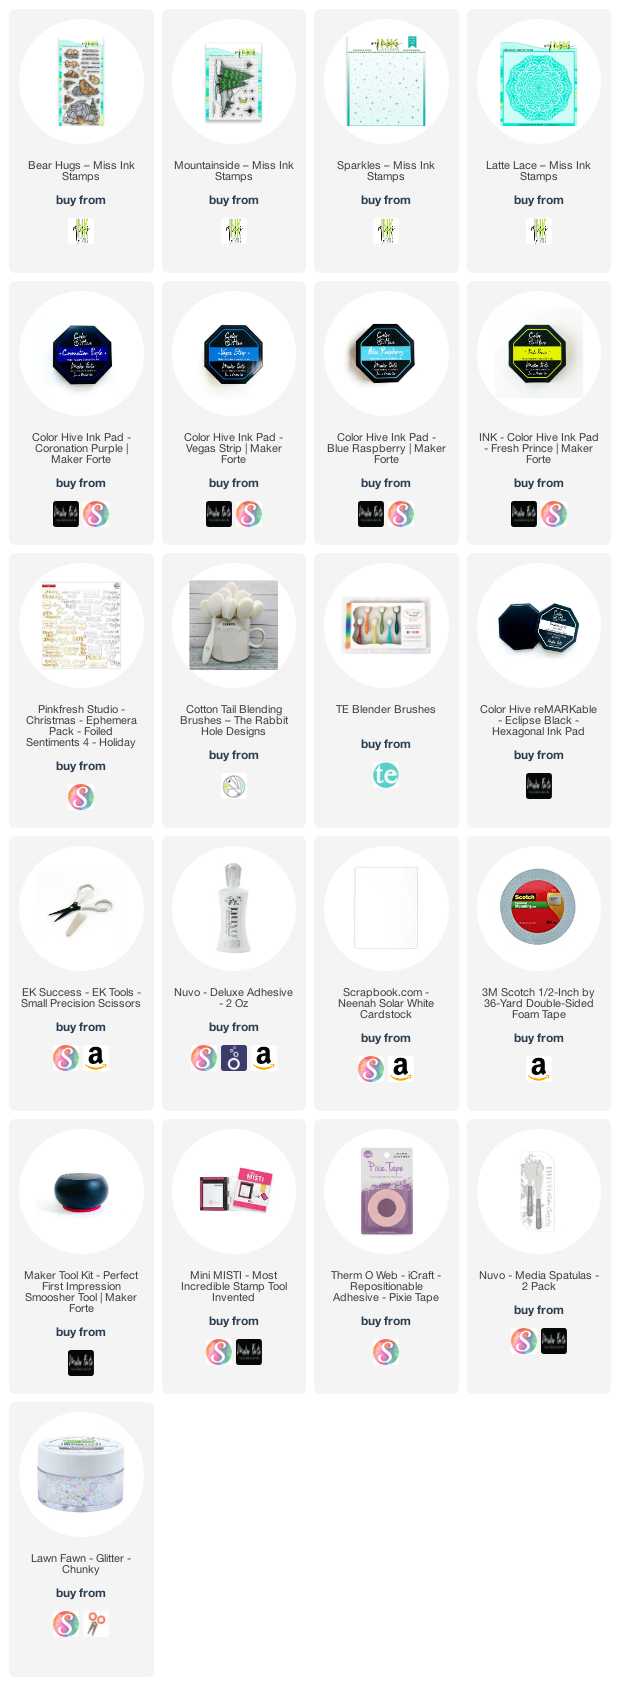
I’m often asked what supplies I use to make my cards and projects, so I’ve put together a list using affiliate links when possible. If you make a purchase with these links I may receive a small commission. These help me to keep up with blog costs and continue bringing you fun projects. Thank you so much for your support!
I hope you enjoyed these projects today. I love a fun holiday tag! I’ll be back with more card inspiration!