Tag Archives | Handmade card
feathers-appear-with-inks

Angel Feathers

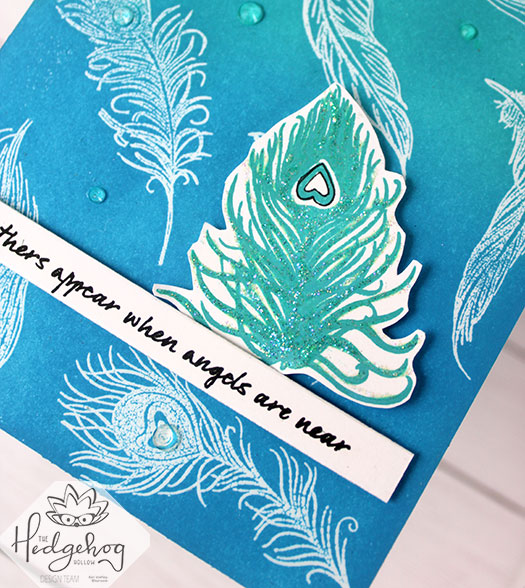
Hello! Today I am sharing the sweetest angel feathers card using the September 2019 Hedgehog Hollow kit. This kit is filled with feathers and peacocks and beautiful sentiments.

I think my favorite sentiment in the entire kit is the one that says “Feathers appear when angels are near.” Isn’t that so sweet? So today I am using that sentiment with quite a few of the feathers from the kit.

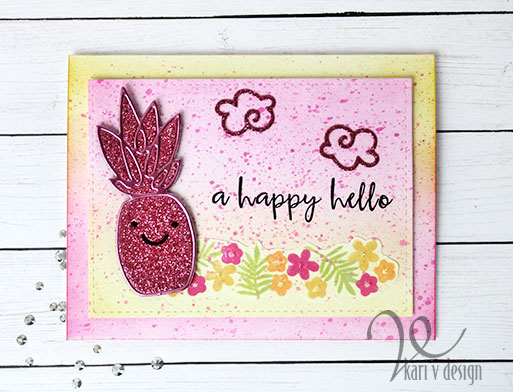
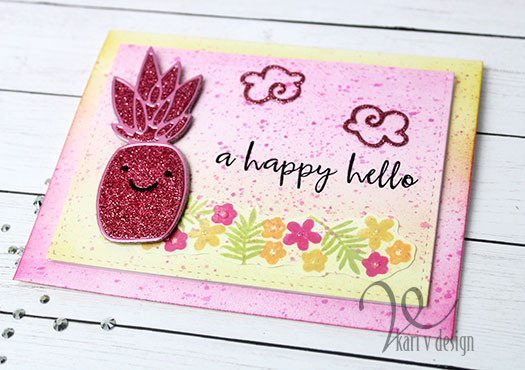
I have a quick video to show you how I made this card, watch it below or on YouTube:

I hope you got to see my NEW favorite domed ink blending tool!? It’s the best and did you notice the handle is already gray?! Perfect for all my Distress Oxides (you can, of course, use this for any of your inks!) I’ve linked it below if you want to check it out for yourself!

I’m often asked what supplies I use to make my cards and projects, so I’ve put together a list using affiliate links when possible. If you make a purchase with these links I may receive a small commission. These help me to keep up with blog costs and continue bringing you fun projects. Thank you so much for your support!

Thanks for stopping by today! See you next time with more inspiration.

Feathers appear when angels are near
Comments { 0 }
happy-fox-birthday

Cards for Guys

Hello! Today I have a surprise for you. I am making masculine cards! Yes, I know it’s a rarity around here, but I took an inspiring class by Jennifer Rzasa with Altenew and I just had some fun ideas!

I used to have only two rules in making cards for guys: NO PINK, NO GLITTER. Lol. Although, I do admit that I’ve made cards with pink on it for guys and they seemed to like it ok! 🙂

Today I used a combination of geometric elements and galaxy elements, as inspired by Jennifer!

Happy Birthday! YOU DA MAN!!

For both cards I used the Altenew Cube builder stencil and Altenew ink cubes as the geometric element. And then for the galaxy element I used a galaxy panel created with Altenew inks, distress inks, Perfect Pearls in mint, and Gansai Tambi watercolors in white for the splatters. I also colored the balloon to look like a galaxy for the fox card.

I show you the complete process in the video below, or watch it on YouTube:

Sweet birthday fox

Don’t you love a fox sitting atop a stack of cubes!? He has his very own galaxy balloon to match.

I created this galaxy balloon with colored pencils, smoothed out with gamsol, and added some white gel pen stars and highlights. This fox is a favorite of mine.

Did I mention that yesterday was my Dad’s birthday? That is who this card was for! It is probably the first card I made without a bear on it for him (bears are his favorite)!

This card is out of this world…

For this second card, I created the galaxy background using a variety of inks and watercolors. I was looking for a little more teal in the galaxy to match the cubes, but next time I know to add more teal!

I popped up these letters with fun foam to give it more dimension. I also offset the letters just a touch to get that shadow look.

Perfect pearls adds a touch of mica

I love how these cards turned out for my AECP projects. I hope you enjoyed them, too. I’m often asked what supplies I’ve used so I have a list below, using affiliate links when possible. When you purchase using these links I may receive a small commission at no additional cost to you. This helps me keep up with blog costs and continue to bring you fun projects. Thank you very much!

Thanks for stopping by!

Comments { 1 }
sandy-beach-big-bear-card-2

How to create (real-looking) sand for a beach card [VIDEO]

Hello! Today it was 120 degrees (Farenheit) here in Arizona, and I really wish I was at the beach! So I decided to share a simple beach card I created with a VIDEO. This is a card I created a while ago, but have never shared the video on my channel.

Wishing I was on that beach right now!

Doesn’t Big Bear look so happy on the beach?!

I hope you enjoy!

Look at that sandy beach! This technique is STILL a favorite way to create realistic sand granules for a beach scene. Check it out and let me know if you’ve tried it before?

Looks like real sand granules!

I also share a colored pencil technique to get a smooth blend. This is another favorite technique when I am using colored pencils.

I’m often asked what supplies I’ve used, so I created a list for you here, using affiliate links when possible. When you purchase using these links, I may receive a small commission. This helps me keep up with blog costs and continue to bring you fun projects like this one! Thank you so much for your support!

Stay cool!
Comments { 0 }
pink-pineapple-card-2

Glittery Pink Pineapple? Why not?

Hello there! Today I have a fun tropical card share. Yesterday I made a beachy card, and today I thought I’d take it one step further: to Hawaii Tropics!

This card uses my favorite background inking technique that is SO FAST!! In fact, I feel like it’s one of the most overlooked tools in the craft room right now. But today, I’m bringing it back!

This was a fun and easy card to put together and I have a VIDEO for you to watch below or on YouTube:

Did you watch the video yet? No? Well, I’m still going to tell you my secret: clarity brushes! (aka Stencil brushes). I love them for a fast and easy way to put ink onto paper. Sometimes I find the blender tool takes too long and is painful for me. The makeup brushes are great, but when I have a LARGE area to blend, I reach for these clarity brushes.

A Happy Pineapple!

I made him a glittery pink to play in the Paper Smooches contest going on this month: here.

This was my inspiration photo:

What do you think? Fun, right?

I’m often asked what supplies I’ve used on a project, so I’ve made a list for you here using affiliate links when possible (at no extra cost to you). When you purchase an item using these links, I may receive a small commission. This helps me with blog upkeep and to bring you more fun projects like this one! Thank you for your support.


I hope you enjoyed this project today! Thanks for stopping by!

Comments { 0 }
poppies-with-copics-1

Poppy Cards 3 Ways

Hello! Today I’m sharing 3 different ways to use 1 poppy flower stamp. This stamp is one of my favorites from the beautiful May 2019 Hedgehog Hollow kit. I just couldn’t stop at one card!

Poppies 3 ways

My first card features Copics and dimensional poppies. My second card in this picture features watercoloring layers. And the third card features heat embossing on vellum. I’m sharing some tips for hiding that adhesive on the vellum!

Watch my video for all the details below or on YouTube:

These poppies are so beautiful and they are illustrated by the talented Sophia Caldwell. I’m loving them so much.

Dimensional Poppies
Quick Watercoloring with White Heat embossing
Poppies with plaid

Thanks for stopping by! I often get asked what supplies I’ve used on my cards, so I’ve put together this list for you. Affiliate links are used when possible, so if you order through these links I may receive a small commission. These help to cover blog costs and also help to bring you more fun projects and cards. Thank you for your support!

I hope you enjoyed these projects today. See you next time!

Comments { 0 }