Tag Archives | Handmade card
both-cards-wood-backgrnd

Hedgehog In The Desert

Hello! Today I am a part of the Hedgehog Hollow YouTube Hop, where the theme is all things Hedgehogs! There are prizes to be won, so be sure to visit us at the hop to enter to win (details at the end of this post).

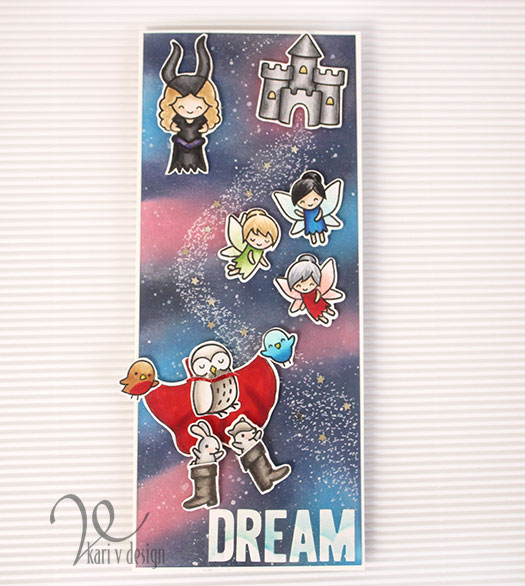
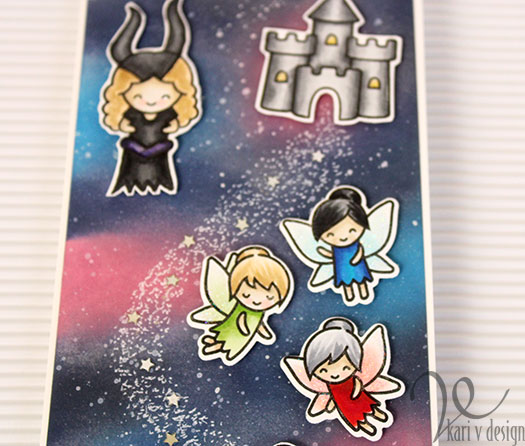
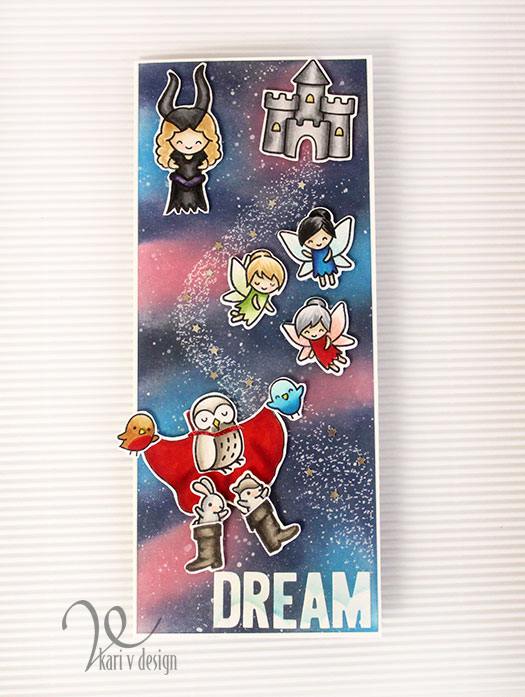
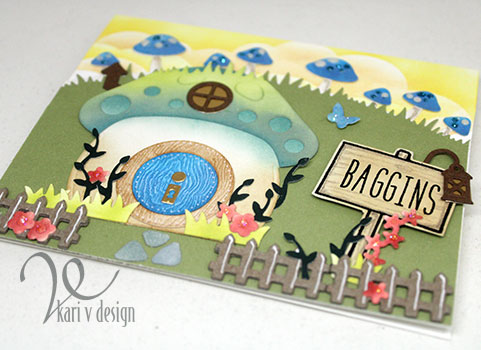
Today I made some fun Hedgehogs In the Desert cards. Since I’m from Arizona, it was fun for me to think of what a hedgehog would be like here in the desert. I image he would fall right in love with a cactus!

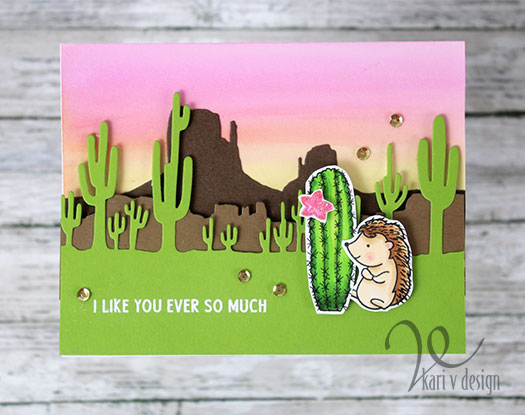
So in my video, I show you how to make an easy Desert Sunset background, and put together this cutie card!

Watch my video below, and be sure to head over to YouTube to like, comment, and see where to go next for the hop!

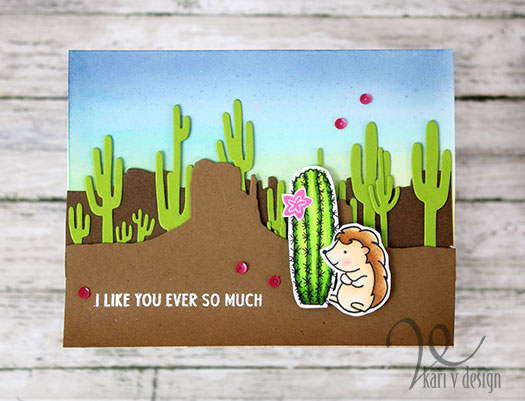
I also made a card with the same idea, but changed up the background colors.

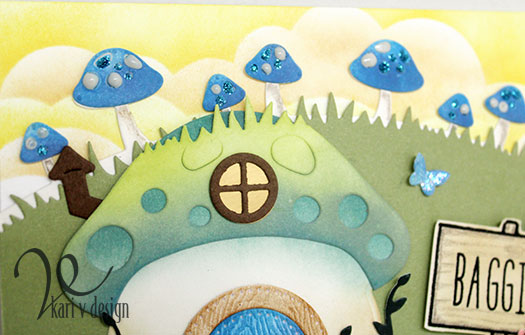
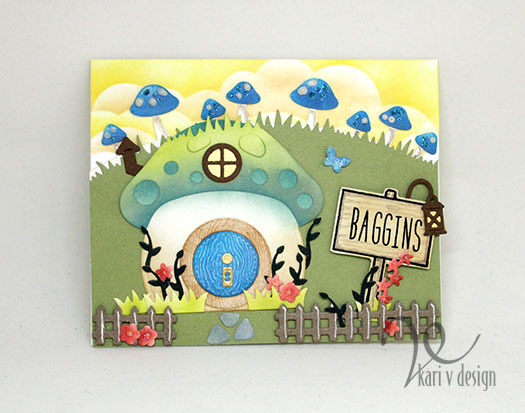
It’s a fun little scene, and a fun card to put together!

Be sure to head over to the hop HERE…and see where to hop next! Good luck at winning one of the awesome prizes! (You have until May 21, 2019 to enter)

I’m often asked what supplies I use on my cards, so I’ve linked them below. I use affiliate links when possible, at no extra charge to you. When you click and purchase using an affiliate link, I may receive a small commission. These help me to keep up with blog costs and continue to bring you more fun projects! Thanks for your support.


Thanks for stopping by! I hope you enjoyed the hedgehog loving the cactus scene, complete with desert sunset! I sure enjoyed making it.

Comments { 0 }
full-card-2

Once Upon a Dream

Hello…I’m here with one more card for the Lawnfawnatics card challenge: inspired by a book, movie, or song!

Today I was inspired by Sleeping Beauty and I have a TALL card to share. I had to make this a tall card just so I could fit all the elements onto my card. Lol.

Do you recognize Flora, Fauna, and Merryweather? There’s also of course, Malificent at the top! And the owl with his animal friends represents the prince! If you have seen the animated version, you know that she is dreaming of her prince and her animal friends create this rendition of the perfect man!

I drew the boots and the cape myself, but the rest of the characters are from the following Lawn Fawn sets:

Screen Time (for Malificent)
Life Is Good (for the castle)
Fairy Friends (for Flora, Fauna, and Merryweather)
Critters in the Arctic (for the owl)
Open Me (for the birds)
Coaster Critters (for the small rabbit and squirrel)
Cole’s ABCs (for the die cut letters that spell DREAM)

Not Bad….only 7 sets this time! Lol.

Extra points if you guess why I did the background with pink and blue!!
It’s a nod to the end of the animated Sleeping Beauty when the fairies couldn’t agree on what color dress she should have, so they kept changing it to BLUE then to PINK and back to BLUE… Lol.

I know you…I walked with you Once Upon A Dream
Flora, Fauna, & Merryweather

For the background I used Distress Oxides, then I splattered on some white paint. Then to make the “magical sparkles” I used a white gel pen to add a million little dots. Lol.

I hope you enjoyed my Inspired By….Sleeping Beauty card today. I just realized how ironic it is that there is no sign of Sleeping Beauty herself on this card. I guess she’s inside the castle!

Linking up to the Lawnfawnatics Challenge here.

Thanks for stopping by!

Comments { 1 }
the-shire-2

Welcome to the Shire

Hello…today I’m excited to share another card I made for the Lawnfawnatics challenge: inspired by a movie, book or song.

This one was a card that WOULD NOT leave me alone until I created it. Does that ever happen to you? I couldn’t stop thinking about it and so now here it is!

Welcome to the Shire!

Looks like nobody is home?

I imagine if you open up that round door you will see a Hobbit!? Or maybe…just maybe he has gone on an Unexpected Journey?

I only used 2 stamp sets and 3 die sets for this card. It’s a record low amount!! Here’s what I used:

Mushroom House
Mushroom Border
Scalloped Treat Box Spring House Add-on
Open Me Stamp Set
Milo’s ABCs Stamp Set

The top of the Mushroom House is grassy…I did some partial die cutting on this to add the grass to the top to make it look like a part of the grassy hill. Those mushrooms on the border not only look great with some Stickles and Nuvo Drops added, but they also double as a Cobblestone Walkway to the Hobbit house!

I used the sign from the Open Me stamp set and spelled out the name “Baggins” with Milo’s ABCs. I inked it up with Vintage Photo Distress Ink and added some wood detail with colored pencil. I love the lantern lamp hanging over the sign. Even at night you will know this is the Baggins’ property!

It’s a beautiful spring day at the Shire! The flowers and the fence are from the Scalloped Treat Box Spring House Add-on. Doesn’t this look like a lovely place to live? I die cut the fence twice from chipboard and added white detail with a gel pen.

The butterfly matches the mushrooms. Lol. I had a vision of the Hobbit House and a color scheme of dark amber, blue and brown. I will say that it ended up turning out a lot brighter than I imagined. But I love it!

Those mushrooms look magical with Turquoise Stickles

The window and the keyhole/doorknob are cut from Satin Gold mirror cardstock. I love the soft golden look. I think the yellow and orangey-brown clouds make it look so dreamy…like it’s nearing sunset.

That blue door is just perfection, don’t you think?

I used some circle dies to cut the door and the door frame. The woodgrain paper gives it just the right detail…and I inked up the door with Salty Ocean and Faded Jeans Distress Oxide inks. The darker blue toned down that Salty Ocean and gave it just the right feeling for this card.

I hope you enjoyed visiting the Shire today. Come back soon, won’t you?

Linking up to the Lawnfawnatics Challenge here.

Comments { 6 }
close-up-2

Bee Happy Rainbow card with the HH February Kit

Hello! Today I have a cheerful card for you using products from the Hedgehog Hollow February kit. It starts with a rainbow of colors of Distress Ink so you know it’s going to be cheery! I used Picked Raspberry, Worn Lipstick, Orange Marmalade, Mustard Seed, Evergreen Bough, Peacock Feathers, Denim Jeans, Shaded Lilac, and Wilted Violet. With all those colors, you are sure to smile! (at least they made me smile)

bee-happy-rainbow-3

I used some die cut hexagons that would normally just be thrown out! But they were perfect for my project today. To adhere these in perfect alignment, I put all the colored hexagons into the die cut, then picked it all up with some Glad Press N Seal. Then I turned it over and added some glue ONLY to the rainbow pieces. I attached it all to the card panel, let it dry for a minute, then removed the die cut to reveal the perfect placement of all those beautiful hexagons!

close-up-2

I used the bees, bee trails and BEE happy sentiment from the stamp set that came in the February Kit, and as an outline for the bottom layer I used the small hexagon stamp repeatedly for the border.

bee-close-up

I popped up those bees with some Scotch 3M foam tape (the mega roll!) to give more dimension. I put some craft foam between the top layer and the bottom layer for even more dimension!

bee-happy-rainbow-3

I hope you enjoyed this cheery project today! Check out how you can get the Hedgehog Hollow Kit here. And she is taking pre-orders for the April Kit (which I hear has some Art Impressions!!)

See you next time!

Comments { 0 }
three-snails-with-envelope

Valentine Snail Mail

Hello! Today I have the cutest Snail Mail to share….delivered by snails! This new set is from Trinity Stamps and I just adore this little guy.

snail-mail-with-postage-and-confetti

He’s called Mr. Snailman and in this card I made him “Valentine snail”….notice his colors. 🙂 The heart confetti is called “Skip-A-Beat” (eep…that’s too cute!) and it’s also available today.

I was having way too much fun coloring him up, so I made another card using some creative masking. I couldn’t resist a matching envelope!

three-snails-with-envelope

TIP: for your envelope…if you want your stamp to stay crisp and not smear in the transit, heat emboss it with clear embossing powder! Here I used Versafine onyx black ink and embossed in clear. I did not color up the image because that envelope is already a nice red.

three-snails-pink-clouds

I love this Snail Crew! Delivering happy hugs, no doubt. I love the pink sky…it just feels like a hug.

Hooray for snail mail! Well, that’s it for me today. I hope you enjoyed these projects.
For more information, please visit the Trinity Stamp blog. Happy Day!

snail-mail-with-postage-border

Comments { 0 }