Tag Archives | Video tutorial
SUNSHINE-beautiful-you-straight-1

Combining Stamps to Create a Geometric Background

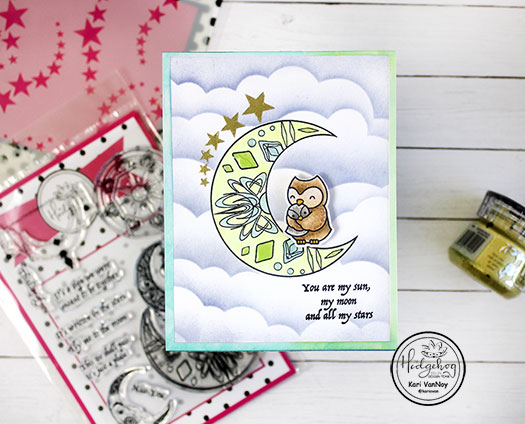
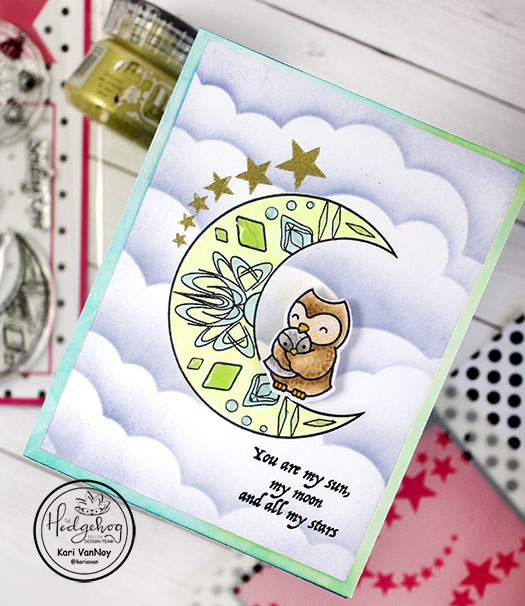
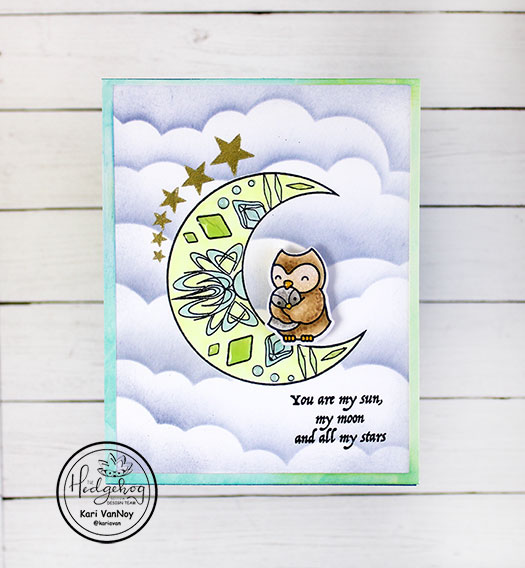
Hello, friends! I am excited to bring you this card today, using a few stamps from the Hedgehog Hollow January Kit. This kit is full of stars, moons, and sunbursts and I was so inspired by it!

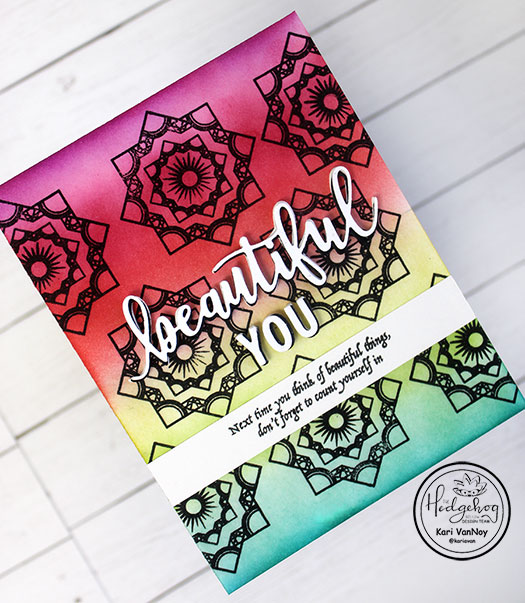
So today, I am taking 3 of the stamps from the “Given Direction” set (the one with all the stars) and stamping them inside of each other to get this fabulous geometric look! (you can see a bit of the stamp set I chose in the photo below)

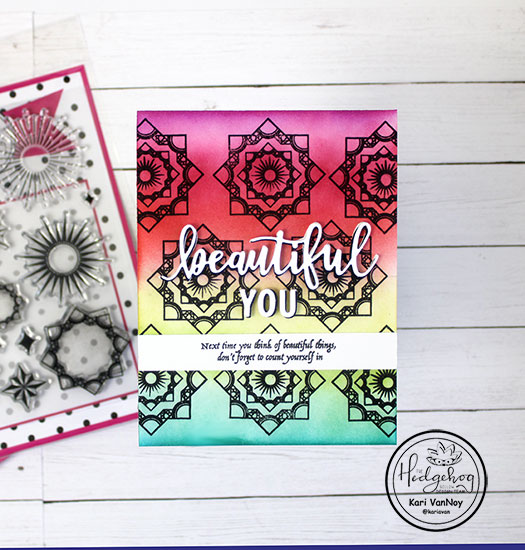
I had a lot of fun stamping this background, and I began using my MISTI for the largest stamp. Then when I went to stamp the smaller stamp, I quickly changed to an acrylic block to get it done faster! I used the acrylic block to stamp the smallest stamp in the middle as well.

I have a video to show you how this card came together, watch it below or on YouTube:

After I finished all the stamping, I let this panel dry for quite a while because I used black pigment ink and I didn’t want it to smear when I inked on the color.

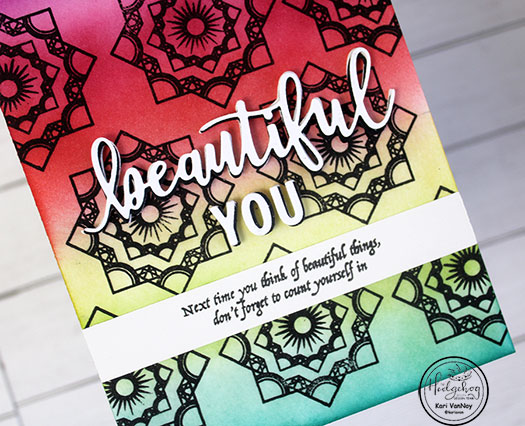
I chose the beautiful Catherine Pooler inks for the colors, and I used a makeup brush to blend. Well, I also used one stencil brush (LOL)…and you will see why if you watch the video!

These inks blended so well! I loved the sentiment from the kit that says “Next time you think of beautiful things, don’t forget to count yourself in”…so I stamped that on a sentiment strip as wide as the card panel itself. Then I added the die cut “beautiful YOU” (from my stash). I cut it out from white cardstock, added a black shadow, and then mounted it all onto fun foam before adhering it to the card.

I’m often asked what supplies I use to make my cards and projects, so I’ve put together a list using affiliate links when possible. If you make a purchase with these links I may receive a small commission. These help me to keep up with blog costs and continue bringing you fun projects. Thank you so much for your support!

I hope you enjoyed this colorful project today! I know I loved creating it. If you haven’t picked up a January 2020 Kit, what are you waiting for? It might be my favorite of all!

I’ll see you soon with more card inspiration!

Comments { 0 }
SUNSHINE-hugging-owls-no-supplies

Masking the Moon

Hello! Today I am masking the moon on this card to create a cloudy background behind that moon. This is going to make a beautiful baby shower card, but it can be used for any occasion, really, when you want to tell someone how much they mean to you.

It is such a sweet little card, and fairly easy to put together to. I have a video to share just how to accomplish this. Watch it below or on YouTube:

I started with a card panel of Neenah Solar white 80# cardstock, and stamped the moon image with my Mini Misti. Then I created a mask with masking paper and placed that over the large stamped moon.

I used my favorite domed blending tool to add the clouds, inking it on lightly with the cloud stencil.

Then I stamped the sentiment with my favorite black ink. I removed the mask from the moon and colored it with Copic markers.

I used the star stencil included in the Hedgehog Hollow January 2020 kit to make those gold stars using Glacier Paste. This kit is so versatile, I am loving creating with it so far!

I added the details with Nuvo Jewel drops over some of the design in the moon. This created a fun raised look to the moon decor! Those little owls are the cutest, aren’t they? I attached them with 2 layers of foam tape.

I hope you enjoyed this card today!

I’m often asked what supplies I use to make my cards and projects, so I’ve put together a list using affiliate links when possible. If you make a purchase with these links I may receive a small commission. These help me to keep up with blog costs and continue bringing you fun projects. Thank you so much for your support!

I’ll be back soon with more brand-new card making videos!

Comments { 0 }
SUNSHINE-yellow-top-moon-card

5 Ways to a Perfect Watercolor Background

Hello! Happy 2020! Today I’m up on the Hedgehog Hollow blog sharing 5 Ways to get a perfect watercolor background. I’m using the NEW January 2020 Kit and it is so beautiful. I’m also using 5 different mediums to get that watercolor look. Check it out in the video below:

For more information, visit my YouTube channel and the Hedgehog Hollow blog. Here is a list of the products I’ve used, in case you are interested.

I’m often asked what supplies I use to make my cards and projects, so I’ve put together a list using affiliate links when possible. If you make a purchase with these links I may receive a small commission. These help me to keep up with blog costs and continue bringing you fun projects. Thank you so much for your support!

I’ll be back real soon with more inspiration!

Comments { 0 }
SUNSHINE-both-cards-close-up

Glitz Glitter Gel Love cards

Hello! I’m so excited to share some Glittery, Bright love cards today using two new products from this year: Glitz Glitter Gel and the Stencil Pal.

I have to say, I think that Stencil Pal is going on my list for favorites this year!

I created a video to show you how I put these cards together and sharing some tricks for using them, watch it below or on YouTube:

I’m often asked what supplies I use to make my cards and projects, so I’ve put together a list using affiliate links when possible. If you make a purchase with these links I may receive a small commission. These help me to keep up with blog costs and continue bringing you fun projects. Thank you so much for your support!

Thanks for stopping by today! I hope you had a wonderful Holiday! See you soon with more inspiration.

Comments { 0 }
holiday-house-standing

Crazy Neighbor Holiday House

Hello! Today I have a fun card inspired by my neighbor’s holiday decorations. This year they have gone all out with lights, lawn decorations, and blow-up characters. It’s fun to see!

That is what gave me the idea to create a Holiday House on a card.

This house is decked out with glittery lights, Christmas trees in candy cane pots, a holiday wreath and door frame decor, and even a holiday welcome mat. The porch light has been changed to green…and I think whoever lives here just loves this time of year!

I had a great time putting this together and it made me feel a little better to create a decorated home on a card since we didn’t put up any Christmas lights this year! We wanted to, of course, but work and other things got in the way until (I thought) it was just too late to pull out all the lights.

I have a video to show you all the fun, watch it below or on YouTube:

Did you decorate for the holidays this year? We DID decorate inside with our tree, ornaments, and stockings for all the kids and grandkids….it’s just OUTSIDE that looks a little grinch-ish. Lol.

I’m often asked what supplies I use to make my cards and projects, so I’ve put together a list using affiliate links when possible. If you make a purchase with these links I may receive a small commission. These help me to keep up with blog costs and continue bringing you fun projects. Thank you so much for your support!

Wishing you a very happy holiday season. I hope you feel so much love this time of year, whatever your traditions and decorations are. See you soon with more inspiration.

Comments { 0 }