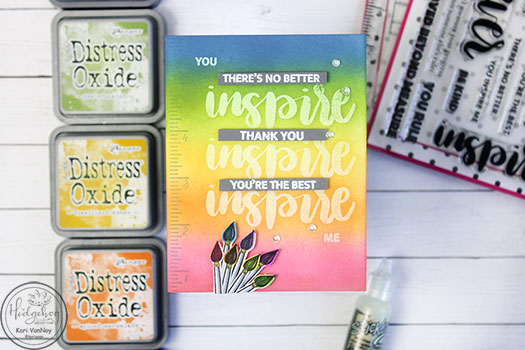
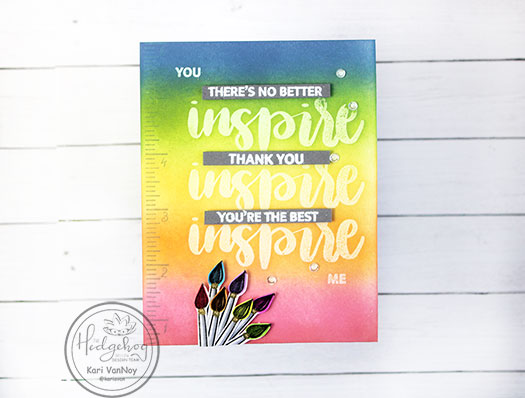
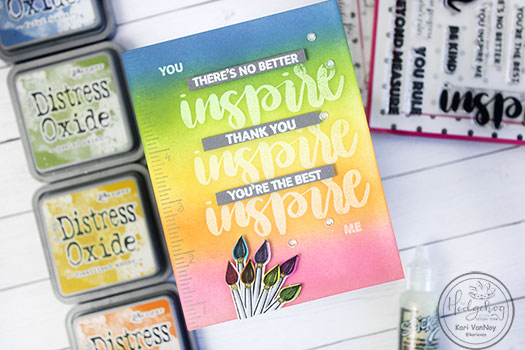
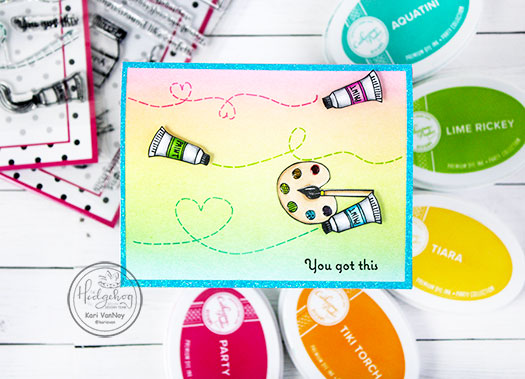
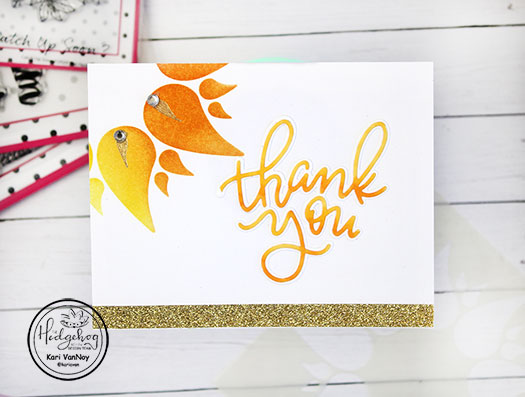
Hello again! I’m back already with another card using products from the Hedgehog Hollow March kit! These stamps got me thinking about people who inspire me, so I put together some of the sentiments for a very colorful and inspirational thank you card.
You inspire me
See how the first “inspire” is a light green, the second “inspire” is a light yellow, and the third “inspire” is a light orange? Well, I’m using clear embossing powder to trap the color below it to get that neat look!
For the process video and to see how this card took on a life of its own, watch the video below or in HD on YouTube:
I’m often asked what supplies I use to make my cards and projects, so I’ve put together a list using affiliate links when possible. If you make a purchase with these links I may receive a small commission. These help me to keep up with blog costs and continue bringing you fun projects. Thank you so much for your support!
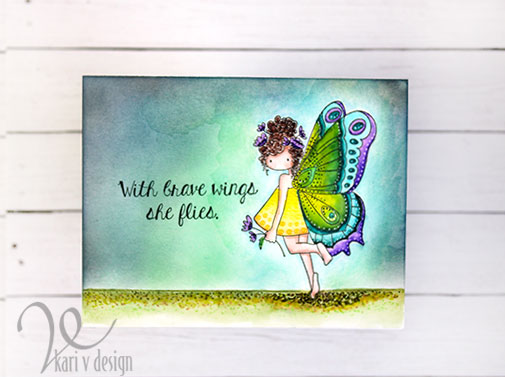
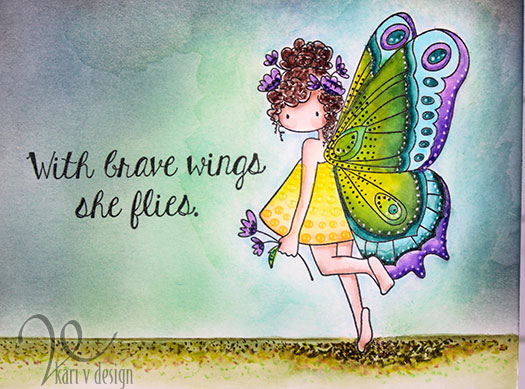
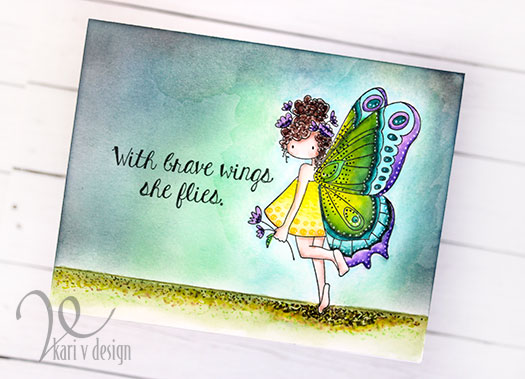
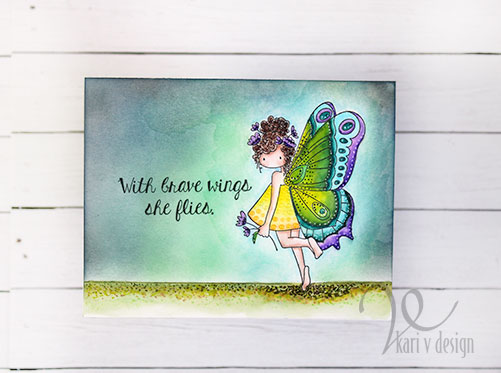
Hello! Today I am excited to share a video about adding fun details to a card. I first colored up my image on bristol paper using Zigs, then I added a bunch of extra details. This detail work is fun and EASY, and it adds quite a bit of interest to an otherwise fairly simple card.
I love this butterfly image…and those sentiments are ALL really good, too. Perfect for a time like this!
See all that fun detail work?! I love it. Watch the video below or in HD on YouTube:
I used four kinds of detail-adding elements: a white gel pen, a Copic multi-liner, Nuvo Jewel drops (translucent), and Zig marker. These are all great ways to add DOTS to your cards. Be sure to watch the video for the details.
Adding this kind of detail is something to try at home and see what you like! I can’t wait to see what you create.
I’m often asked what supplies I use to make my cards and projects, so I’ve put together a list using affiliate links when possible. If you make a purchase with these links I may receive a small commission. These help me to keep up with blog costs and continue bringing you fun projects. Thank you so much for your support!
Want to know a secret? That background was not going to be a stormy background. It was going to be a bright, watercolored background. But it morphed into this stormy background, with that angel butterfly staying calm amidst it all! We can all learn from this bright butterfly.
I hope you enjoyed this project today! See you real soon with another card to share.
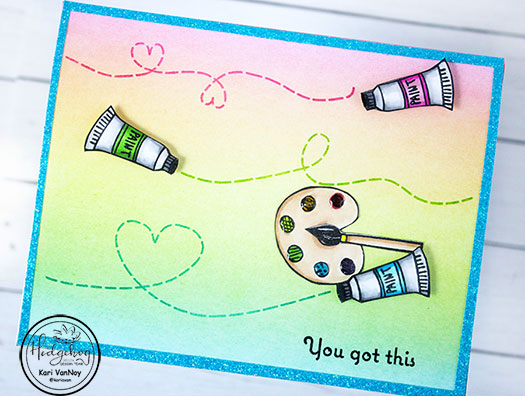
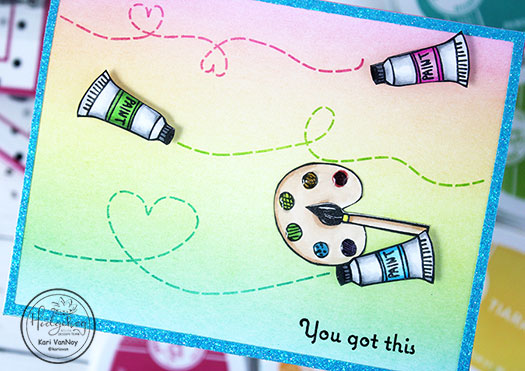
Hello! Today I have a fun airbrushed looking background…but you don’t need a machine for this one!
I’ve got all the details on a short video…watch it here or in HD on YouTube:
For the written instruction, visit the Hedgehog Hollow blog here.
I’m often asked what supplies I use to make my cards and projects, so I’ve put together a list using affiliate links when possible. If you make a purchase with these links I may receive a small commission. These help me to keep up with blog costs and continue bringing you fun projects. Thank you so much for your support!
I hope you enjoyed this fun project. This background is such a soft blend..and it’s so easy! Thanks for stopping by!
Hello, today I have even more ideas for using a 2-Layer stencil! Last week I promised extra ideas for using the layering stencil that came in the Hedgehog Hollow February 2020 kit…and here they are!
I’ve got five more (bonus) ideas and 7 cards to share with you! And I put it all in a video, watch it below or in HD on YouTube:
I think my favorite of the bunch is using just the second layer of the stencil to create a background, see my card below.
Although the foiled card is fun too…here I used foil on both the first layer AND the second layer of the stencil. Then I created a foiled sentiment die cut with toner paper. (I explain this more in the video!)
I’m sharing all my tips (and mistakes) with you in the video, too, so you can laugh at me (or with me…lol) and learn how to do things the best way.
I hope you’ll take a look and let me know which card is YOUR favorite! I’ll be back soon with more inspiration.
Disclosure: The links below are affiliate links. If you decide to use these links to shop, you are supporting today’s post writer – thank you! They may receive a small portion of the sale, at no extra cost to you. These products are endorsed by the author, and we hope you will love them too!
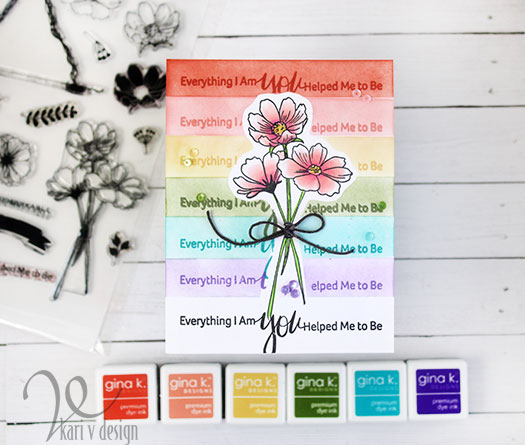
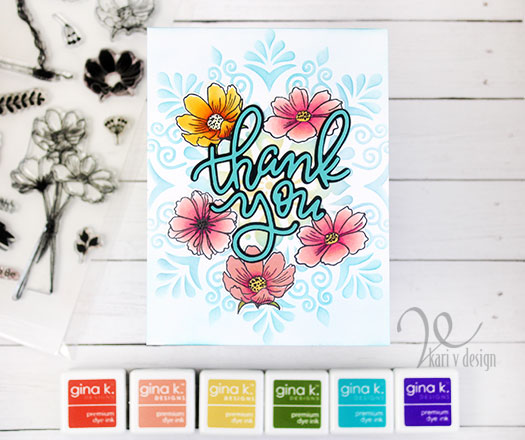
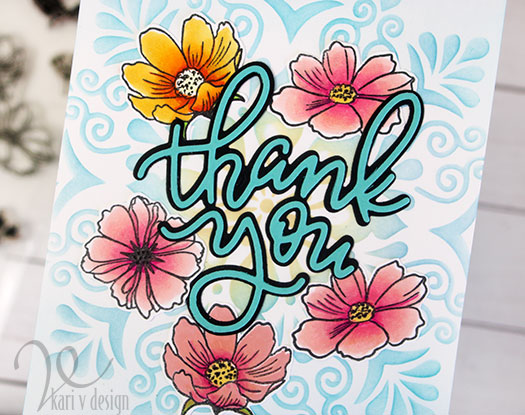
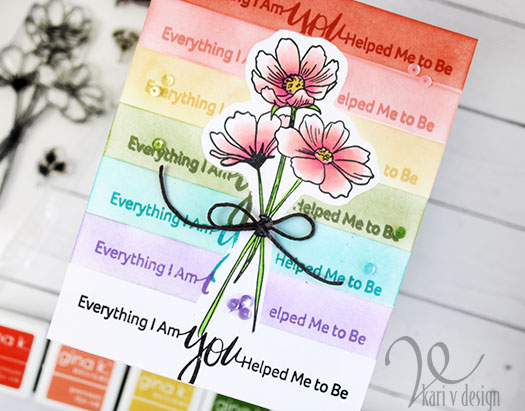
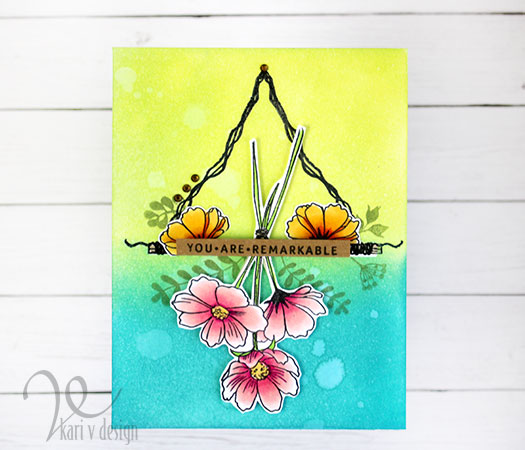
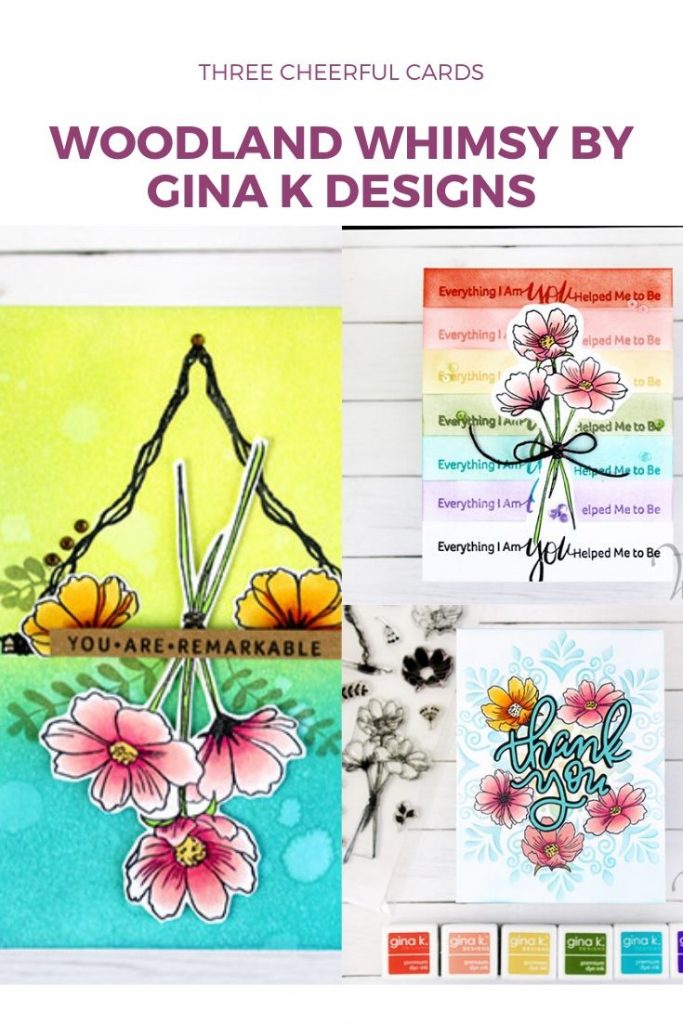
Hello! Today I’m excited to share three cards using the same stamp set. This set is from Gina K Designs and it’s called Woodland Whimsy. It’s a charming set filled with beautiful flowers and a hanging rod…so many possibilities!
The first card I made uses a beautiful sentiment from the set that says “Everything I am, You helped me to be.” I first wanted a rainbow of sentiments down the card, and it turned into this happy card:
The most important thing for this card, is to mask those flowers and leave a good sized white border. Then the inking is the easy part! I have a video showing you all the cards I made today.
Watch how they all came together in the video below, or in HD on YouTube:
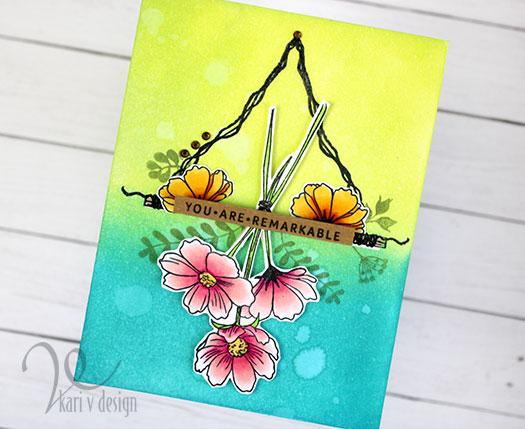
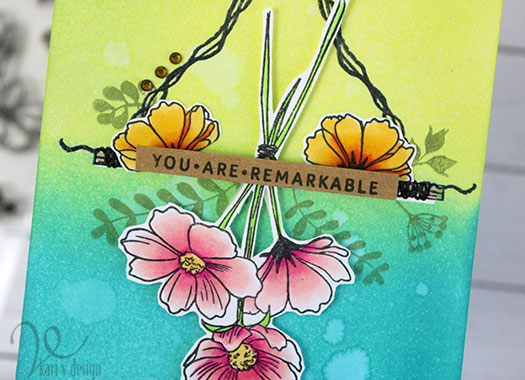
For my second card, I was excited to use that hanging dowel. It made me think of when I used to dry flowers by hanging them upside down, and that is how this card was inspired!
You are remarkable!
I inked the background with that hanging dowel masked off. Then I added some green leaves to the background. The flowers and sentiment are popped up with foam tape to give this a 3D look. I added those topaz gem stones for some fun glamour!
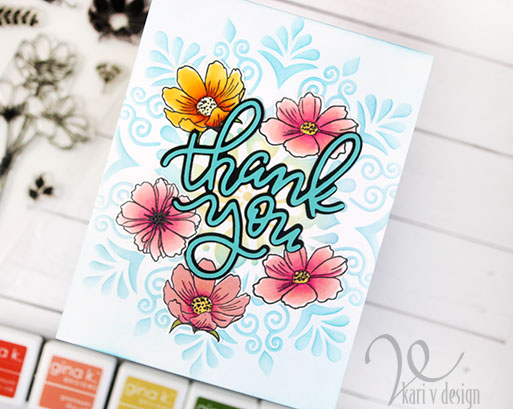
My last card came into existence because I had FIVE flowers leftover that I had already colored. So of course I needed to create another card! So I die cut a simple thank you, inked up my favorite Gina K stencil, and created this thank you card.
One of these flowers is the one I stamped with ink, and the other four are colored with Copics. Can you guess which ones?!
I just love that there are solid stamps that give you the option of inking the flowers (or just coloring them yourself). You still get a great result!
I’m often asked what supplies I use to make my cards and projects, so I’ve put together a list using affiliate links when possible. If you make a purchase with these links I may receive a small commission. These help me to keep up with blog costs and continue bringing you fun projects. Thank you so much for your support!
I hope you enjoyed these cards today. I think they are so happy and cheerful, which is a great card for sending to someone special. See you next time! Thanks for stopping by!
Hi I'm Kari. I'm a creator, a card maker, and a day maker! I am Lucky in love to a supportive husband, blessed to raise 3 kids (all moved away now!), and happy to be watched over by 2 dogs.
I originally started this blog to remind me to be happy amid adversity, and I hope it inspires you, too!