Tag Archives | ODBD
peace-close-up

Owl Always Love you and Winter cards

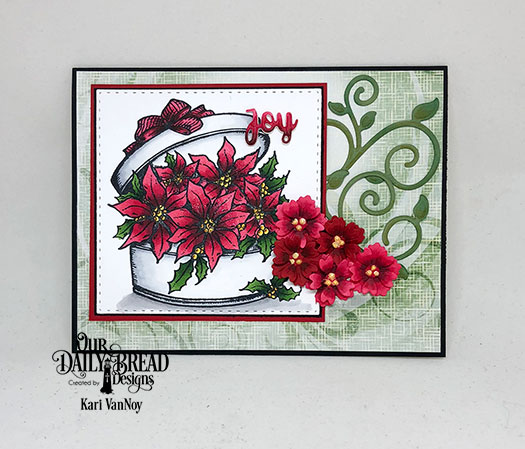
Hello! Today I am sharing my last cards as a Designer for Our Daily Bread Designs. I have absolutely loved designing for ODBD, and I will certainly miss all the fun!

My first card is for my friends at ODBD, using the Winter Greetings stamp set with that beautiful owl. (I’ll always love you, ODBD friends and team! And a big thank you to Kelley for having me!)

sunshine-owl-always-love-you

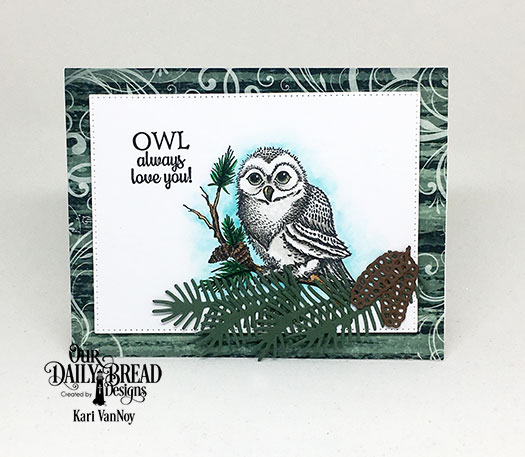
I love that this set has a variety of greetings for both winter cards and other sentiments! I used the Pine branches and Pinecones dies on this card (some of my favorites).

My next card shows the beautiful snowy trees from the December release called Peaceful Wishes.

sunshine-peace-on-earth-trees-with-tag

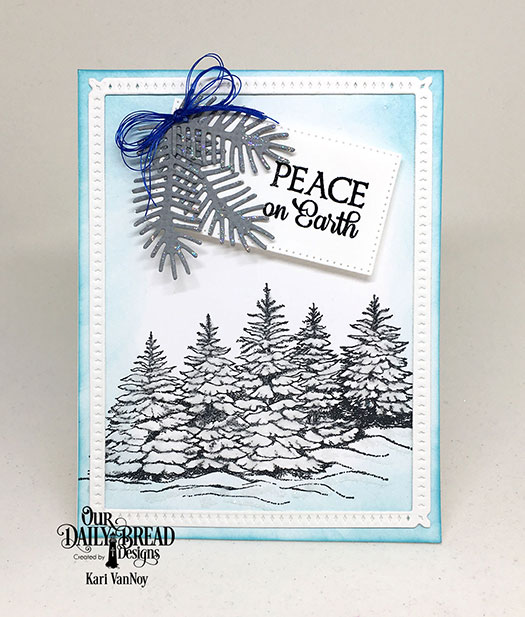
I added some glitter to those snowy trees and used Distress ink to ink around the edges of this card. If you don’t have a tag die, never fear…you can use a rectangle die in a smaller size to make a tag! I love how it looks with some grey pine branches and a blue thread bow. The frame is from this set.

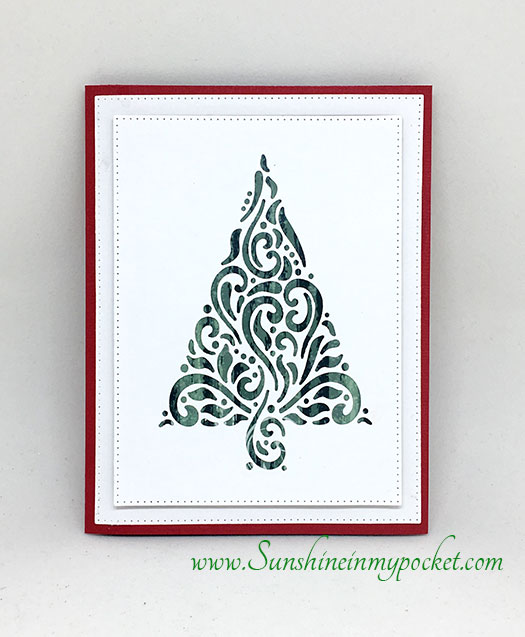
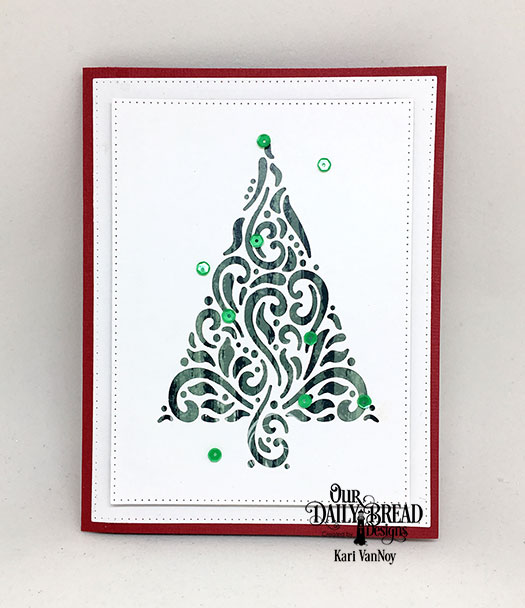
My last card is a favorite:

sunshine-peace-snowflake-sky

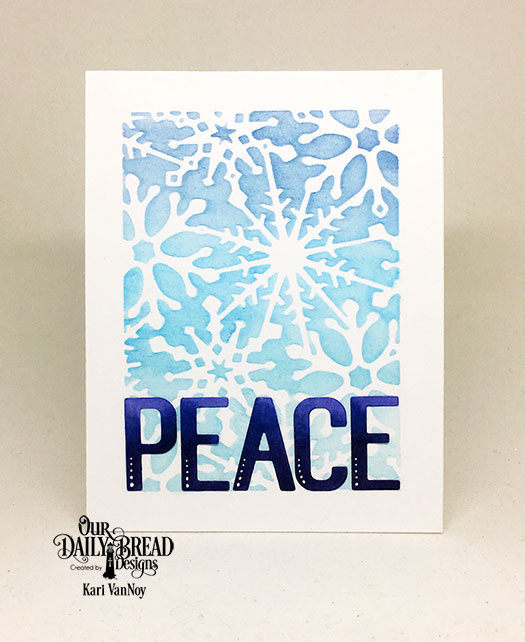
I cut out that PEACE word from this die, then colored it with Copic markers in a variety of violets. I added dots using a white gel pen.

peace-close-up

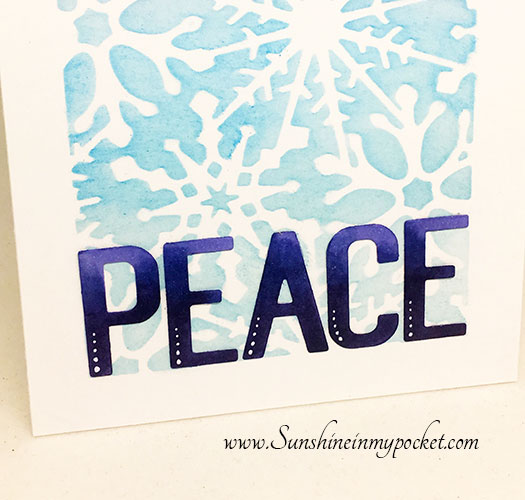
Then I cut out the Snowflake Sky die and used it as a stencil. To make it feel soft and dreamy, I used Clarity brushes to add the Distress ink in Salty Ocean, and Tattered Jeans. Those Clarity brushes are wonderful!

I hope you enjoyed my projects today. I hope you have a very happy Holiday season and a Merry Christmas!

Comments { 0 }
sunshine-flourish-tree-red-green-cut-out

Flourish Tree Three Ways

Hello! Today I have three very different cards using the exact same die, the Flourished Tree Inset die from Our Daily Bread Designs.

The first one is very simple, just showing off that beautiful die:

sunshine-flourish-inset-plain

After I finished, I thought it needed a little more pizzazz, so I added some green sequins.

sunshine-florish-tree-with-sequins

There! That’s better. Just a few simple touches and you have a beautiful card. I used the Pierced Rectangle Dies to create a frame for the middle piece. The fun foam creates even more dimension behind that middle panel.

Then, I thought it would be fun to create a STENCIL from this die cut. So I cut two trees out of white heavy cardstock, and used one for the green tree stencil and one for the red tree stencil. Here’s my card: sunshine-flourish-tree-stencil-card

It creates a beautiful stencil and I just alternated the colors and the direction of the tree! I added a white heat embossed sentiment from this set on black cardstock and a few clear gem stones to dress it up a bit.

sunshine-stencil-card-close-up

After I was finished with this card, I saw those cardstock stencils and decided to create a card out of them, too! Nothing goes to waste around here! I simply cut around each of those tree stencils (they were already red and green from creating the last card) and added them to a Snowy Sky backdrop.

sunshine-flourish-tree-red-green-cut-out

I added some vellum before adhering the Merry Christmas sentiment from the Holiday Words dies. I hope you were inspired by all the ways you can use this Flourish Tree Inset die!

For more inspiration on the December release products, visit the Our Daily Bread Designs blog here.

Comments { 0 }
sunshine-silver-blue-poinsettia-new-year

Poinsettias for Days

Hello and welcome to my “Poinsettias for Days” post! I just cannot stop with these poinsettias…I’m in love. So today I have a bunch of projects to show you!

This first project features that beautiful poinsettia from this set from Our Daily Bread Designs that I colored “white” using Copic Markers in W3, W1, and Y11. I stamped the same poinsettia on red paper and heat embossed it with gold embossing powder. It adds such a glamour to this card, I think.

sunshine-red-and-white-poinsettia-card

The Merry Christmas sentiment is from the Holiday Words dies, and I die cut it with green paper. Then I used mowed Lawn Distress ink and a finger dauber to ink up the lower portion of the words. I also added Vintage Photo Distress Ink around the outside corners of the red panel.

This next card shows off the Poinsettia Box stamp. This time I colored it up with watercolor markers and added details with colored pencil. I used Kathy Racoosin’s method of paying attention to those “nooks and crannies” with a darker color of pencil. I love how this makes the image really pop!

sunshine-poinsettia-box-card

The background paper is from the new Christmas Collection 2018 paper pad, and the striped paper is from the Christmas Collection 2013 paper pad (one of my favorites)! That sentiment is white heat embossed on the dark green paper. I added some rhinestones for a fancy flair.

I couldn’t forget about my favorite purse dies! I thought they would be perfect with these large poinsettias. Who wouldn’t want a poinsettia purse this time of year!?! 😉

sunshine-green-purse-with-poinsettia

My first one uses a green paper layer for the body of the purse, and then I thought I definitely need a red striped purse, so this one was created:

sunshine-red-purse-with-poinsettia

It’s so fun right?! I love this purse die and the layers dies…it’s one of my favorites of the year! There are so many things you can do with it. Check out my other purse posts here and here.

For my last project, I made a New Years card with a blue poinsettia and lots of glittery silver goodness! I die cut the Vintage Flourish Pattern die in silver glitter paper, then before I adhered it to the card base I heat embossed around the edges with silver embossing powder. Such a sparkly, festive look!

sunshine-silver-blue-poinsettia-new-year

To finish it off I colored up the poinsettia in B00 and B000 Copic blues and the leaves in YG Copic greens. I love this combination of colors. The Happy New Year die cut is also from the Holiday Words dies. Last, I added some clear/gray dots with Nuvo drops.

Poinsettias galore! I hope you enjoyed these projects today. These will be the last poinsettia projects I share for a while, but I had such a great time making them all! Thanks for stopping by.

Comments { 0 }
sunshine-poinsettia-trellis

Poinsettia Love

Hello! Today I’m sharing some of my favorite POINSETTIA stamp (and die) sets! These are so beautiful and I couldn’t resist making a bunch of cards using the new November 2018 release from Our Daily Bread Designs.

sunshine-pink-poinsettia-spray

I colored this up in some pink Copics in the colors E50, R81, R83, and R85 so I could match that beautiful new Christmas Collection 2018 Paper from Our Daily Bread Designs. I used the Snowflake Sky die to cut out the white snowflake background, and attached the poinsettia spray to some black fun foam to add dimension.

This next one shows the large poinsettia stamp set. It also comes with it’s own die to cut out the image! I love that it is included! The size of this stamp is perfect to fill an A2 size card.

sunshine-red-poinsettia-large

I added some Pine branches from this die, and that beautiful paper with the woodgrain is also from the new paper pack. The Merry Christmas sentiment is red glitter paper cut out with the Holiday Words dies.

The last card features the same poinsettia die as the first card, and this time I added two of the poinsettia sprays over the Lattice Background Die.

sunshine-poinsettia-trellis

I love that you can mix it up a bit by just adding another spray of flowers. I also love how the leaves turned out! I used a classic Copic green color combo in YG17, YG67, and YG03.

I hope you enjoyed these beautiful poinsettia projects today! Have you started on your Christmas cards yet? If you are looking for poinsettias to add to your holiday cards, they are on sale as a bundle, which you can check out here. The bundle includes the paper pack I featured here, as well as the Poinsettia Box stamp set…which is also so beautiful! So go ahead and check it out.

Thanks for stopping by!

Comments { 0 }
sunshine-retro-ornaments

November Release for Our Daily Bread Designs

Hello again! I’m sharing some cards using the November 2018 release from Our Daily Bread Designs. This month is filled with poinsettias and ornaments and it is beautiful!

First up is this large poinsettia stamp and die set called “Merry Christmas.” This is my new favorite poinsettia of all time. It is so detailed and large enough to fill an A2 size card!

I love that this set includes the die to cut out that beautiful poinsettia.

sunshine-pink-poinsettia-with-banner

The background paper is a part of the new Christmas Paper Pack 2018. I had to create a pink poinsettia just so I could use this dreamy paper featuring the blush colored florals. The banner die is from a previously released set here.

Next is the fun Poinsettia Box stamp. This one is so different from anything I’ve seen. Here I’ve paired it with some die cut florals and a sentiment “Joy” from the new Merry Messages die set.

sunshine-new-poinsettia-box

I hope it makes you think of overflowing joy, like it does me! I love the look of the flowers falling out of the box 🙂

The last card I’m sharing today features the new Retro Ornaments set. I’ve already made a sneak peek card with this set using Copic markers to color them (find it here); and today I’m using the new Retro Ornaments Paper Pack with these fun ornaments.

sunshine-retro-ornaments

Don’t these just scream RETRO? Lol. I have so many projects I have in mind with these fun dies.

I hope you enjoyed these projects today. For more inspiration using the November Release and to see the other designers projects, be sure to visit the ODBD Blog here.

Thanks for stopping by!

Comments { 2 }