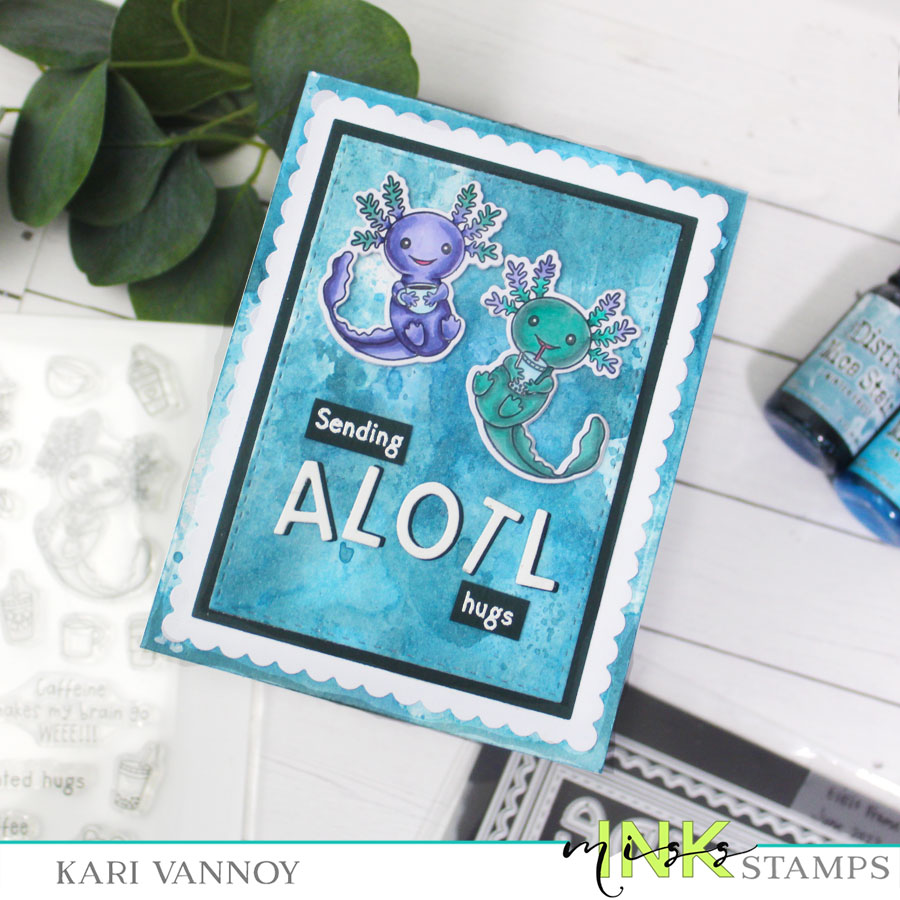
Hello! Today I have a fun project using Mica Sprays for Ink Smooshing! I’ve never used this medium for ink smooshing before, but found that it adds some fun pearl shine to a background.
Watch the video below or on YouTube:
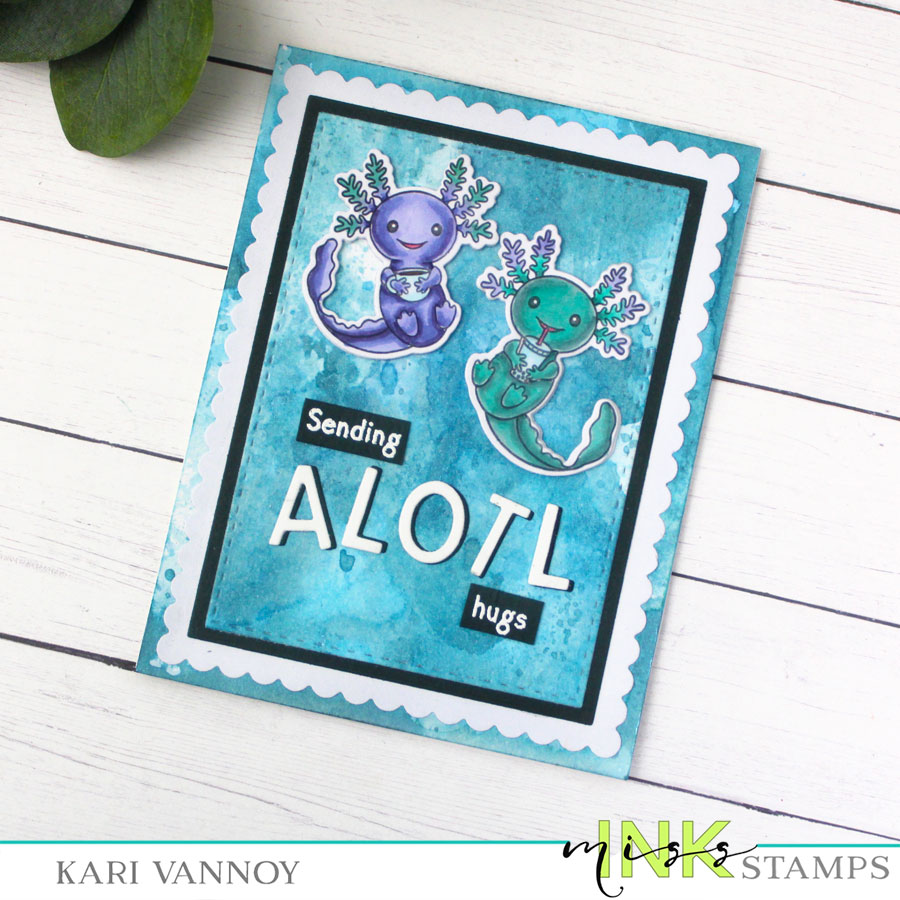
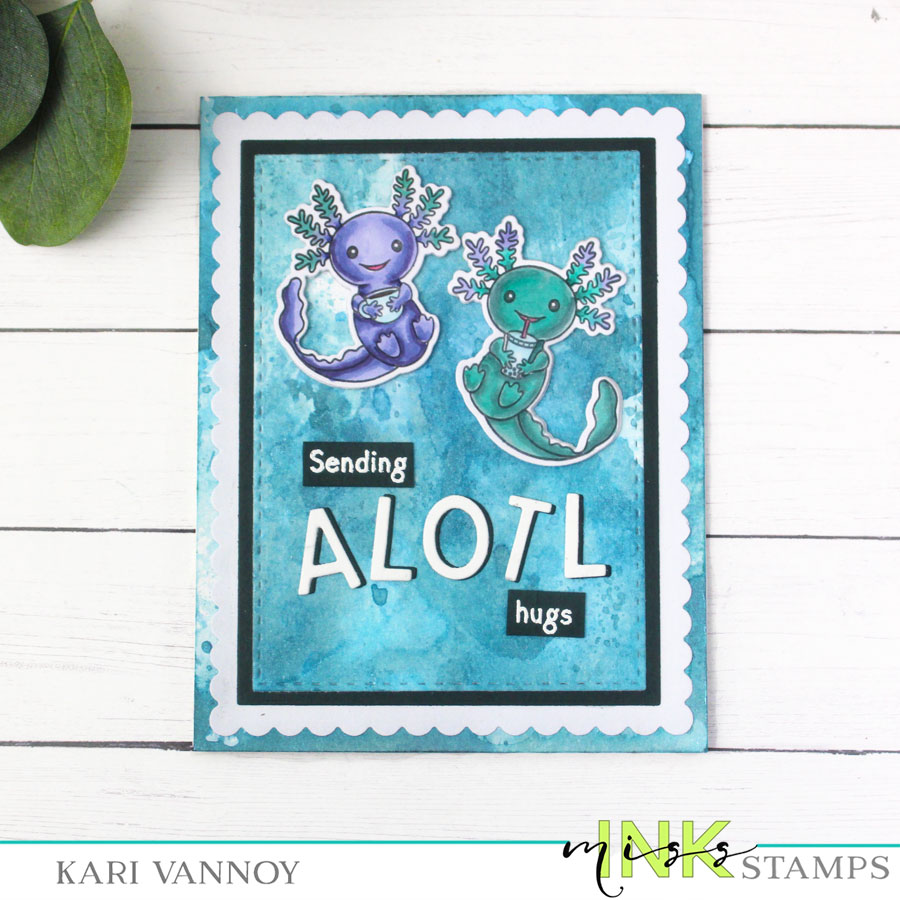
I love this set from Miss Ink Stamps…these Axolotls are so fun! I used the coordinating dies for this one, and this time I was SOOOO happy to use them…cutting these critters out would have been a bear! See how the dies cut out the inside pieces too? So perfect.
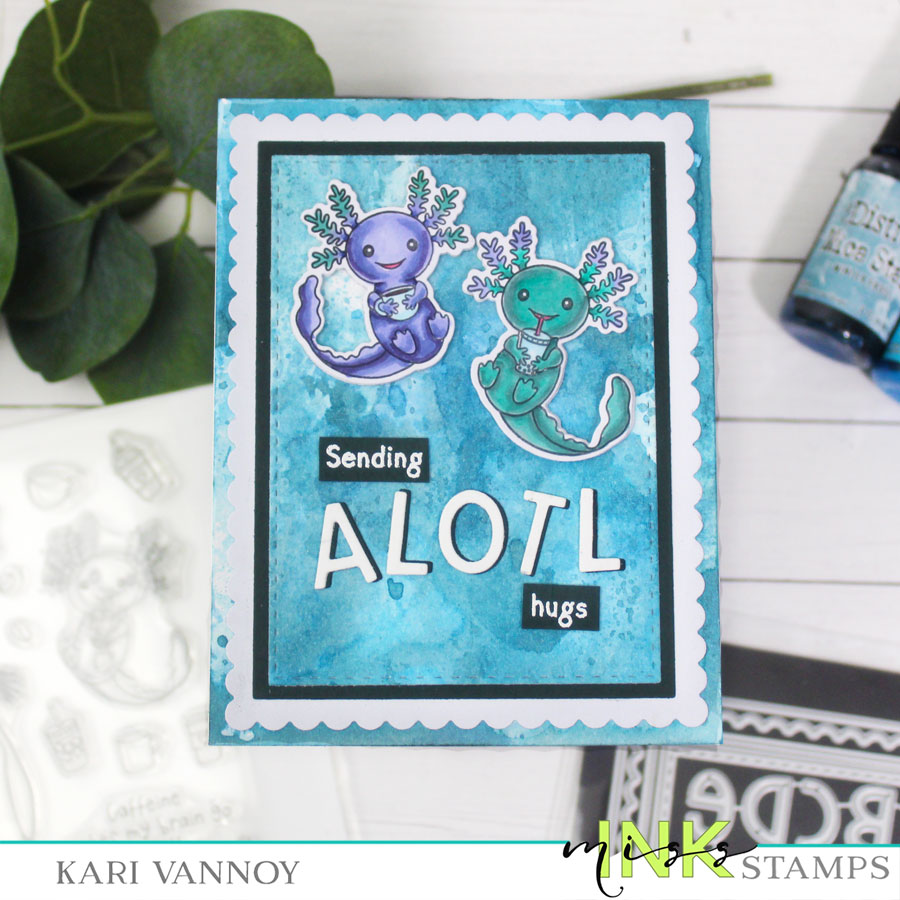
For ink smooshing I used Distress inks and then Mica Sprays. See the video for how I did this. The EIEIO Frame die set has four frame dies and I used them ALL on this card. I also used the included alphabet dies to spell the word “ALOTL.” I just love creating my own sentiments like this.
I’m often asked what supplies I use to make my cards and projects, so I’ve put together a list using affiliate links when possible. If you make a purchase with these links I may receive a small commission. These help me to keep up with blog costs and continue bringing you fun projects. Thank you so much for your support!
I hope you enjoyed this project today! Thanks for stopping by!