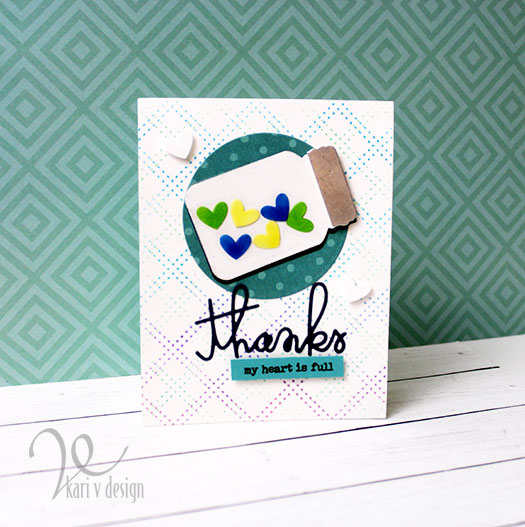
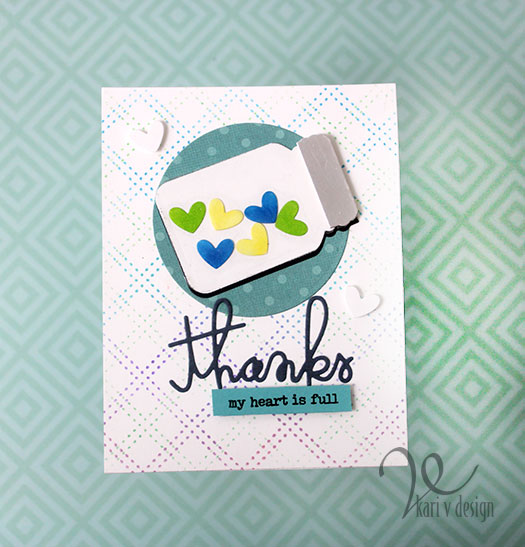
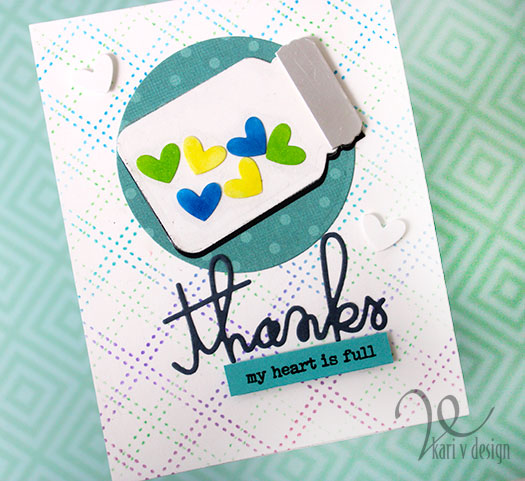
Hello! Today I’m participating in the Paper Smooches Thank you challenge. I decided to use a die that I have never used before: the small jar die. I paired it with a favorite thanks die, and that’s how this card was born!
The background was a stencil that I inked up and I added the “my heart is full” as a sentiment strip. Can you tell that the jar lid is silver mirror cardstock? It always turns out a little funny in pictures.
Thank you challenge
I may have to re-take the photos because I took them at night, and the lighting was strange on them. But for now, they will do.
I absolutely ADORE Paper Smooches fonts, and this thanks word die is definitely a favorite!
I’m often asked what supplies I use to make my cards and projects, so I’ve put together a list using affiliate links when possible. If you make a purchase with these links I may receive a small commission. These help me to keep up with blog costs and continue bringing you fun projects. Thank you so much for your support!
Here’s one of the backgrounds I created inspired by one of the tags…I can’t decide if it should be a vertical or landscape card! lol. So I haven’t attached the hello sentiment until I can decide.
Thanks for stopping by! I hope you enjoyed the May kit this year…it’s already sold out, it has been so popular.
Hello! Today I am a part of Ardyth, Jen C & Kathy’s celebratory video hop for 5,000 subscribers!
This video hop has lots of prizes, so go check it out, then follow along the hop, like and comment on the videos for your chance to win!
Today I’m sharing 4 jaw-dropping ways to use a coverplate die, so go check it out!
In case you are interested, I have listed all the supplies here as well.
I’m often asked what supplies I use to make my cards and projects, so I’ve put together a list using affiliate links when possible. If you make a purchase with these links I may receive a small commission. These help me to keep up with blog costs and continue bringing you fun projects. Thank you so much for your support!
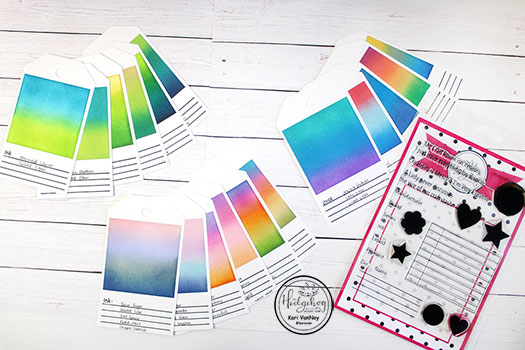
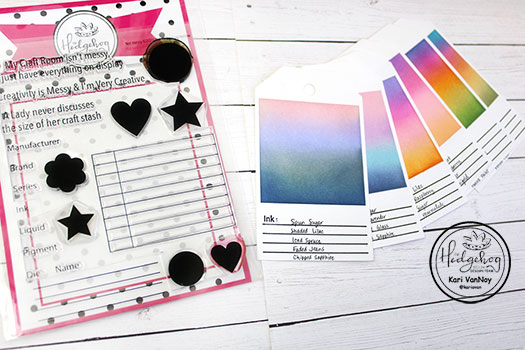
Hello again! I’m back with another installment of my Organization in the Craft Studio Series! Today I’m talking about stencil organization and 6×6 paper organization. The May 2020 Hedgehog Hollow Kit had a really great product that inspired me to do this organizing!
It’s the 6×7 Storage Pocket, and it’s sturdy with a tab at the top for easy labeling! Oh, I think I’m really going to love this!
Check out my video below or in HD on Youtube, where I also talk about the easiest way to organize and store stencils:
And of course, while I was organizing, I was so inspired by the papers that I had to create a quick card! Lol…ever wonder why it takes so long to organize?!? I get distracted!
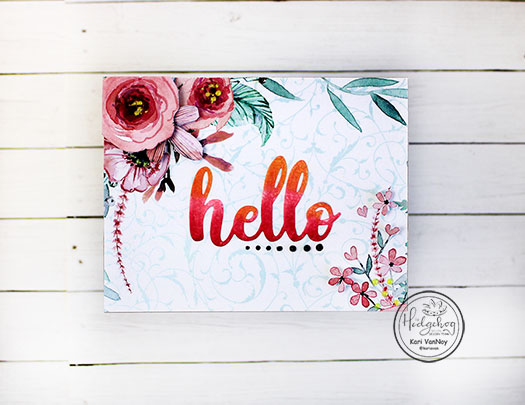
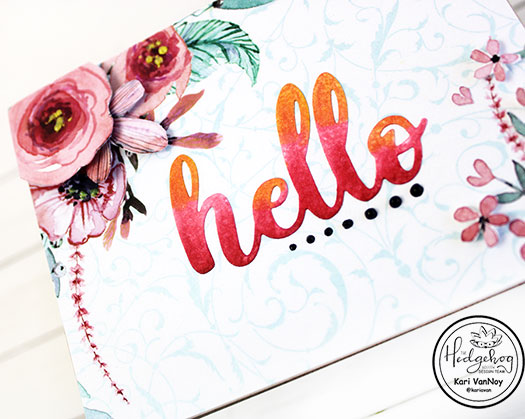
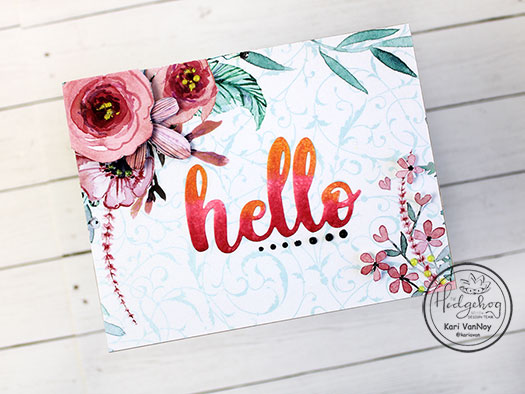
I took a piece of the 6×6 paper and cut it down to 4.25″ x 5.5″. Then, with the remaining pieces, I fussy cut some of the flowers and popped them up with foam tape on the top left and lower right side of the panel.
I added a hello die cut, colored with alcohol markers, into the center and added some black Nuvo drops. That’s it! The easiest, happy hello card!
I’m often asked what supplies I use to make my cards and projects, so I’ve put together a list using affiliate links when possible. If you make a purchase with these links I may receive a small commission. These help me to keep up with blog costs and continue bringing you fun projects. Thank you so much for your support!
I hope you enjoyed my organizing tips for stencils and 6×6 paper today! And my card made with minimal supplies. 🙂
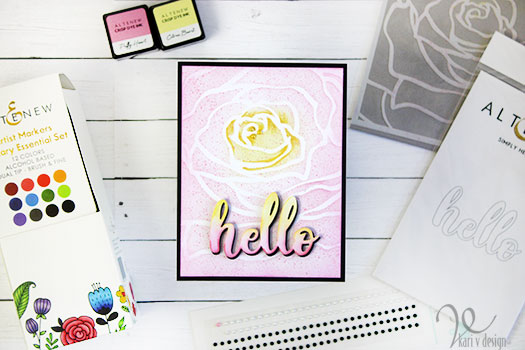
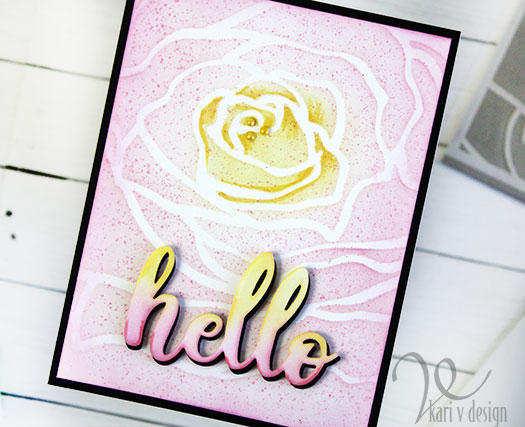
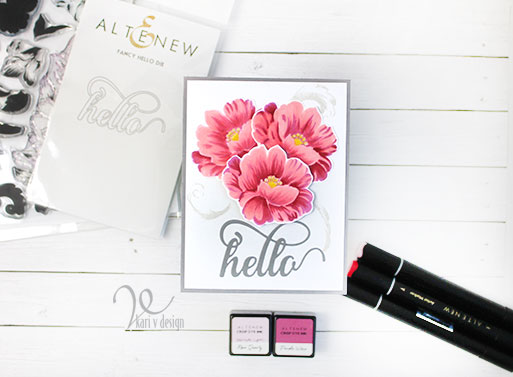
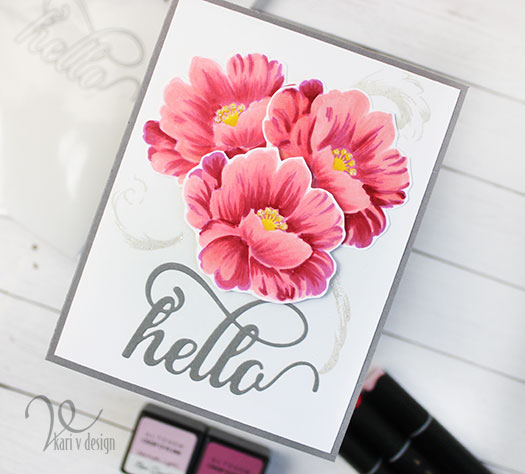
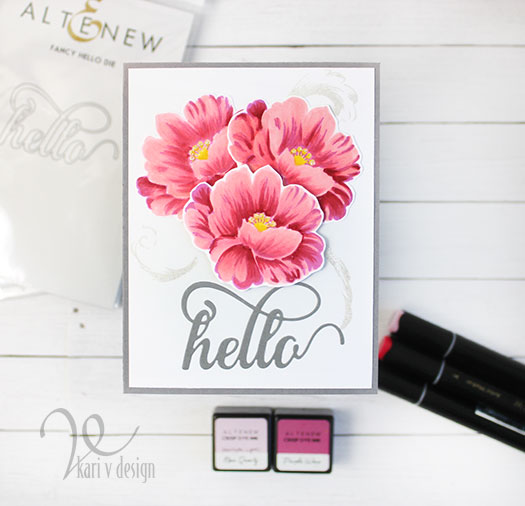
Hello! Today I have some cards inspired by my latest class at Altenew Academy called Magical Marker Techniques.
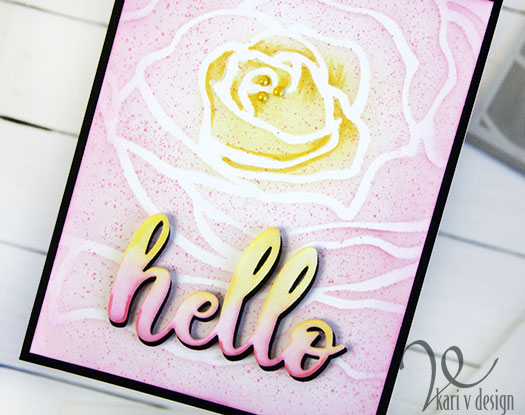
There were many techniques I wanted to try, so I actually made two cards! The first one features stenciling, with some marker accents. Then I splattered on the marker ink using alcohol to make it more liquid, and a stippling brush.
See the stippling?
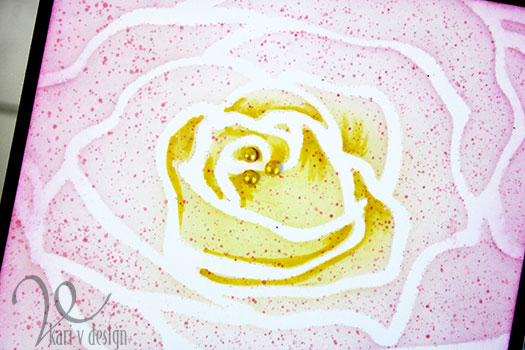
I inked on the stencil first, then added some darkness with the markers. I also colored some pearls with the same artist marker to make them match.
This stippling technique creates such small, dainty splatters! I love how this turned out.
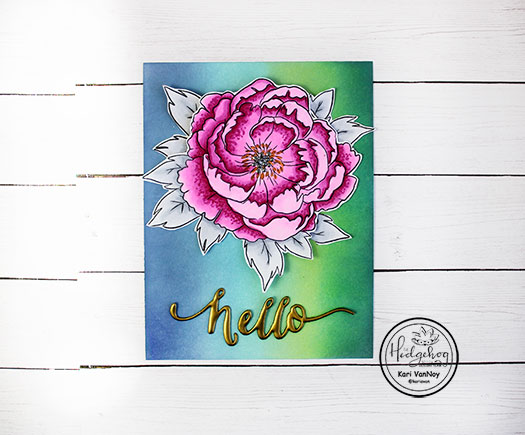
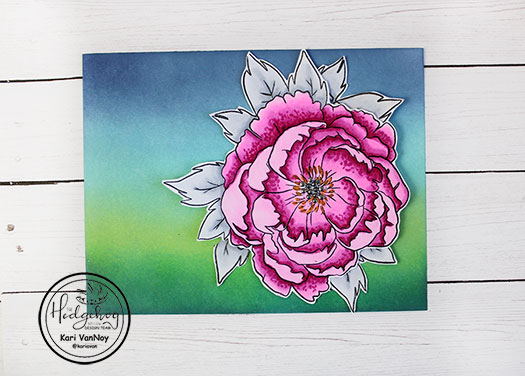
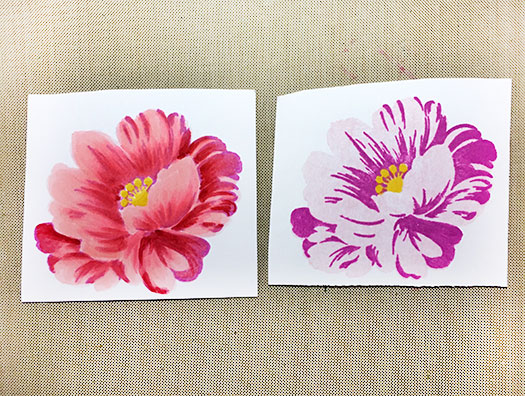
Then, I really wanted to use the markers to color an image. So, I first stamped the layers of this flower with ink, then I added to it using the artist markers.
Beautiful flowershello!
The artist markers really add such a beautiful dimension! The stamping (on the right) is beautiful on its own, but add the markers (on the left) and get a flower that really pops!
I added some soft gray stamping in the background using the leaves from the same stamp set. Then for a little sparkle, some stickles to the center of the flower, and painted onto the gray leaves. It’s subtle, but gorgeous!
I hope you enjoyed these projects today! This is my last project/class for my AECP Certification…now onto the Final! (wish me luck). Thanks for stopping by!
Hi I'm Kari. I'm a creator, a card maker, and a day maker! I am Lucky in love to a supportive husband, blessed to raise 3 kids (all moved away now!), and happy to be watched over by 2 dogs.
I originally started this blog to remind me to be happy amid adversity, and I hope it inspires you, too!