I’m often asked what supplies I use to make my cards and projects, so I’ve put together a list using affiliate links when possible. If you make a purchase with these links I may receive a small commission. These help me to keep up with blog costs and continue bringing you fun projects. Thank you so much for your support!
I love a traditional red and green holiday card, how about you? I’ll be back soon with more to share!
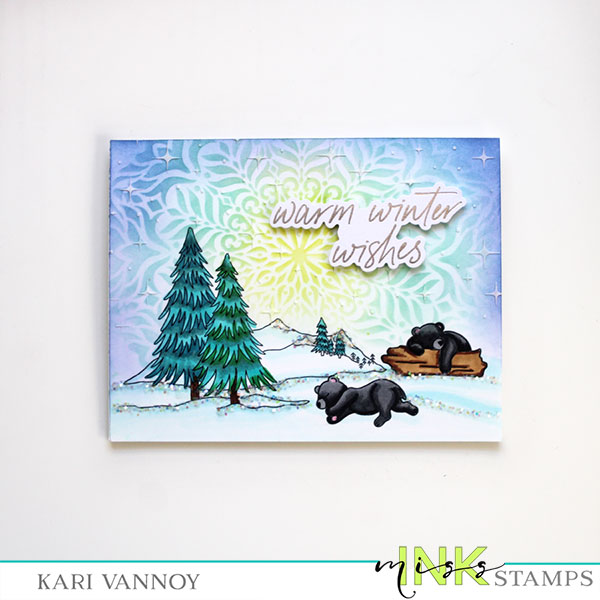
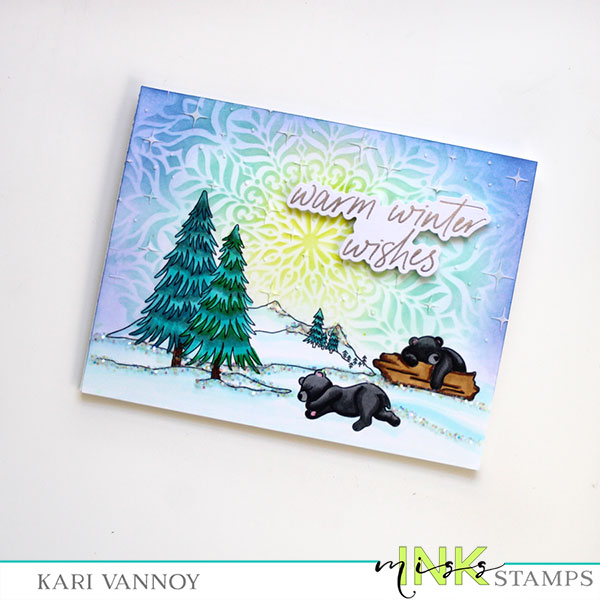
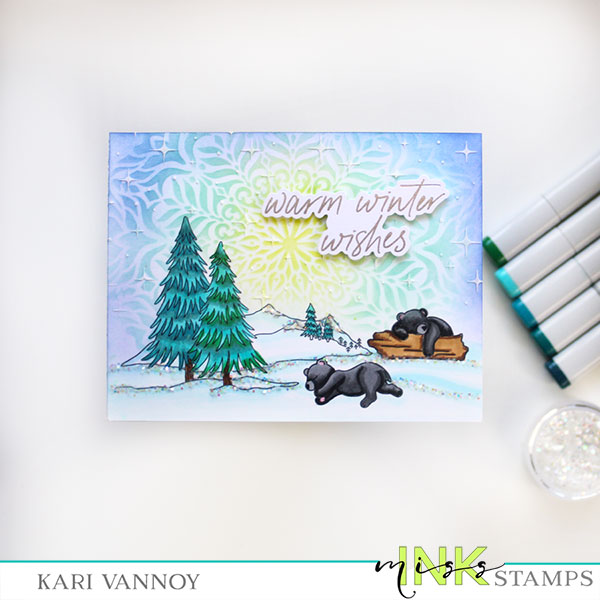
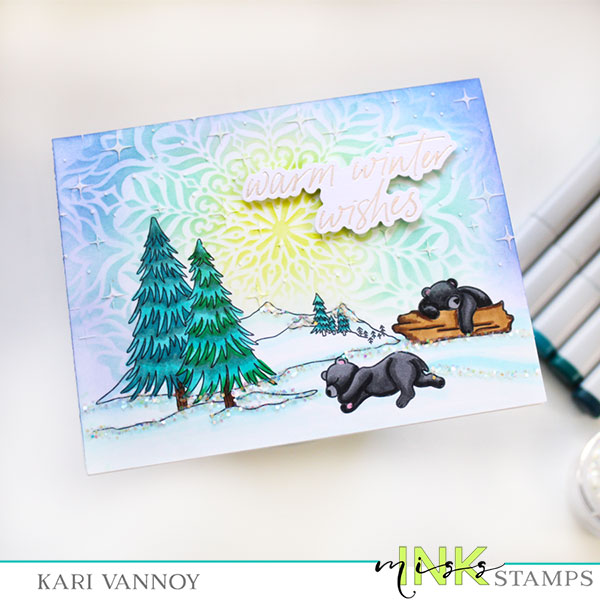
Hello! Today I am smiling at this Sleepy Bear card that I have to share. It’s a favorite bear stamp set (from Miss Ink Stamps) that I’ve paired with a favorite stencil.
Just how cute are these bears?! This card uses NO MASKING at all…I show you how easy you can build a scene like this in the video above.
I first stamped out all my images, then I stenciled on that sky in greens, blues, and purples!
Next I colored up all the images. I used some Blue-greens on those trees (thinking of a Blue Spruce here!
For some more magic, I added some white embossing paste through the Sparkles stencil on the top; and some glitter on the snowy scene on the bottom of the panel.
I’m often asked what supplies I use to make my cards and projects, so I’ve put together a list using affiliate links when possible. If you make a purchase with these links I may receive a small commission. These help me to keep up with blog costs and continue bringing you fun projects. Thank you so much for your support!
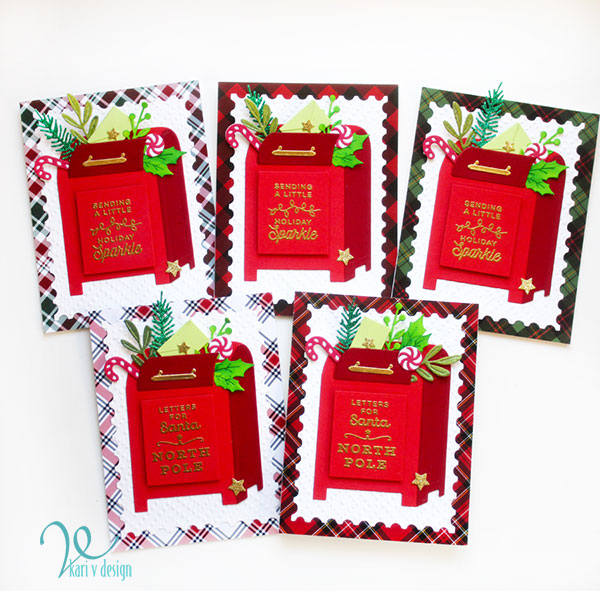
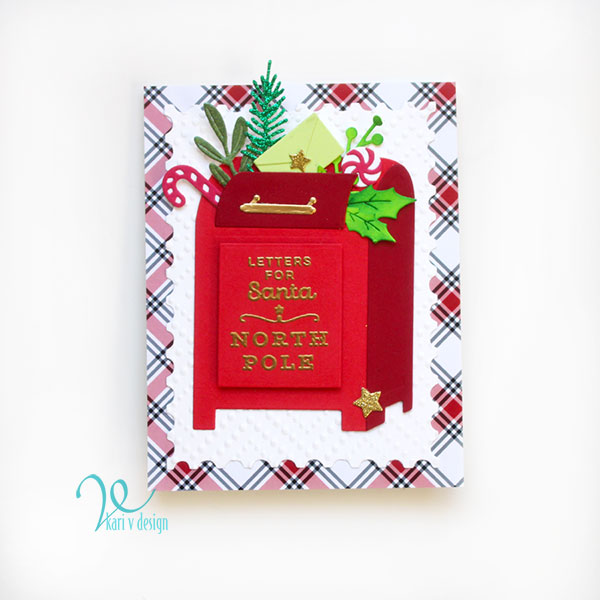
Hello! Today I am sharing some favorite holiday products that I LOVE to create with. This is a Mailbox set that I made for family members this year.
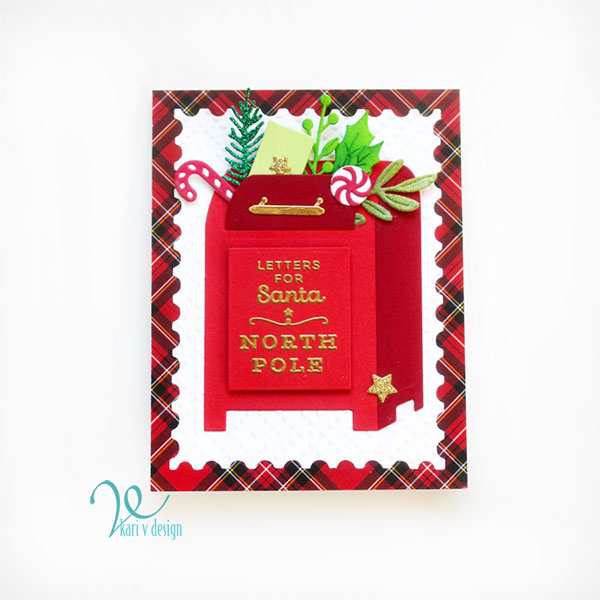
Aren’t these mailboxes so cute?!? In the spirit of the holiday season, I created red mailboxes with lots of greenery in different colors. I got some different greens using GLITTER PAPER, INK BLENDING, and MICA SPRAYS!
I really think Spellbinders did a beautiful job in creating this array of products. I also used the peppermint stick and the starlight mint with the holiday add-on set.
For the sentiment on the mailbox, I chose to heat emboss in gold embossing powder using the stamp set. They also have a hot foil plate set so you can use foil if you would like!
I used a Postage Stamp Infinity die from Hero Arts for the layer just behind the mailbox. To add a little more interest, I used an embossing folder with a beautiful dot design on that layer.
The back layer is plaid Christmas paper! I love using plaid paper for Christmas and I chose a variety here to mix things up a bit.
I’m often asked what supplies I use to make my cards and projects, so I’ve put together a list using affiliate links when possible. If you make a purchase with these links I may receive a small commission. These help me to keep up with blog costs and continue bringing you fun projects. Thank you so much for your support!
I hope you enjoyed these projects today! I can’t wait to give them to my family at our Christmas party. See you soon with more papercrafting projects!
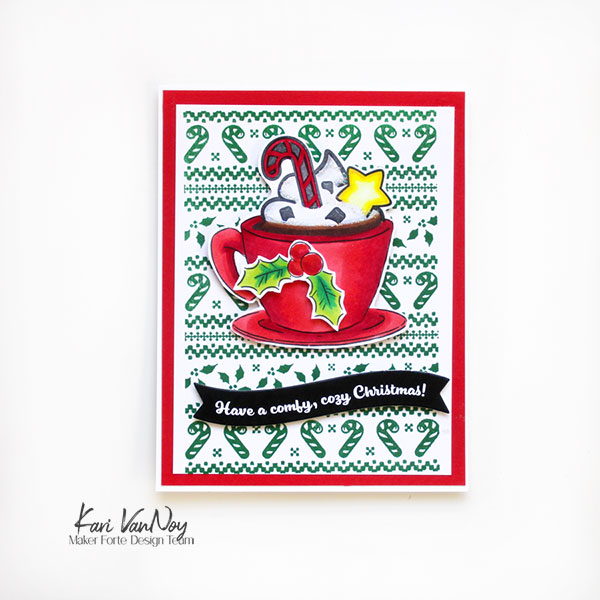
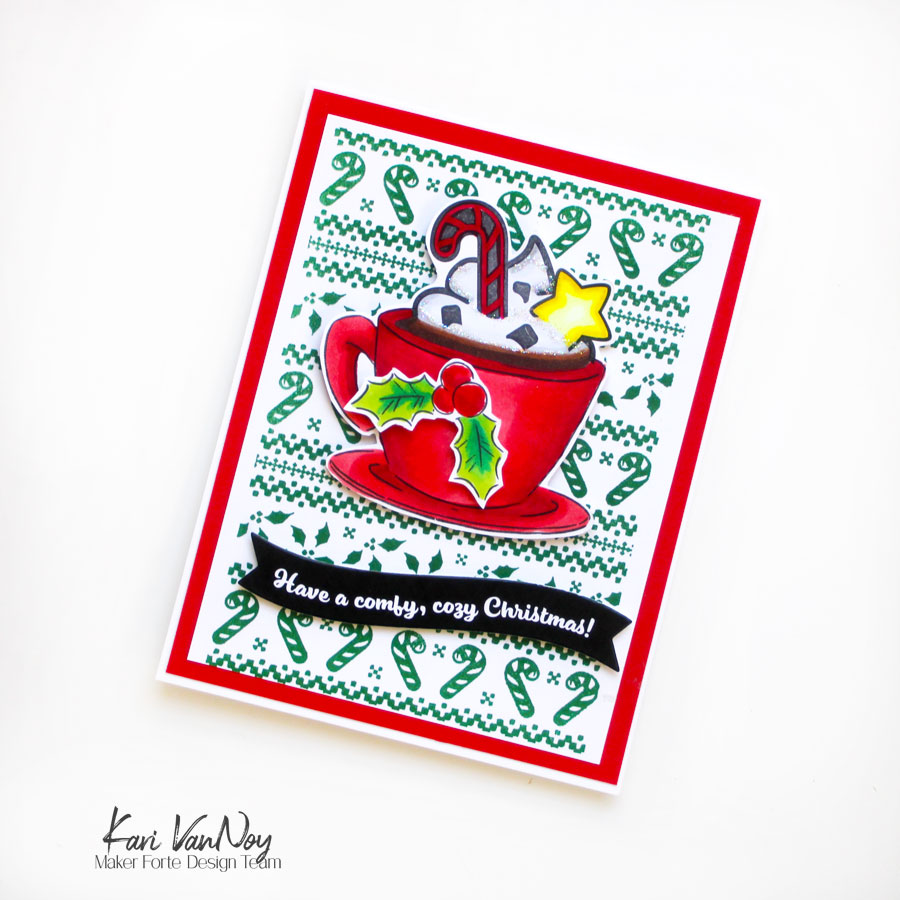
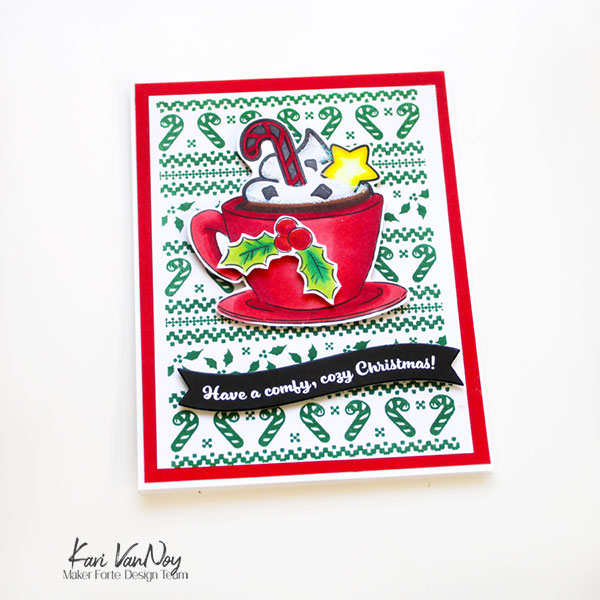
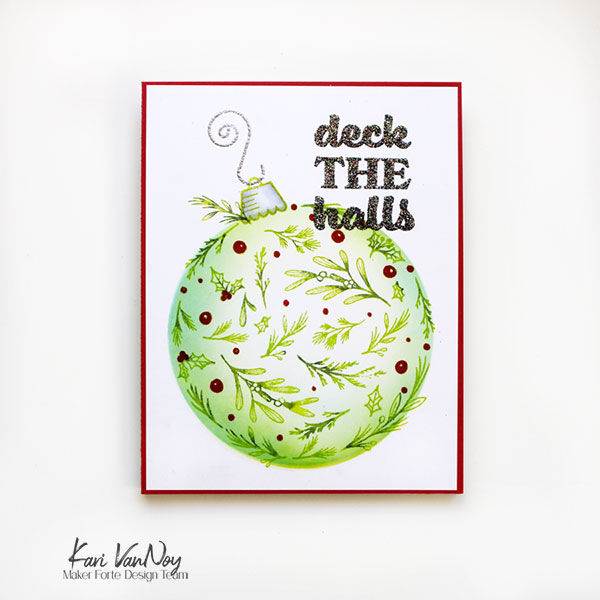
Hello! Today I have a fun ornament card to share using a new Maker Forte stamp set. I love how large this ornament is, it really creates a full card just by itself.
For this stamp, I used some watercolor markers to color up the stamp itself. First I colored the leaves with a green marker and added some darker greens to just portions of the leaves. I spritzed that with water and stamped it down. Then I used a red marker to color the berries, spritzed the stamp with water and stamped it down.
To color the ornament, I used the A2 Circle Spotlight stencil to mask around the ornament and slowly ink blended on a couple green inks. I made portions darker to give it more dimension (so it looks more round).
Next, I added the ornament topper with a light grey ink and colored it with grey Copic markers. I added an extra sprig of greenery by the topper for more festive look!
I heat embossed both the sentiment and the topper with embossing powders. I used my favorite Rainbow Sparkler embossing powder for that “Deck the Halls.”
I matted the whole panel with red cardstock and added it all to the card base. That’s it!
I’m often asked what supplies I use to make my cards and projects, so I’ve put together a list using affiliate links when possible. If you make a purchase with these links I may receive a small commission. These help me to keep up with blog costs and continue bringing you fun projects. Thank you so much for your support!
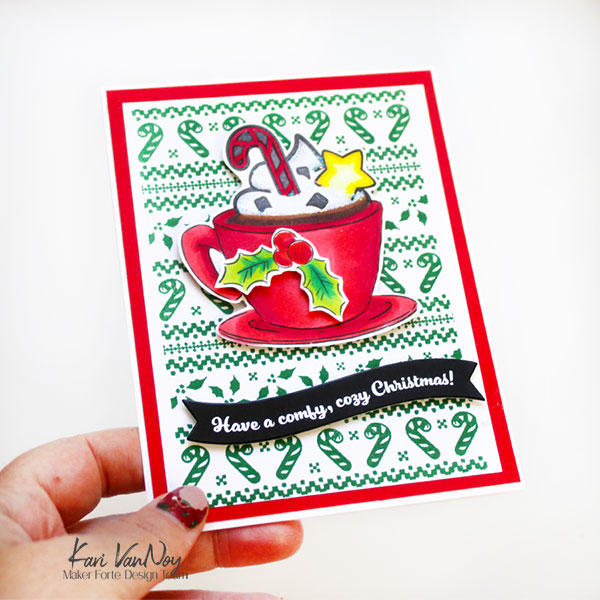
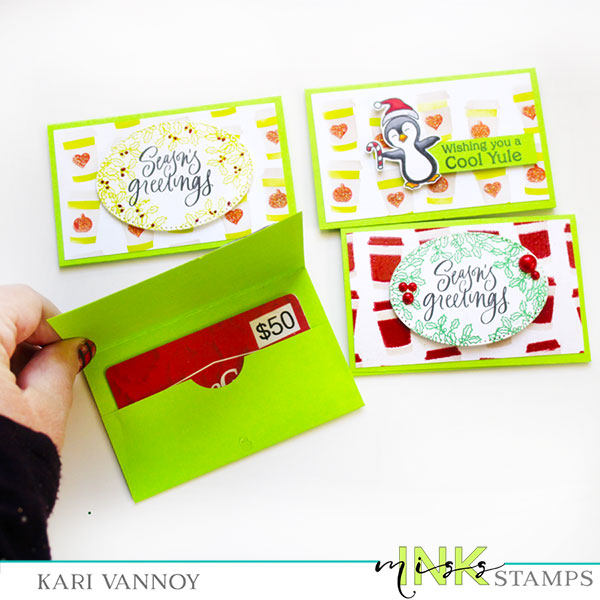
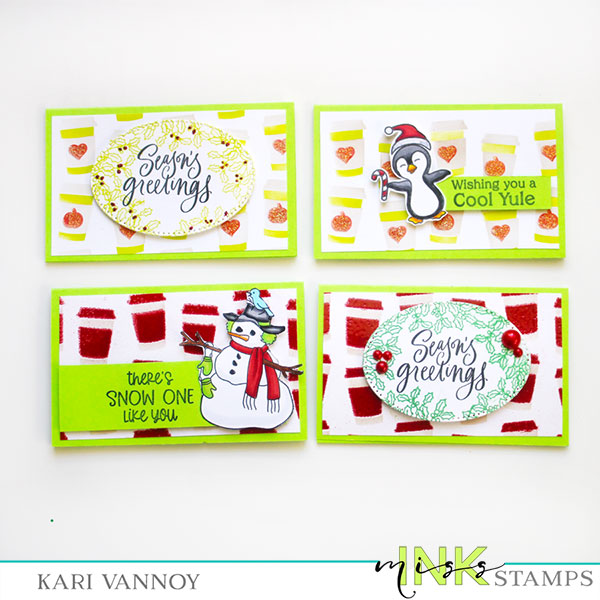
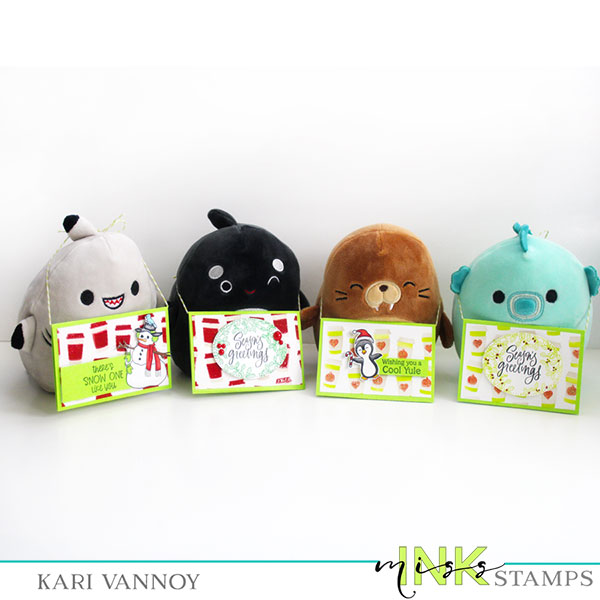
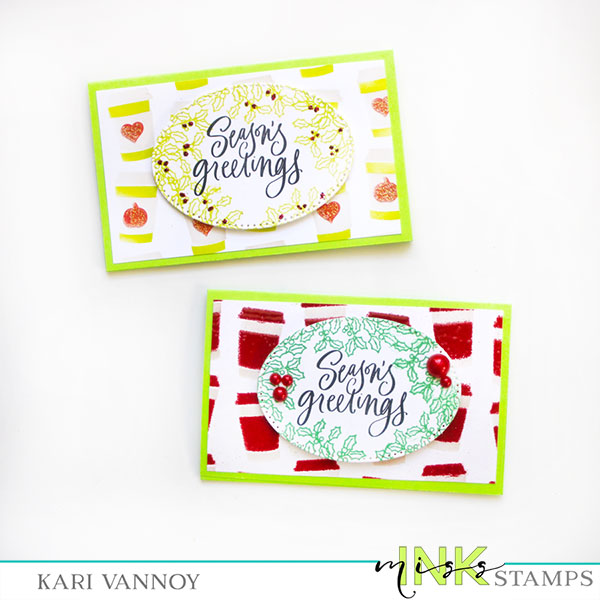
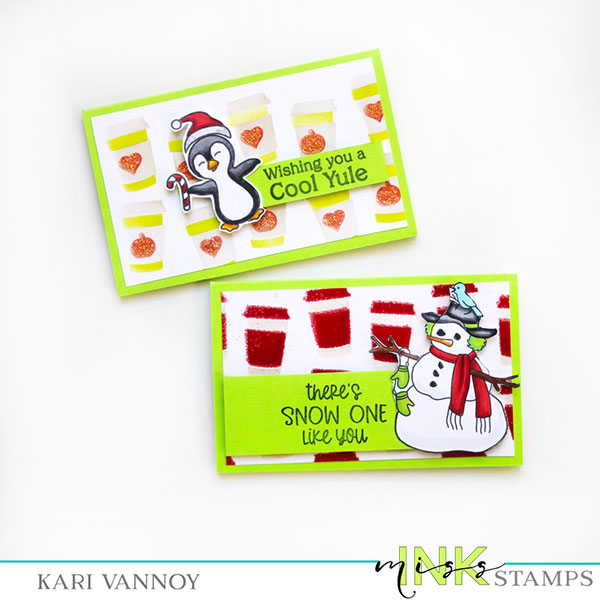
Hello! This time of year I am always in need of cute gift card holders, so today I have some EASY gift card holders to share!
I’m using some cute stamps and a new stencil called Cuppa Joe to Go from Miss Ink Stamps. Watch the video below or on YouTube:
These gift card holders are perfect to add into a stocking, hang on the tree or use them like I am this year: as a necklace around a Squishmallow!
I’m often asked what supplies I use to make my cards and projects, so I’ve put together a list using affiliate links when possible. If you make a purchase with these links I may receive a small commission. These help me to keep up with blog costs and continue bringing you fun projects. Thank you so much for your support!
Hi I'm Kari. I'm a creator, a card maker, and a day maker! I am Lucky in love to a supportive husband, blessed to raise 3 kids (all moved away now!), and happy to be watched over by 2 dogs.
I originally started this blog to remind me to be happy amid adversity, and I hope it inspires you, too!