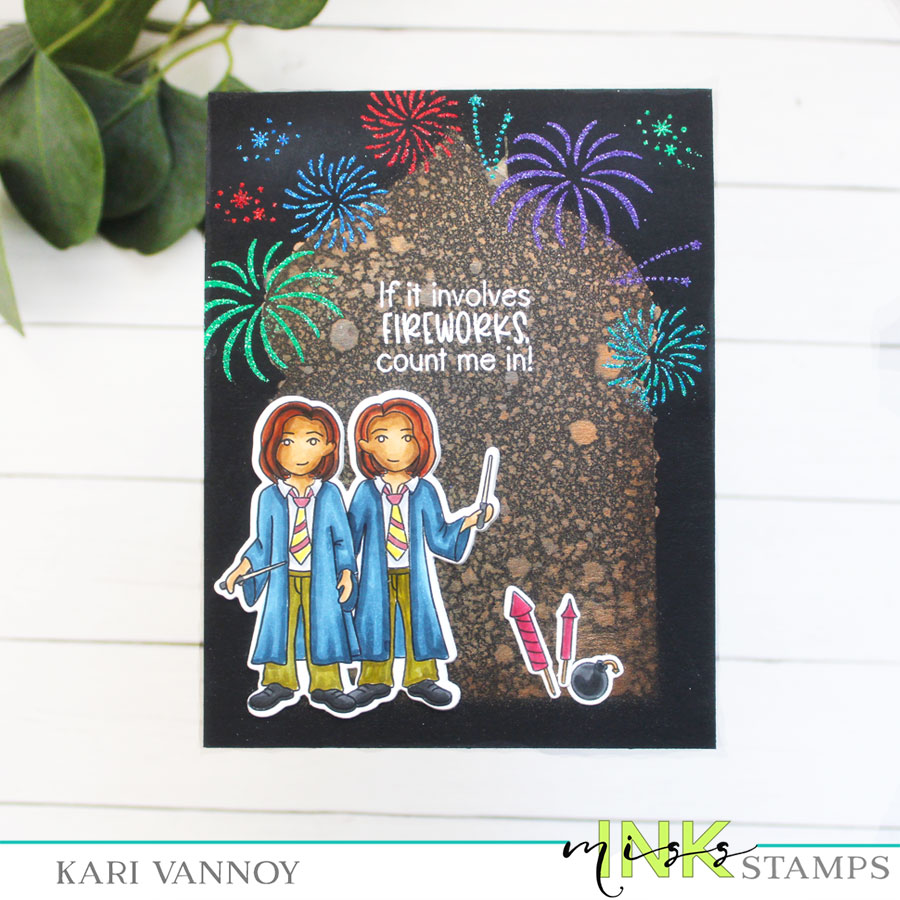
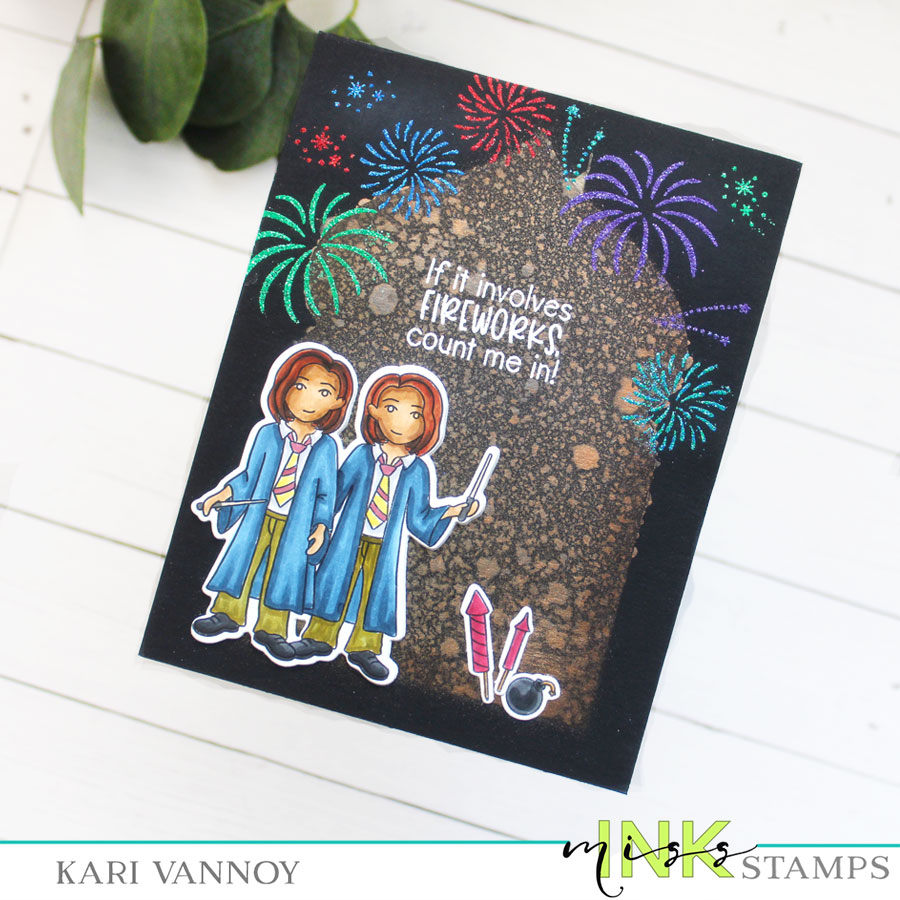
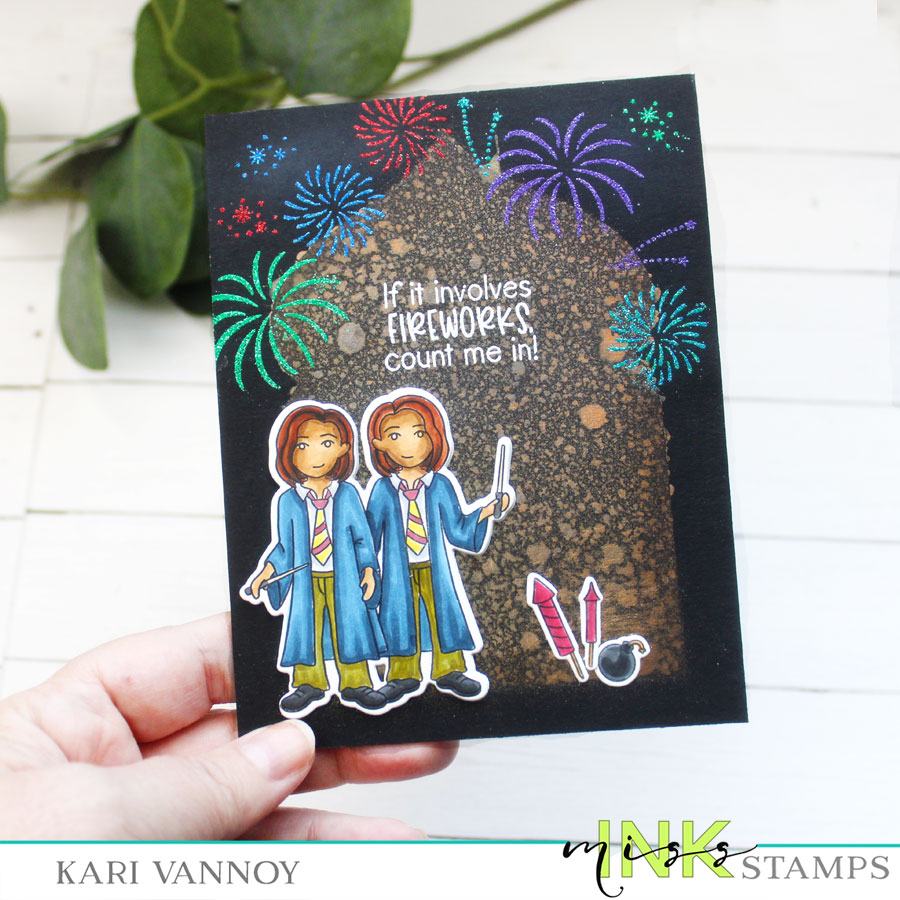
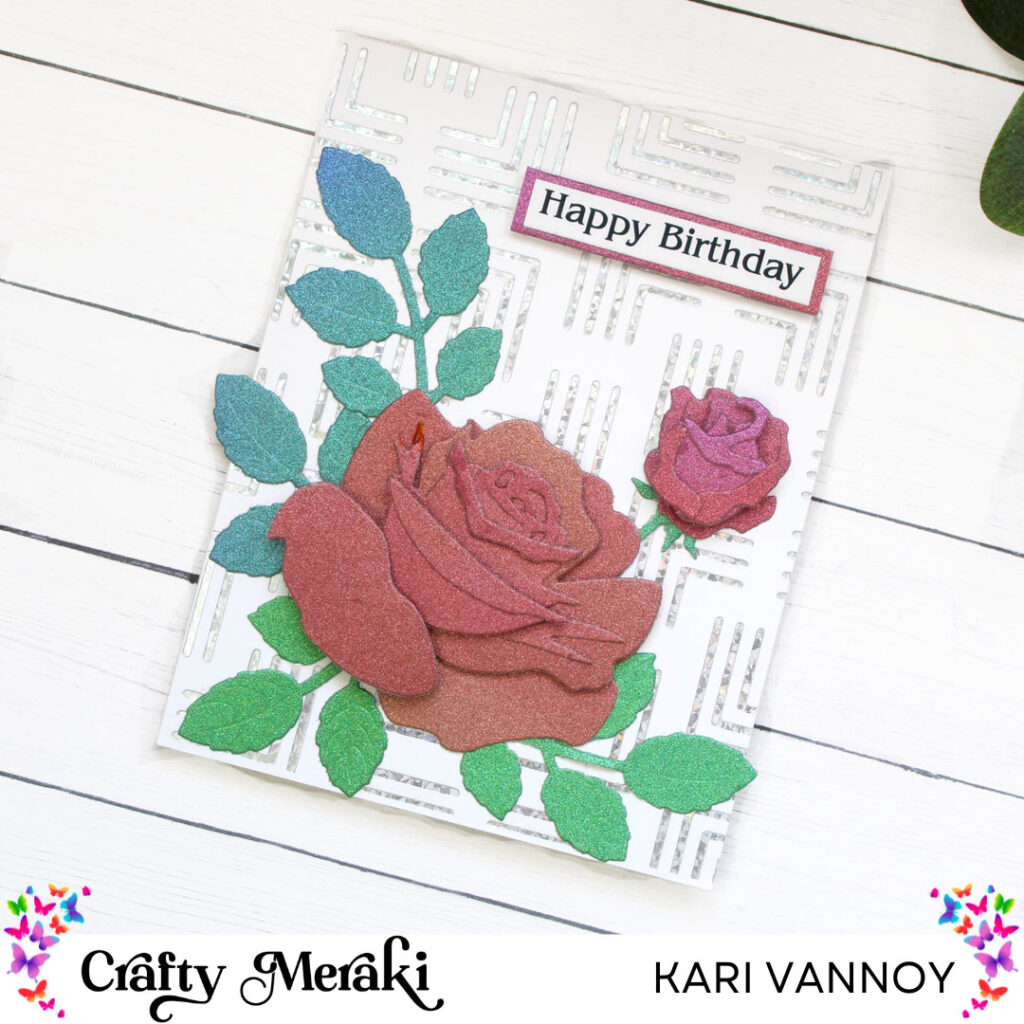
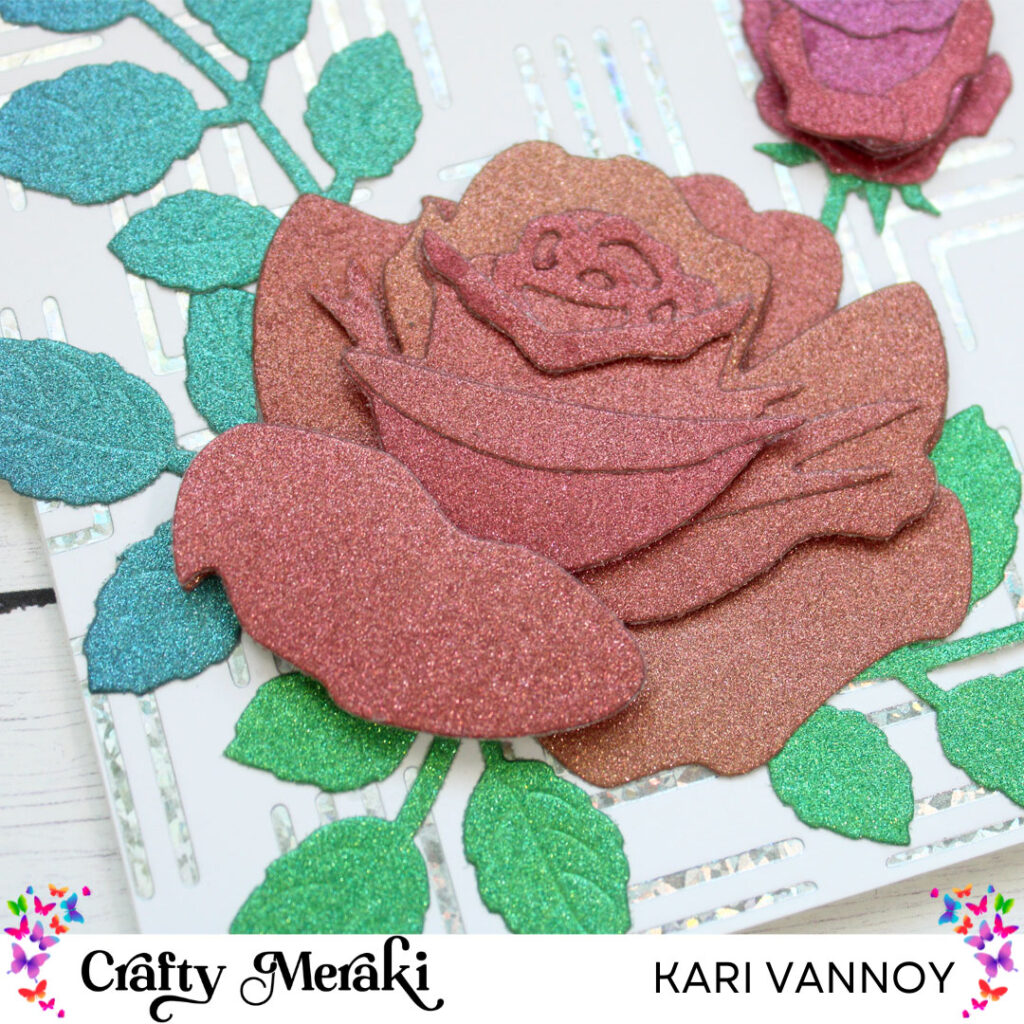
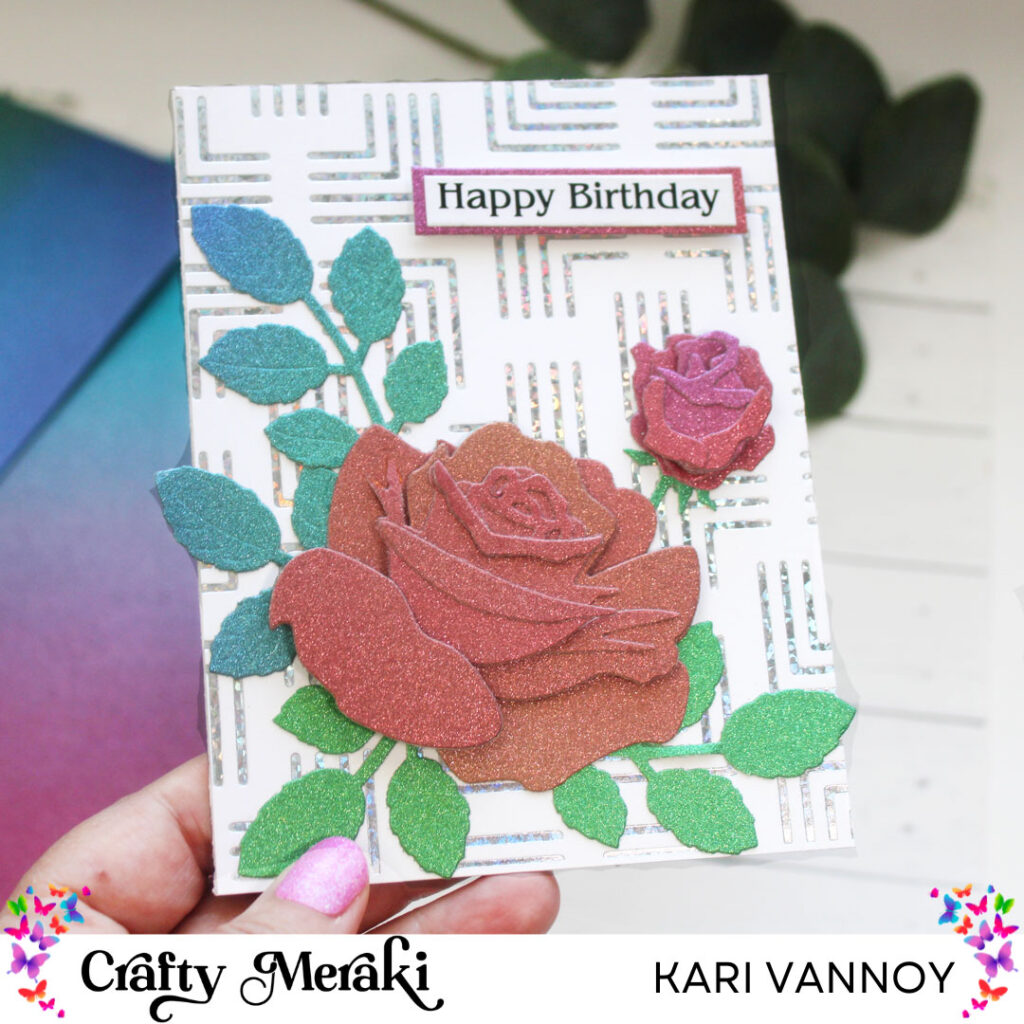
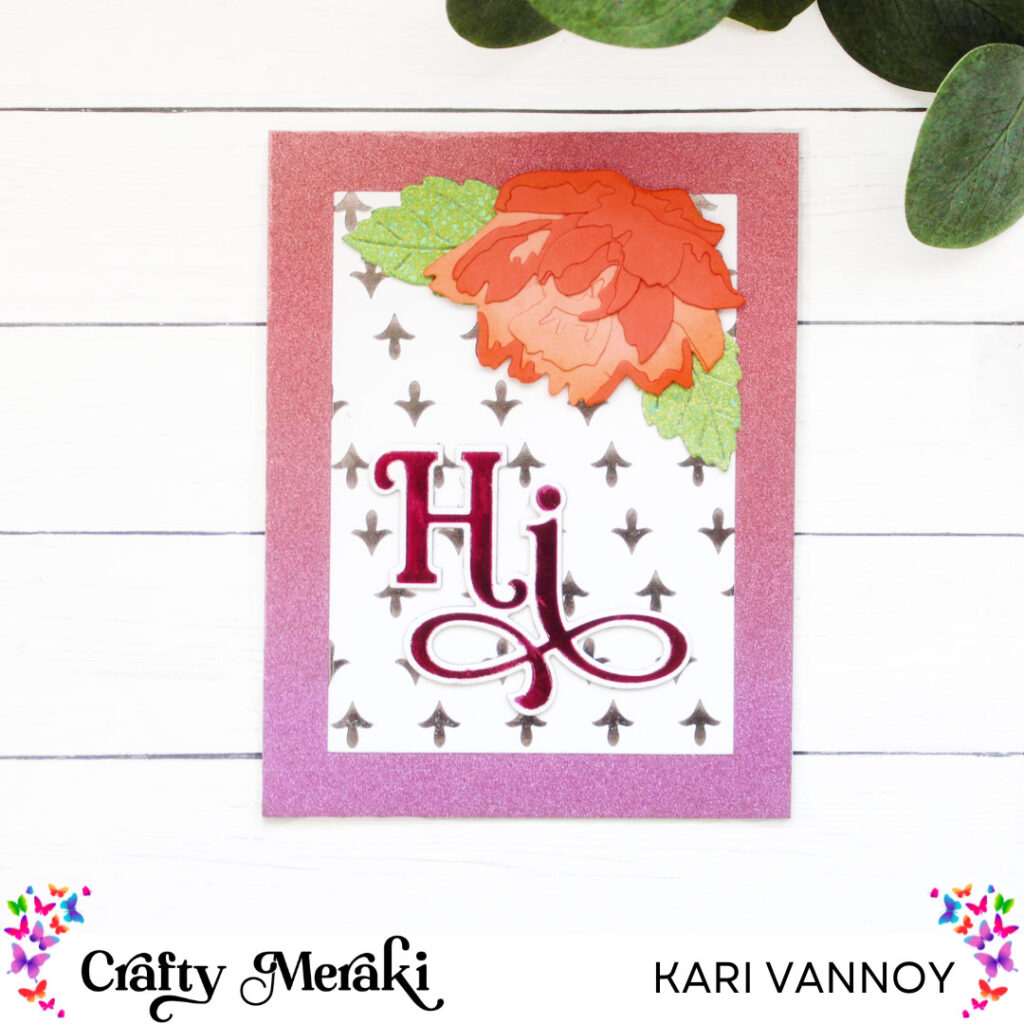
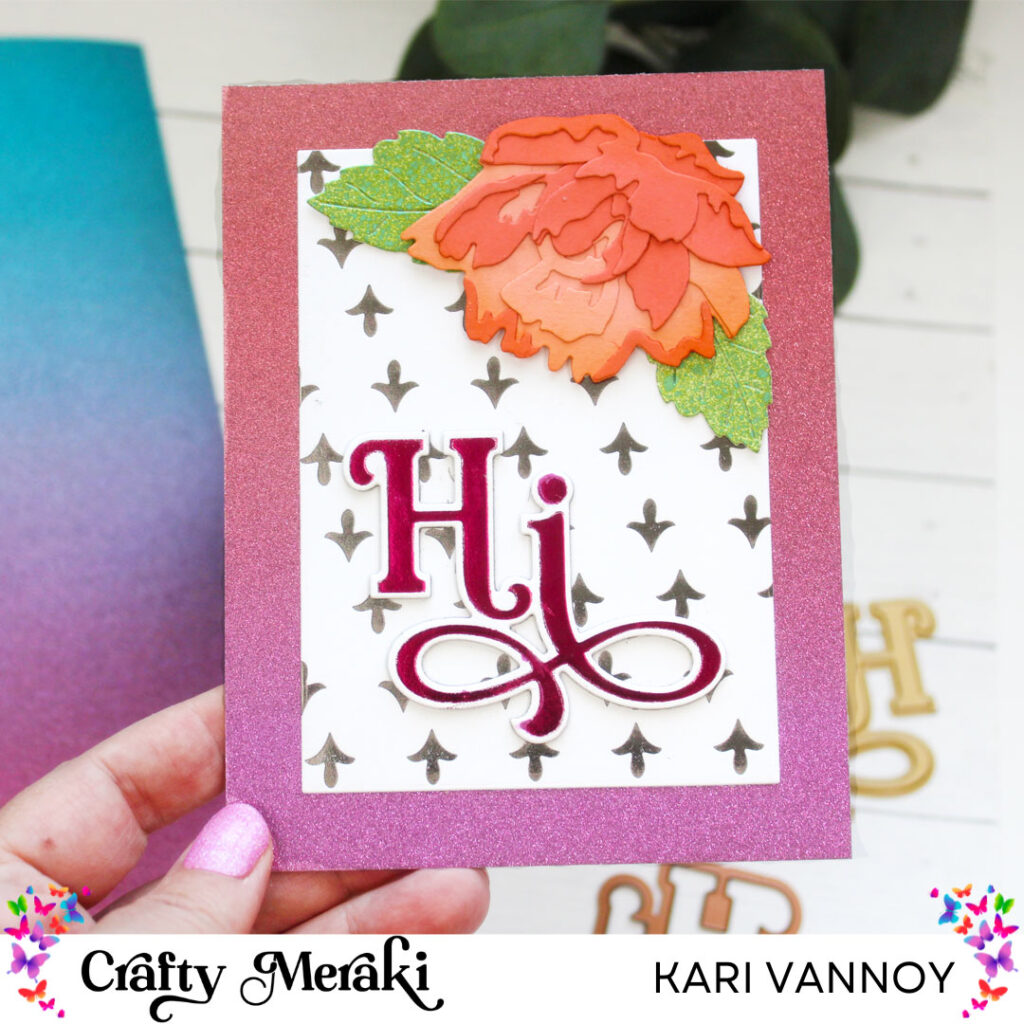
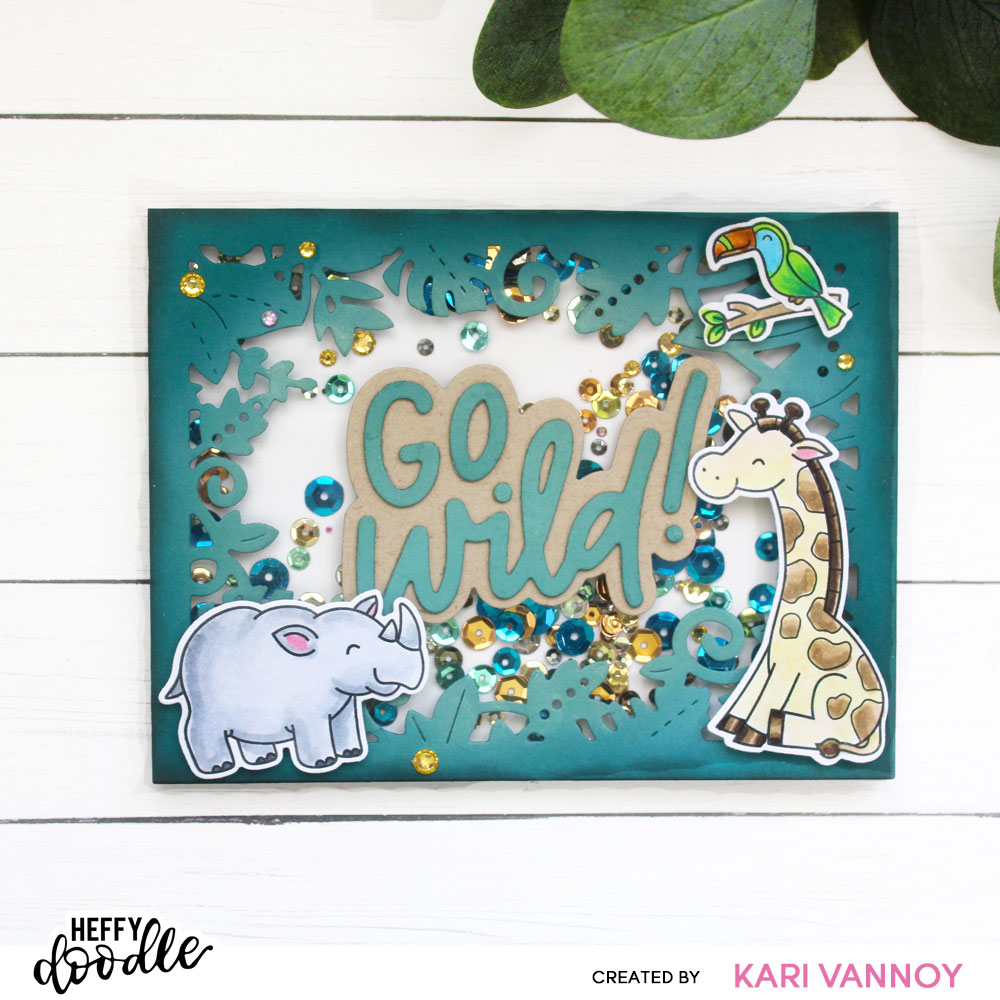
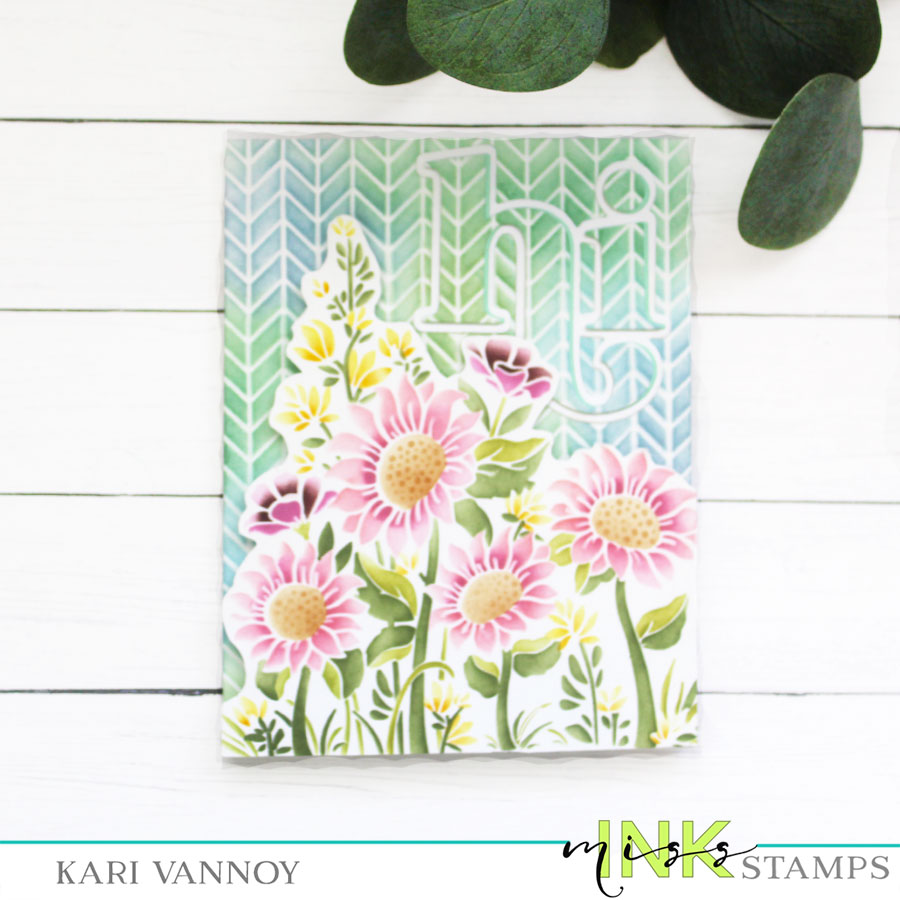
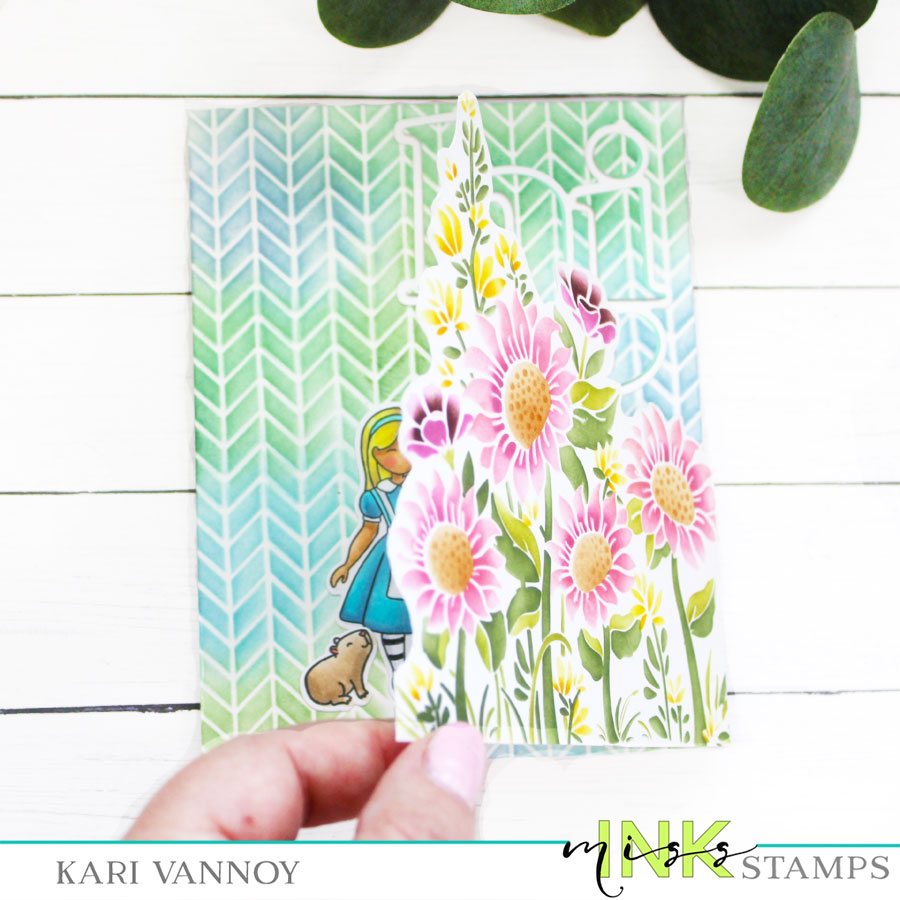
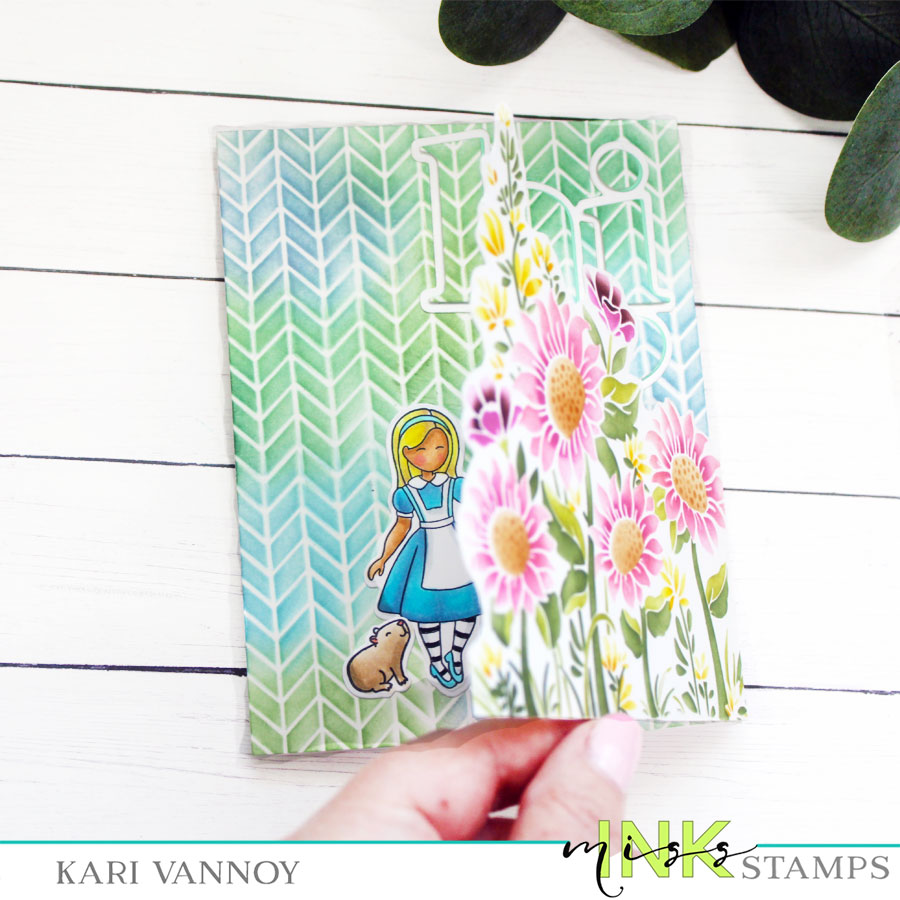
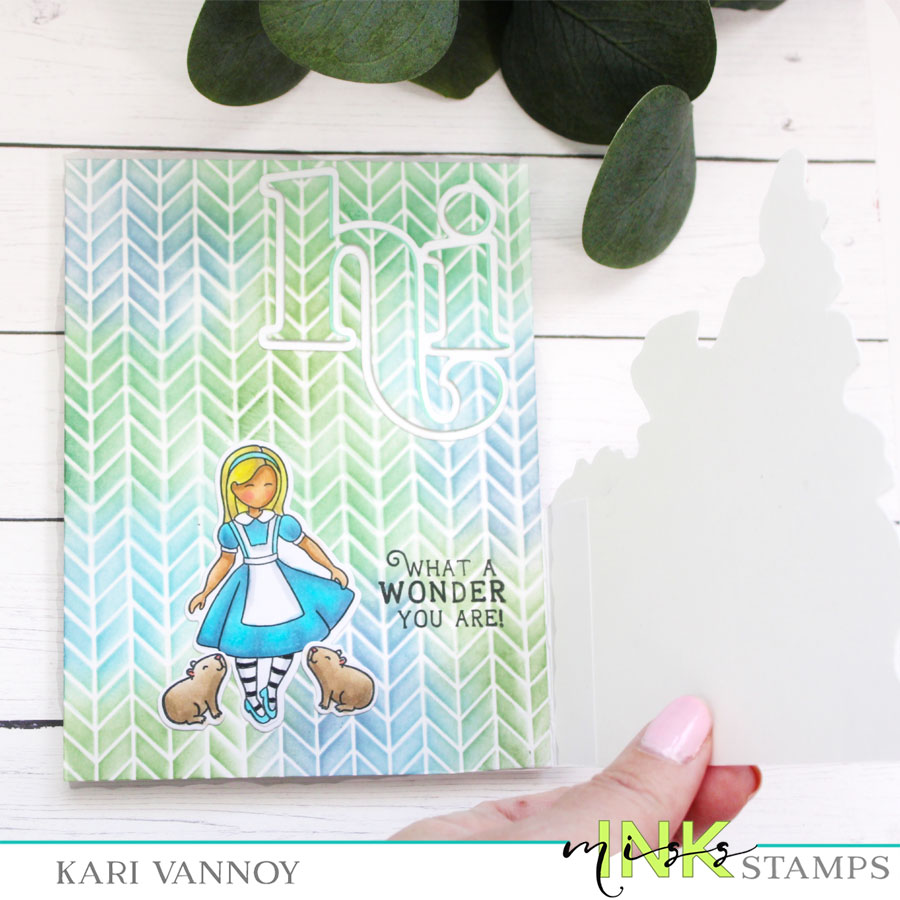
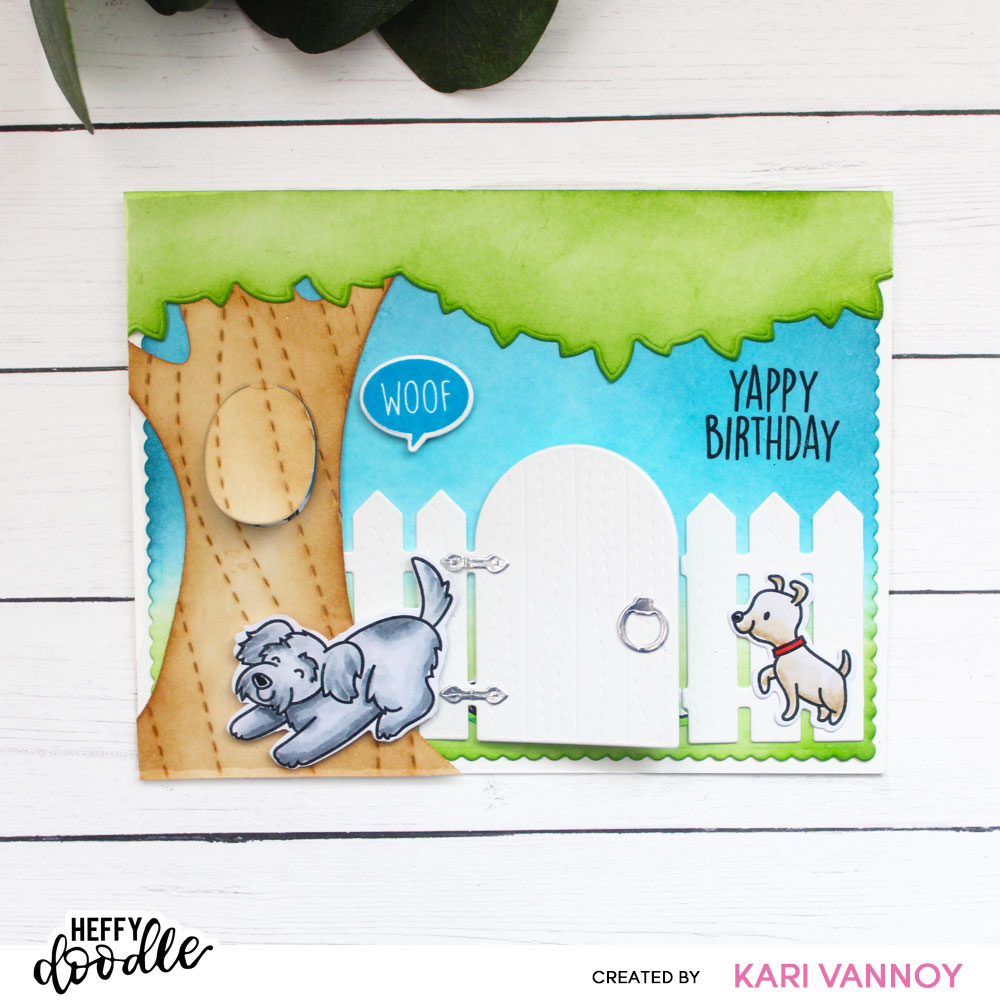
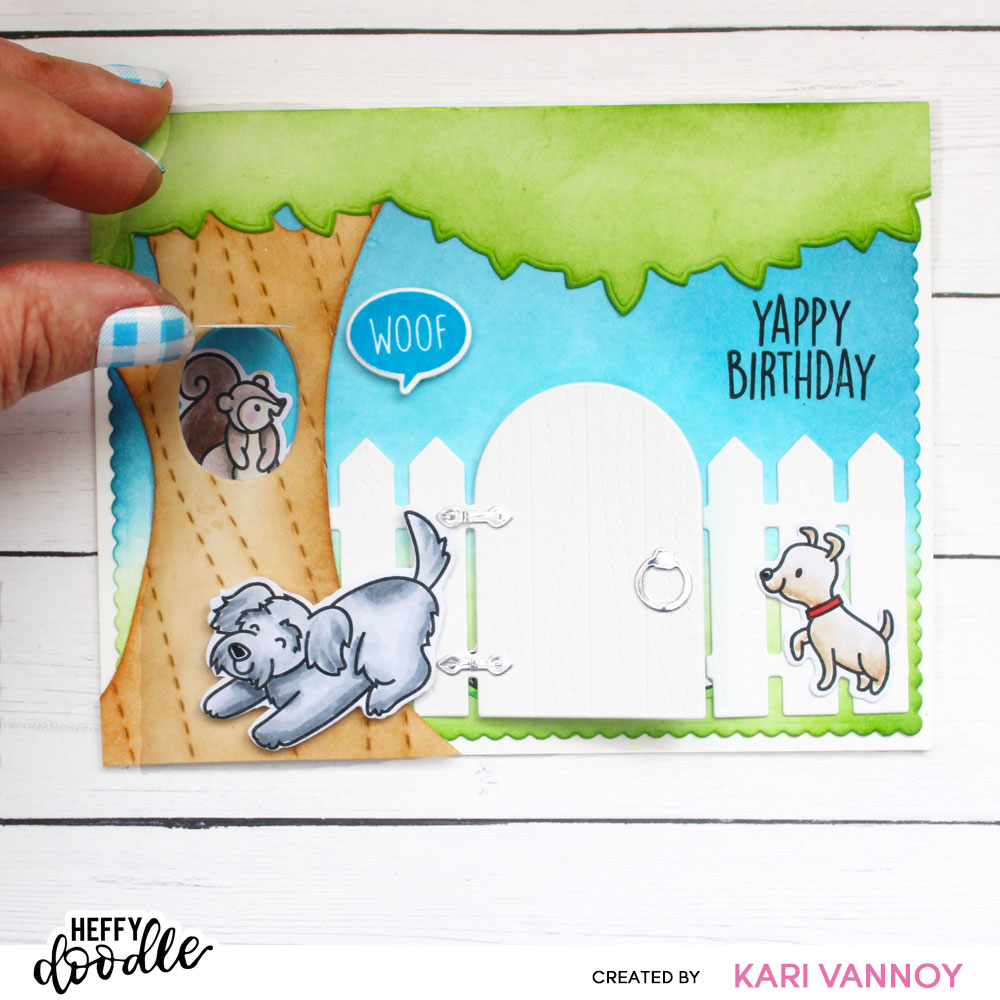
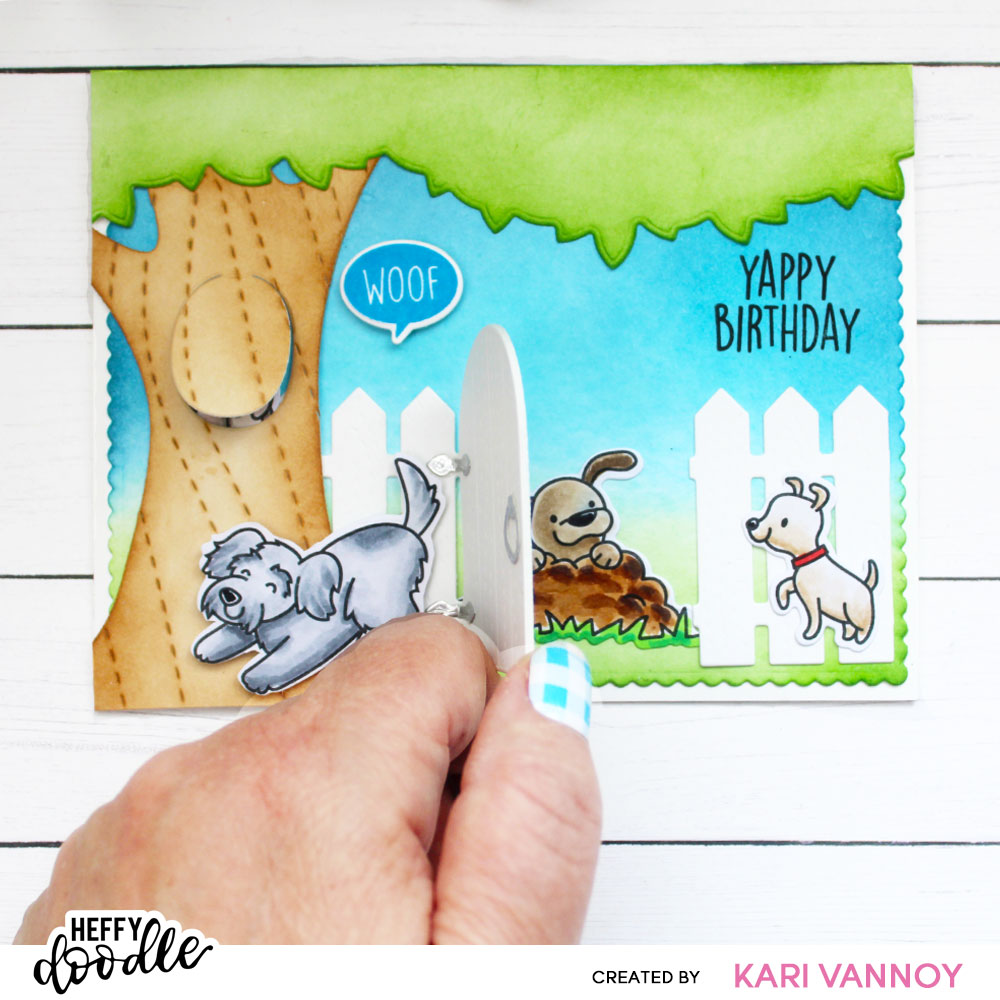
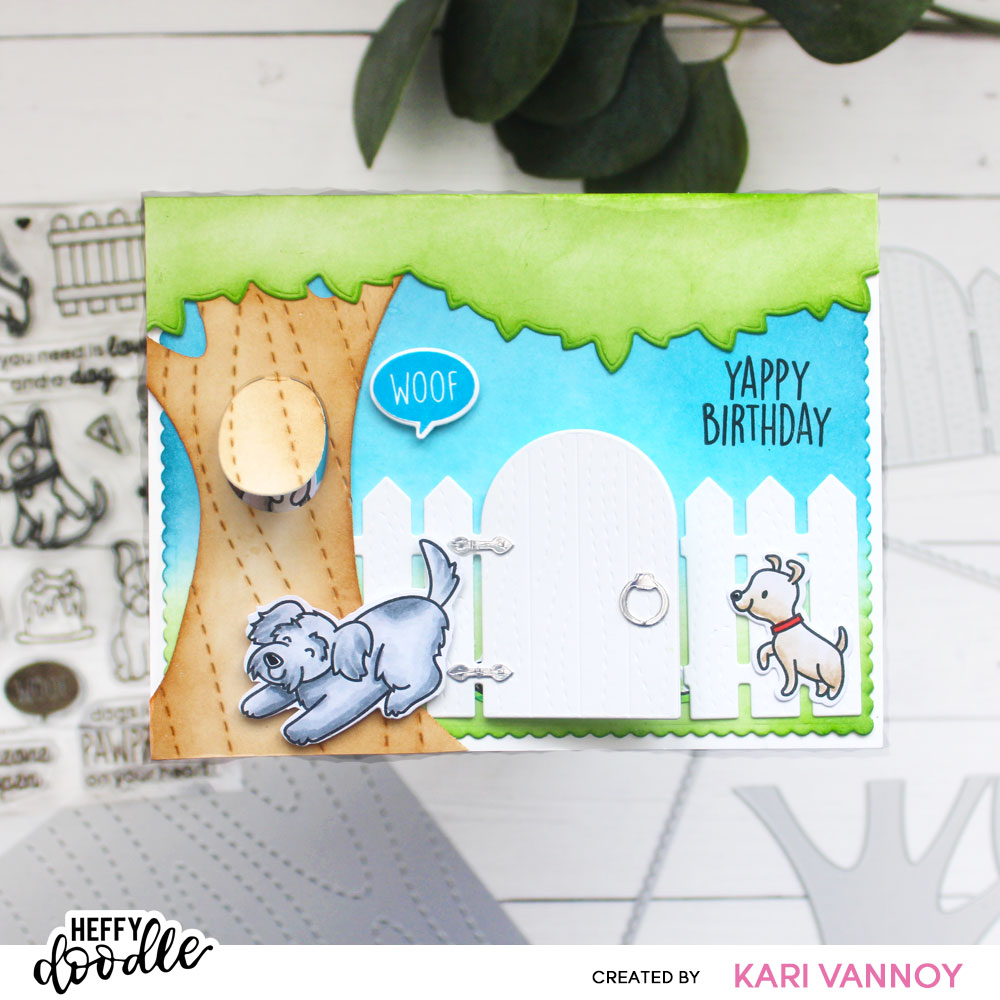
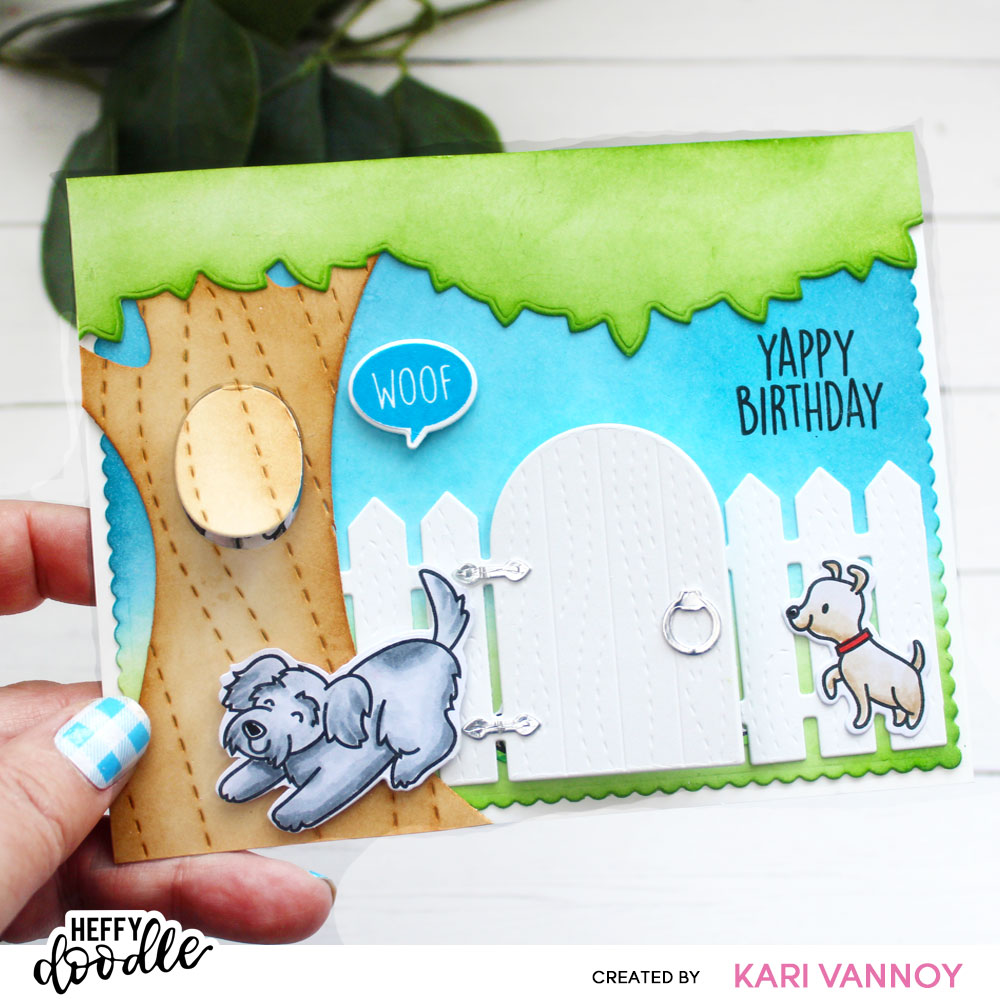
Hello! Today I have a double Interactive Card to share as my last Design Team post for Heffy Doodle. This is such a fun card, and fun to create!
Watch the video below or in HD on YouTube:
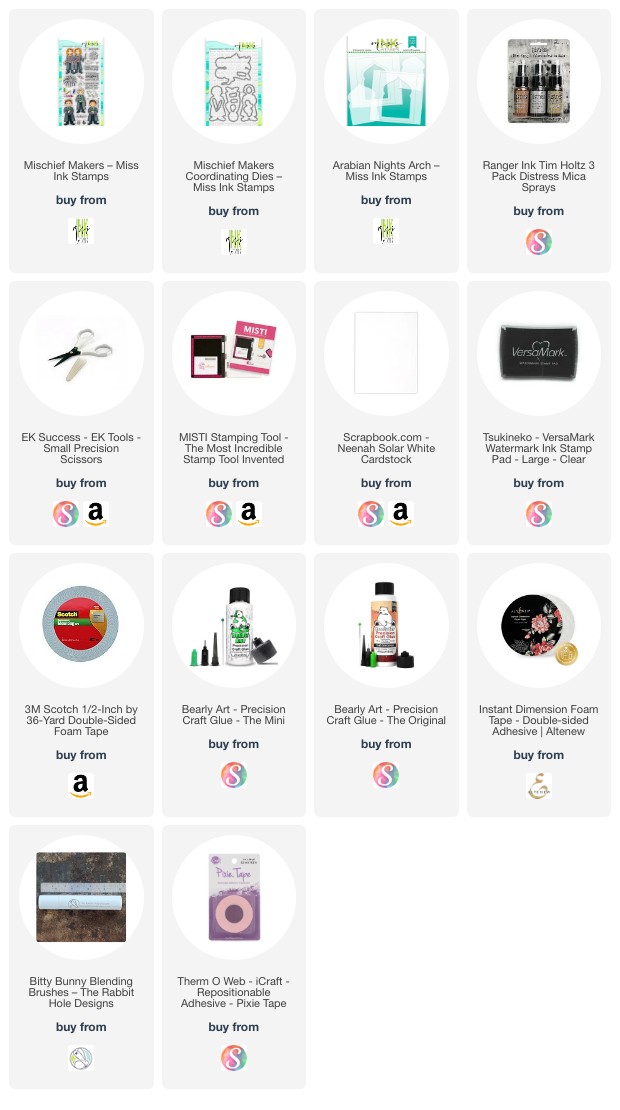
I’m often asked what supplies I use to make my cards and projects, so I’ve put together a list using affiliate links when possible. If you make a purchase with these links I may receive a small commission. These help me to keep up with blog costs and continue bringing you fun projects. Thank you so much for your support!
If you haven’t heard already, Heffy Doodle shop is closing and everything is on super sale! The last day to shop is June 30, 2024, so hurry on over and get your goodies at a great deal.
I have truly enjoyed designing with Heffy Doodle projects! I wish Lesley the very best in her next chapter. I hope you have enjoyed my projects today! See you soon with more cards to share.