Archive | Paper Crafting RSS feed for this section
the-shire-2

Welcome to the Shire

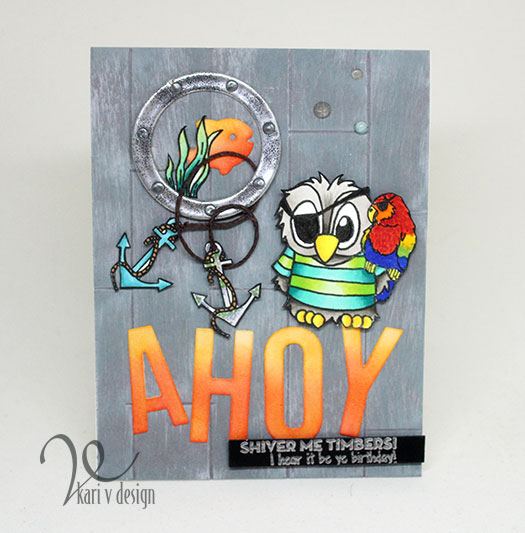
Hello…today I’m excited to share another card I made for the Lawnfawnatics challenge: inspired by a movie, book or song.

This one was a card that WOULD NOT leave me alone until I created it. Does that ever happen to you? I couldn’t stop thinking about it and so now here it is!

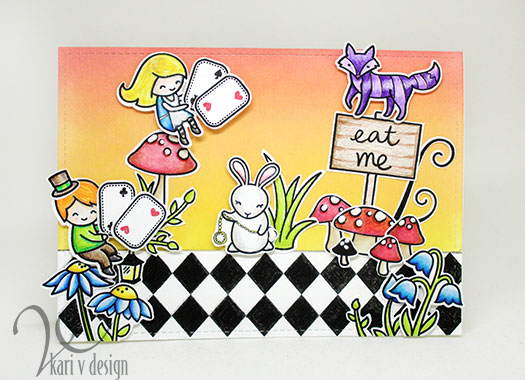
Welcome to the Shire!

Looks like nobody is home?

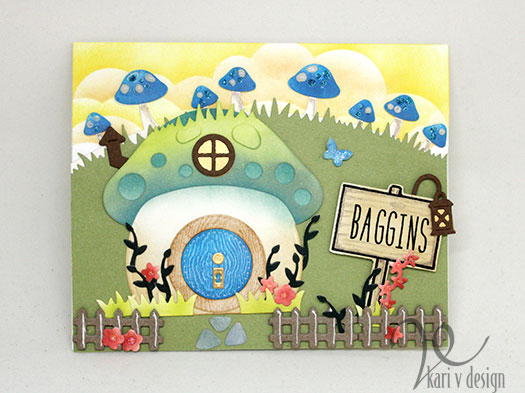
I imagine if you open up that round door you will see a Hobbit!? Or maybe…just maybe he has gone on an Unexpected Journey?

I only used 2 stamp sets and 3 die sets for this card. It’s a record low amount!! Here’s what I used:

Mushroom House
Mushroom Border
Scalloped Treat Box Spring House Add-on
Open Me Stamp Set
Milo’s ABCs Stamp Set

The top of the Mushroom House is grassy…I did some partial die cutting on this to add the grass to the top to make it look like a part of the grassy hill. Those mushrooms on the border not only look great with some Stickles and Nuvo Drops added, but they also double as a Cobblestone Walkway to the Hobbit house!

I used the sign from the Open Me stamp set and spelled out the name “Baggins” with Milo’s ABCs. I inked it up with Vintage Photo Distress Ink and added some wood detail with colored pencil. I love the lantern lamp hanging over the sign. Even at night you will know this is the Baggins’ property!

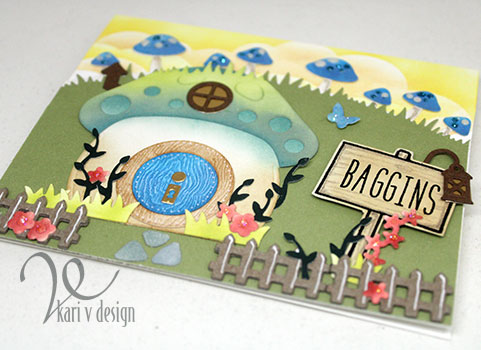
It’s a beautiful spring day at the Shire! The flowers and the fence are from the Scalloped Treat Box Spring House Add-on. Doesn’t this look like a lovely place to live? I die cut the fence twice from chipboard and added white detail with a gel pen.

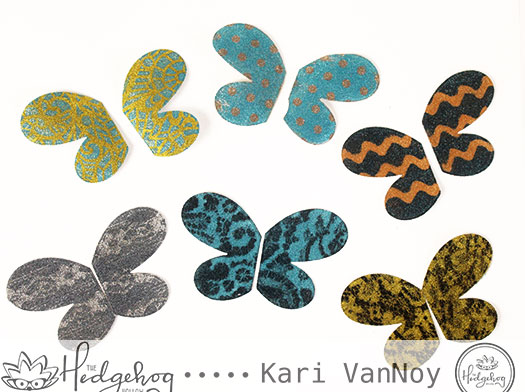
The butterfly matches the mushrooms. Lol. I had a vision of the Hobbit House and a color scheme of dark amber, blue and brown. I will say that it ended up turning out a lot brighter than I imagined. But I love it!

Those mushrooms look magical with Turquoise Stickles

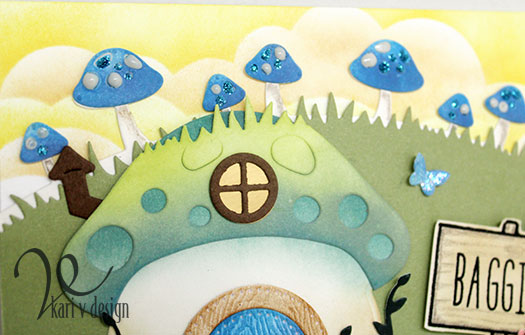
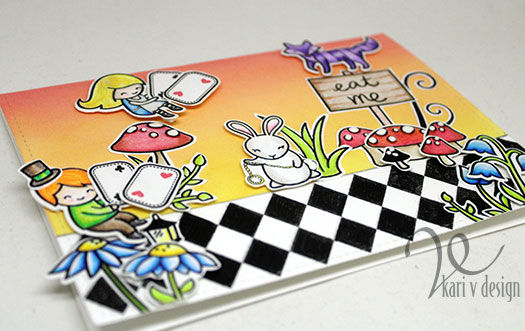
The window and the keyhole/doorknob are cut from Satin Gold mirror cardstock. I love the soft golden look. I think the yellow and orangey-brown clouds make it look so dreamy…like it’s nearing sunset.

That blue door is just perfection, don’t you think?

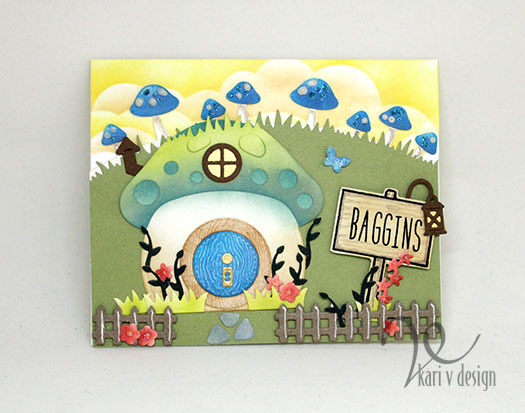
I used some circle dies to cut the door and the door frame. The woodgrain paper gives it just the right detail…and I inked up the door with Salty Ocean and Faded Jeans Distress Oxide inks. The darker blue toned down that Salty Ocean and gave it just the right feeling for this card.

I hope you enjoyed visiting the Shire today. Come back soon, won’t you?

Linking up to the Lawnfawnatics Challenge here.

Comments { 6 }
side-view-alice

Inspired by Alice in Wonderland

Hello! Today I’m participating in the Lawn Fawn Challenge: Inspired by a book, movie, or song.

I just could not resist playing along with this fun theme!! So, I have a list of cards I want to make (Yes…a full page of ideas!) and I’m definitely not going to have time to make them all before the challenge ends.

I got one done to share today; So here’s my card…see if you can guess what it was inspired by:

I hope it is just so obvious that it’s Alice in Wonderland! I used the following sets on this card:

Argyle Backdrops (for the flooring)
Bicycle Built for you (Alice, Mad Hatter, Top Hat)
Some Bunny (White Rabbit)
Joy to the Woods (Cheshire “cat”)
Open Me (for the wooden sign and the “me”…the “eat” is handlettered)
Oh Gnome (for some of the mushrooms)
Gleeful Gardens (for flowers, mushrooms, grass)
Fairy Friends (for flowers, Curly leaves, lantern, small mushroom)
Lights Out (for the playing cards)

This is probably the most sets I’ve ever used together on one card, but I think it was worth it! I colored everything up using my Prismacolor pencils. It’s been a while since I’ve used them so I thought it was time.

The White Rabbit says there’s no time for cards!

I made those playing cards using the small set called “Lights Out” for the shape, then I added a small heart I found in the “Oh Gnome” set and drew on the clubs and spades myself. I also drew the pocket watch for the White Rabbit.

The Cheshire Cat is of course really a fox from the “Joy to the Woods” set. Can you believe of all the Lawn Fawn sets I own, I don’t have a single cat?!? What? I need to remedy that situation right away! But I think this fox works well in purple stripes! I could add a big smiling, toothy grin…but I’ll leave that for your imagination…

I inked up the background with Distress Oxides in a new favorite color combination: Abandoned Coral, Spiced Marmalade, and Mustard Seed.

Linking up to the Lawnfawnatics Challenge here. Thanks for stopping by!

Comments { 5 }
count-blessing-sideways

Count Your Blessings

Hi Friends! You know, it’s International Women’s Day today (who knew?) and I wanted to put together a card for all my crafty friends. (I’m not sure how many crafty male friends I have out there…but maybe there’s another day I can dedicate a card to you, too *wink.)

Affiliate links are used when possible. When you click on an affiliate link in this post and purchase a product I may receive a small commission. Those really help in keeping up my blog and bringing you new projects! Thank you so very much for your support.

Do you know, when I count my blessings I count you TWICE! So I put together a card for you using some of my favorite products.

Counting my blessings….

Isn’t she sweet? She’s from this Waffle Flower set called “Always”. I love the matching dies for this one, it makes it so easy to make a floral swag or wreath on your card. And that sentiment is from the Simon Says Stamp “you got this” set. I love them paired together.

I used Zig Clean Color Real Brush markers on this one and I think it turned out so dreamy and fun. This image is definitely one of my favorites to color!

I popped up the sentiment AND the top set of leaves on foam tape for some fun dimension. Then I inked around the edges with Distress Oxide ink in Weathered Wood and Wilted Violet to create a dreamy look.

Isn’t she just the cutest? I hope you enjoyed this quick share with you today. Thanks for stopping by! And always, I love your comments and thumbs up!

Comments { 0 }
ahoy-owl-sideways-view

How to make a Wood Plank Background

Hello friends! Today I have some fun cards to share AND a video on how to make a wood plank background.

Affiliate Links are used when possible. When you click on these links and make a purchase I receive a small commission, which helps me to continue to bring you projects and blog posts! Thanks for your support.

These are some cute images from Jessica Lynn Originals. I just couldn’t resist coloring up those mermaid owls. Here’s my first card:

I colored up that cutie mermaid as a blonde bombshell, complete with glittery pink bikini top.

The background is called Everyday Tintables Card Pack from Concord & 9th, these are so great because they have a white design pre-printed that allows for this emboss resist look. I inked up with Distress Inks in three different colors: Peacock Feathers, Cracked Pistachio, and Fossilized Amber.

Close up of Mermaid Owl

I used some Jewel Nuvo Drops to finish off this card. They are so beautiful because they are semi-transparent with just a little tint of color. These are the three colors I used: Limoncello, Key Lime, Sea Breeze.

My second card shows of that mermaid owl with some hot pink hair:

Look at her cute little octopus friend! I used Copics to color them up and added some white gel pen dots for accents. The ocean waves are a die from this set. I just love the added stitching to the edge.

My last card features Brentwood Owl, which is actually the logo of Jessica Lynn Originals. Did you know she’s celebrating 14 years in business in April?! So this little owl is extra meaningful:

Shiver me Timbers! I hear it be ye birthday!

Take a look at his sidekick parrot! I used some extra lines to serve as his feathers and I think he turned out pretty cute! Here’s a close up:

That wooden plank background is made using one of my favorite techniques! I have a video to show you just how to create that wooden plank look, as well as how I put this card together.

[Note: listen for the “guest pirate” in this video! LOL. I had a great time having a guest join in on this voiceover!]

Watch it below or on YouTube:

I love that Porthole die from Lawn Fawn. To finish it off, I used Nuvo drops in Liquid Mercury…I think it adds just the right amount of detail.

I hope you enjoyed these projects today. Check out more of Jessica’s designs at her blog here.

Ahoy!

I’m loving how the wooden plank background turned out!
Until next time…Thanks for stopping by!

Comments { 0 }
wendi-close-up-of-yellow-bee

Lacy Bee Wings!

Oh, honey. Today I have a really fun glittery project to share! I’m going to share with you how to make glitter wings that look just like LACE. Eep! These are so much fun to make and so pretty on a bee. (I imagine they would be just as beautiful on a butterfly or a fairy, too!)

First, let me show you my cards. Please notice those lacy glittery wings!

Those lacy wings have me all glittery-eyed!

I’m going to show you just how to get these two-toned glittery wings. Watch the video below or on YouTube:

I hope you are inspired to try this technique yourself. I also made a tall card using two of those bees with their two-toned wings.

I hope you enjoyed this project today. I’m also up on The Hedgehog Hollow blog sharing all the information! Check it out and get more information on the HH Subscription boxes here.

Thanks for stopping by today!

Be Happy!

Comments { 0 }