Archive | Paper Crafting RSS feed for this section
crooked-coffee-card

I Made Cookies

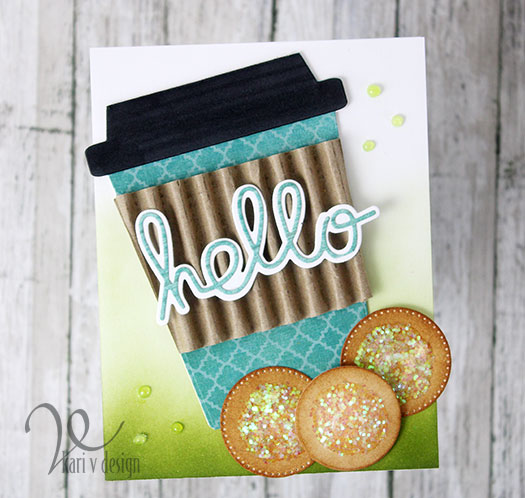
Hello again! Today I have a quick card share for the Coffee Lovers Blog Hop. And I made cookies! Paper cookies with sprinkles, that is.

Hello there!

Here’s a funny fact: I don’t drink coffee. But I LOVE making coffee cards for the Coffee Lovers Blog Hop. I know, weird right?

I didn’t have any donut stamps or dies to go with my coffee cup, so I made cookies. I simply used a circle die cut, inked them up with Vintage Photo ink, and added some chunky glitter. Easiest cookies I’ll ever make. AND I won’t eat these ones. Lol.

These cookies remind me of those Danish shortbread cookies with the big sugar crystals on top. Do you know the ones? I love them.

For the background I inked on some Peeled Paint ink with a makeup brush. Then I added some Nuvo Jewel Drops.

That coffee cup is really a gift card holder, but you can use it on a card front, too! I just cut off the front panel and the lid, added some patterned paper to the cup, and colored the lid black. Then I glued them all together.

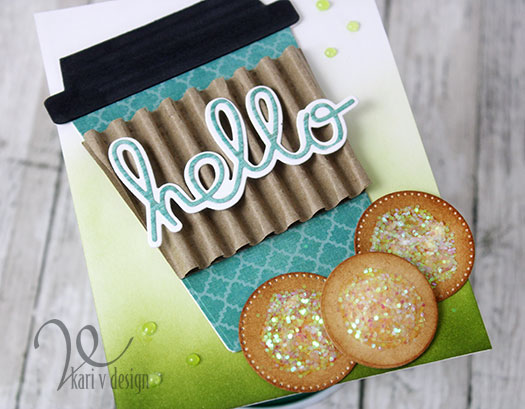
I have an entire roll of this corregated cardboard. I have no idea where I got it from. But I think it makes an excellent coffee cup holder piece (what in the world are those cup holders called?)

A fun card that made me smile today. I hope it made you smile, too.

Linking up to the Spring/Summer Coffee Lovers Blog Hop here.

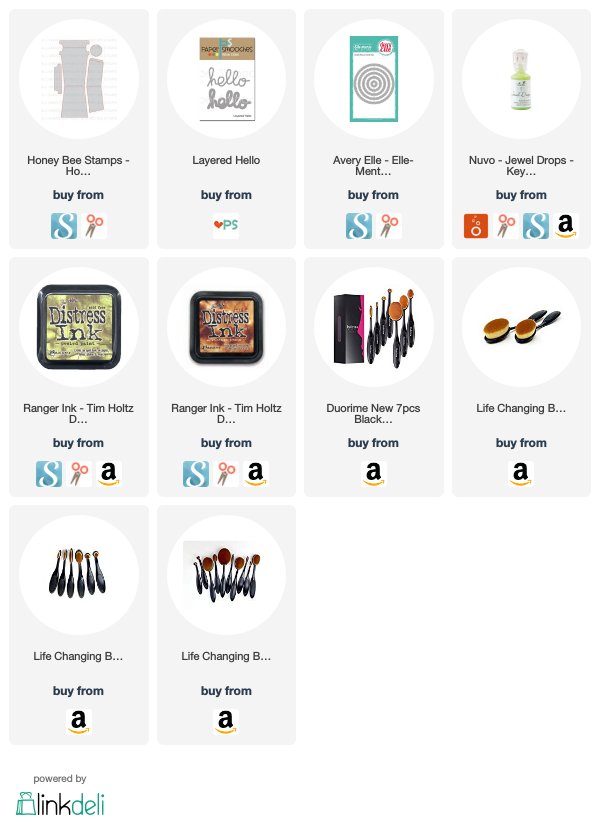
I’m often asked what supplies I use on my cards, so I’ve linked them below. I use affiliate links when possible, at no extra charge to you. When you click and purchase using an affiliate link, I may receive a small commission. These help me to keep up with blog costs and continue to bring you more fun projects! Thanks for your support.


Thanks for stopping by!

Comments { 12 }
full-box-and-tag

Quick Rooftop Gift Tag

Hello! I’ve been playing with the birdhouse stamp set from Art Impressions and I thought it would make a GREAT TAG! Especially with the sentiment that says “From our nest to yours.”

So today, I’m sharing this cute and quick tag; perfect for a neighbor using just the rooftops of those birdhouses!

And I have a short video to show you the easy watercoloring and strategies to make it look more 3D! Watch it below or on YouTube:

It’s a fun project and your neighbors will LOVE it! Thanks for stopping by!

For more information about this April Kit from the Hedgehog Hollow, visit the shop here.

Comments { 0 }
yellow-card-2

Designer Bird Awnings with the Hedgehog Hollow

Hello! Today I am up on the Hedgehog Hollow blog sharing my colorful birdhouse cards with “Designer Awnings.”

Designer PAPER awnings, that is! Lol. I love these birdhouses so much and I really just wanted a variety of colors.

Check out the post on The Hedgehog Hollow here to see all the details and more pictures!

Yellow polka dot awnings have my heart!

I hope you are just inspired to create some colorful birdhouses with designer awnings yourself! And if you do, please tag me at my Instagram or comment here on my blog…because I’d love to see what colorful creations you are making!

If you love these birds and birdhouses, check out the shop at the Hedgehog Hollow to get your April 2019 kit…but hurry because they sell out fast.

See you next time!

Comments { 0 }
both-cards-with-m&ms

Hoppy Easter Cards

Hello! Today I have a video showing you some cute Easter Bunny cards using the Lil Inkers Design Peek-A-Boo bunny die.

I love this die and just picked it up a few weeks ago. I definitely wanted to get some Easter cards made before the holiday came and went, but this die is great for cards ALL SPRING long!

Hoppy Easter
Hi there!

Aren’t these bunnies just the cutest? I have a process video showing you just how easy these cards can come together. Watch it below or on YouTube:

I hope I inpsired you to make some cute Easter cards of your own. Hoppy Easter to you and your Family!

I often get asked what supplies I used and where to get them. So I’ve included a list of supplies below, using affiliate links when possible. When you purchase a product using one of these links, I may get a small commission. This helps to bring you more projects and upkeep on my blog. Thank you!

I hope you enjoyed these cute bunny cards! Oh, and those white chocolate M&Ms…I bought those purely for photo purposes. *Wink 🙂

Hoppy Easter!

Thanks for stopping by! Happy Easter to you and your family.

Comments { 0 }
purple-green-close-up

Watercolor Resist Technique

Hello! Today I have a favorite technique to share called watercolor resist. I am using some images and dies from the April 2019 Hedgehog Hollow Kit.

It’s a really easy technique, but can be quite an eye catcher!

First, I stamped the birdhouse onto some watercolor paper using Versafine Onyx Black ink. Then I embossed it with some clear embossing powder.

Then, I used Gansai Tambi watercolors in rainbow colors on the first panel and overlapped them a little bit. The heat embossing resists that watercolor!

I die cut the panel down with a rectangle die cut. Then I cut the vines (also in the kit!) from the outer edges of the watercolor panel. No sense letting that beautiful color go to waste!

A Rainbow of Watercolor

To finish off this card, I used the polka dot paper from the Kit as a mat, and added a black frame. I popped up some birdies with 3M Foam tape and used some pearls for the final touch.

Green, blue, purple

I made another card using a cool color palate. The green polka dot paper was also included in the kit!

I hope you enjoyed this project! Visit the Hedgehog Hollow for more information about these card kits! Thanks for stopping by.

Comments { 0 }