Tag Archives | Whimsy Stamps
Kari-V-Potions-Bottle-die-all-12-treat-boxes

Potion Bottles

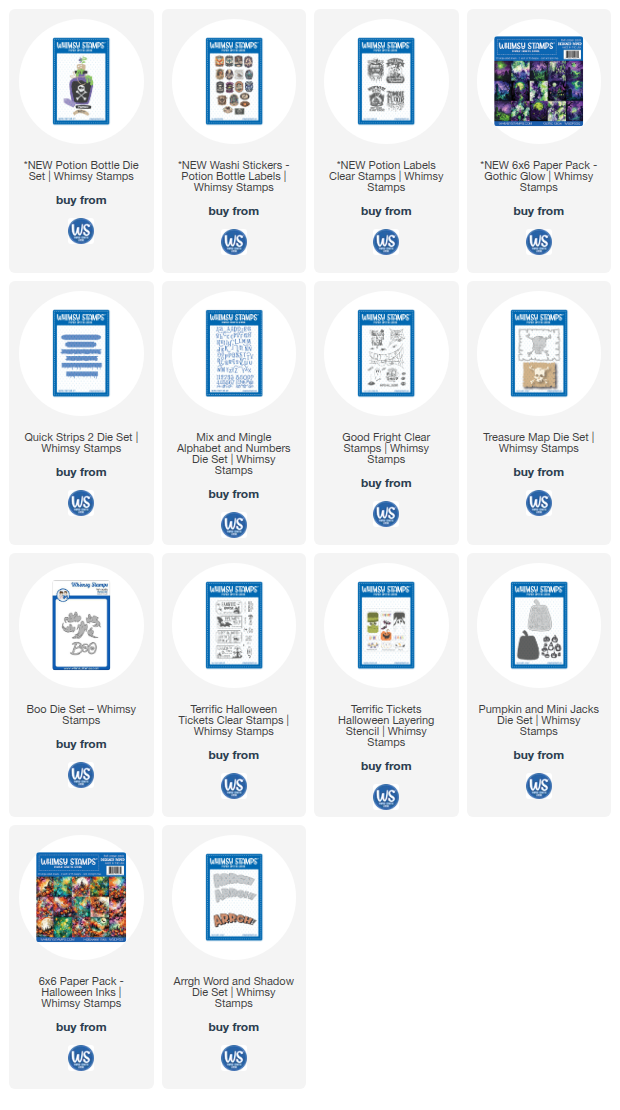
Hello! I’m so excited to share some new Potion Bottles projects with you, using some new products from Whimsy Stamps. Watch the video below or on YouTube:

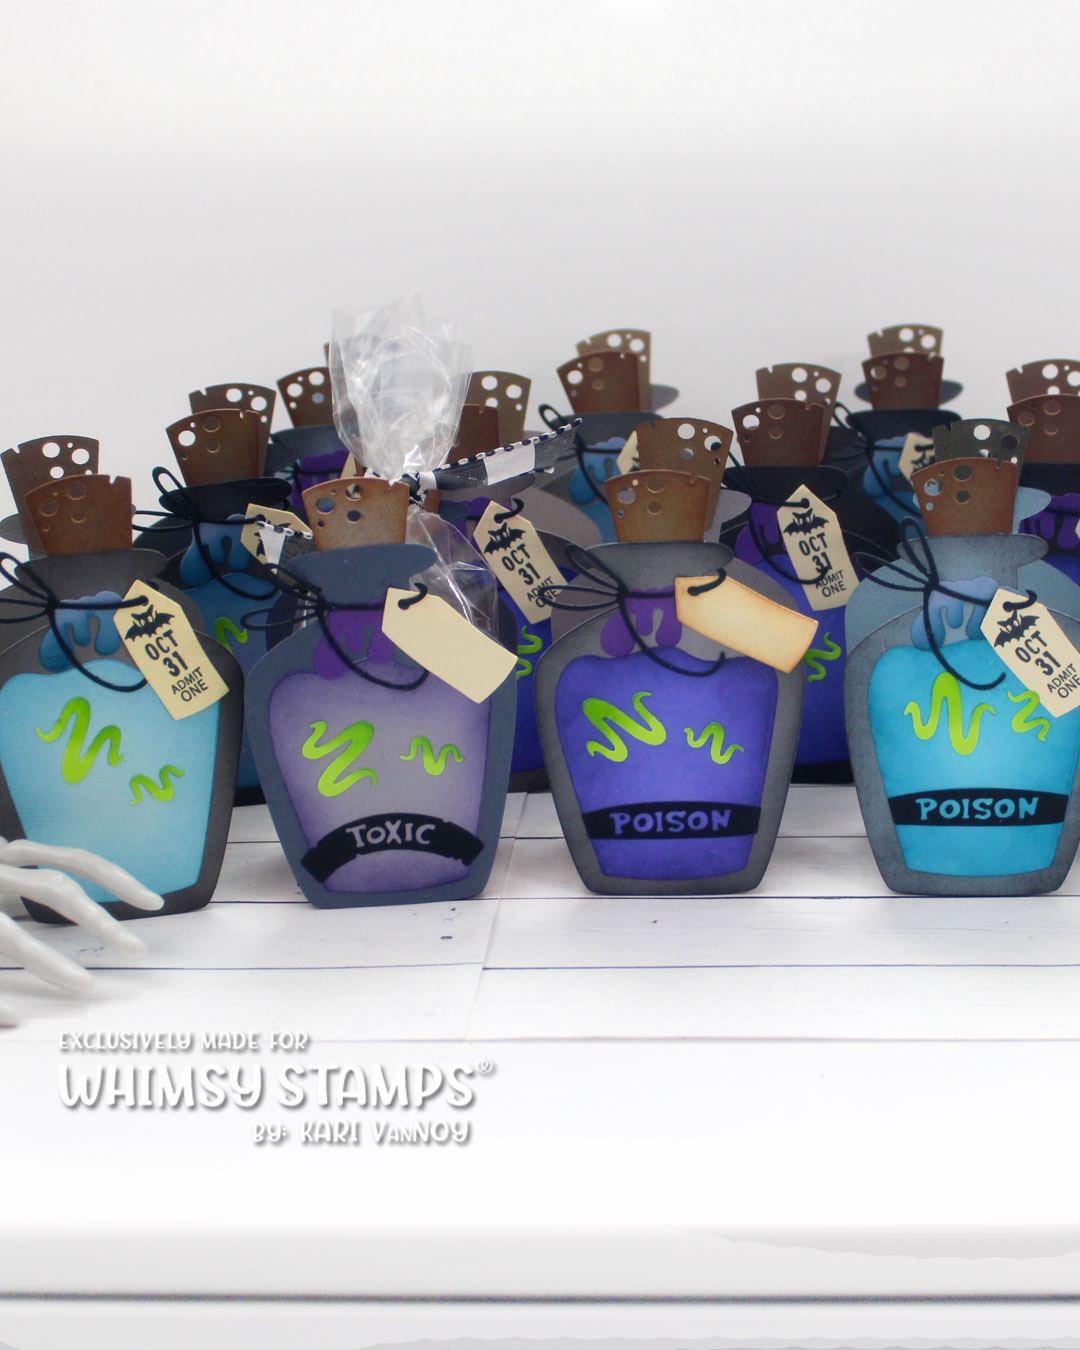
I had a great time making these potion bottle treat boxes, but I also made MANY more samples and I just couldn’t stop creating with these new sets! Whimsy Stamps really knows how to do Halloween!

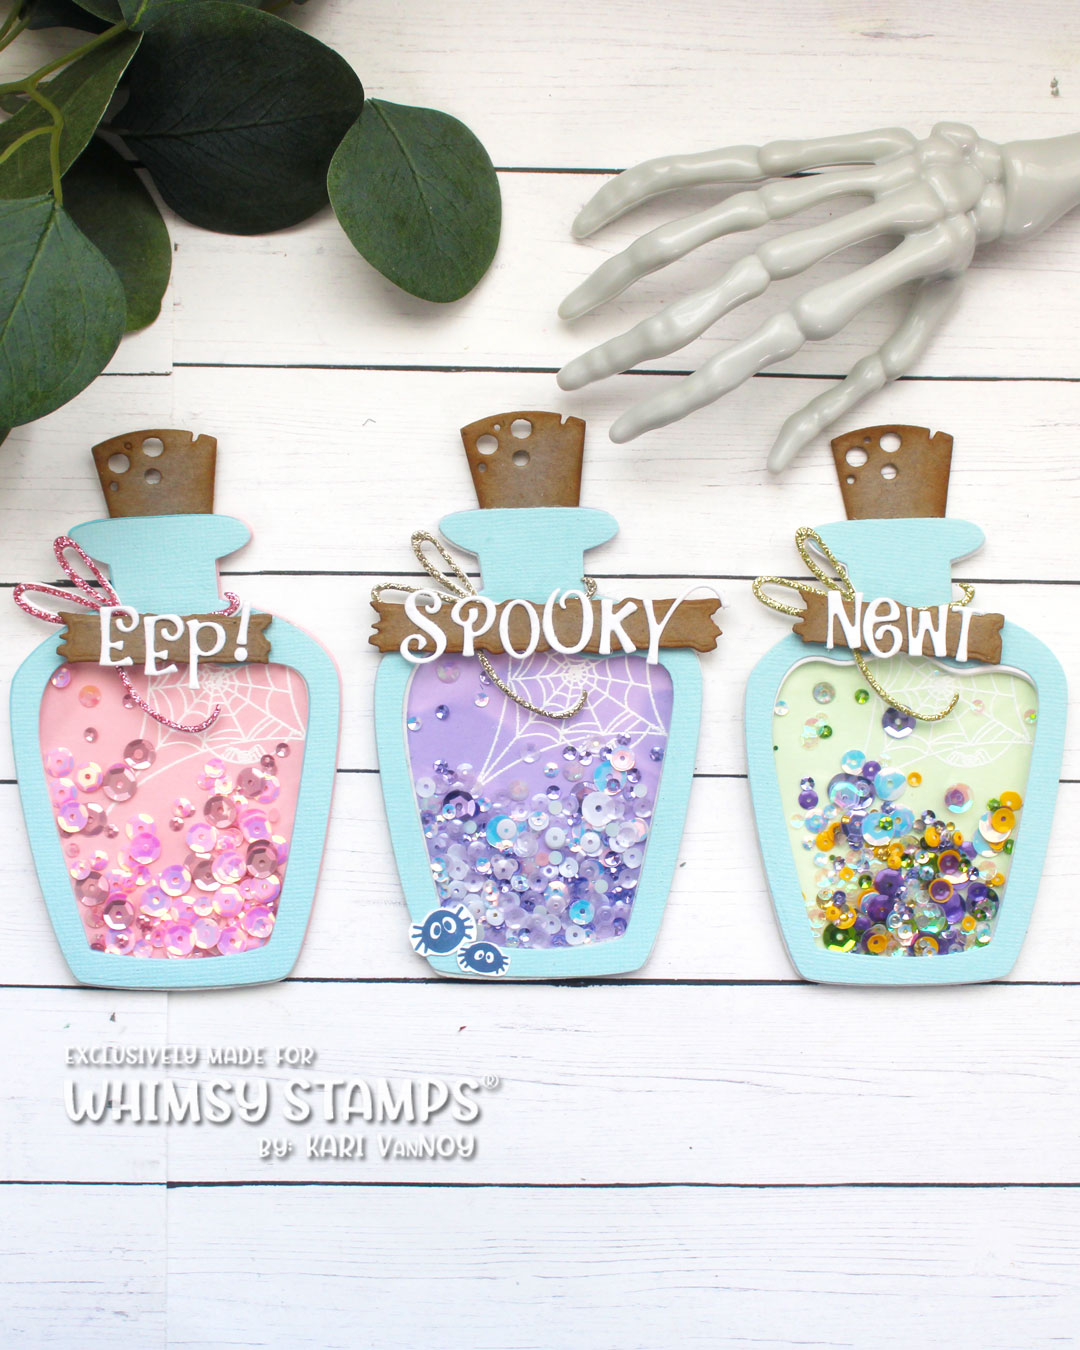
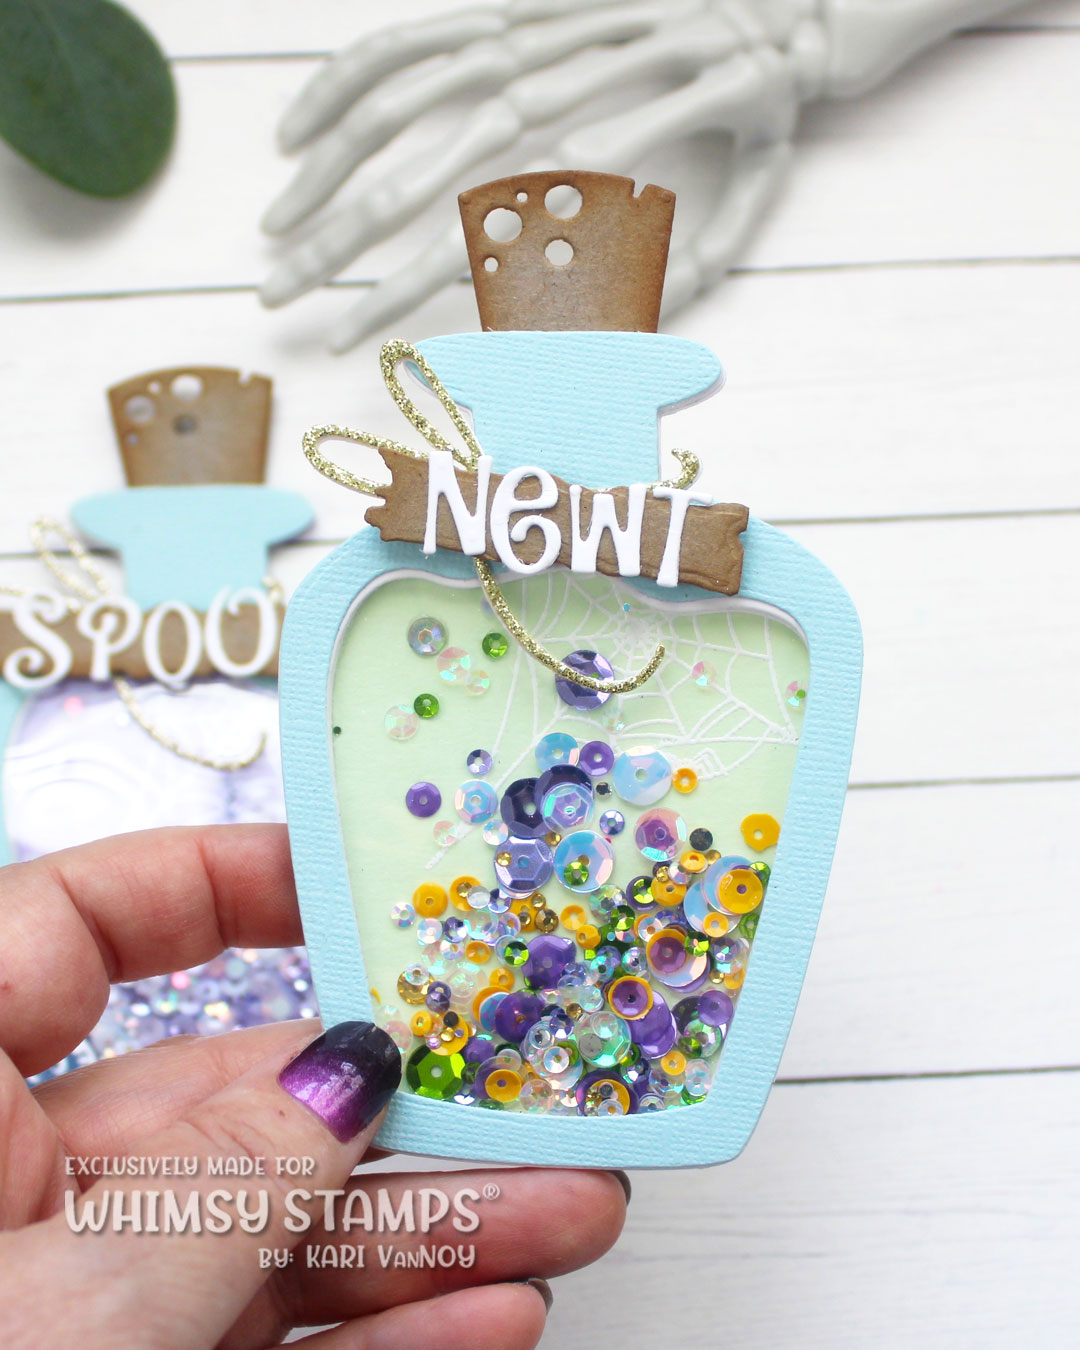
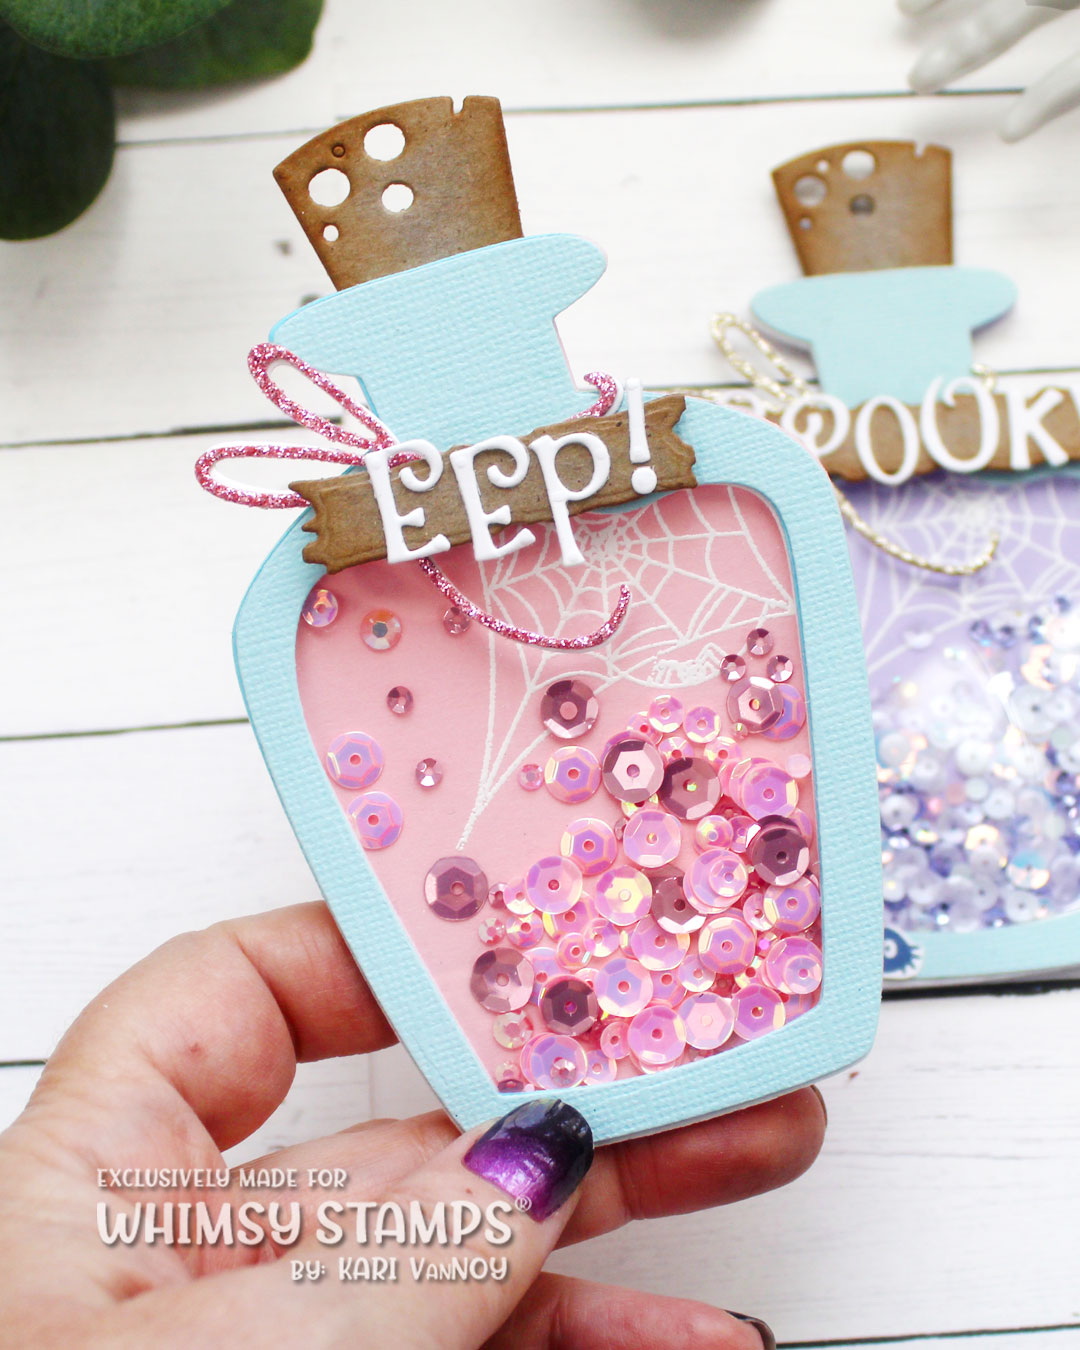
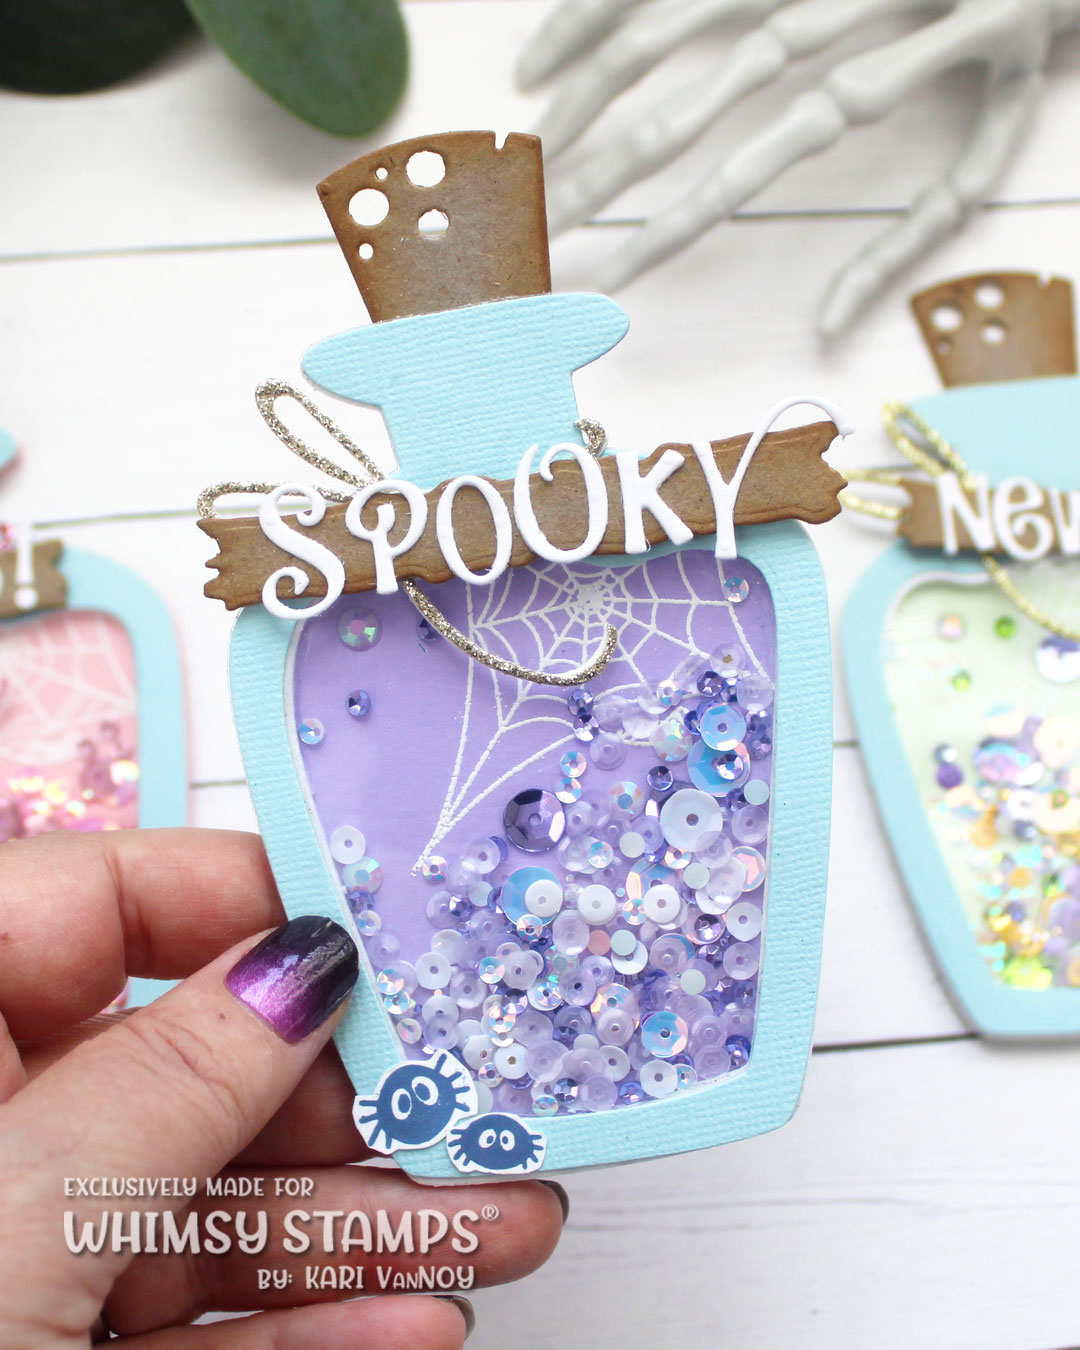
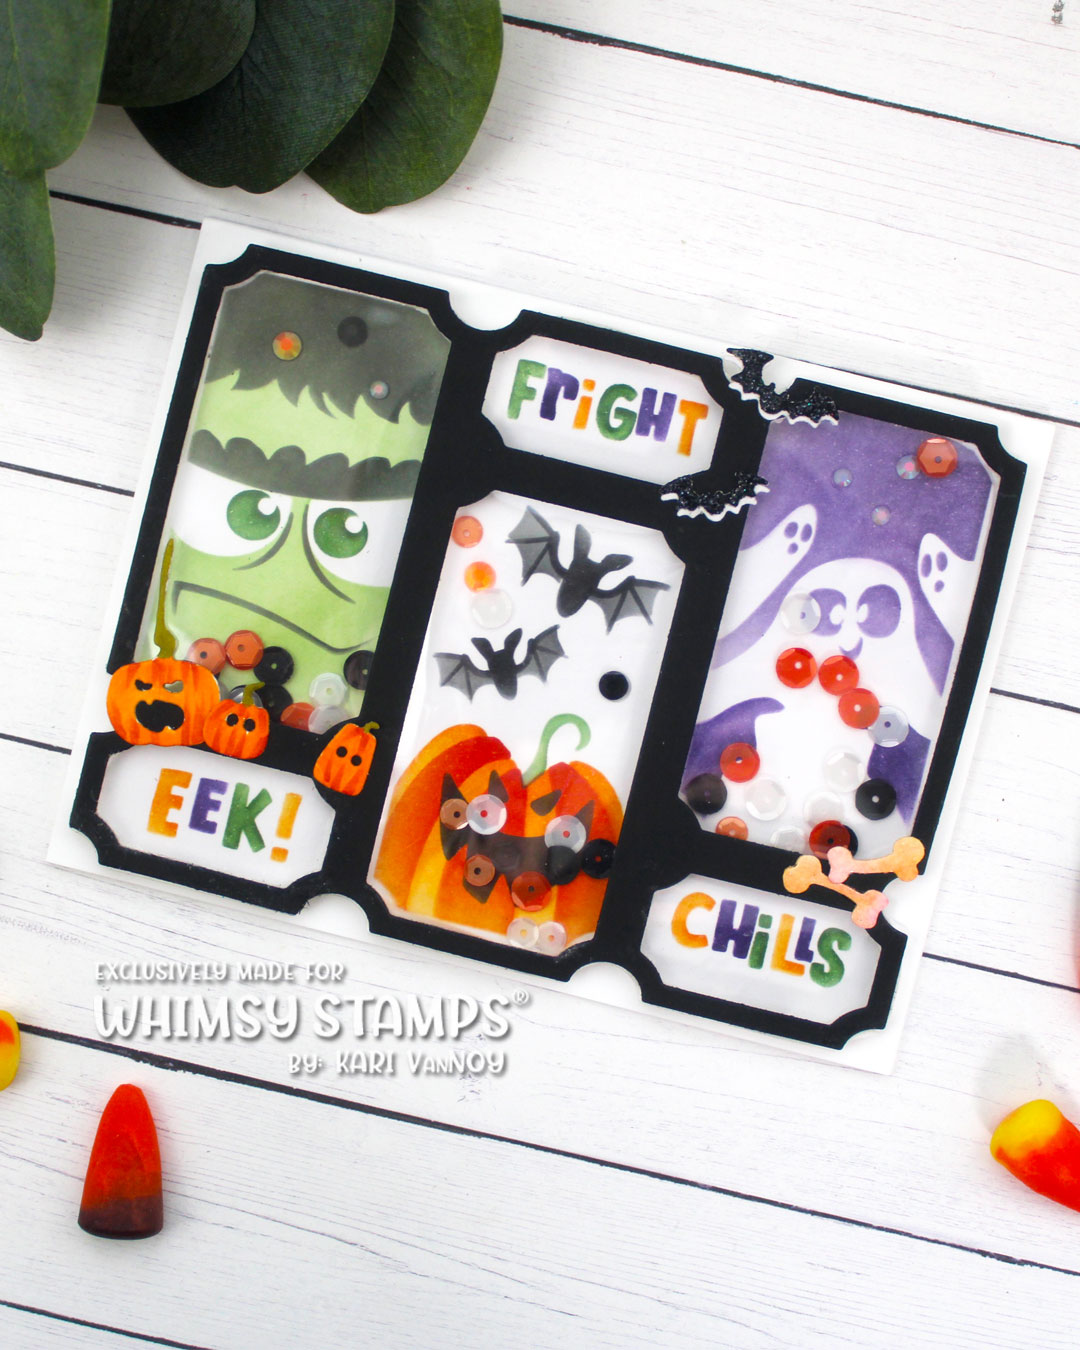
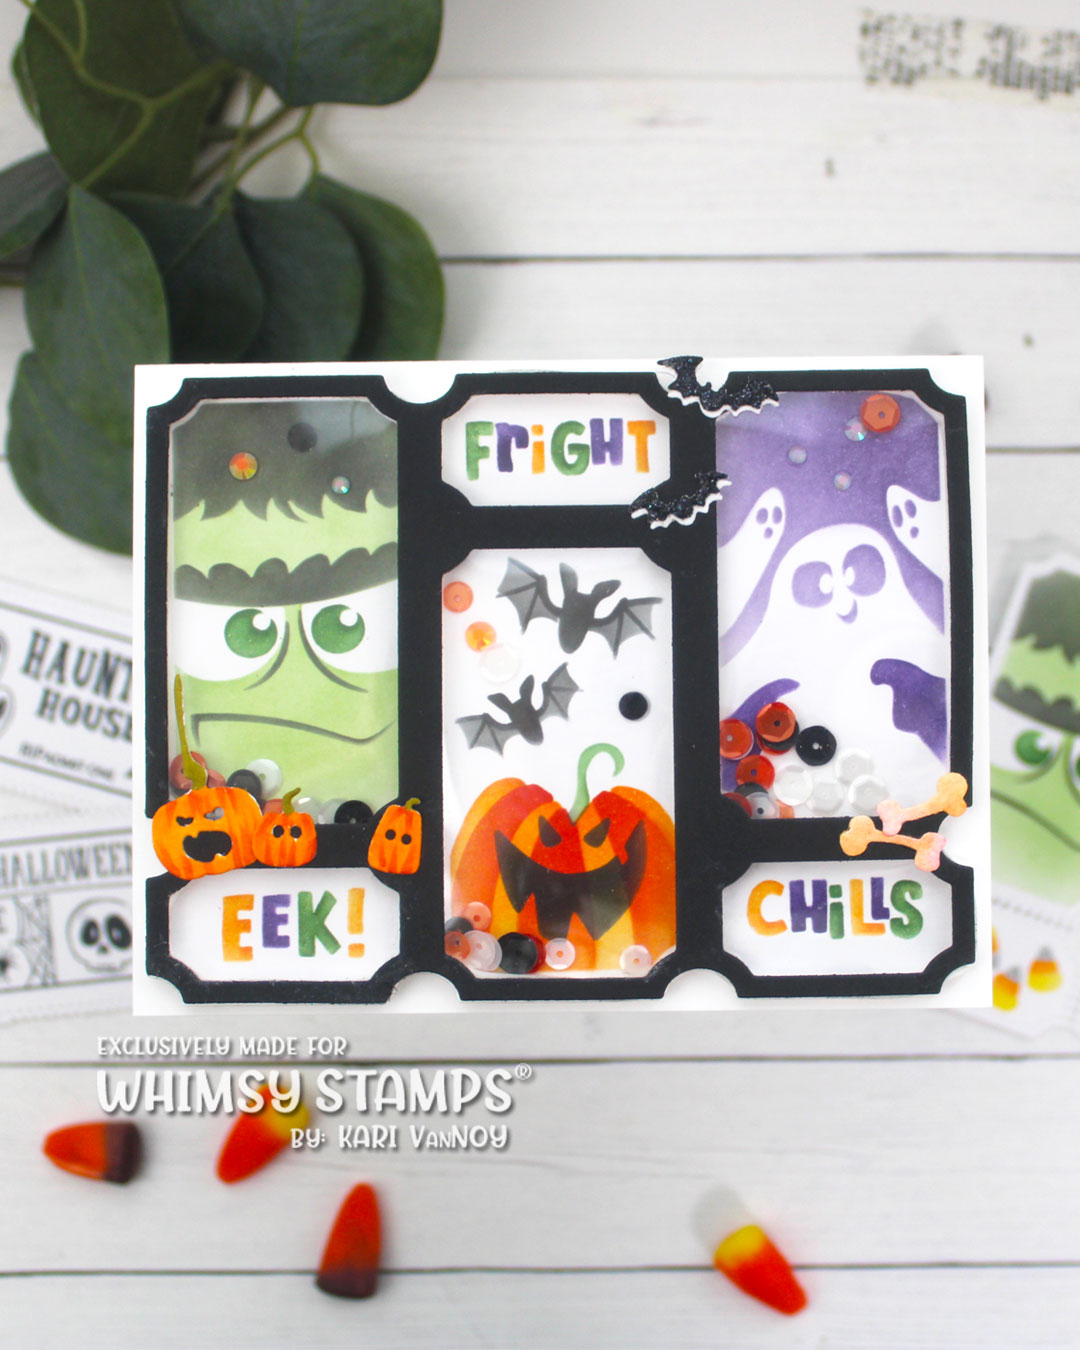
I created these tags into shakers and added my own sentiments using the Mix ‘n Mingle Alphabet die set. I love creating my own sentiments with this alpha die: Newt, Eep, and Spooky!

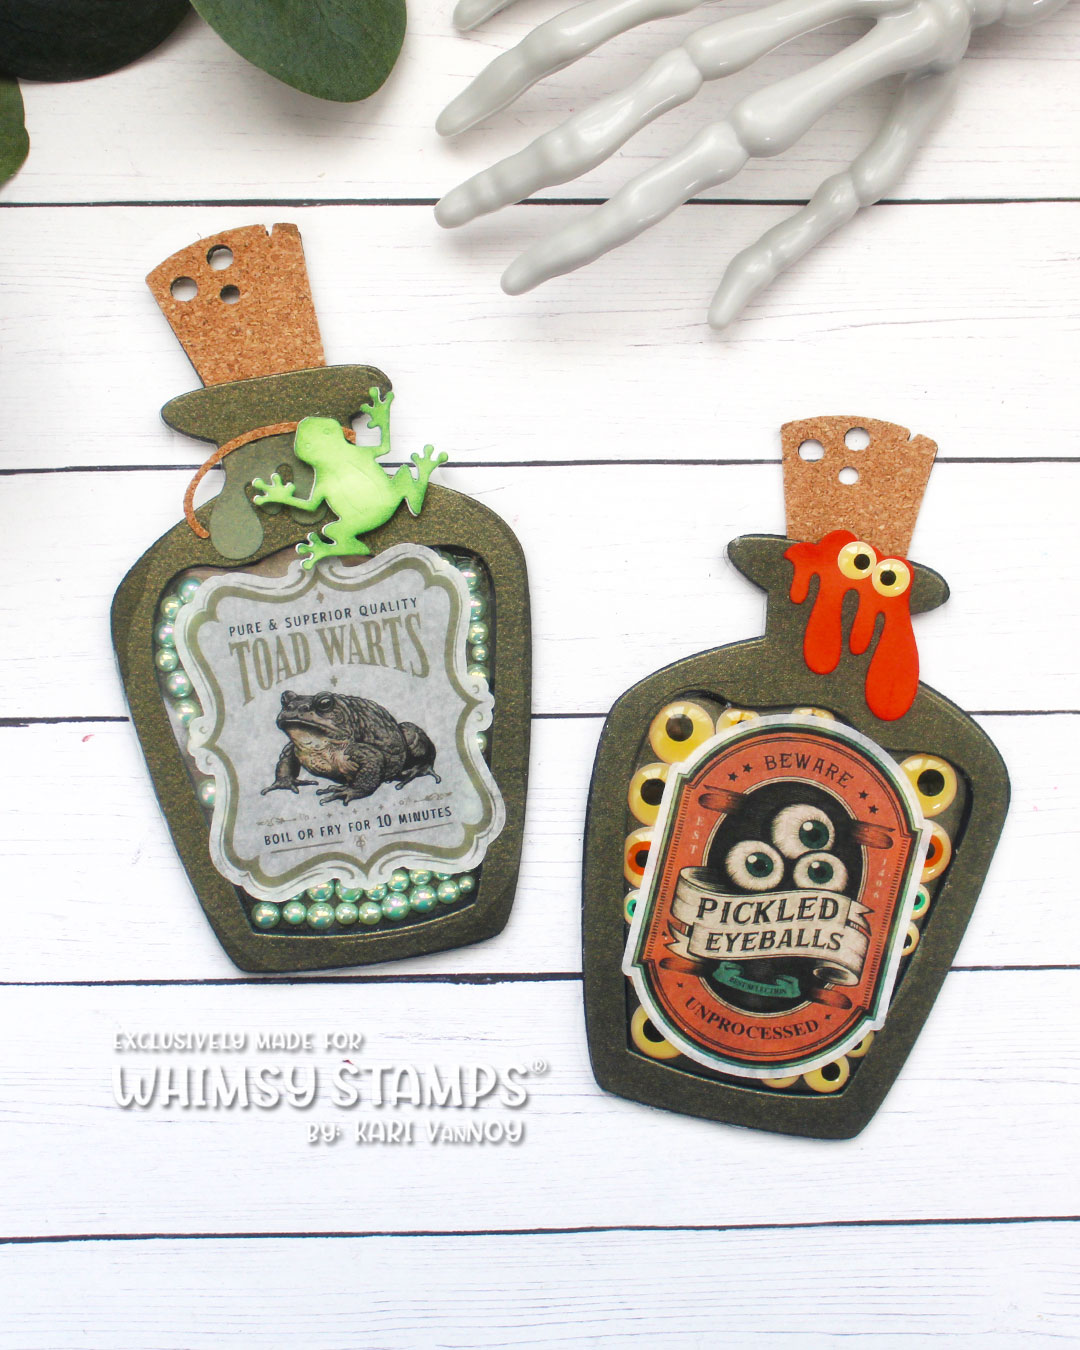
For each of these, I broke into the Washi Tape labels for the front of these bottles, and created faux shakers using some fun embellishments: half-bead pearls for the frog warts, and eye stickers for the pickled eyeballs.

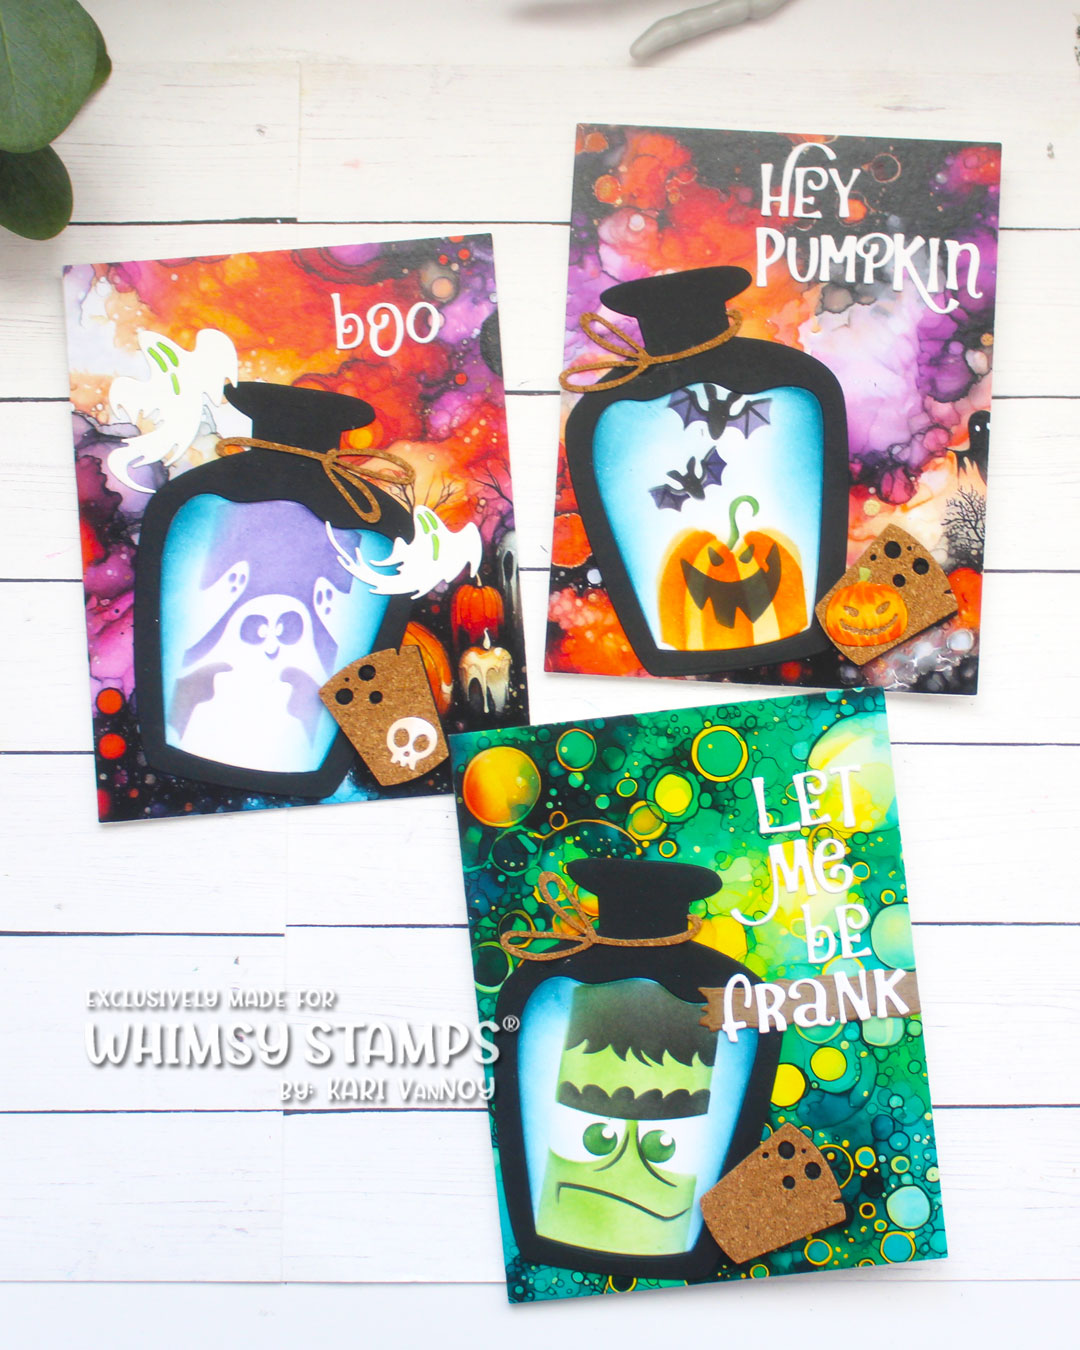
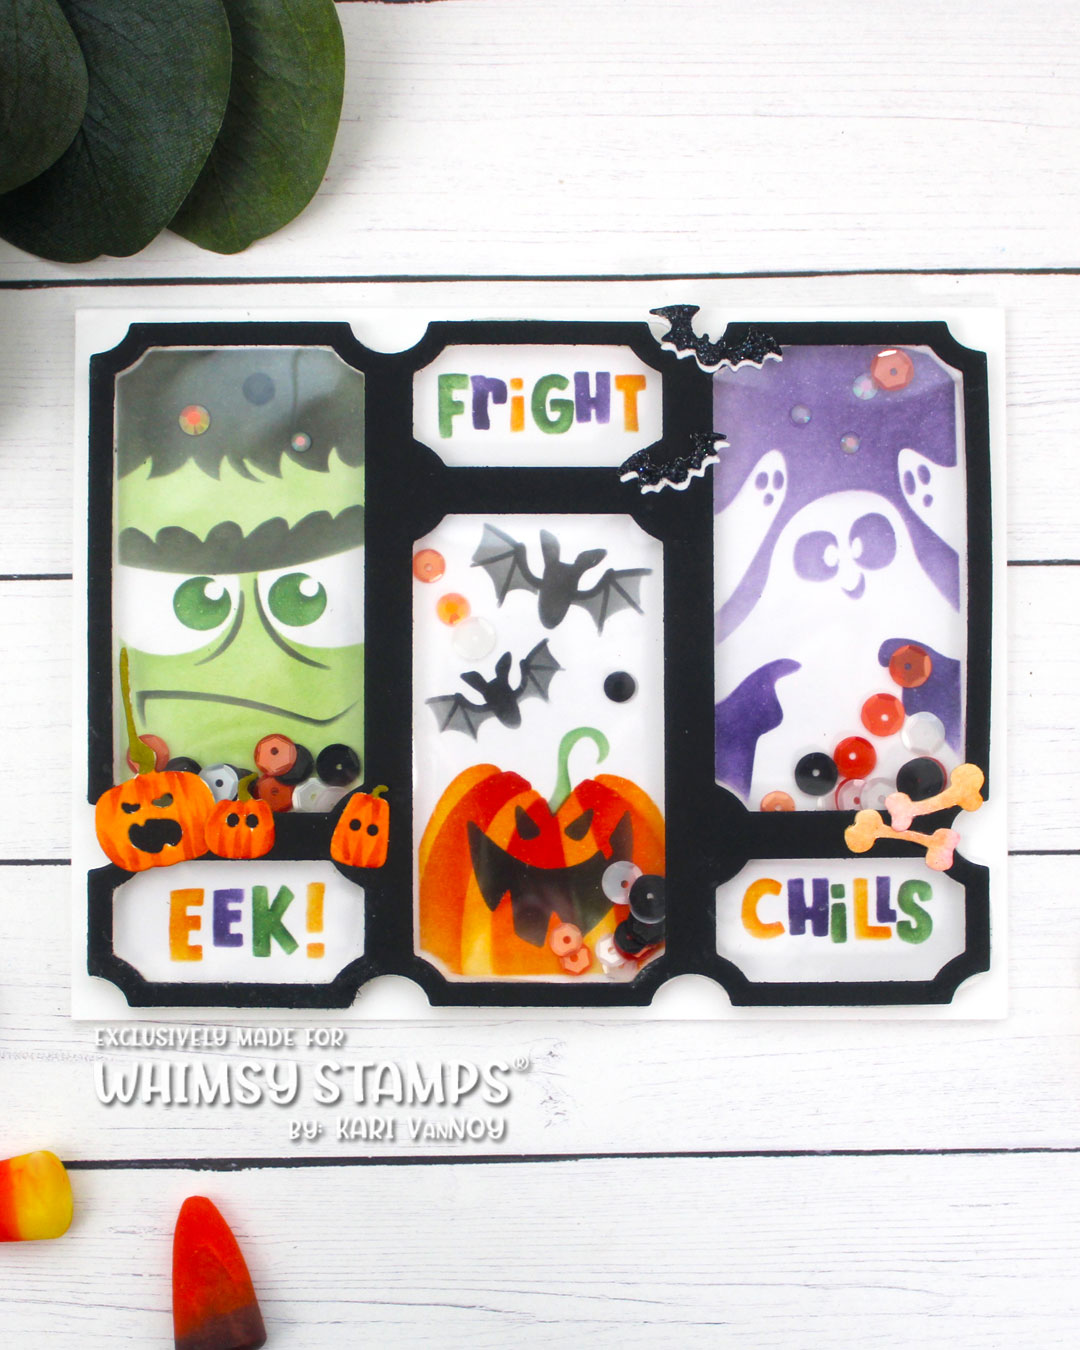
Next, I created some cards using the Terrific Tickets Layering stencil…these fit great inside the potion bottles! I cut the cork tops with real cork paper!

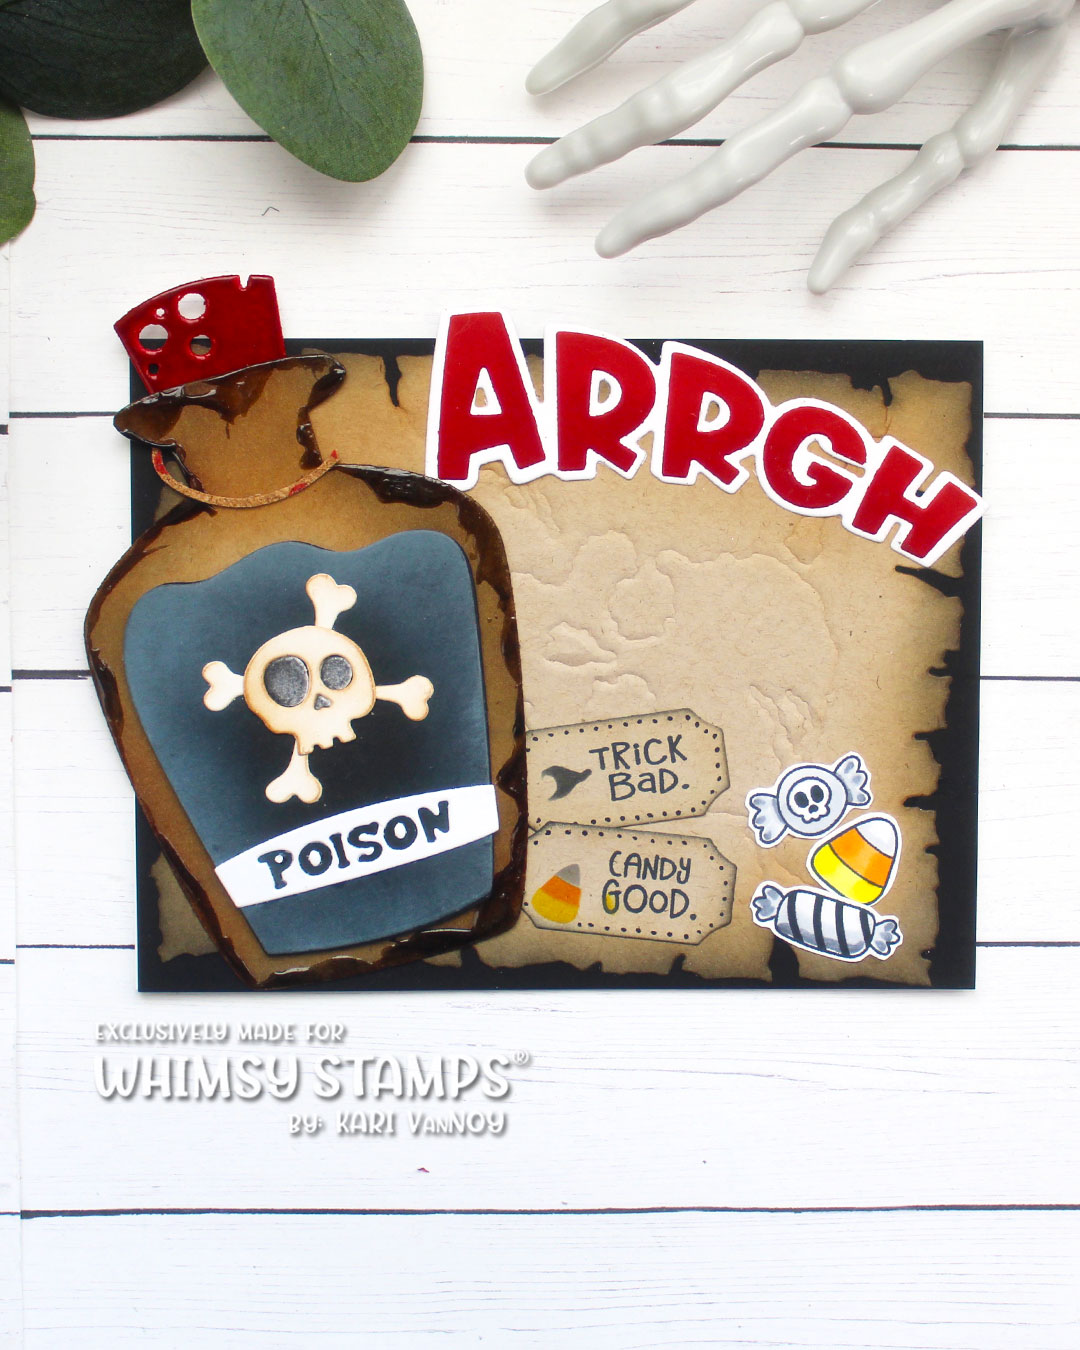
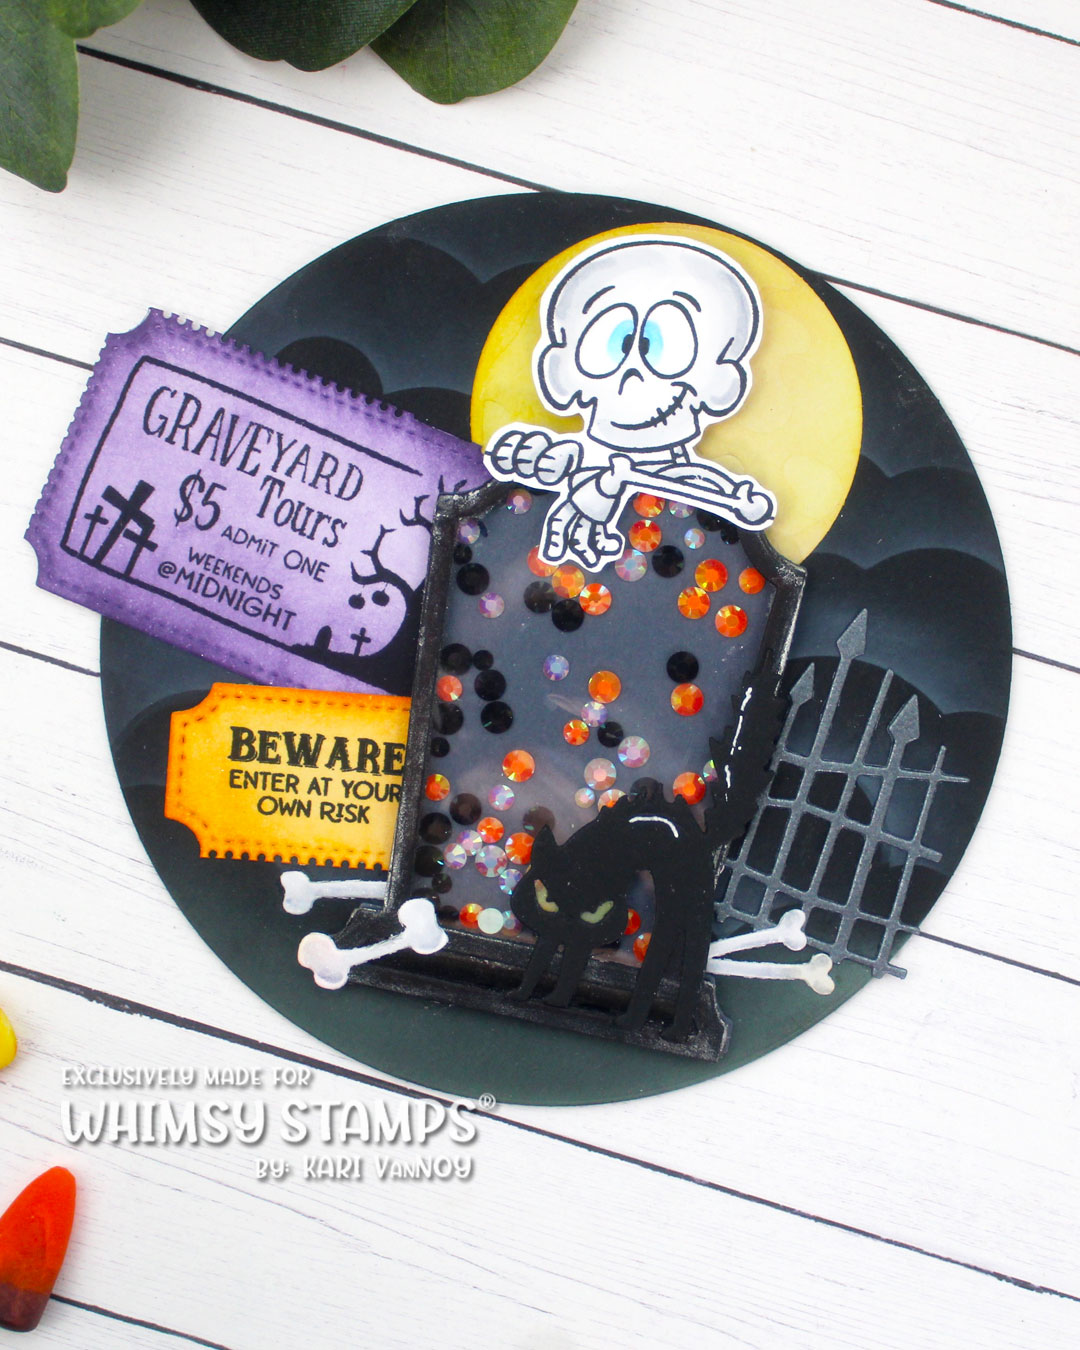
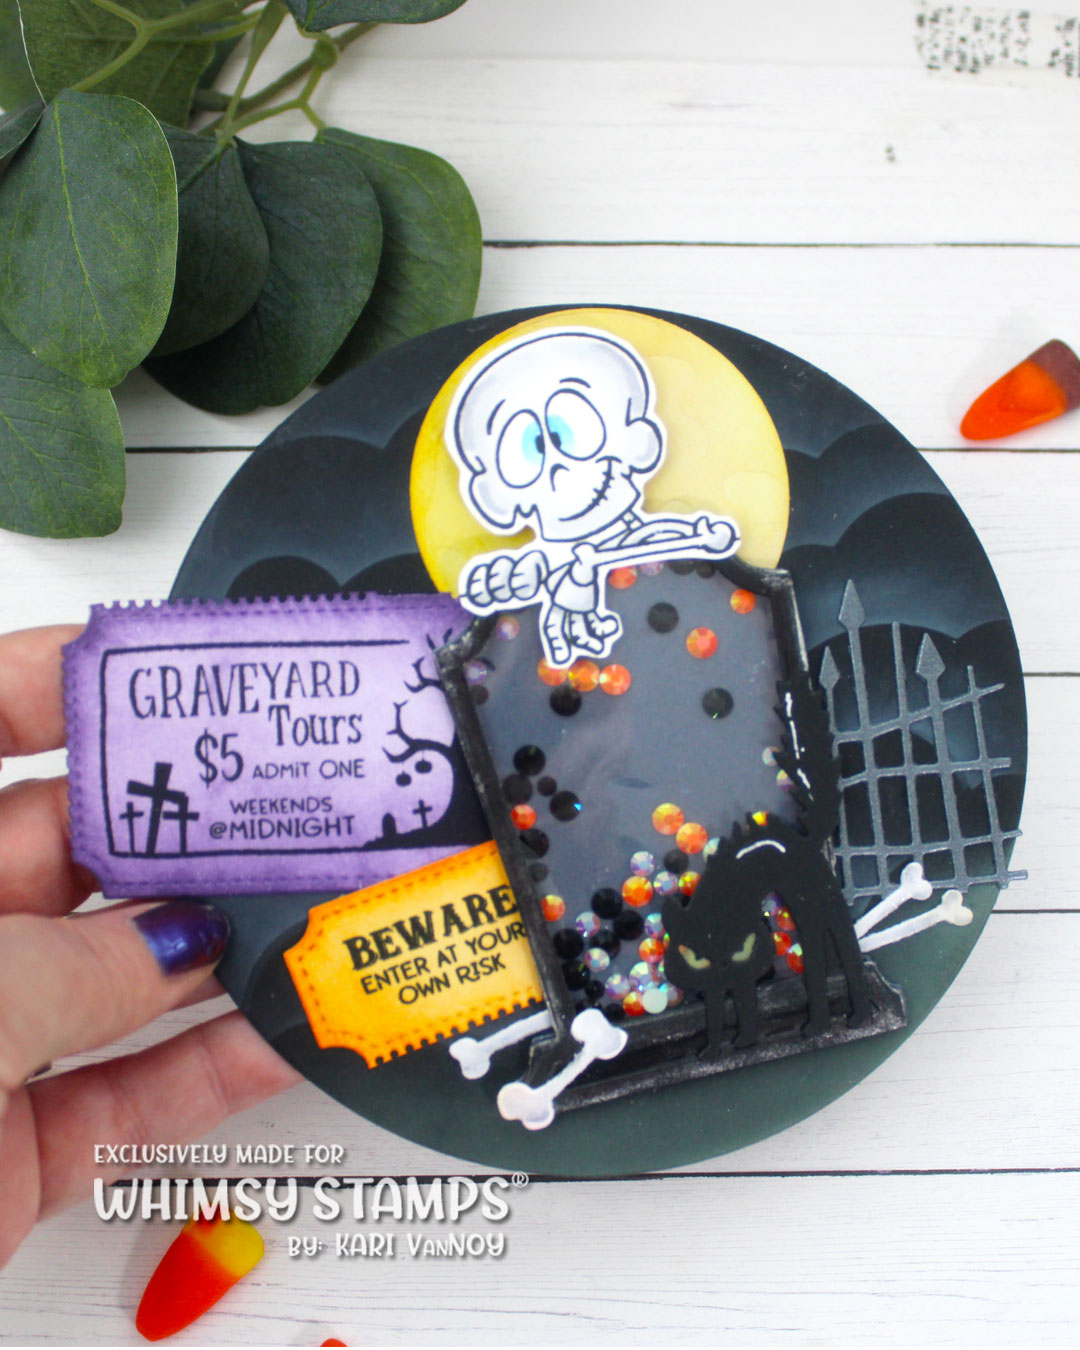
Then of course, I HAD to create a poison bottle…the dies in the Potion Bottles die set are perfect for this!

I’m often asked what supplies I use to make my cards and projects, so I’ve put together a list using affiliate links when possible. If you make a purchase with these links I may receive a small commission. These help me to keep up with blog costs and continue bringing you fun projects. Thank you so much for your support!


all potion bottle treat boxes made with the Potion Bottles Die set

I hope you enjoyed these projects today! See you next time,

Kari

Comments { 0 }
Kari-V-Terrific-Tickets-tt-layering-stencil-tt-window-die-card-1

Terrific Tickets Shaker Cards

Hello! Today I have some Terrific Tickets Shaker cards to share with a video! These new products from Whimsy Stamps are so fun and easy to mix and match! Today I decided to make two shaker cards to give you an idea of some of the cards you could make. Let your imagination soar!

Watch the video below or on YouTube:

The Terrific Tickets die has a matching Terrific Tickets Window die, which is what makes it so easy to turn these into shaker cards! I first cut the Terrific Tickets die and used the Layering Stencil on it (all products are linked below for you to check them out). Then I cut the Window die out of black cardstock and used that as the top portion for the shaker. I cut some acetate from the original Terrific Tickets die to adhere to the window die. Please watch the video to see all the details on this!

To make it tall enough to allow the sequins to shake around, I used double-thick foam tape in thin strips for the frame/window die. I just LOVE that you have the option to shake it up!

For a few details, I added some Mini Jacks, mini bats, and bones.

For my second card, I created a graveyard shaker…I wanted to use that “Graveyard Tours” ticket (that I stamped on the ticket with the stamps that match). So I ink blended those tickets in purple & orange. The skeleton from the No Bones About It stamp set works perfectly on these gravestones!

I made this into a circular card, with a secret trick I use to make them STAND UP on your table! I hope you’ll stop by the video to take a look!

I’m often asked what supplies I use to make my cards and projects, so I’ve put together a list using affiliate links when possible. If you make a purchase with these links I may receive a small commission. These help me to keep up with blog costs and continue bringing you fun projects. Thank you so much for your support!


Thanks for stopping by today! Which shaker is your favorite?

Comments { 0 }
Kari-V-Wanted-Poster-ALL-4-second

Most Wanted

Hello! Today I have a fun project and video featuring my MOST WANTED posters! Lol. These were so fun to create, so stop on by and check out the video below:

I cannot believe how many of these I wanted to create. It’s really a matter of mix and match and choosing some favorite stamps and dies and just having FUN!

I’m often asked what supplies I use to make my cards and projects, so I’ve put together a list using affiliate links when possible. If you make a purchase with these links I may receive a small commission. These help me to keep up with blog costs and continue bringing you fun projects. Thank you so much for your support!


Thanks for stopping by! I hope you had a giggle or two over these cards! See you next time,

Kari

Comments { 0 }
Kari-V-Dont-mean-to-bug-ya-Bug-Hugs-card-4

Big Bug Hugs!

Hello, today I have a Bug Hugs card that’s as cute as a bug! I love to create cards with Whimsy Stamps, however, it’s rare I share a video. TODAY I have a video to share creating this Bug Hugs card! I also have a bonus simple card at the end *Wink!*

Watch it below or in HD on YouTube:

Aren’t these bugs so cute?! Their expressions really make me smile.

I used the BIG Hugs sentiment die, but did a little slick switcharoo and made it say BUG Hugs instead!

Here’s the bonus card using the same supplies, in a different way:

I’m often asked what supplies I use to make my cards and projects, so I’ve put together a list using affiliate links when possible. If you make a purchase with these links I may receive a small commission. These help me to keep up with blog costs and continue bringing you fun projects. Thank you so much for your support!


I hope you enjoyed these Bug Hugs today! Thanks for stopping by!

Comments { 0 }
Kari-V-St-Patricks-Vintage-Postcards-QCF-Celtic-Knots-Die-set-card-2

St. Patrick’s Day Cards

Hello! Today I’m sharing some fun St. Patrick’s Day Cards with new products from Whimsy Stamps. I love making St. Patrick’s Day cards and I have for a while since I have some loved ones whose birthdays are on March 17th!

This first set called Lucky Charm really made me smile! I heat embossed the sentiment in gold and created an ink blended rainbow background. I colored up that lucky leprechaun with Copic Markers and popped him up with foam adhesive….you might notice the gold coin (and trail) stamped on the background. That’s right!! I stamped it first on the background just to have those elements showing, then put the colored version of the leprechaun only over the top!

I used the clovers in the stamp set to create a background and ink blended some green ink around the edges.

Next, I created a shaker card with the new Quick Card Fronts! There are actually 2 different sets of Quick Card Fronts this release, this one with the harp is the Celtic Mix.

For the border, I used only one of the dies from the new Celtic Knots Die set. I LOVE this die set! See my next card for a full look at the border in this set.

Here is the magic of that Celtic Knots die set!! This time I used it with the St. Patrick’s Day Vintage Postcards Quick Card Fronts (a beautiful collection)!

I’m often asked what supplies I use to make my cards and projects, so I’ve put together a list using affiliate links when possible. If you make a purchase with these links I may receive a small commission. These help me to keep up with blog costs and continue bringing you fun projects. Thank you so much for your support!


I hope you enjoyed these projects today! Thanks for stopping by!

Comments { 0 }