
Hello! Today I have another episode in my Halloween Card Series with these Mixed Media Harlequin cards. I love the look of this harlequin stencil and it has 3 different areas on this stencil for different looks!
Watch the video below or in HD on YouTube:
These harlequin cards are similar, but different. I started out with some light cardstock in green, purple and blue. Then I ink blended a darker shade around the perimeter of each panel. Then I cut a different pumpkin for each of them using patterned paper and white cardstock.
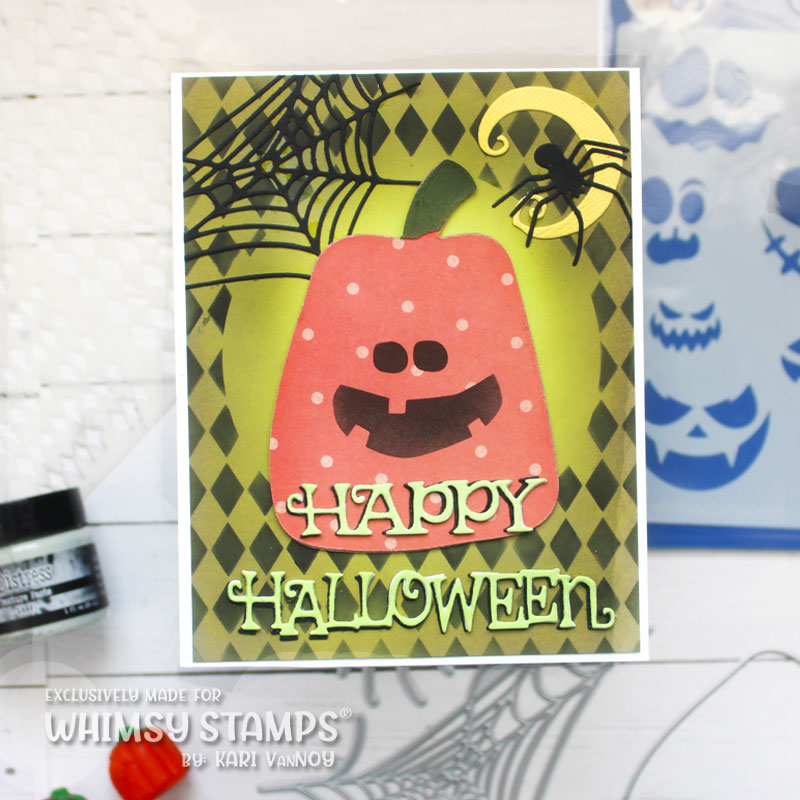
For the green card, I stacked up that pumpkin before adding it to that harlequin background. I used some black ink to ink on those diamonds and stretched it out with a stencil trick that I share in my video.
Then I added some additional elements: a moon, web, and spider along with the Happy Halloween die cut in green and black. I offset the green to create a black shadow on the sentiment.
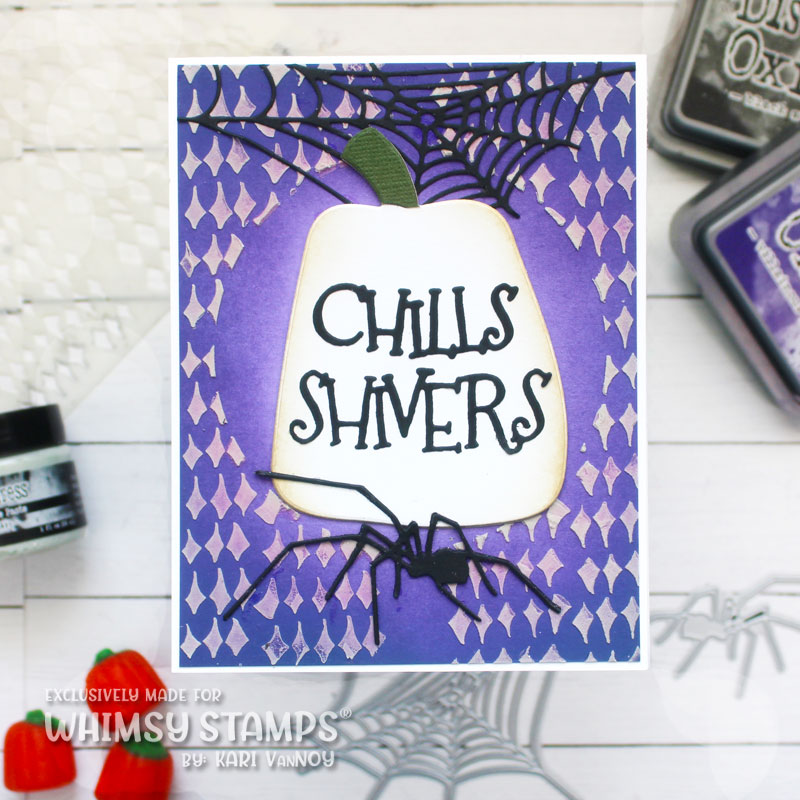
For the purple card, I used some Texture Paste and a different area of that harlequin stencil. I added some Antique Linen Distress ink around that white pumpkin to add more of a round look…and I do think it looks like it’s glowing! The spider, web, and Chills Word dies finish off this one.
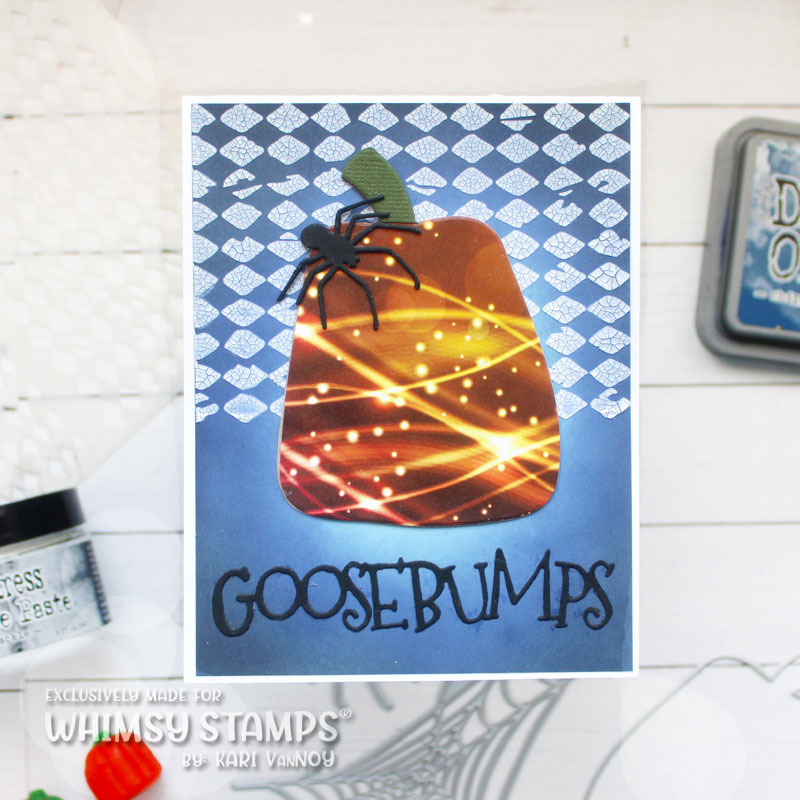
For the blue card, I added the distressed harlequin portion of the stencil with some Crackle paste! I love this look! Then I added a pumpkin that was cut out of the BOOkeh paper. A simple sentiment and spider finish it off.
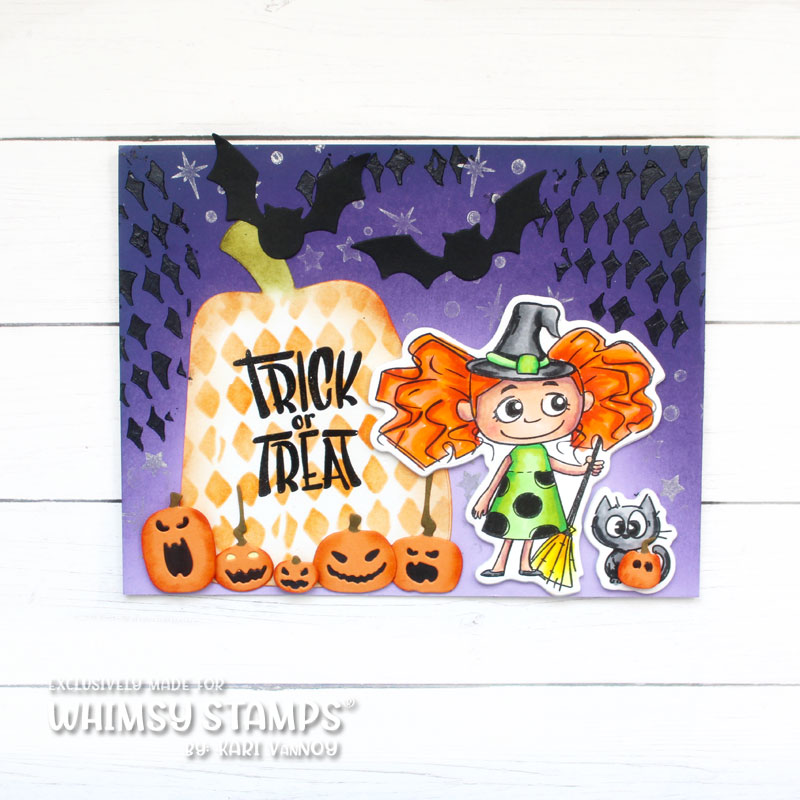
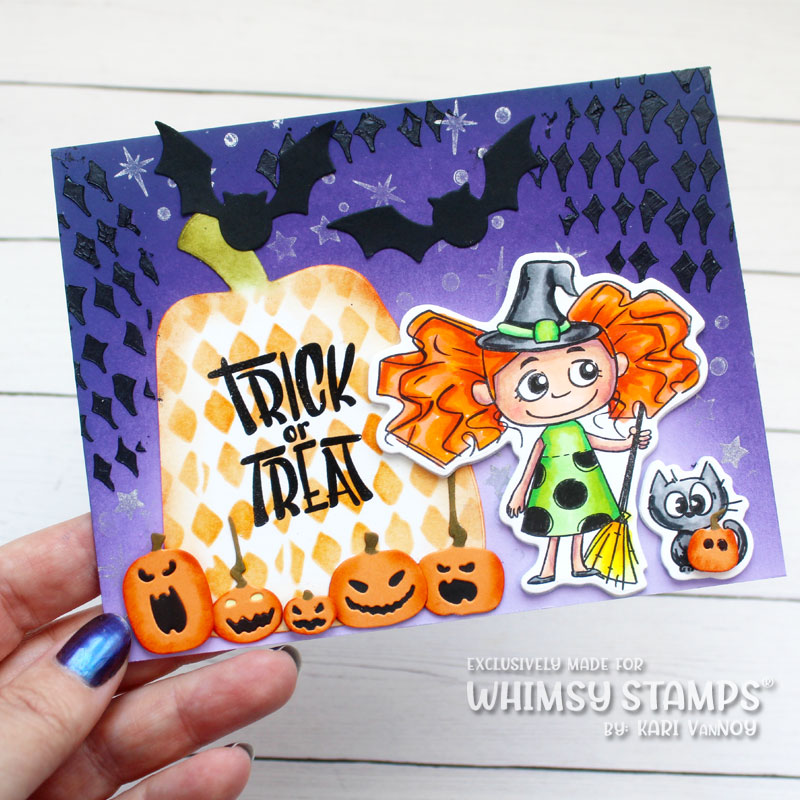
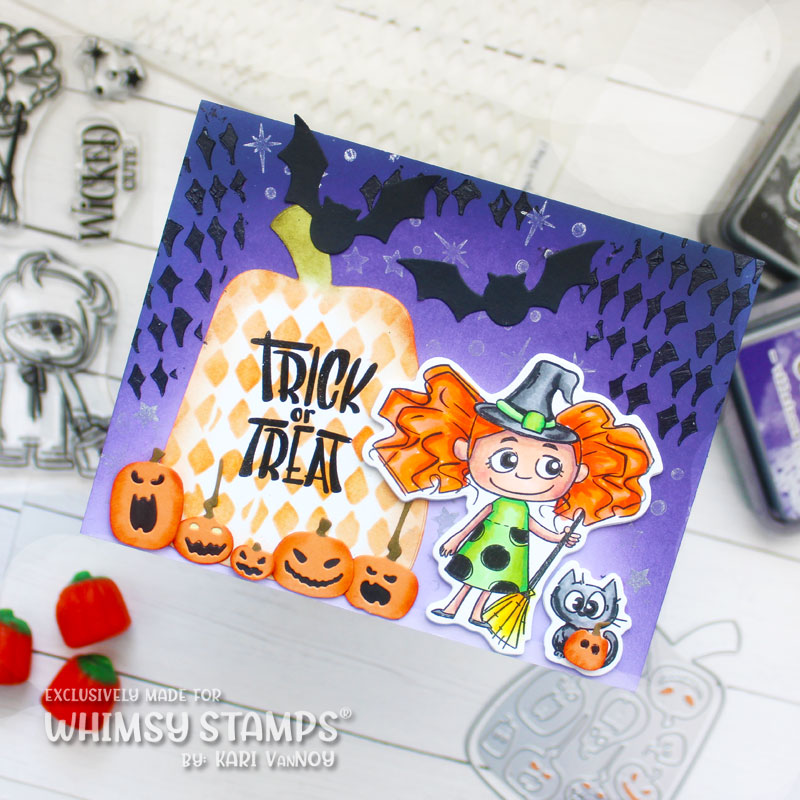
This little witch and cat are from the Wicked Cute stamp set. Aren’t they cute. I think they look great with the Pumpkin and Mini Jacks die cut set. For the background I added some black Paper Glaze. Once that dried, I stamped on some stars and dots with silver ink.
One last card I have to share uses the Harlequin stencil in a different way: as a design for the sky, grass, and pathway.
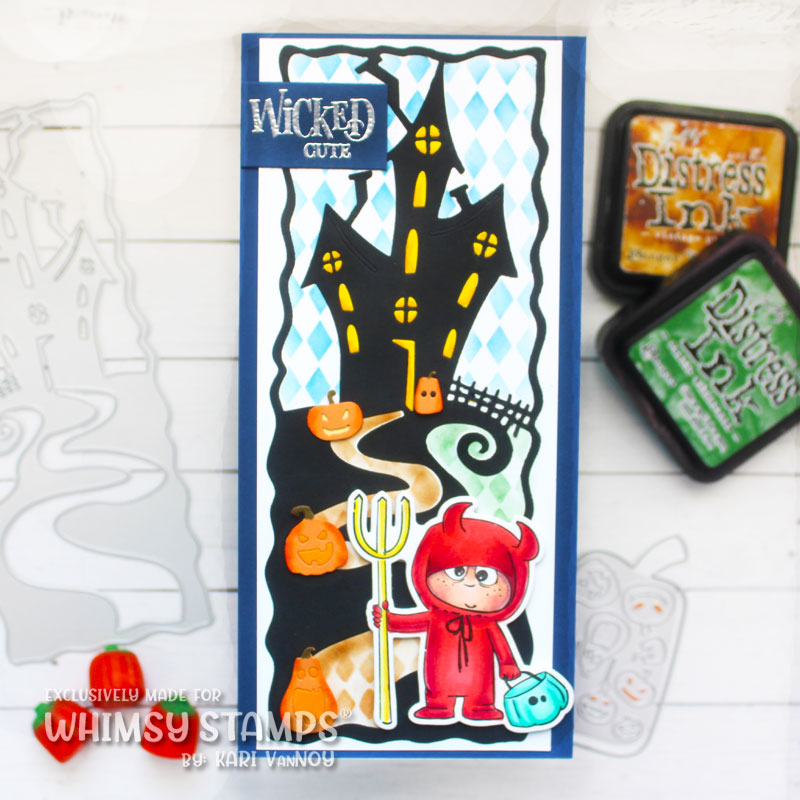
I love that spooky house on this slimline card! I heat embossed the “Wicked Cute” sentiment and added some jack-o-lanterns along that pathway.
I’m often asked what supplies I use to make my cards and projects, so I’ve put together a list using affiliate links when possible. If you make a purchase with these links I may receive a small commission. These help me to keep up with blog costs and continue bringing you fun projects. Thank you so much for your support!
I hope you enjoyed these projects today! Don’t forget to go check out my Halloween Card Series on Youtube. See you soon with more cards!


