Tag Archives | watercolor brush markers
SUNSHINE-happy-day-rose-card-3

Easy Watercoloring

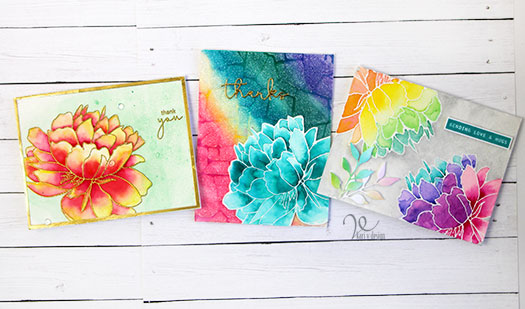
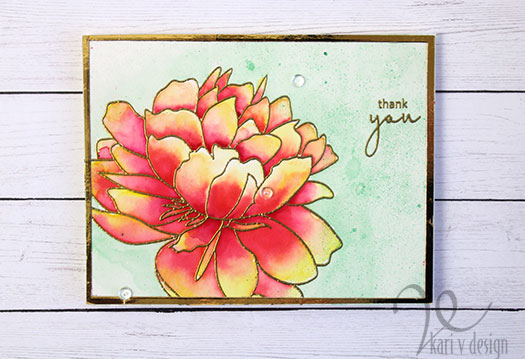
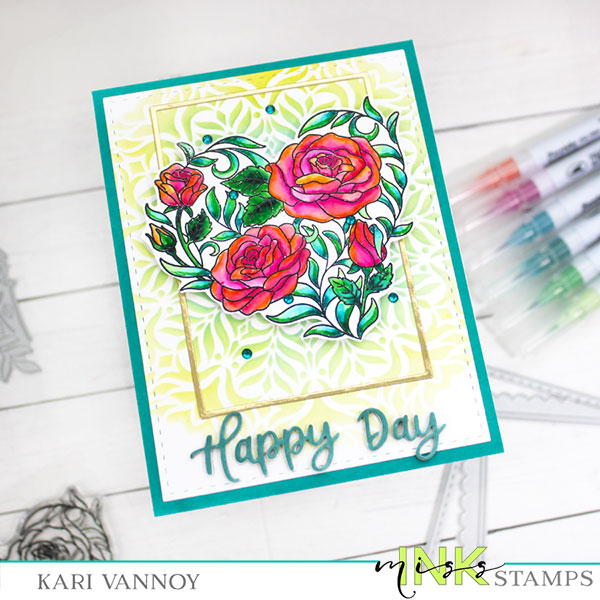
Hello! Today I have a card with Easy Watercoloring. I love to watercolor, and I love it even more when it’s EASY. This technique is so fun to do and you can do this even if you aren’t a professional watercolorist!

Watch the video below or in HD on YouTube:

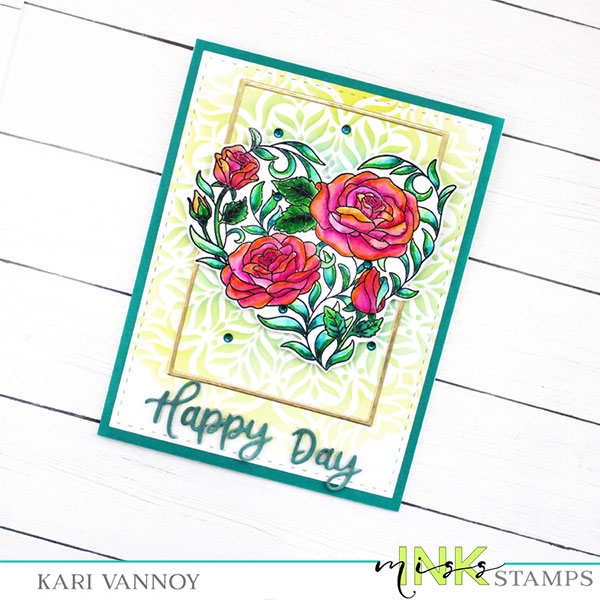
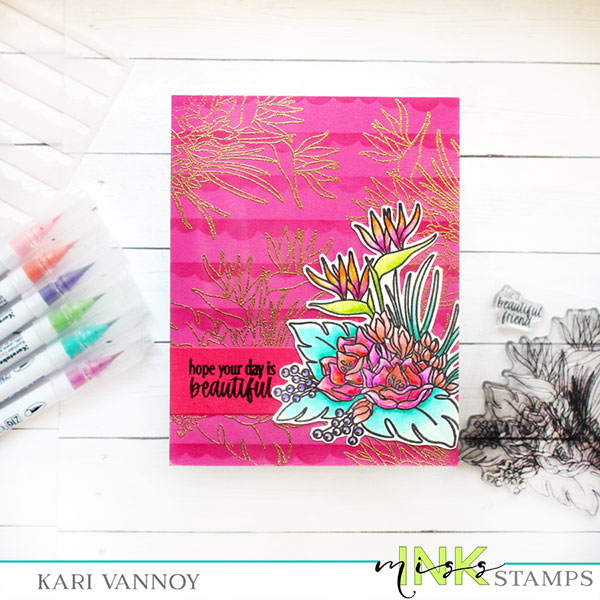
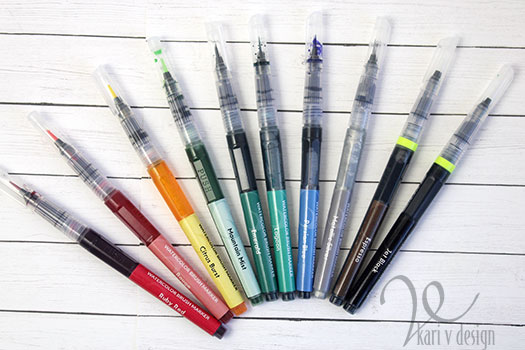
I have some tips for easy watercoloring, today I am using Zig Clean Color Real Brush markers, so these tips will be for having great success using those watercolor markers.

  1. Choose Bristol Smooth cardstock. This cardstock allows the Zig Clean Color Real Brush markers to blend smoothly with a waterbrush!
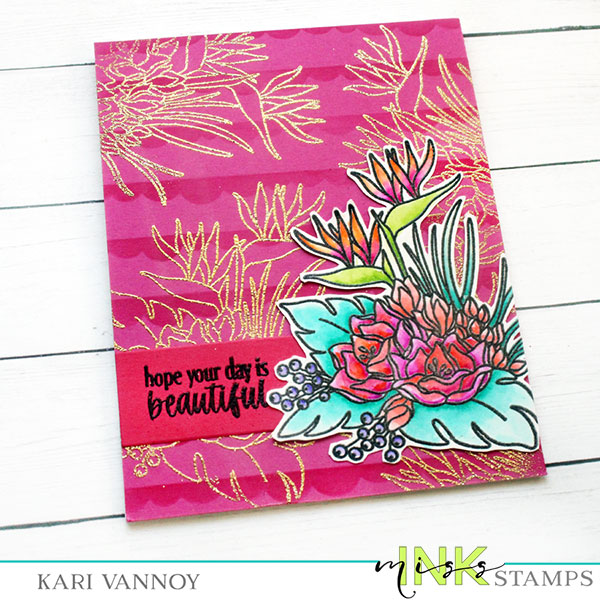
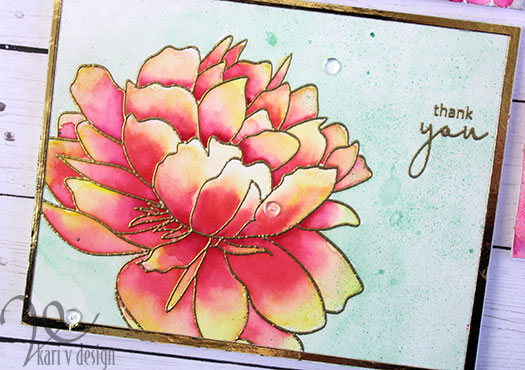
  2. Heat emboss your image. Here I stamped using black ink (Versafine Onyx Black) and then used some clear embossing powder over the top. This will keep the watercolor inside these embossed areas!
  3. Choose 2 or three colors to blend and use a waterbrush in the lightest color first to blend into the darker color(s). It makes a beautiful blend

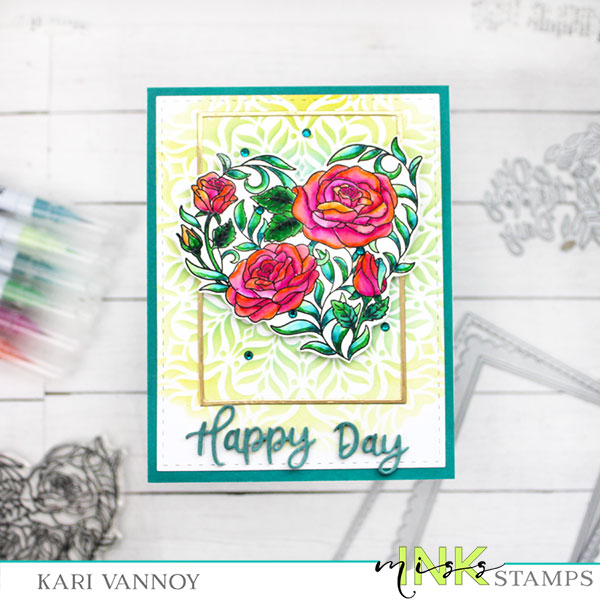
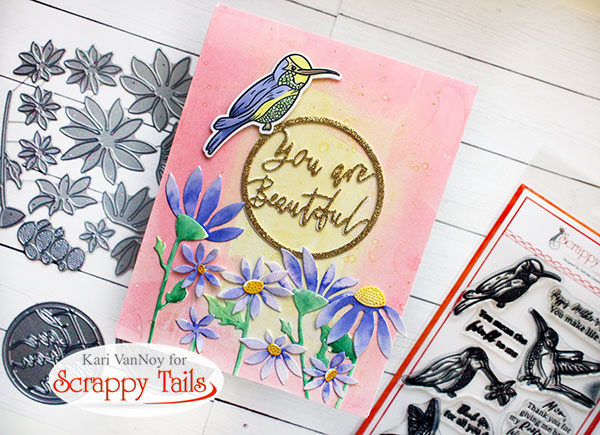
I used a gorgeous stencil (Latte Lace) for the background, using only TWO ink colors. I blended the Tumbled Glass and Squeezed Lemonade Distress inks together and they created a beautiful green.

The frames are from the Oh Happy Day die set. There are so many great options in this set! That’s where the sentiment came from also.

Watch the video above to see how this all came together!

I’m often asked what supplies I use to make my cards and projects, so I’ve put together a list using affiliate links when possible. If you make a purchase with these links I may receive a small commission. These help me to keep up with blog costs and continue bringing you fun projects. Thank you so much for your support!


I really love a calm watercoloring session, especially when it’s THIS EASY! I hope you enjoyed this project today. I’ll be back with more cards to share soon!

Comments { 0 }
SUNSHINE-tropical-flowers-card-1

Tropical Bouquet Watercolor

Hello! Today I have a watercolor project for you, with a simple watercolor technique! I’m also sharing some tips for making your background panel pop.

Watch the video below or in HD on YouTube:

This was a really fun project to create. I hope you enjoy!

I’ll be back real soon with more cards to share!

Comments { 0 }
SUNSHINE-both-cards-1

Daisies for Mom

Hello! I have a couple daisy cards to share today, using a favorite die set from Scrappy Tails Crafts. This set is called Layering Daisies and it’s really fun to work with.

My video shows you an easy way to watercolor these dies, and create two cards. Watch it below or in HD on YouTube:

I love working with these products…and you can see the Hummingbird I used here on this card. Hummingbirds are my mom’s favorites and everytime I see one, I think of her.

I used brush watercolor markers for these cards, which are so vibrant and colorful!

For the background on this card, I mixed some watercolor brush marker color with embossing paste. Then I added it to my card panel with a dot stencil. I added the daisies all around the frame of the card.

The circle sentiments are my favorites! So unique and perfect for cutting out glitter paper. I used glitter paper on both projects.


Hope you enjoyed these projects today. See you soon!

Comments { 0 }
peach-flower-1

Watercolor Brush Pens

Hello! Today I have some very BRIGHT cards for you, created using Watercolor Brush Markers from Altenew. I was quite surprised and amazed at the amount of pigment in these brush markers, and you will see that you can create some vivid, beautiful images with them!

This is a part of my AECP certification training, and I was inspired by the class called “Creative watercolor Media” taught by Jennifer Rzasa, Debbie Hughes, and Laura Bassen. I used quite of few of the techniques from this series: like watercoloring from a palette, watercoloring with sprays, and others.

Take a look at these cards! Those colors are amazing!

I create a video to share the three techniques I used, watch it below or on YouTube in HD:

For the first card, I used the wet-on-wet technique with watercolor paper. I heat embossed the image in gold, then used a waterbrush to add some water to a few of the petals. Then I added the color in. I let the water do most of the work and it turned into a brilliant flower! Wow!

Three colors blended together

For the background, I used a Metallic Spray to add color and splashes of interest.

On the second card, I used the watercolor pens direct to the watercolor paper and got amazing color. I put on some color from each of the markers, then blended with a brush and water to get a smooth look. So bright!

Glitz Glitter gel over the top to tone down the color

I used only ONE color on that big flower this time…so much depth. These pigments are just so good.

For the last card, I mixed colors together to get even more colors for my rainbow flowers.

I stamped the large flower on both corners of this card, and heat embossed in clear. Then I mixed some colors to get a nice rainbow spectrum. I finished off this card with some rainbow die cuts and a sentiment stamped in Lagoon ink to match the watercolor pens.

I’m often asked what supplies I use to make my cards and projects, so I’ve put together a list using affiliate links when possible. If you make a purchase with these links I may receive a small commission. These help me to keep up with blog costs and continue bringing you fun projects. Thank you so much for your support!

I really hope you enjoyed these projects, I challenge you to try out some watercolor brush markers and give these techniques a try!

Comments { 1 }