Hello! Today I have a new card and video sharing a Mixed Media Magnolia card. This is a fun one to make, I hope you enjoy the video!
Watch it here or in HD on YouTube:
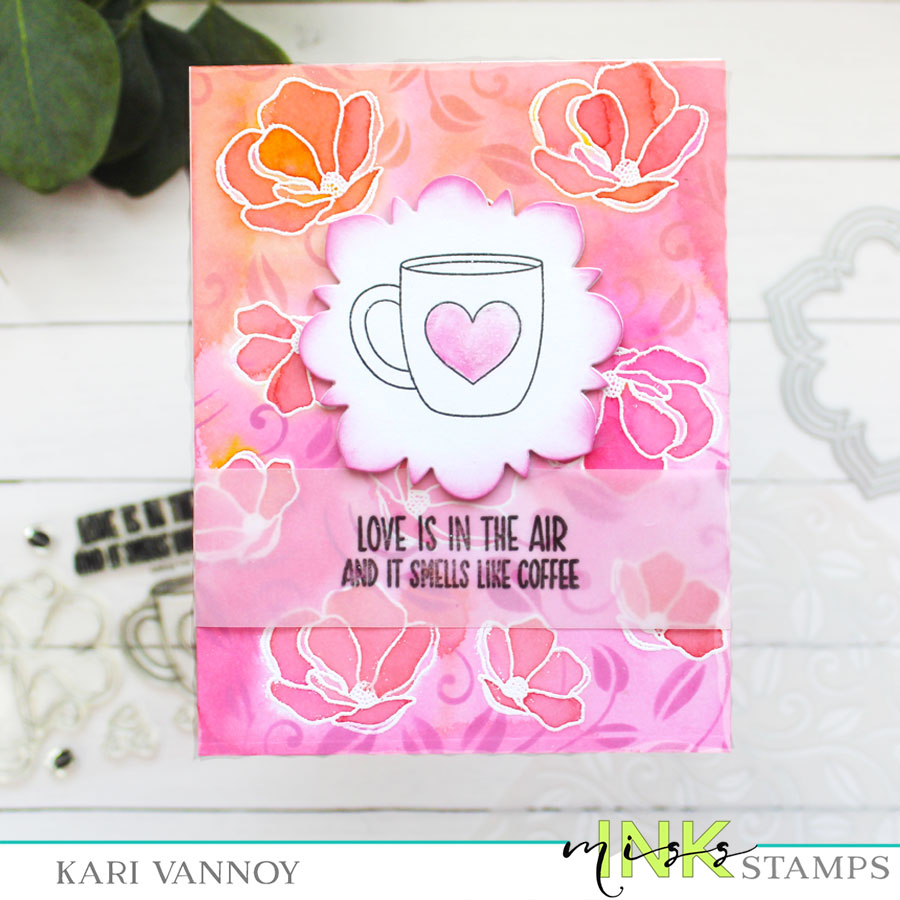
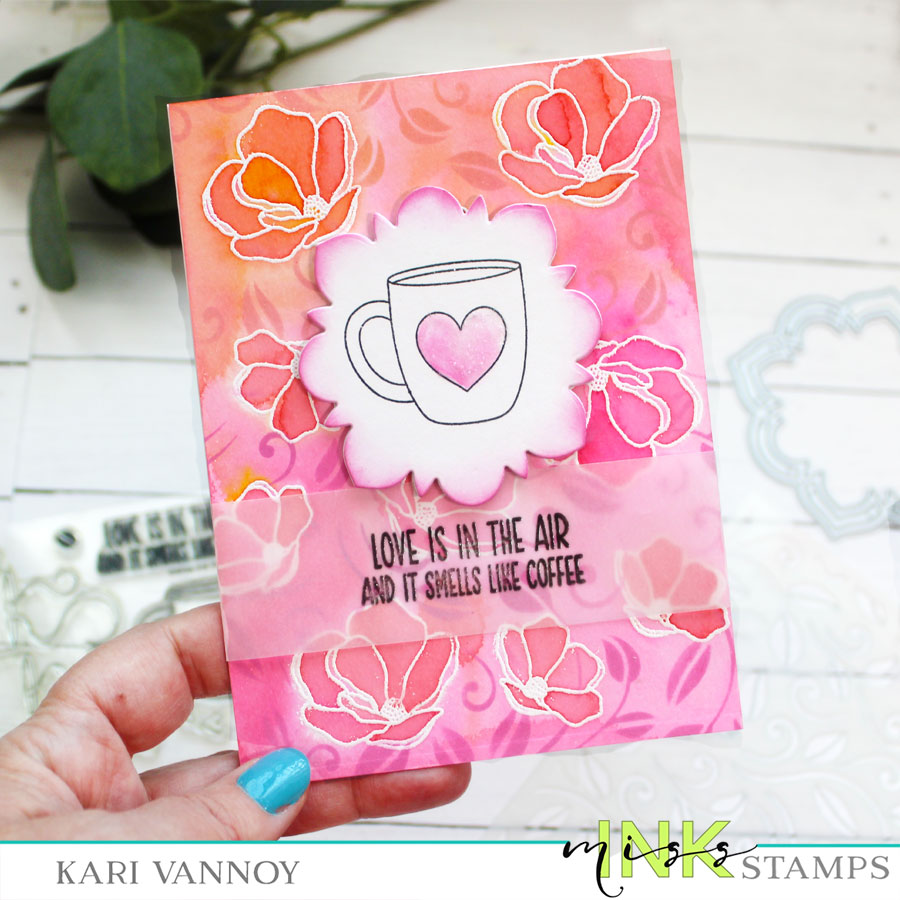
I start with some watercolor cardstock and heat emboss the magnolia images on it using white embossing powder. Next, I brought out an oldie that I haven’t used in a while: Color Bursts! These really are a burst of color, so be judicious in using them. A little goes a long way! (Watch the video to see how to dot this).
I added some extra color inside the magnolias so they were darker when they dried.
Once the entire panel was dry, I stenciled some Distress Oxides over the top. I used the center piece of the Magnolia Frame die to stamp my focal image…the heart mug! See, it pays to keep all your extra pieces. WINK*
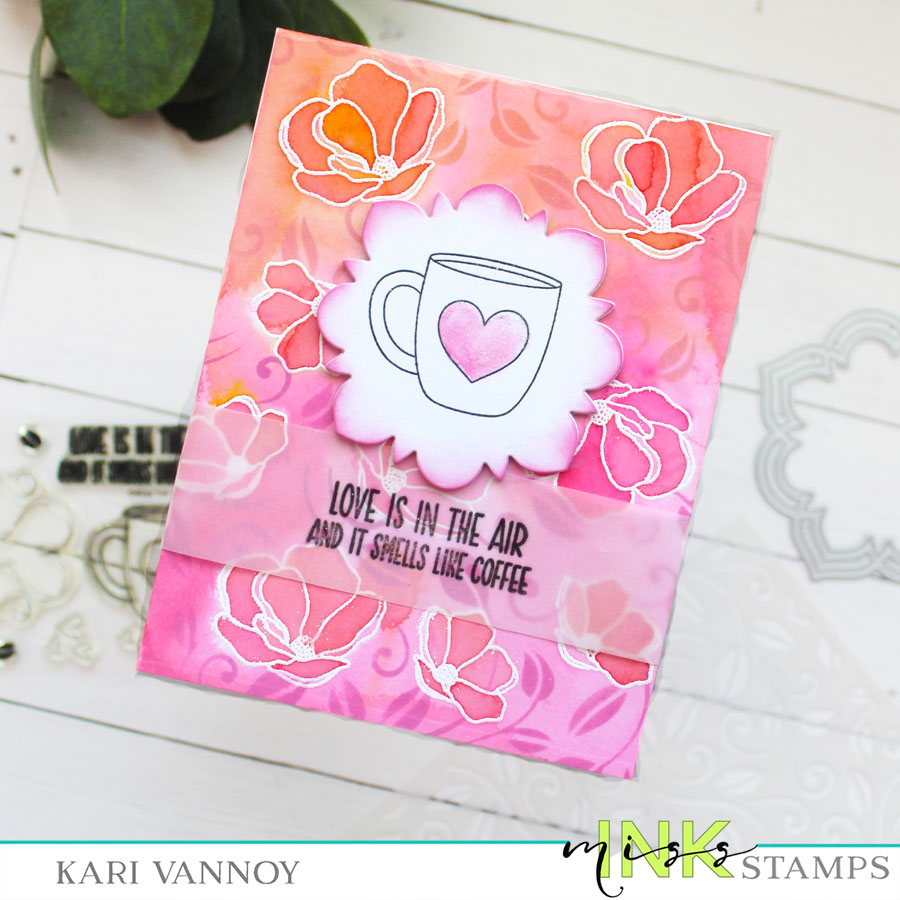
I used vellum for the sentiment today and that finished it all off! I hope you had as much fun as I did with this card. 🙂
I’m often asked what supplies I use to make my cards and projects, so I’ve put together a list using affiliate links when possible. If you make a purchase with these links I may receive a small commission. These help me to keep up with blog costs and continue bringing you fun projects. Thank you so much for your support!
Hope you enjoyed this one! Do you create many mixed media cards? See you soon with more cards to share.