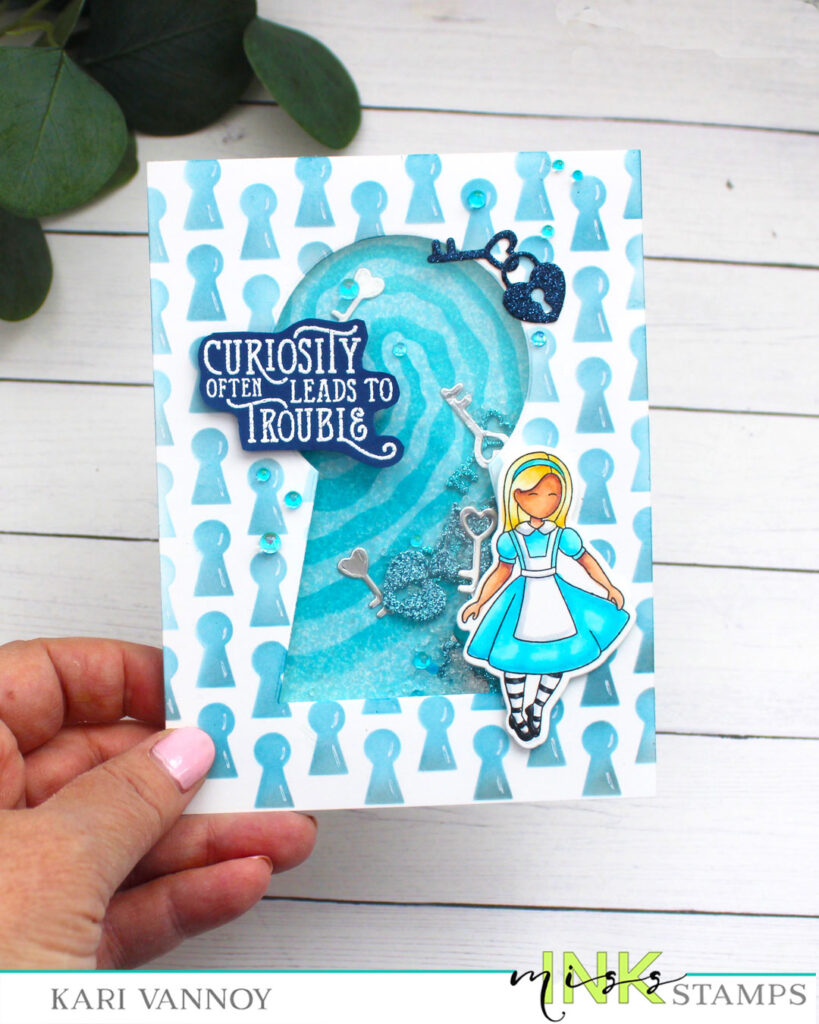
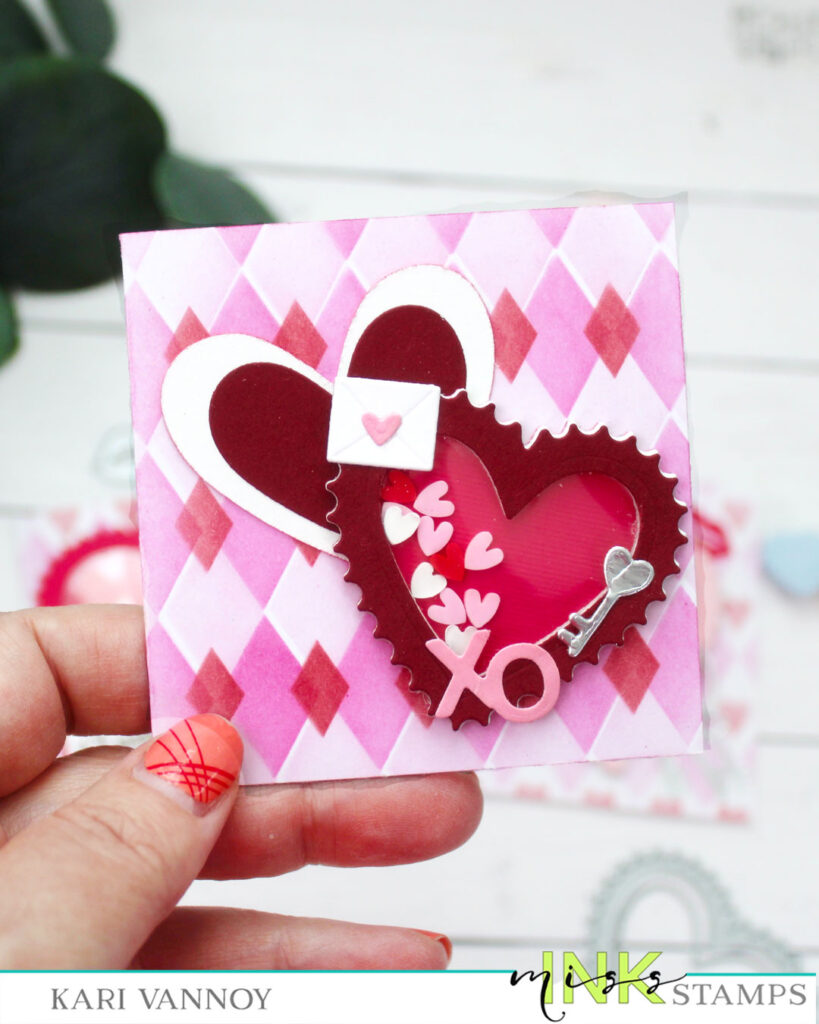
Hello, today I have a Bug Hugs card that’s as cute as a bug! I love to create cards with Whimsy Stamps, however, it’s rare I share a video. TODAY I have a video to share creating this Bug Hugs card! I also have a bonus simple card at the end *Wink!*
Watch it below or in HD on YouTube:
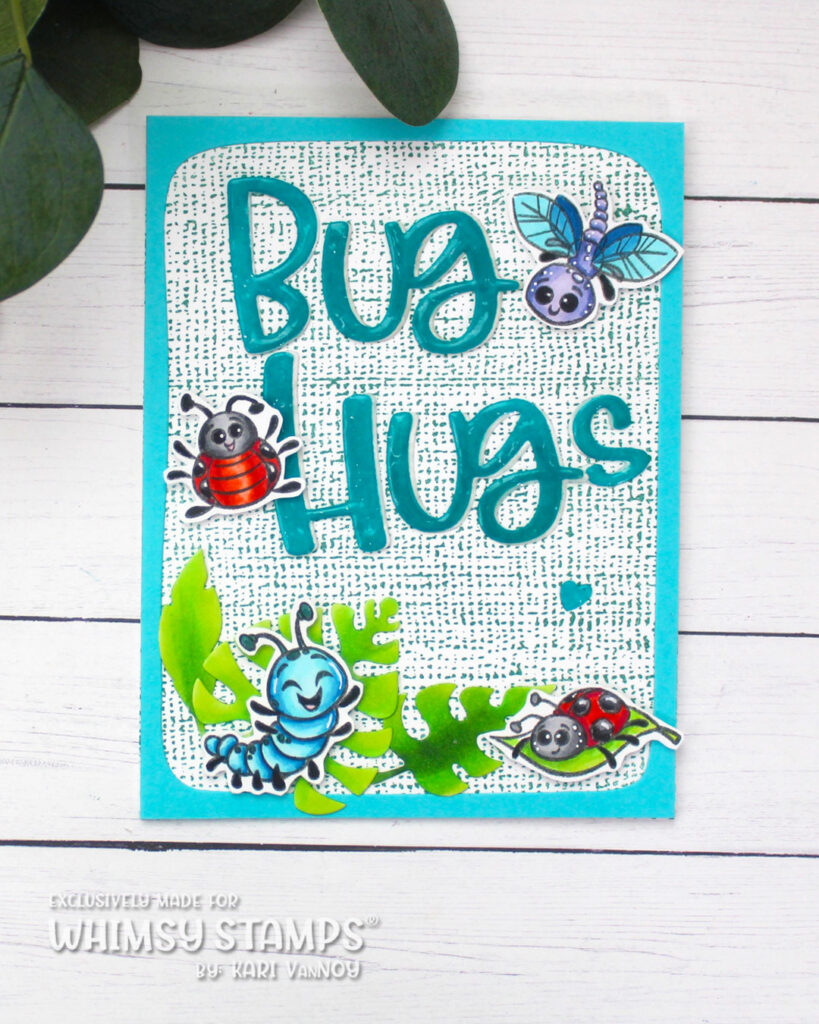
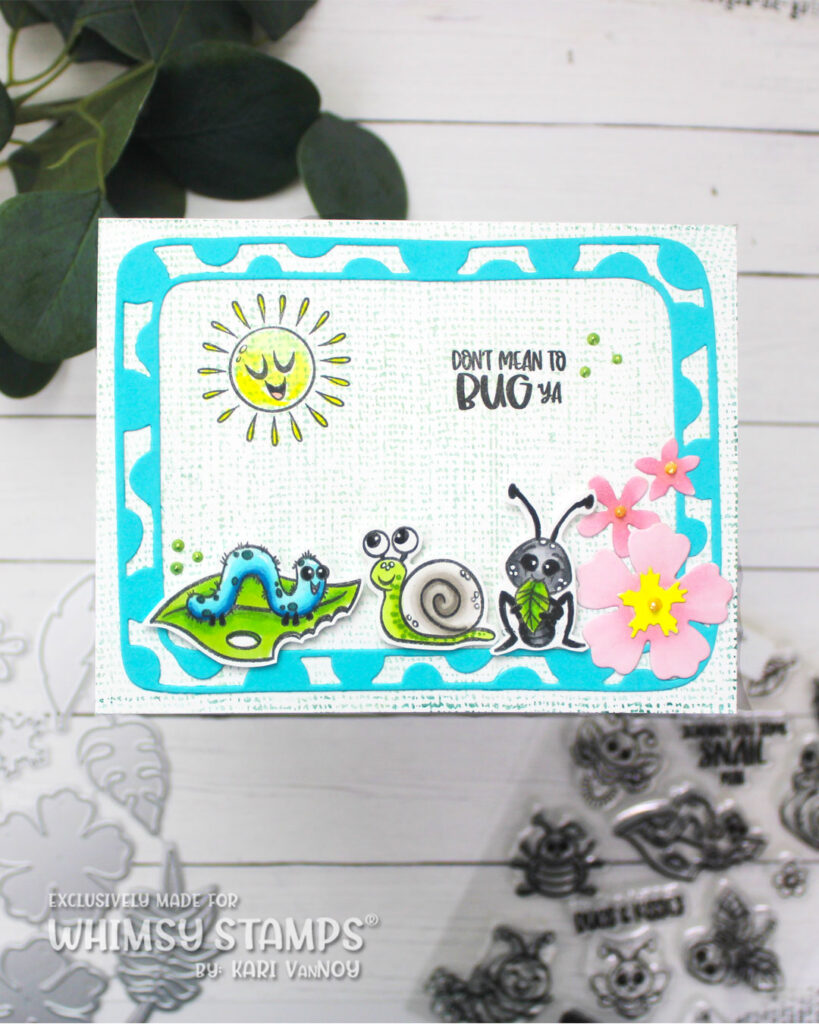
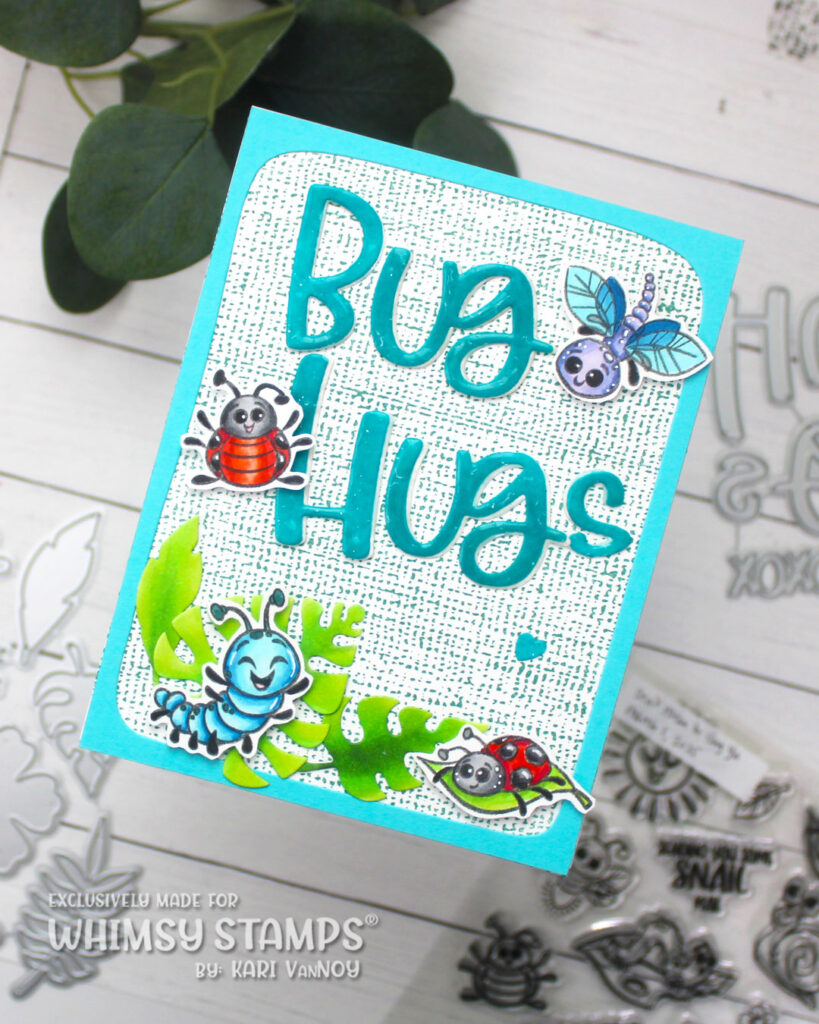
Aren’t these bugs so cute?! Their expressions really make me smile.

I used the BIG Hugs sentiment die, but did a little slick switcharoo and made it say BUG Hugs instead!
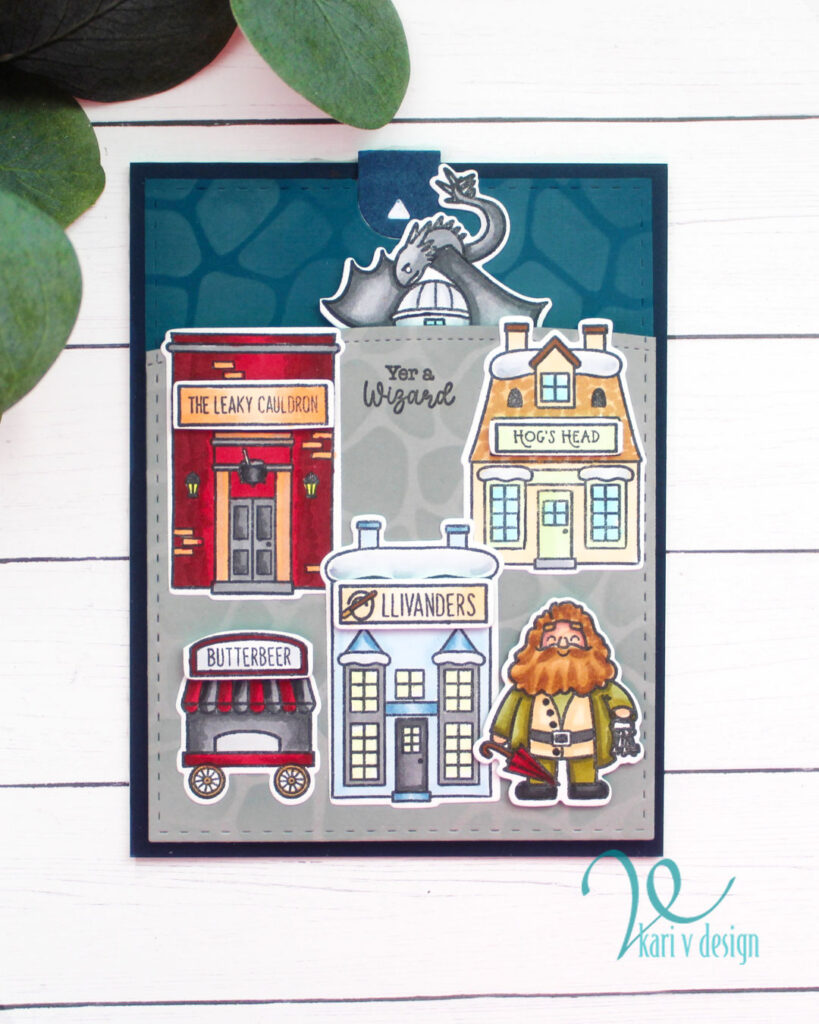
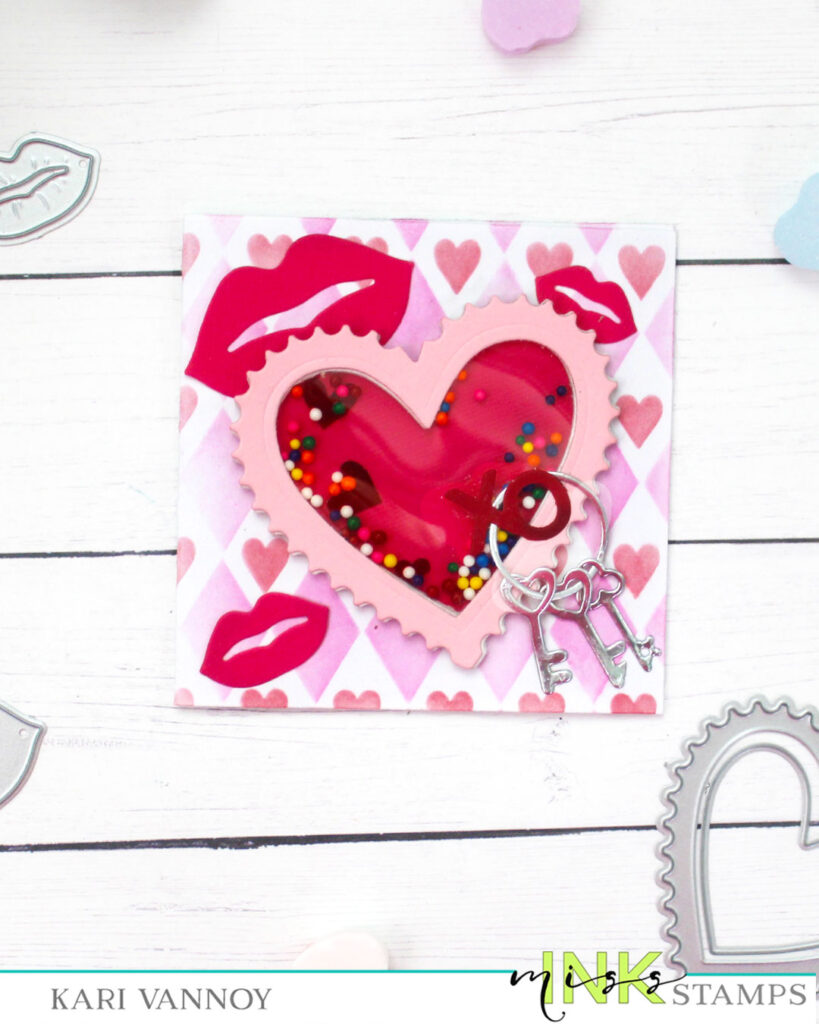
Here’s the bonus card using the same supplies, in a different way:
I’m often asked what supplies I use to make my cards and projects, so I’ve put together a list using affiliate links when possible. If you make a purchase with these links I may receive a small commission. These help me to keep up with blog costs and continue bringing you fun projects. Thank you so much for your support!
I hope you enjoyed these Bug Hugs today! Thanks for stopping by!