Tag Archives | The Hedgehog Hollow subscription box
photo-os-stamp-coastal-cuties

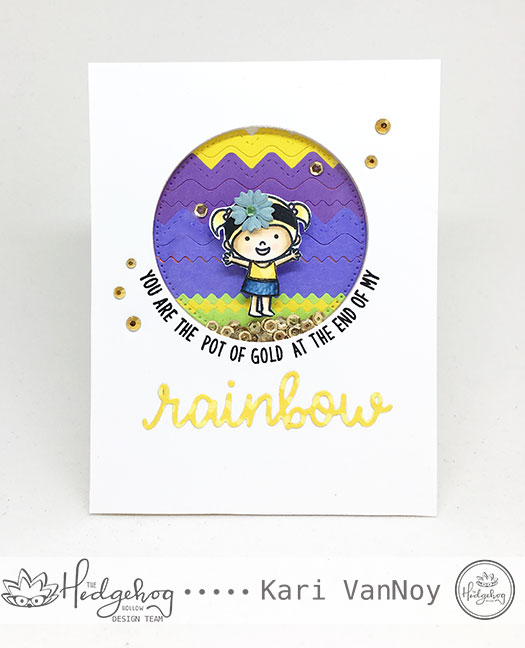
You are the Pot of Gold at the end of my Rainbow

Hello! Today I have two sweet cards to share using the Ric Rac Die from Sunny Studio Stamps (exclusive to the Hedgehog Hollow July Subscription box).

I’ve had so much fun with this July release, and today I want to show you a few creative ways to use these products.

The first card is this Pot of Gold shaker card where I used the ric rac die as a scenery backdrop:

pot-of-gold-at-end-of-my-rainbow-shaker

I made this into a shaker card and added gold sequins…I thought it was completely appropriate with that sentiment! I did shape the sentiment to fit around the circle using my Misti.

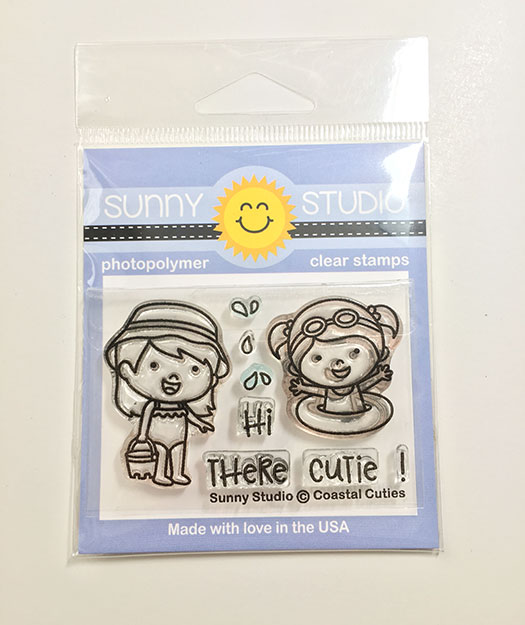
You may recognize that little girl as the innertube girl…she did not have legs!

photo-os-stamp-coastal-cuties

Yes, I did a little “paper surgery” and drew her a skirt, cut off the innertube, and used the legs from the other girl image to let her stand!! Hooray! I think she turned out cute. And I only feel a little bit bad about cutting the legs off the other stamped image (ugh!) But it was worth it to get this cutie!

She also had goggles on her head, so I colored over them to create a black “headband” and added a flower. Then I gave her a denim skirt and matched the yellow of her shirt to the rainbow sentiment.

I was going to add some shoes on her…but I chickened out! Hey, you can only do so much, you know what I mean?! Lol.

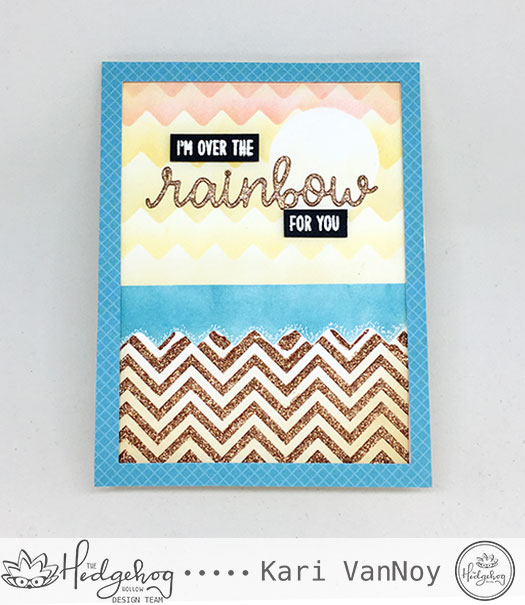
My second card is a card where I used the ric rac border dies as a MASK to make a beautiful sunset and ocean scene.

Im-over-the-rainbow-for-you-copper-sand

The glitter of the Nuvo Glitter Accents is a dreamy copper color! I thought it would look fun as a shimmery sand beach in the sunset.

I have a video showing how I made this one, watch it here or on YouTube:

I hope you enjoyed these projects today. I had a blast, and I will have a few more to share with you throughout the month!

If you have any questions about the subscription boxes, visit The Hedgehog Hollow. I think you will be pleasantly surprised at these boxes and content. I love that she changes up the companies and stamps/dies that come each month. And U.S. shipping is only $3.99…still don’t know how she does it!

See you next time!
Comments { 0 }
close-up-of-pink-swim-suit

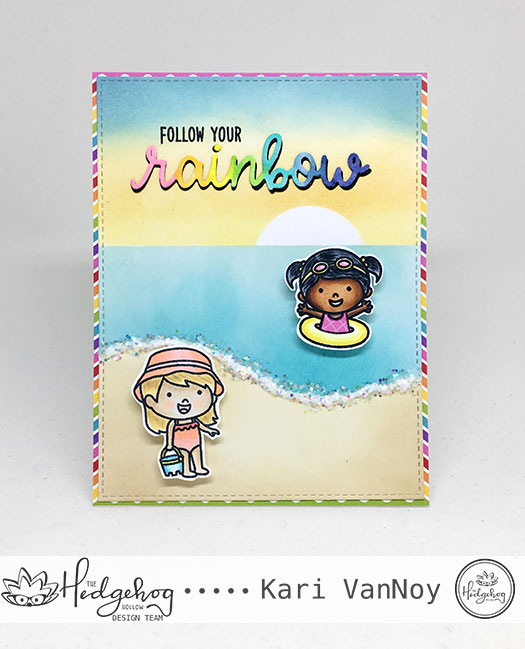
Follow Your Rainbow

Hello! Today I’m sharing a project with the brand new July Subscription box from The Hedgehog Hollow! I love this month’s box, it’s filled with cuties from Sunny Studios Stamps. If you didn’t see the unboxing video showing everything included in this month’s box, see below to view it!

Here’s my project using some of the bright rainbow paper, the cute stamps of the little swimmers and the rainbow die.

follow-your-rainbow-beach-scene

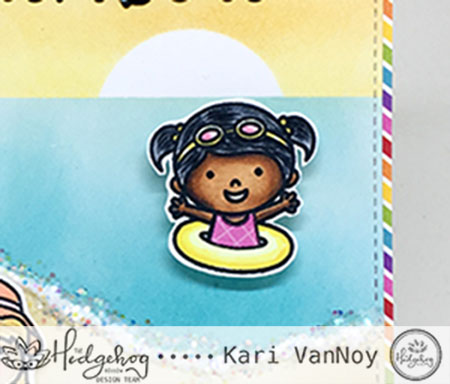
Notice the swim suit on the girl in the intertube…I paper pieced her pink suit with paper in the kit. I colored up the rainbow die with copics in a rainbow of colors. And the “foam” from the waves is made with chunky glitter.

close-up-of-pink-swim-suit

This is such a bright, fun, summery kit! There are three exclusive products from Sunny Studio Stamps, available only in The Hedgehog Hollow box. The last box sold out very quickly, so don’t wait! I know you will love this month’s kit.

Here’s the unboxing video you can view here or on YouTube:

I hope you enjoyed my first project from this kit! I have lots more to share this month…Until then I wish you lots of crafty time!

For more information or to order a box for yourself, visit The Hedgehog Hollow shop here.

Comments { 1 }
all-five-pocket-cards

Pockets Galore with the Hedgehog Hollow

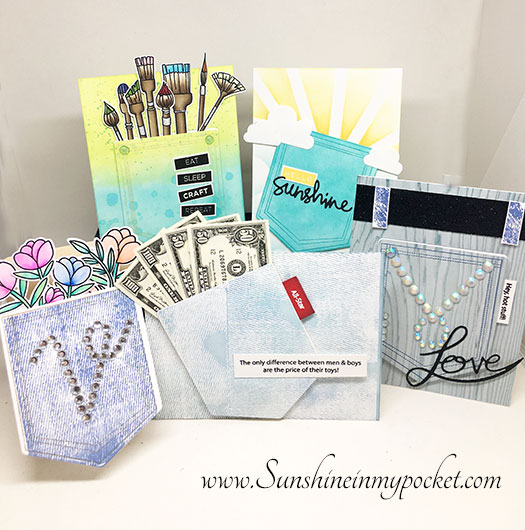
Hello! Today I couldn’t stop making pocket cards with the June 2018 Hedgehog Hollow box! I made 5 cards to share today. Yes, FIVE! I just kept on going (and I still have a dozen more ideas for this versatile box)! Even though this is a masculine themed box, there is still potential for feminine cards, too.

Affiliate links are used when possible, when you click on these links and purchase a product, I will receive a small commission. These help to pay for my blog and crafty news that I bring to you! Thank you for your love and support.

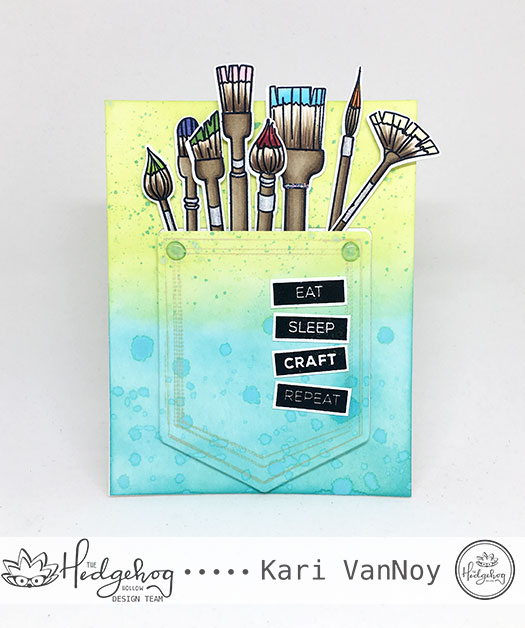
The first one could be for any crafty friend, and I splattered it with a little paint and added some paintbrushes from my stash.

paintbrushes-in-pocket

I used Distress Oxides in Peacock Feathers and Twisted Citron to ink up a card panel before cutting out the pocket die. Then I added my brushes and popped it all up using my favorite Scotch 3M foam tape. I added a sentiment that says “Eat. Sleep. Craft. Repeat.”

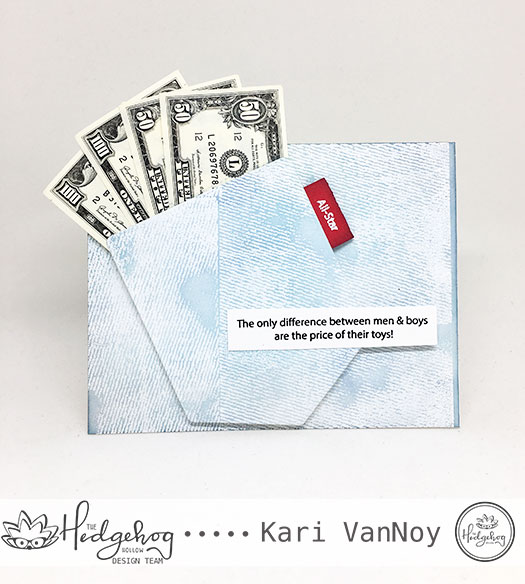
The next card I made just HAD to have some money sticking out of it. Because after all, what do you put in your pocket? My favorite is when I put a twenty dollar bill in my pocket and forget about it…then I find it when I wear those pants again! (do you ever do that, is it just me?)

money-pocket

I used the sentiments from the Hedgehog Hollow stamp sets in the June box: “The only difference between men & boys are the price of their toys!” Then I used “all-star” as a red tag on that pocket….to kind of resemble the “Levis” tag on a pair of jeans. Believe it or not, I FOUND this paper money just floating around in my craft room. Perfect!

Here I just inked up the background with a little Distress Oxide in Faded Jeans, then I stamped on the denim stamp with the same Distress Oxide ink. So easy, but it adds a lot of texture!

My next card had to be a pocket with BLING!!

love-gemstone-pocket

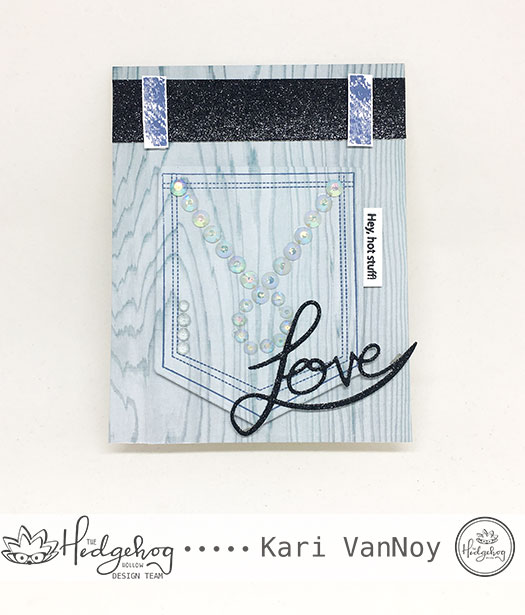
So I created a pattern with some gemstones on the pocket. The woodgrain paper was also in the box. Who ever heard of wood grain pants?! But I kinda liked the look, so I went with it. I created a glittery belt out of black glitter paper and added some “belt loops” with the stamp set. The “Love” die is from this set and is a part of the Crafting for a Cure bundle to raise money for the Akron Children’s hospital. (I love that Alexandra did this set!)

For the tag on the side of this pocket, I used “hey hot stuff!” and I think it works perfectly for a girl card.

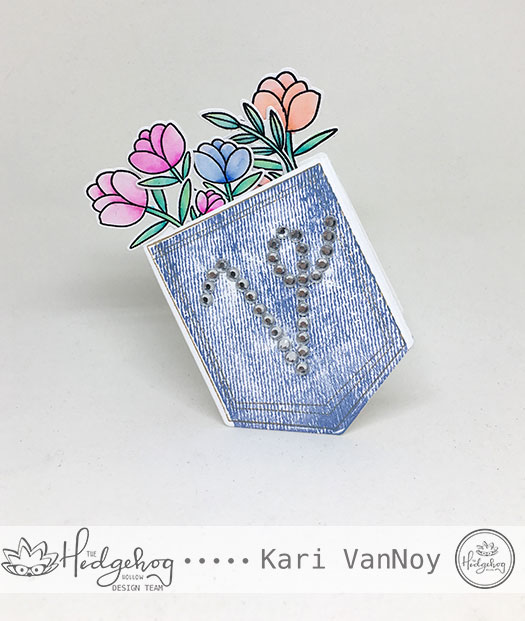
Now, I just couldn’t go on until I made a pocket SHAPED card! Again, I used gem stones for the pocket. But this time I cut the pocket out and left the top portion over the fold in the card, so it created a POCKET SHAPED card! So cool.

shaped-pocket-card-with-flowers

I added some flowers that I had colored up with my Zigs, then I covered the back of the card with another pocket die to hide the glue. On the inside it says “Sending Joy.” (see the video for a better look)

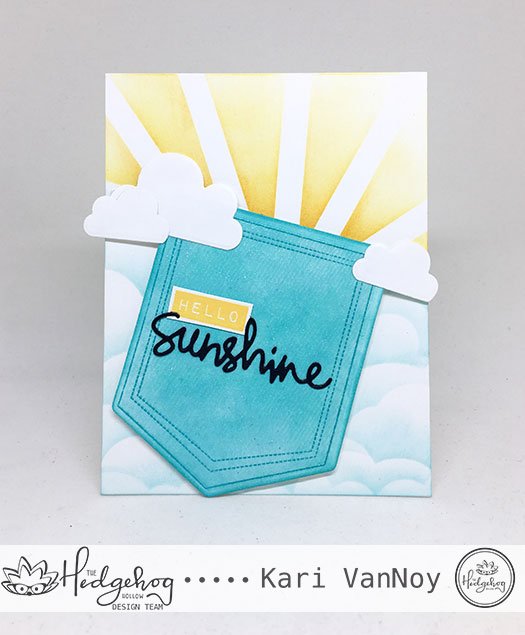
Now, for my last card, you just KNOW I had to make a Sunshine in My Pocket card! I mean, c’mon…it’s the name of my BLOG!

sunshine-in-my-pocket

The sentiment says “Hello, Sunshine” and I used some products from my stash to create it. I taped off the sunshine coming out of the pocket with post-it, then I used Distress Ink in Mustard Seed and Wild Honey to ink on those sun rays! The pocket is inked up with Distress Oxide in Peacock Feathers, then I used the denim stamp with Versamark and added clear embossing powder for texture.

Check out my video for more details here or on YouTube:

I hope you had as much fun as me and got some inspiration for your own pocket cards! Here’s one more look at them all together!

all-five-pocket-cards

Comments { 1 }
dad-man-of-the-hour

For the Men in our Lives

Hello again! I’m here to share some fun cards for Dad and Grandpa! These are made with the June 2018 Hedgehog Hollow box (which I believe are now sold out!)

Affiliate links are used, when possible, at no additional cost to you. When you purchase items using these links I get a small commission that helps me to pay for my blog costs, thank you!

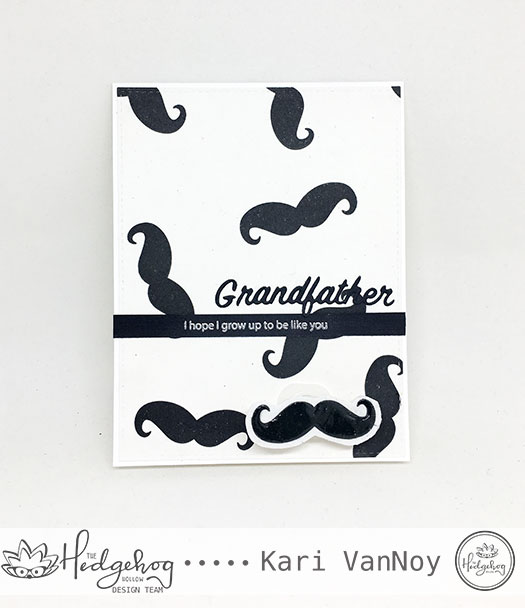
I couldn’t resist using the tissue paper from the box….yes: the tissue paper that all the goodies were wrapped up in! It was the cutest mustache tissue wrap and I just knew it needed to be the card panel background for my grandfather. So, I turned it into this card:

grandfather-mustasche-card-1

I used Stick It to adhere to the tissue paper and then I smoothed it out with my Teflon bone folder and was able to get all the wrinkles out! That made it so easy to attach to my 110# card base.

My grandfather would really get a kick out of this. But let me explain that mustache in the bottom corner…it is on an ACTION WOBBLE so it moves!! He would laugh and laugh because he really liked the “Groucho Marx” look and I can just see him wobbling that mustache for hours. This is for you, Grandpa!

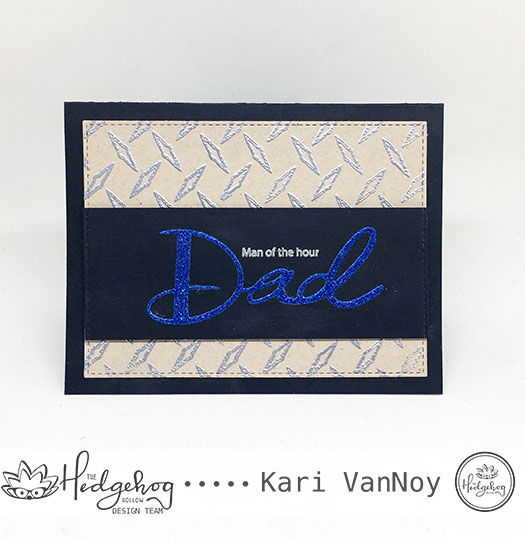
My second card features the awesome background stamp that looks like a metal tool box…I thought it would look stunning on a kraft background heat embossed with silver.

dad-man-of-the-hour

The silver embossing is just the thing to make it shine! I cut the large “dad” die cut out of blue glitter paper (blue is, in fact, my Dad’s favorite color!) I know that Father’s Day has already passed, but this could make a fun Birthday card or Congratulations card. And the black adds just another masculine touch.

I have really enjoyed making some cards for the men in my life. I hope you have enjoyed these projects, too. And I’m super excited to share the next ideas I have for this box…that’s coming up next week! Until then, I hope you get some crafty time in. šŸ˜‰

To see what boxes are still available, visit the Hedgehog Hollow page.

Comments { 1 }
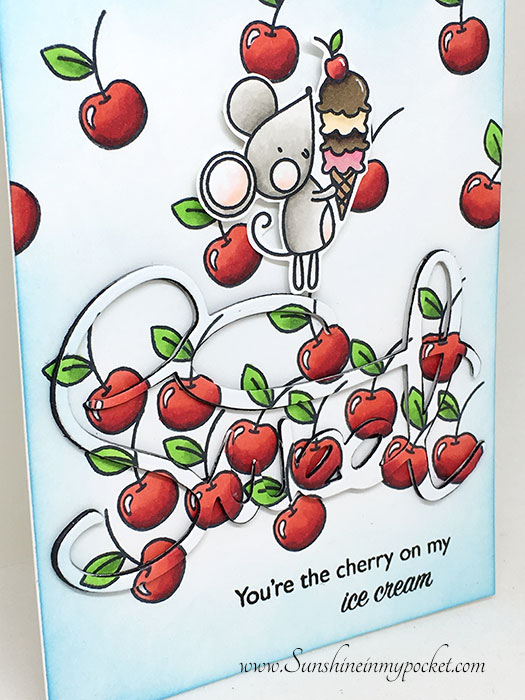
cherry-tall-card-with-mouse-close-up

Creating a “Disappearing Die” Background

Hello! Today I have fun technique to share with you, using a small stamp to create a background for a “disappearing die” card! I used the May 2018 Hedgehog Hollow subscription box products, which include some great stamps & a beautiful “Sweet” die! I love this box and I cannot stop creating with these products. (You can see everything included and more information about this box here)

Affiliate links used in this post where possible, at no additional cost to you. Thank you for your support of my blog!

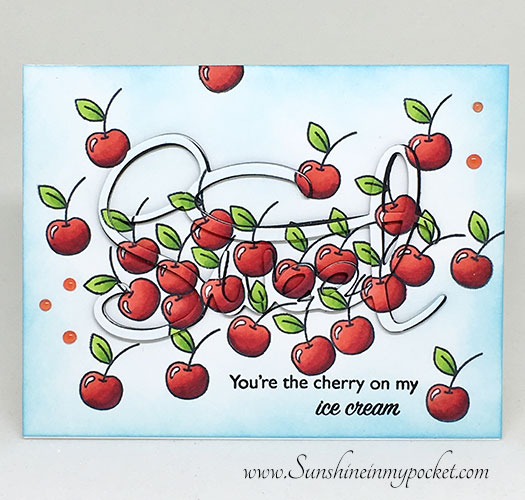
This is theĀ FIRST card I made with this technique:

cherry-sweet-original

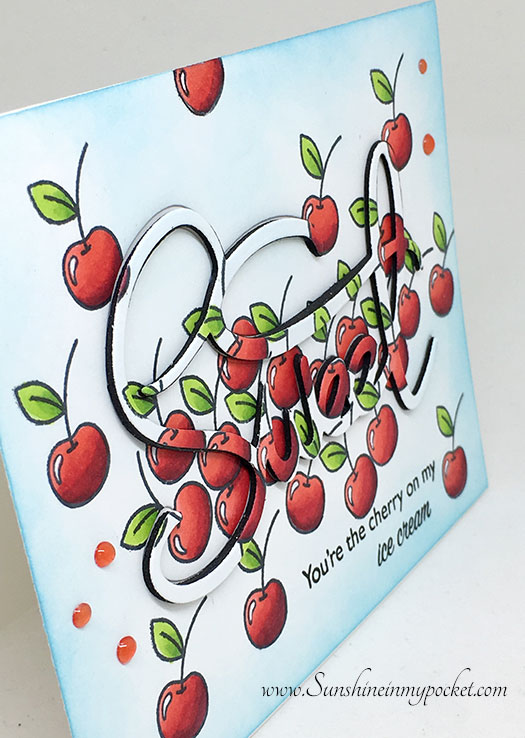
See how that die sort of disappears? But in real life you can read that it says “SWEET!” Here’s a close up:

cherry-sweet-original-close-up

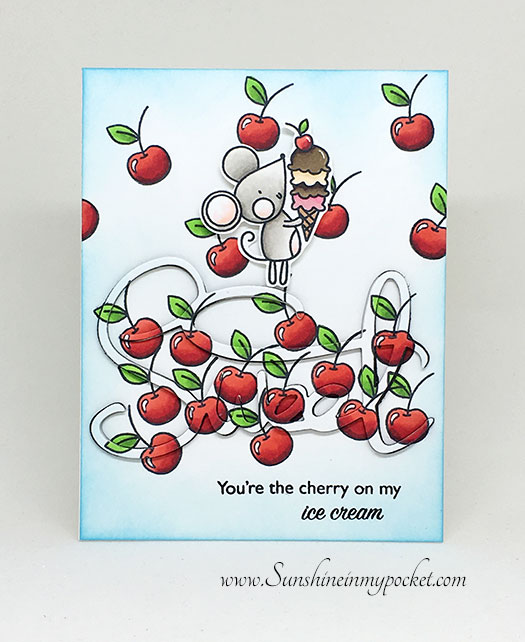
Today I haveĀ  a video to share with you, making a variation of this card. I wanted to see if I could fit that sweet die on a vertical card…and YES! You can!

cherry-tall-card-with-mouse

I have a video on just how to make this card here, including a short clip on how I colored those sweet cherries! Watch it below or on YouTube:

I love how you can create this card using a small stamp!

I stamped those cherries first, as close together as I could without using a mask. Then I colored them up using copic markers in R89, R27, and R14. For the leaves I used YG17 and YG05. I added some blue ink around the edges using “Daydreaming” ink from Waffle Flower Crafts using a round ink blender. I added the sentiment from the “Sweet Sentiments” set from The Hedgehog Hollow using my Misti and my favorite black ink for sentiments. Then I cut out the Sweet die from the card panel and added it back in over black craft foam. I added all the inside pieces as well…that’s what creates the “Disappearing die” effect! I popped up that cute mouse from this Waffle Flower set using Scotch 3M Foam Tape.

cherry-tall-card-with-mouse-close-up

I hope you enjoyed this project today! For more information about the subscription boxes, visit The Hedgehog Hollow website here. (I am really enjoying these boxes!) And, if you didn’t know, Alexandra is the face behind the Hedgehog Hollow and she designed this “Sweet” die and “Sweet Sentiments” set as her VERY FIRST ones! So exciting! I am glad to have them and also to know that you can create a card either vertically or horizontally and that die will fit! Love it.

Comments { 0 }