Tag Archives | scrapping for less
!blog header blog hop

Four Cards with Scrapping For Less

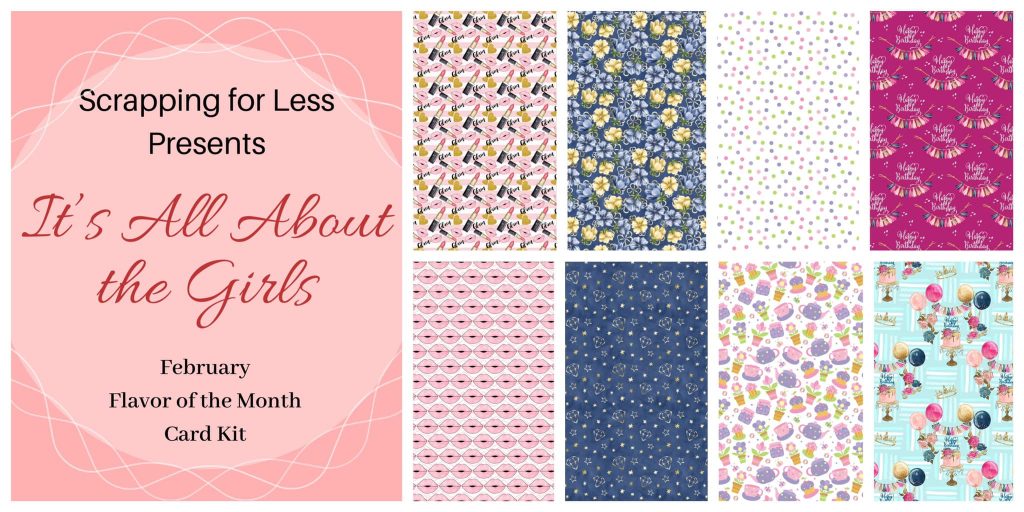
Hello! Today I’m participating in a blog hop with Scrapping For Less featuring the February card Kit! It’s All About the Girls this month and you know that’s right up my alley. There’s a giveaway, so stay tuned for instructions on how to enter, below!

I made four cards using each of the collections that came in the kit, and I followed the sketches that also came in the kit. It is so fun to have sketch challenges to follow that spark creativity.

If you are not familiar with these card kits, I have a video where I show you everything that came in the kit AND all four cards I made. Watch it below or on YouTube:

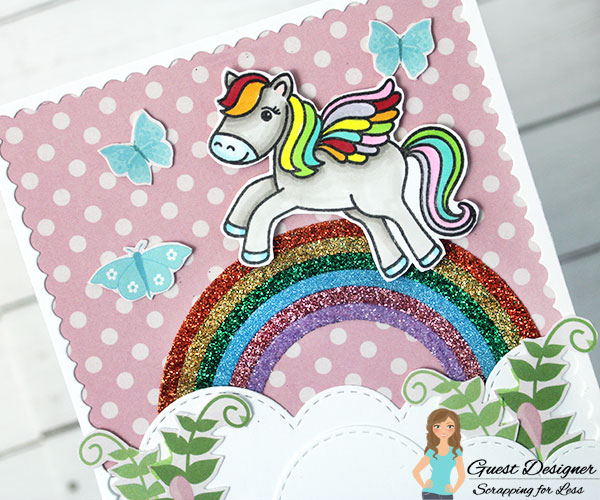
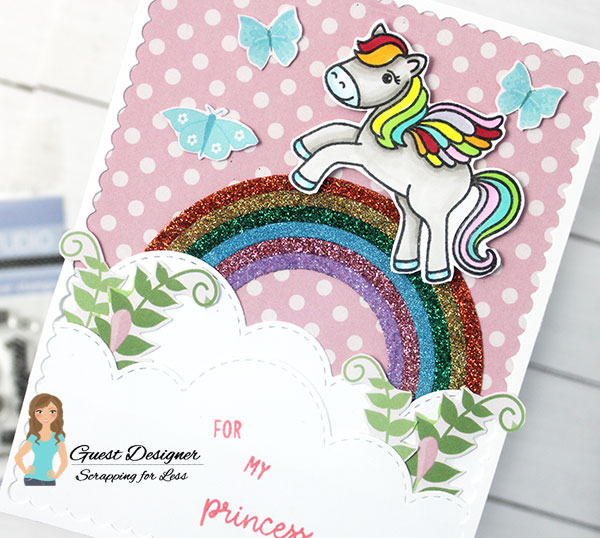
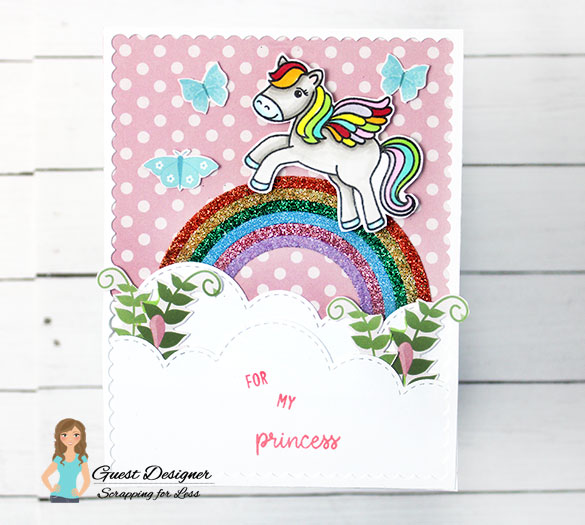
Let’s get to the cards! For my first card, I used the last sketch. I chose two of the patterned papers as well as the pink cardstock from the kit to create this one.

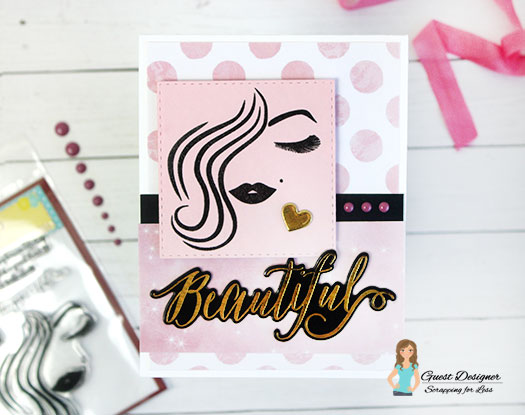
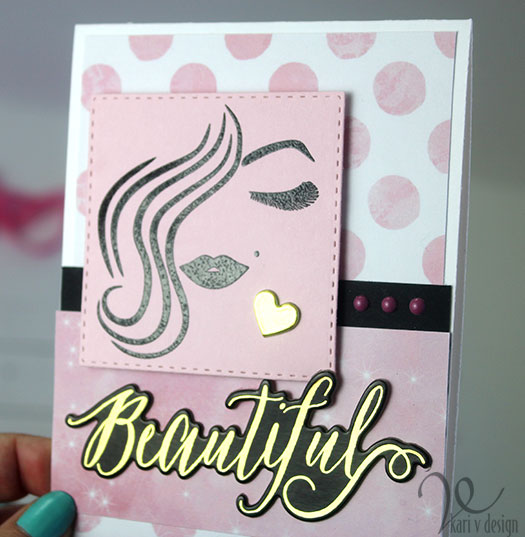
That beautiful sticker in the kit has got to be a FAVORITE of mine! After I made this card, I had many more ideas…and there’s still A LOT of product to make plenty of cards! I love that you get paper and stickers/ephemera as well as enamel dots.

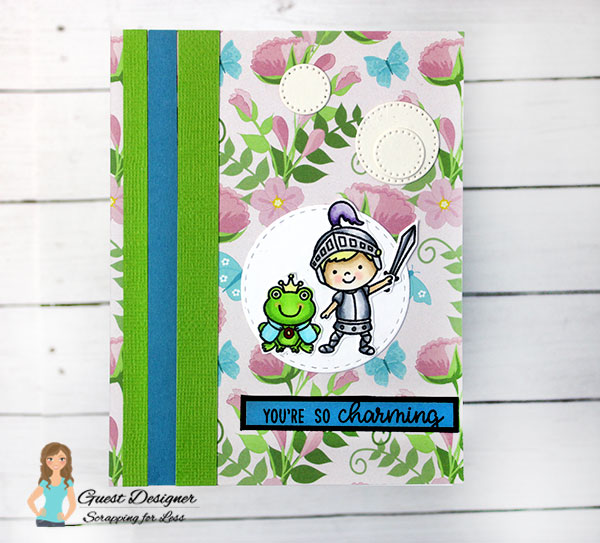
For my second card, I used the third sketch with Collection Two.

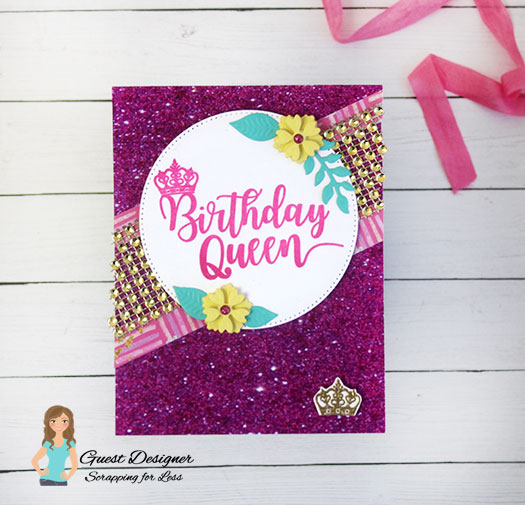
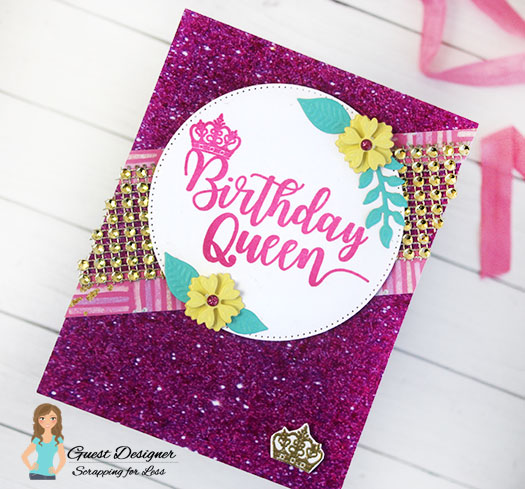
I couldn’t resist that glitter paper!! It’s actually flat paper PRINTED to look like glitter. Love it. Here I added a few die cut flowers from my stash to complete the look. This is my first time adding Gold Rhinestone Mesh to a card EVER…I think it’s a fun touch. Doesn’t this remind you of a beauty queen sash?

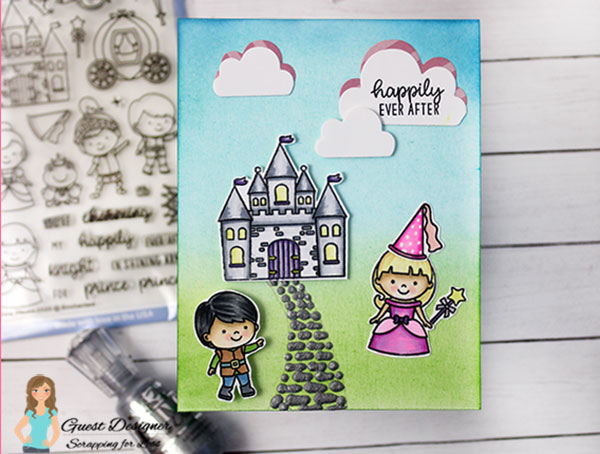
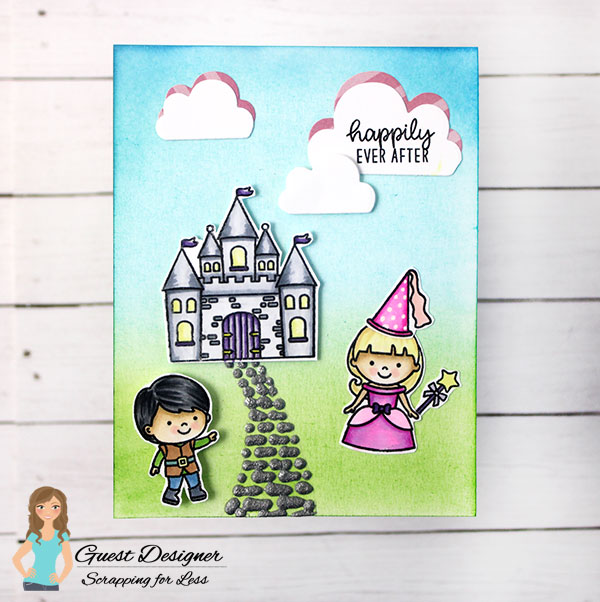
For Collection Three, I followed along with the second sketch and used the key ephemera popped up on foam tape. I colored those glass slippers with Cool Gray Copics (with a touch of light blue).

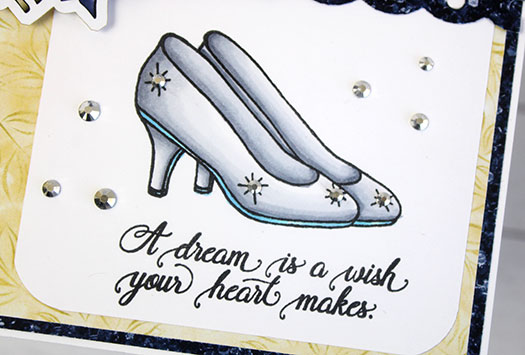
I added some silver gemstones to this one to finish it off. I used my new favorite embellishment wand (that I learned of at Creativation) for this…and it worked like a charm! I love this sentiment from the stamp set…”A dream is a wish your heart makes.”

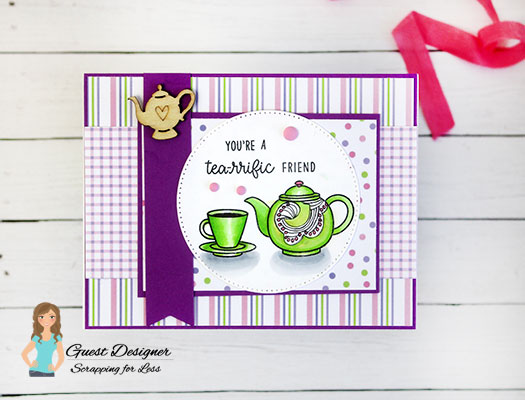
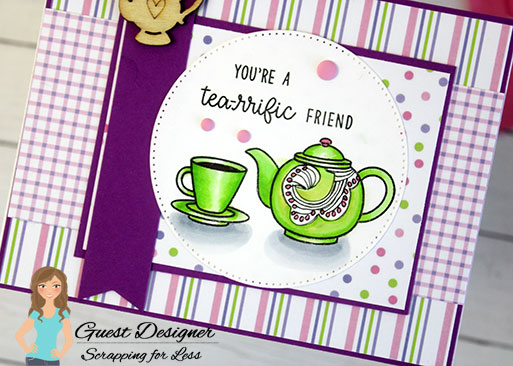
And for Collection Four, I made a Tea Party card inspired by Sketch 1. I used the stencil in the kit to create a design on the tea kettle, then I drew on a design. Not my typical style, but I sure had a lot of fun with this!

Be sure to watch my video for a process of how these cards all came together. I really enjoyed this kit and all the papers, ephemera, extras, and inspiration that came with it!

I’m often asked what supplies I use to make my cards and projects, so I’ve put together a list using affiliate links when possible. If you make a purchase with these links I may receive a small commission. These help me to keep up with blog costs and continue bringing you fun projects. Thank you so much for your support!

NEXT ON THE HOP!
I hope you enjoyed these projects. Don’t forget to continue on the hop for even more inspiration with the February Kit! Your next person on the hop is the talented Stacy, visit her HERE.

GIVEAWAY!
Make sure to check out the Subscription page for the links to order your kit or to subscribe! Also for your chance to win, make sure to enter the Rafflecopter on the Scrapping For Less page (click here)!

No photo description available.

And if you’d like to follow along with more of my creations, you can also find me here:

Instagram * YouTube

Thanks for stopping by!

Comments { 6 }
both-princess-cards

Happily Ever After…

Hello, I’m so excited to share these Happily Ever After cards with you. I used the Fairy’s Garden paper pack and the Sunny Studios Enchanted stamp set today from Scrapping For Less.

For my first card I created a castle home for the princess and her prince. I first ink blended a soft blue and green ink onto the background. I colored up the images with Copic markers. Then I added some clouds with a pink lining from the paper pack.

I think pink clouds are so dreamy! When they say every cloud has a silver lining, pink lined clouds are one step above that! Lol. I stamped the Happily Ever After sentiment on one of the clouds.

I added the images with 3M foam tape. That cobble stone walkway is made with Nuvo Stone Drops. These are so dimensional and dry with a matte finish to look like stones!

This stamp set is so inspiring, I couldn’t resist featuring that cute little frog in the stamp set for ONE MORE card! I chose one of my favorite papers from the Fairy’s Garden paper pack for the background. Then I added the frog and the Knight in Shining Armor to a circle die cut.

I added some solid paper stripes to the left side of the card, and stamped the sentiment “You’re So Charming” onto one of the blue paper strips.

How many frogs have YOU had to kiss to find your Knight?!

I hope you enjoyed these projects today. They were so much fun to create! Thanks for stopping by!
Find me here: Instagram * Blog * YouTube

Comments { 0 }
rainbow-pegasus-card-2

Pegasus Love

Hello! Today I’m up on the Scrapping For Less blog sharing some cards made with the Prancing Pegasus stamp set and beautiful Fairy’s Garden paper pad.

For my first card, I inked up the background with some Distress Oxides in Picked Raspberry and Dried Marigold. Then I splattered on some white pearl watercolor to give it more of a magical feel.

I stamped some of the stars from the same stamp set on the background using the same colors of Distress Oxide inks. They are a little difficult to see in the photos, but it adds a subtle detail.

I colored up the Pegasus with Copic markers and added some sparkly stickles to the wing. I die cut some clouds from my stash and added WOW! Sparkle glitter to the smaller ones. This is some WOW! glitter I got to preview at Creativation and oh…I love it!

That frame is from the diagonal paper in the paper pack and it adds just the right touch! I stamped the sentiment on strips of teal paper and popped it up with foam tape. This is for sure a “magical” birthday card that is fit for a princess!

For my second card I knew I wanted that Pegasus to be running on top of a rainbow. So I glittered up a rainbow and added it to a pink polka dot background from the Fairy’s Garden paper.

I colored the Pegasus’ mane, tail, and wing in the same rainbow colors with Copic markers. Those butterflies and leaves are cut from the paper pad as well! I was so excited to see those butterflies in there and they were so perfect for this rainbow card!

I added some clouds to the card and stamped the sentiment “For My Princess” with pink ink.

I added the Pegasus with foam tape to give it more dimension. I also folded up the butterfly wings just a little to so they look like they are flying!

I hope you enjoyed these projects today! I really loved making them. I’ll see you real soon with some more inspiration.

Kari VanNoy
Find me here: Instagram * Blog * YouTube

Comments { 0 }