Tag Archives | Our Daily Bread Designs June 2018 Release
gold-embossing-new

3 Ways to use a Silhouette Stamp – Sister cards

Hello! Today I am excited to share with you 3 Ways to Use a Silhouette Stamp using the set “Sister Time” by Our Daily Bread Designs.

I have my absolute favorite go-to for using silhouette stamps, and that is to Distress Ink the background, then stamp over it in black ink. But today I have THREE ways to show you!

Disclosure: Affililate links used when possible, at no extra cost to you. By clicking on these links you are supporting my blog just a little and I thank you very much!

  1. SISTER ADVICE

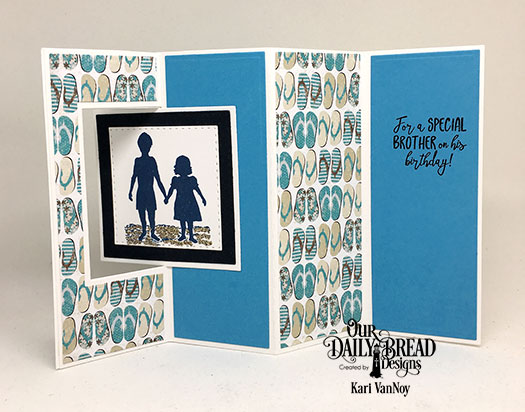
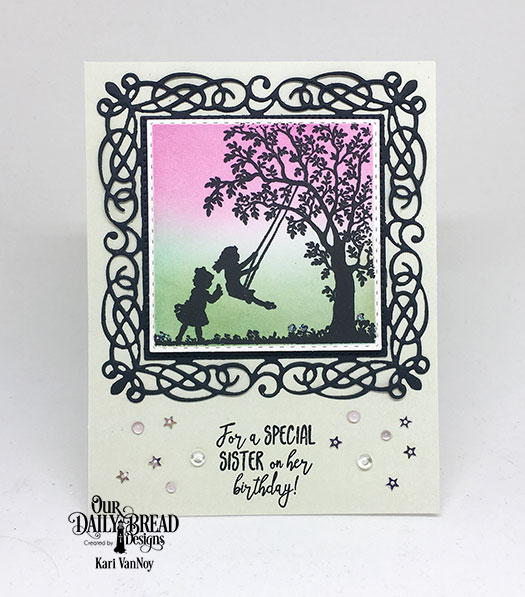
The first way is Distress Inking a panel, and then using a die to cut it out. I used the Flourishy Frame Die and Distress Oxide Inks in Picked Raspberry, Spiced Marmalade, and Fossilized Amber ink here.

sunshine-sister-advice

I did splatter some water over that background, then I allowed it to try before I die cut the frame. I masked off the edges before adding the stamp from Sister Time in my favorite crisp black ink.

Doesn’t this just look like an older sister giving advice to the younger sister? I love that.

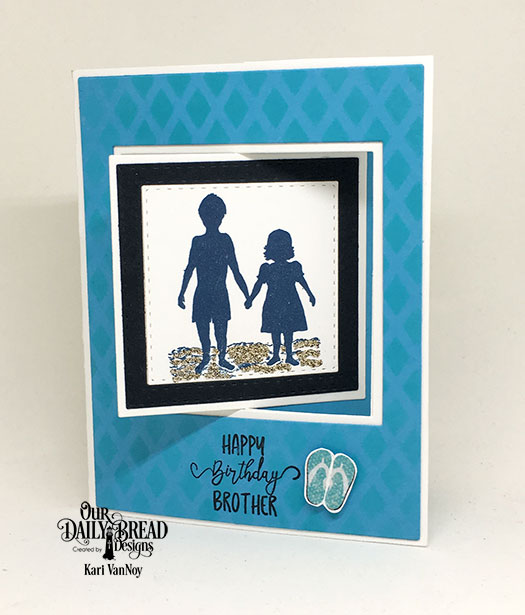
2. LAUGH SMILE LOVE GOLDEN ADVICE

Another way to get more out of your silhouette stamps is to GOLD emboss them. Here I used black paper to gold emboss, then I cut it out using the Double Stitched Square Dies. I added it onto black fun foam before attaching it to the Flourishy Frame Die. I love that die and have used it a lot this month. I used two layers of the frame to give it more dimension and pop!

gold-embossing-new

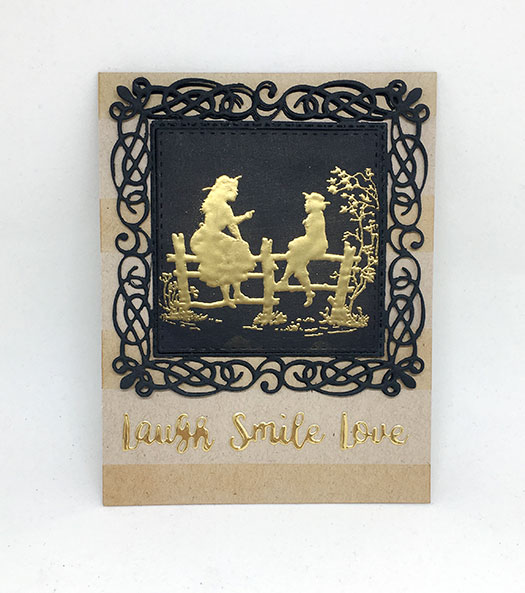
I cut those words out of gold foil paper. But you could also heat emboss them using the same gold embossing powder to make them completely match. My gold colors were just close enough!

The stripes are made using a clarity brush and Tea Dye Distress Ink…I masked off the stripes using Post It tape!

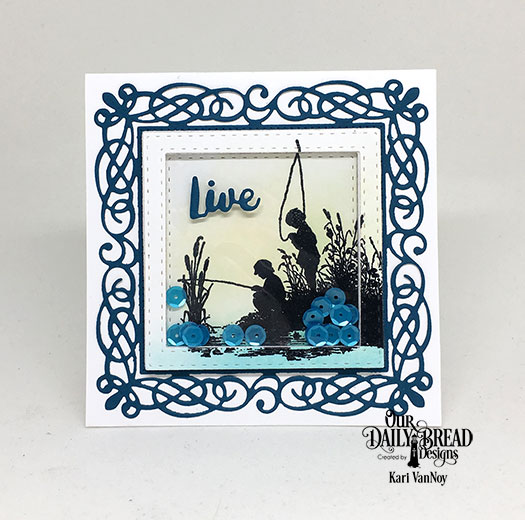
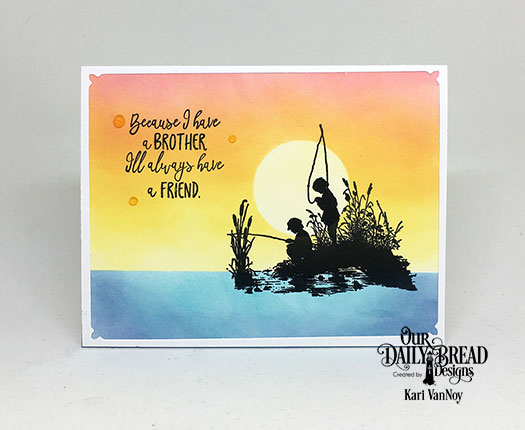
3. OMBRE INKED SISTERS

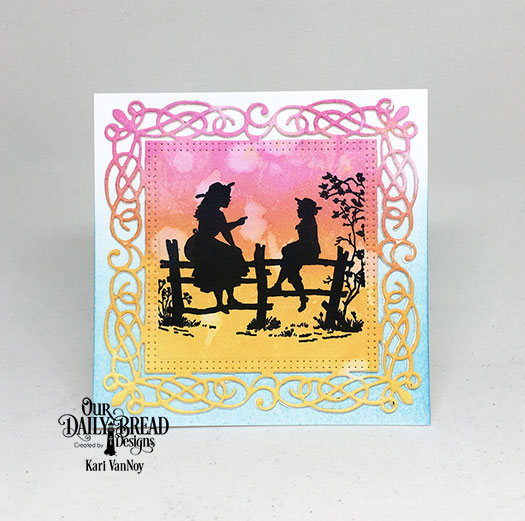
The last way I have to share with you today is to ombre ink the stamp! Here I used different colors and a Misti. I inked up the first color, then stamped. Added the second color further down the stamp, then stamped. And then the third color at the bottom of the stamp, then stamped again. Having a MISTI really helped with this technique!

sunshine-sisters-make-the-best-of-friends

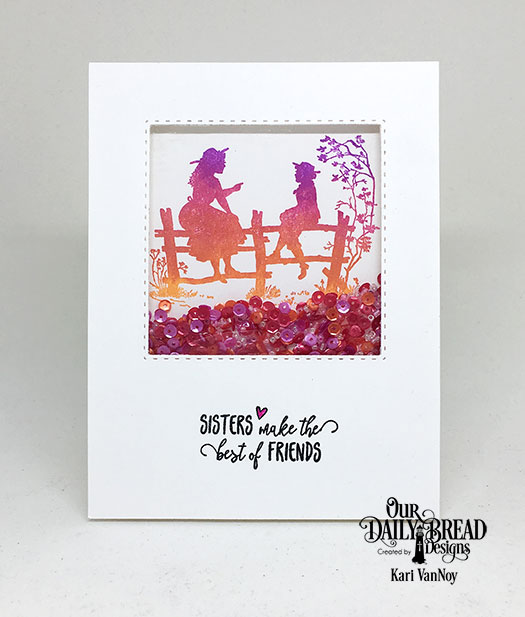
I could’t resist turning this into a shaker card using all the matching colors of sequins. I cut out the top layer with the Double Stitched Square Dies, then added two layers of foam tape. Be sure to add the sequins before you tape the panels together!

I can think of a few more ways to using silhouette stamps, but those will have to wait for another day! (How about a watercolored background or Sponge inking inside a shape?) Lol…I could go on.

If you have any other suggestions for a different way to use your Silhouette stamps, please let me know in the comments below. Thanks for stopping by!

Comments { 0 }
Sunshine-flip-flop-lever-card-inside

Cards for Brother

Hello! Today I am featuring the new “Brother In Christ” stamp set from Our Daily Bread Designs. If you have been following me, you know that I don’t make a lot of masculine cards and so this was a fun challenge for me.

The first card was one I knew I wanted to make just as soon as I saw this new set! It’s a beautiful square card with a shaker element! I wanted the sequins to mimic the look of the water.

LIVE FOR FISHING!

Sunshine-Live-for-fishing

I used the Flourishy Frame Die to create the frame around my scene, but also used the Double Stitched Square Dies for the shaker portion. The stamp of the fishermen fit perfectly inside…and then when I cut the frame with the square dies, added a fun layer of dimension with a portion of the picture outside of the shaker! I’m not sure if I explained that correctly, but I really liked the way it turned out!

The “live” sentiment is from the Inspiration Words Dies.

SUNSET FISHING

Then, I knew I had to make a sunset fishing card. We used to love to walk around the vacation lake at sunset and I thought sunset fishing would be fun. After he saw this card, my husband said…”no, you need to go fishing in the morning!” Well, what do I know about fishing? Not much. But I know a sunset fishing CARD was a really pretty idea! Lol.

Sunshine-sunset-fishing

I masked off a circle for the “sun” and strategically placed it on the card just where I knew those fellas would be stamped. Then I sponged on Distress Oxide inks in some of my favorite colors: Abandoned Coral, Orange Marmalade, Squeezed Lemonade and Antique Linen for the sky; Faded Jeans and Peacock Feathers for the water. Then I stamped the image in my favorite crisp black ink.

For my last card today using this set, I tried my hand at a Lever Card:

sunshine-flip-flop-lever-card-front-new

Sunshine-flip-flop-lever-card-inside

My brother is definitely a beach kinda guy and he almost ALWAYS wears flip flops, so this card was just a natural. I really love the mix of fonts on these sentiments! I used the Lattice Background Die to ink on a interesting pattern on the front, and then used the By The Shore Collection Paper for the fun flip flops!

I hope you enjoyed a look at the new Brother In Christ stamp set. For more information and details, visit the Our Daily Bread Designs website here. Thanks for stopping by!

Comments { 0 }
sunshine-fish-coloring-page-1

June Release for Our Daily Bread Designs

Happy June! Today is a very special day because it’s the new JUNE 2018 Release for Our Daily Bread Designs! Today I have three projects to share with you.

I’m using affiliate links when possible, at no additional cost to you. Thank you for supporting my blog!

The first uses two brand new products that I love: Sister in Christ stamp set and Flourishy Frame Die set.

sunshine-for-a-special-sister

Aren’t they just beautiful? I added a few sequins and Jewel Nuvo drops to add some fun! For the background, I masked the edges of the die cut square and then inked on Distress Inks in Picked Raspberry, Cracked Pistachio, and Evergreen Bough. Then, I stamped the image over the top in my favorite crisp, dark black ink.

The next two projects use the new God’s Beauty Coloring Pages. These pages are sized at 3.5 in x 4.75 in, so they will easily fit on an A2 size card.

sunshine-poppy-coloring-page

I added some glitter drops and Nuvo Jewel drops for fun. This page I colored with Copics, and as we all might know, the reds/oranges have a tendency to bleed…so I did have a bit of a problem with bleeding on the flower itself. But I found that the paper was nice and smooth. I added just a touch of sparkle in the middle of the flowers and on the butterflies.

sunshine-poppy-close-up

On my second panel I used my favorite Prismacolor colored pencils on the coloring page. At the time of posting this, there is an amazing sale on these pencils at Amazon here! (A WAYYYYYY better deal than I got when I bought my set. Lol.)

For this card, I colored up the fish coloring page and popped up a turtle on the top for a dimensional look! The sentiments on both cards are from the Inspiration Words Die. I partially inked the die cut word using Distress Inks in Scattered Straw (on the fish card) and Abandoned Coral (on the poppy card). I’ve been collecting the Mini Distress Inks lately so I can keep even more colors organized in my craft room!

sunshine-fish-coloring-page-1

I have a quick video sharing 6 Ways To Add Dimension and Interest to a flat card. Watch it here or on Youtube:

**VIDEO


Thanks for visiting today! I’ll be back next week sharing a few more of the new June release items that I love. See you then!

Comments { 0 }