Tag Archives | ODBD
sunshine-get-well-close-up-on-plaid

Get Well Soon Bandages

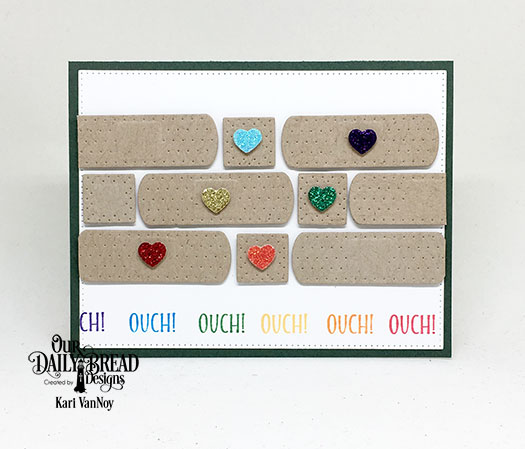
Hello! Today I’m showcasing the bandage dies from Our Daily Bread Designs. I love these bandage dies…when you die cut them and then emboss them, they look like real bandages!

Here I used kraft paper to cut and emboss the bandages:

sunshine-ouch-bandge-card-new

The “Ouch” sentiment is from the Get Well Wishes stamp set. (This stamp set is just full of great wishes!) I added some glitter hearts in rainbow colors to match the colors of sentiments. The heart die cut is from this set.

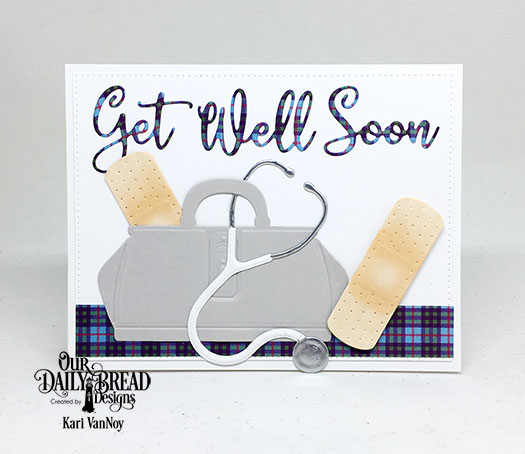
My next card, I die cut the bandage from white paper and then used my Copics in E30 colors to color them up. I love this look…I really feel like they look like the real bandages!

sunshine-plaid-get-well

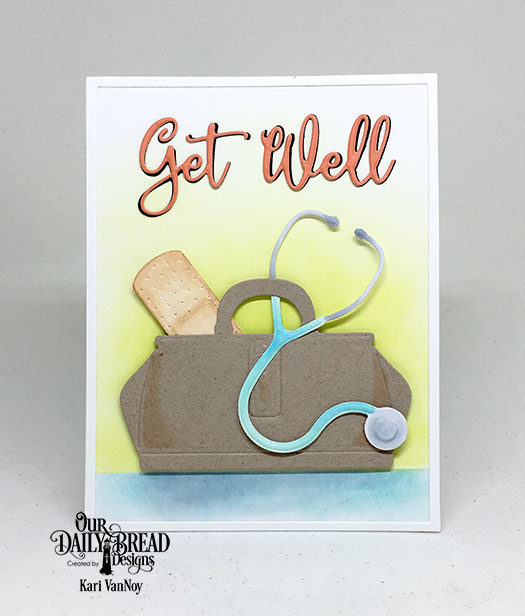
The stethoscope and doctor bag dies are now some of my favorites! I did use a bit of silver embossing powder on that stethoscope to give it a metallic look.

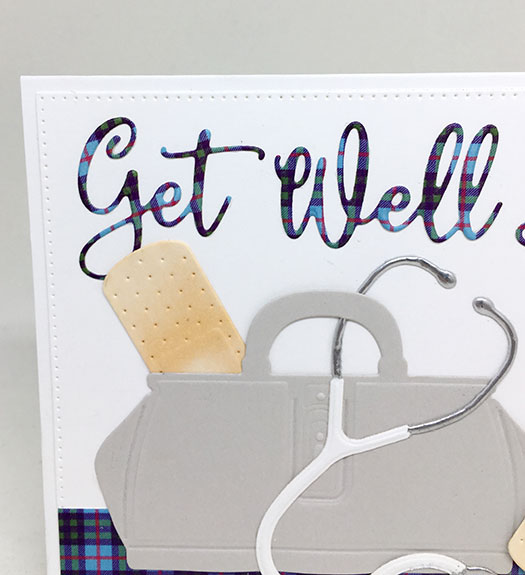
The plaid paper is from the Boho Bolds paper pad and I used this paper for the Get Well Wishes die, too! That is some good looking plaid… Here’s a little close up:

sunshine-get-well-close-up-on-plaid

I think this Get Well Soon die is such a great size! When you make a landscape card (like this one), it will all fit on an A2 size card (4.25″ x 5.5″).

When you want to create a portrait card, the Get Well Soon dies will also fit using only the first two words:

sunshine-get-well-bag-and-bandage

I hope you enjoyed this look at these dies from Our Daily Bread Designs. For more inspiration from the design team, be sure to visit the Our Daily Bread Designs blog! Thanks for stopping by.
Comments { 0 }
sunshine-for-a-very-special-dentist-v2

August Release with Our Daily Bread Designs

Hello and welcome to a preview of some of the August new release items for Our Daily Bread Designs! This release is a beautiful assortment of get well wishes and products to show gratitude for our dentists, nurses, doctors, and such. I have a few projects to share highlighting some of the new release!

First is this unique set called King of My Heart. It is a stamp AND die set, with lots of great sentiments.

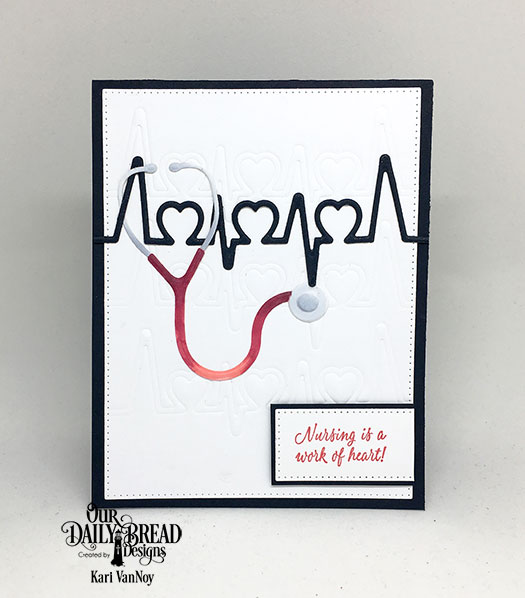
sunshine-nursing-is-a-work-of-heart

The die is that unique heartbeat…and here I cut it with black paper, and then dry embossed it multiple times over the white background. The stethoscope is a separate die, which I cut and colored with copics. If you know a nurse or doctor, this set is perfect!

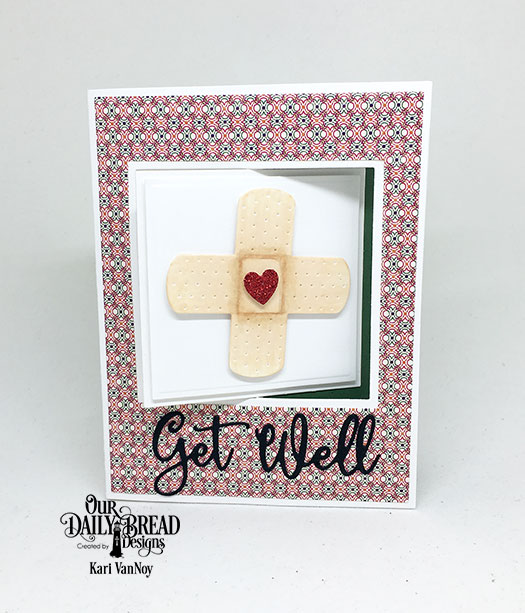
Next is another great die…it’s called Bandages, and there are a variety of sizes and shapes to choose from. I am showing just one of the bandages, which I cut out of white paper and then colored with Copics in E30, E31, and E33. I added a glitter heart that I cut with the King Of My Heart die. I used the Lever Card die (from a previous release) to make a fun, interactive card for this one.

sunshine-get-well-bandage-lever-card

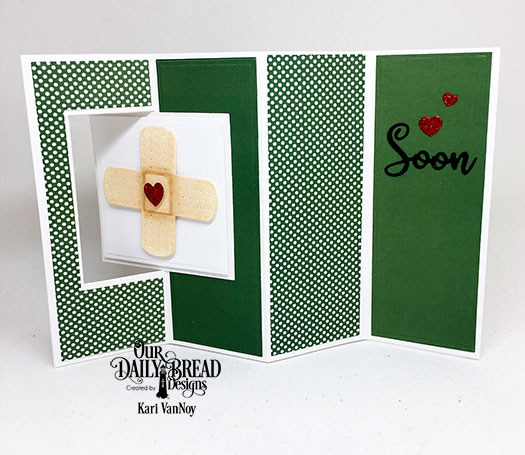
and here’s the inside:

sunshine-get-well-bandage-inside

The Get Well Soon sentiment is just the right size!

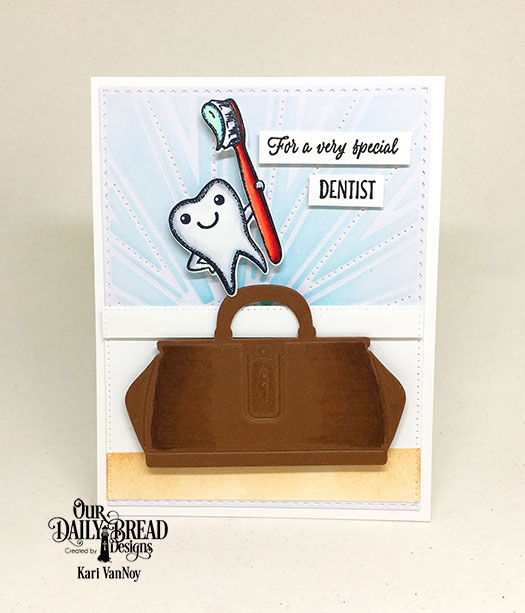
My last card today showcases the new Happy Smiles Stamp/Die duo set and Doctor Bag die. I am absolutely in love with these sets! Just look how cute that little smiling tooth is holding his toothbrush!!

sunshine-for-a-very-special-dentist-v2

I used the Sunburst Background die to create a stencil on the background with Distress Oxide ink in Salty Ocean. I used Copics on the tooth and to add some shadowing on the Doctor’s Bag.

For more inspiration and to see the whole release, be sure to visit the Our Daily Bread Design New Release blog post here and take a look at all the designer’s projects!

I hope you enjoyed a small look at some of these new products. I’ll have more to share next week!

Comments { 0 }
sunshine-rainbow-hugs-to-you

Rainbow Hugs for You

Hello! Today I have some rainbow hugs for you!! Yes, I am taking a closer look at the Hugs Stamp/Die Duo from Our Daily Bread Designs and I just knew they would look great with a rainbow of colors.

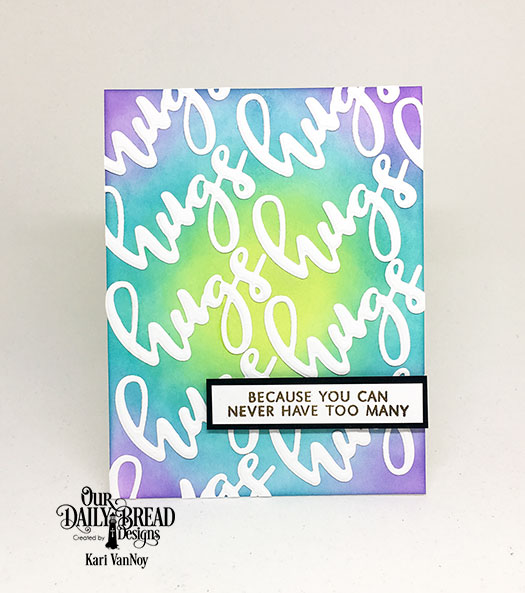
I used Distress Oxide to ink up the backgrounds in a variety of colors and then I added the Hugs die cut in a diagonal pattern. Isn’t it cute? This hugs die cuts AND embosses…which adds some great interest to the card.

sunshine-hugs-because-you-can-never-have-too-many

That sentiment is oh-so-true! You can never have too many hugs! This sentiment comes in the stamp/die duo and I love all of the sentiments included.

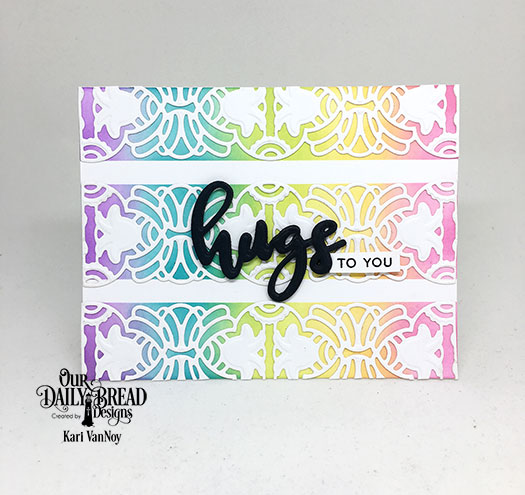
On my second card I also used a rainbow of colors, and this time I masked off the stripes to leave some white space. Then I added the Art Deco Border Die over the inked portions. This is my first time using this die and I’m so pleased with how smooth it cut…it’s just beautiful!

sunshine-rainbow-hugs-to-you

I used spray adhesive on this one (my first time!) and it adhered like a dream. I recommend using a box to spray in and a well ventilated area!

I popped up the hugs sentiment on black craft foam to give more dimension and really make that “hugs” die pop!

I hope you enjoyed these fun, bright cards today. For more inspiration and to see more products from the July release, be sure to visit the Our Daily Bread Designs blog post here.

Rainbow hugs to you!

Comments { 0 }
sunshine-faith-in-god-quilting-squares-bw

Quilting on cards

Hello! Today I’m sharing the new July release from Our Daily Bread Designs….and it’s all about quilting! Are you a quilter? Well, you CAN be a “card quilter” with these new designs!

The first new product I’m sharing is the Quilted Background Die. It is a coverplate die, so it will fill the entire card (size A2). Let me show you a few quilts I designed:

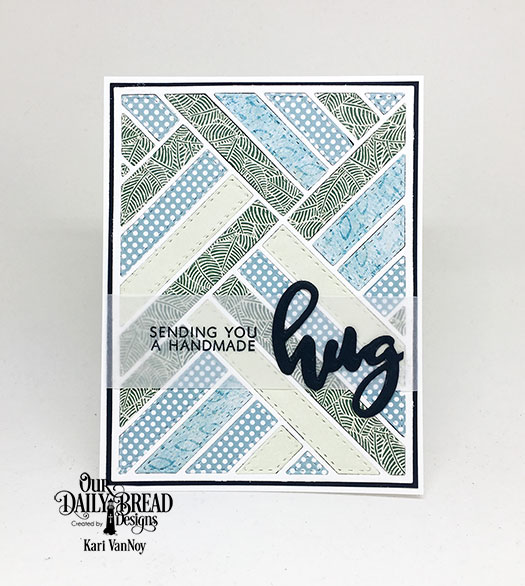
sunshine-sending-you-a-handmade-hug

On this one I also used the new Hugs Stamp & Die Duo. The die is actually the plural word “hugs,” but you can cut off the “s” and create the singular word to go with this sentiment. I really like the idea of sending a handmade hug! (It reminded me of a quilt…that’s like a hug in itself!) By the way, one more thing I LOVE about the new release stamp/die duos: they are CLEAR STAMPS!! Yay! That makes them so easy to line up and use with your stamp positioner, in my humble opinion.

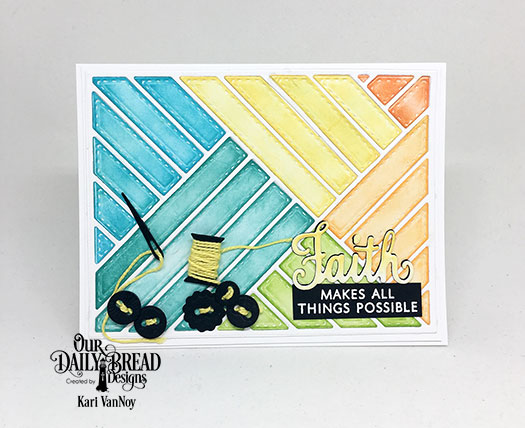
For the next one I used Distress Inks to create a Color Block quilt. The new Walk by Faith Stamp/Die Duo set is also a beautiful set, and I used that for the sentiment.

sunshine-color-block-faith-makes-all-things-possible

Isn’t the needle and thread so cute?! It’s from the new Sewing Set Dies and I love them! They work so well with this theme of quilting.

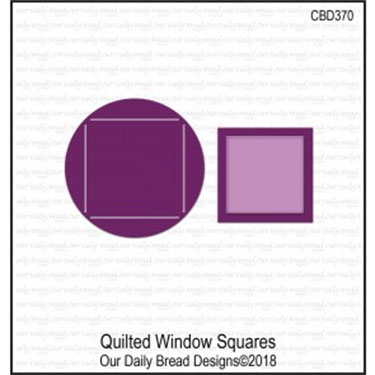
Now, for the last one I have to share with you, I first have to show you the dies I was working with…because you might NOT BELIEVE that they can create such amazingness! Here’s the dies, called Quilted Window Squares:

quilted-window-squares-image

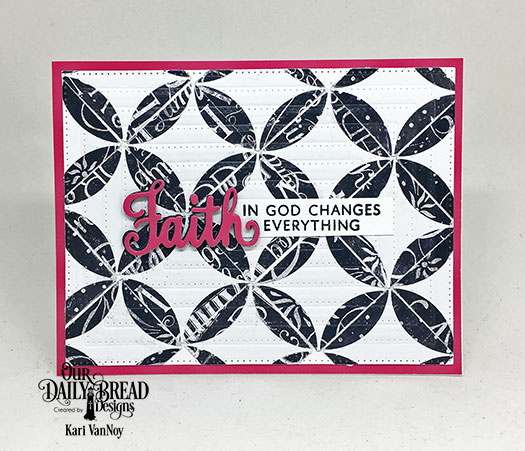
It looks like an unassuming circle die (with some score lines) and a square die. But if you put them together just right, you can create a beautiful quilt like this:

sunshine-faith-in-god-quilting-squares-bw

Isn’t that awesome!?! Such little dies can create such a beautiful quilt. I used the pierced rectangles dies to emboss over the top of the quilt (to look like quilting!)

I hope you enjoyed a look at the new products for July and some fun quilted cards! For more information and inspiration for this month, visit the Our Daily Bread Designs website here.


Comments { 0 }
gold-embossing-new

3 Ways to use a Silhouette Stamp – Sister cards

Hello! Today I am excited to share with you 3 Ways to Use a Silhouette Stamp using the set “Sister Time” by Our Daily Bread Designs.

I have my absolute favorite go-to for using silhouette stamps, and that is to Distress Ink the background, then stamp over it in black ink. But today I have THREE ways to show you!

Disclosure: Affililate links used when possible, at no extra cost to you. By clicking on these links you are supporting my blog just a little and I thank you very much!

  1. SISTER ADVICE

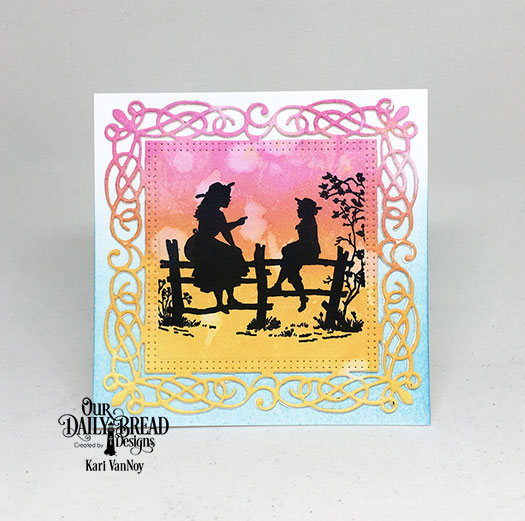
The first way is Distress Inking a panel, and then using a die to cut it out. I used the Flourishy Frame Die and Distress Oxide Inks in Picked Raspberry, Spiced Marmalade, and Fossilized Amber ink here.

sunshine-sister-advice

I did splatter some water over that background, then I allowed it to try before I die cut the frame. I masked off the edges before adding the stamp from Sister Time in my favorite crisp black ink.

Doesn’t this just look like an older sister giving advice to the younger sister? I love that.

2. LAUGH SMILE LOVE GOLDEN ADVICE

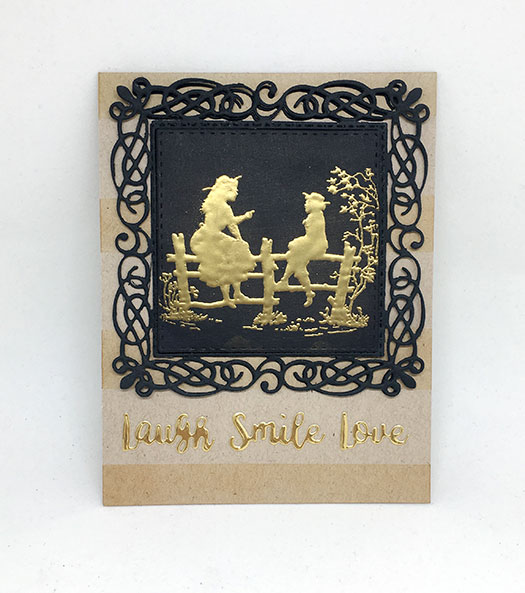
Another way to get more out of your silhouette stamps is to GOLD emboss them. Here I used black paper to gold emboss, then I cut it out using the Double Stitched Square Dies. I added it onto black fun foam before attaching it to the Flourishy Frame Die. I love that die and have used it a lot this month. I used two layers of the frame to give it more dimension and pop!

gold-embossing-new

I cut those words out of gold foil paper. But you could also heat emboss them using the same gold embossing powder to make them completely match. My gold colors were just close enough!

The stripes are made using a clarity brush and Tea Dye Distress Ink…I masked off the stripes using Post It tape!

3. OMBRE INKED SISTERS

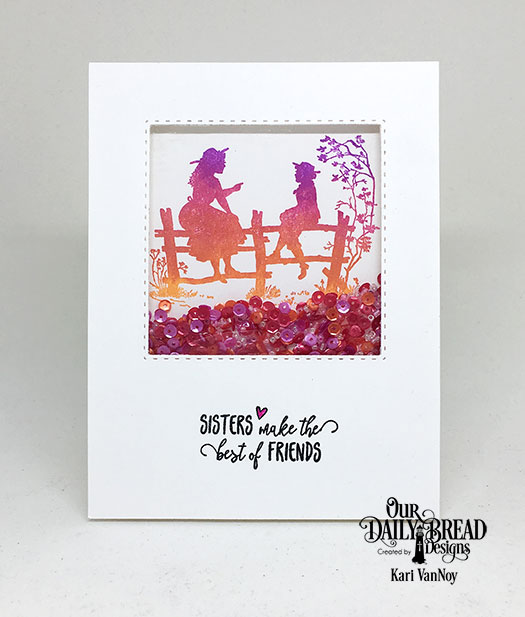
The last way I have to share with you today is to ombre ink the stamp! Here I used different colors and a Misti. I inked up the first color, then stamped. Added the second color further down the stamp, then stamped. And then the third color at the bottom of the stamp, then stamped again. Having a MISTI really helped with this technique!

sunshine-sisters-make-the-best-of-friends

I could’t resist turning this into a shaker card using all the matching colors of sequins. I cut out the top layer with the Double Stitched Square Dies, then added two layers of foam tape. Be sure to add the sequins before you tape the panels together!

I can think of a few more ways to using silhouette stamps, but those will have to wait for another day! (How about a watercolored background or Sponge inking inside a shape?) Lol…I could go on.

If you have any other suggestions for a different way to use your Silhouette stamps, please let me know in the comments below. Thanks for stopping by!

Comments { 0 }