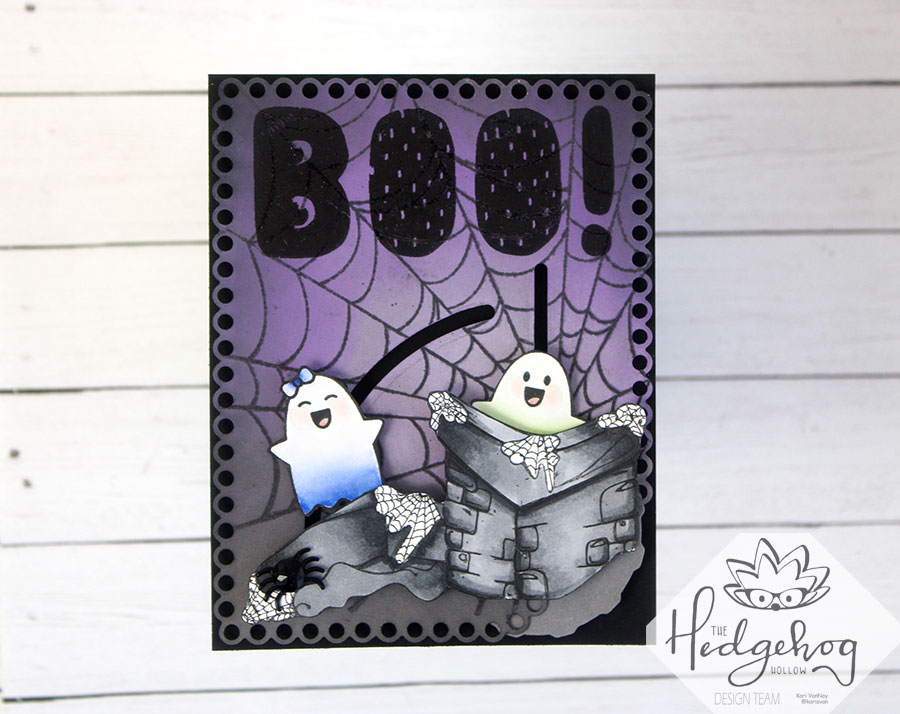
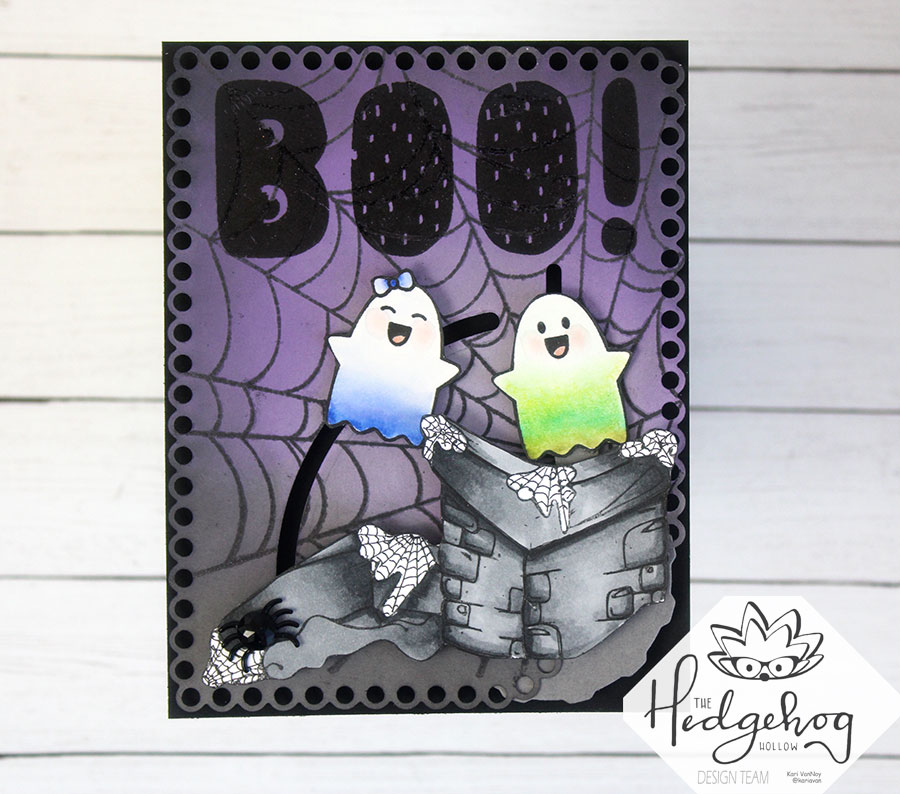
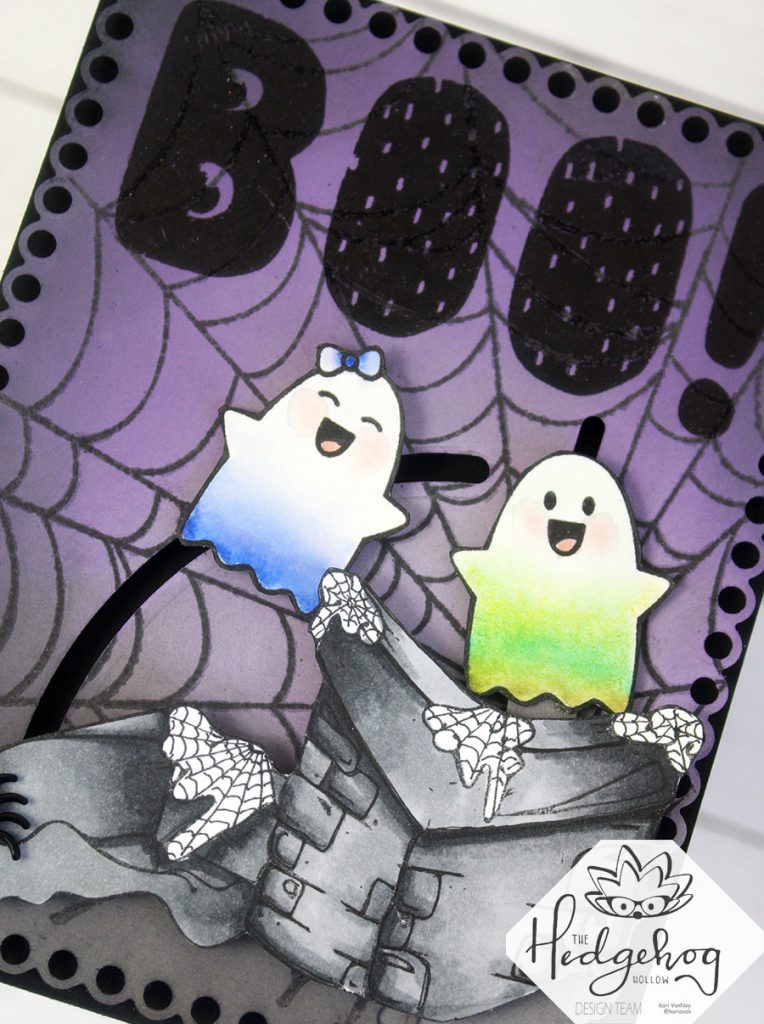
Hello! Today I have a fun Halloween card using the Queen’s Castle from Miss Ink Stamps. This is a beautiful castle, but when you color it up just a little differently, it becomes a Haunted Mansion!
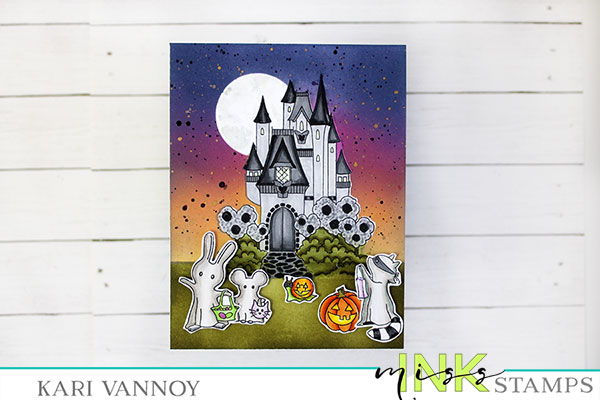
I paired it with the Boo Crew stamp set Trick-or-Treaters. How cute are they!? I love that the rabbit, mouse, and raccoon are all dressed as ghosts!
I’ve been waiting for the perfect card to blend these ink colors together for a background. This is the perfect card for these colors!
I have a video showing you how to re-create this card, watch it below or in HD on YouTube:
I’m often asked what supplies I use to make my cards and projects, so I’ve put together a list using affiliate links when possible. If you make a purchase with these links I may receive a small commission. These help me to keep up with blog costs and continue bringing you fun projects. Thank you so much for your support!
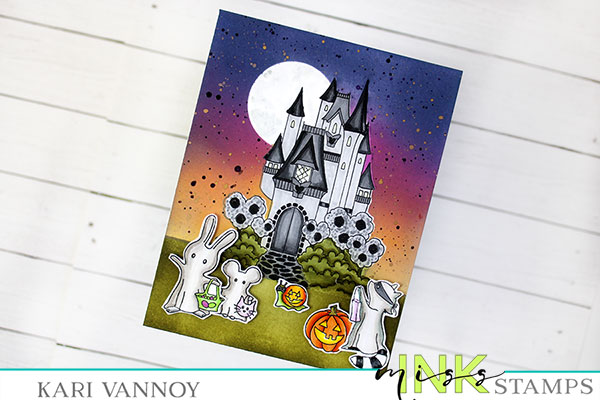
I added that moon behind the castle using a simple circle die. Easy masking makes it all possible! (for all the details, see the above video!)
Thanks for stopping by today! I’ll be back soon with more card ideas.