Hello! Today I have a geometric background for a geometric animal card…and while last week I published a masculine geometric card, this week the cards are definitely more feminine.
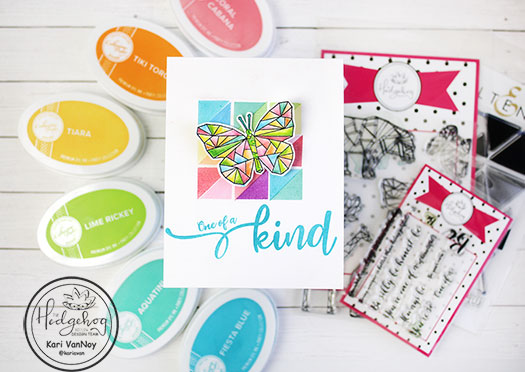
To make the background, I took an isosceles triangle stamp and stamped it twice to create a square. I did this 9 times to create an even larger square in a variety of ink colors.
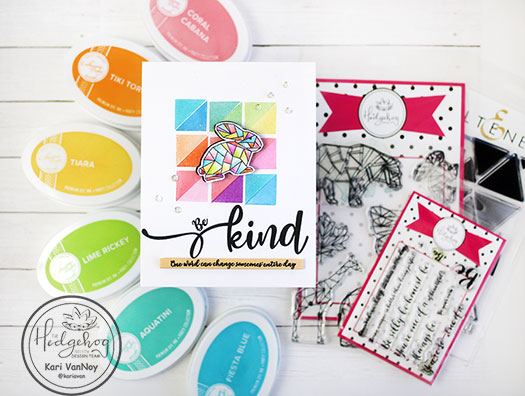
Then I stamped the Geometric Zoo animals (a bunny and a butterfly) with Versafine Onyx Black ink. I watercolored them in the same ink colors as stamped on the background.
The sentiment is stamped in a blue ink to match, and I added green gemstones on the butterfly body to finish it off.
I just love all the colors of these cards!
I’m often asked what supplies I use to make my cards and projects, so I’ve put together a list using affiliate links when possible. If you make a purchase with these links I may receive a small commission. These help me to keep up with blog costs and continue bringing you fun projects. Thank you so much for your support!
I hope you enjoyed this geo background technique today! I’ll be back real soon with more card inspiration!
Hello! Today I have a secret to share with you: it’s my formula for making masculine cards. This is also a part of my FINAL for Level 2 of the Altenew Educator’s Certification Program (AECP).
The Final Challenge was to create 4 Masculine Cards using 3 components of the techniques I learned in Levels 1 & 2 of the AECP. The components I chose were:
Stencil Techniques
Impressive Heat Embossing
Let It Shine
I also pulled together 3 masculine themes (metallic, nature, & geometric) and 3 colors to create all of my cards. I get a lot of questions on how I create Masculine cards, so today in my video I’m sharing my SECRET FORMULA for making Masculine cards (it’s not a secret anymore)! Watch the video below to find out the formula I use, or watch it in HD on YouTube:
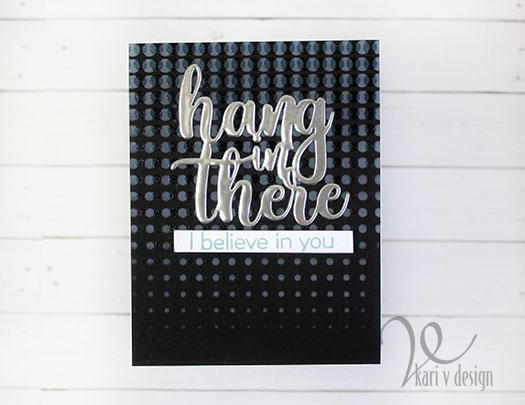
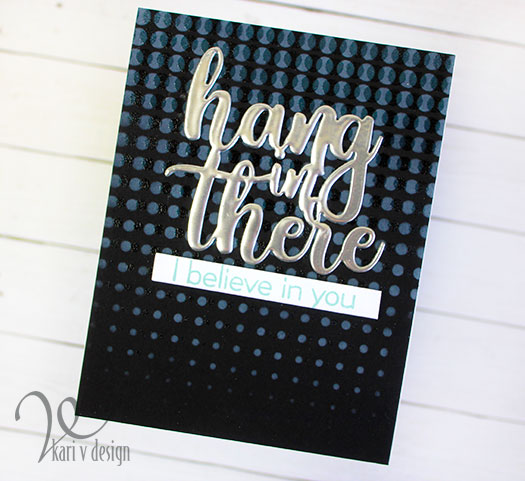
For my first card, I used some stencil techniques: inking with Distress Oxide on dark cardstock & offset stenciling. I used the Halftone stencil to ink on some of the new Speckled Egg Distress Oxide ink, then let it dry. Once it was dry, I offset the stencil just a bit to add some Versamark sticky ink and added some Distress Embossing Glaze & heat set that. The embossing glaze is translucent so you can see through to the inking, but it gives a shiny element to the background. (So neat!)
I also created a temporary “holder” to emboss that die cut sentiment three times. This holder was so helpful so I didn’t burn my fingers or get any tweezer marks in my silver embossing!
The sentiment adds a metallic look for the “Let It Shine” inspiration on this card! I love a metallic element on a handmade card. I stamped the subsentiment with the same Speckled Egg Distress Oxide and popped it up with foam tape.
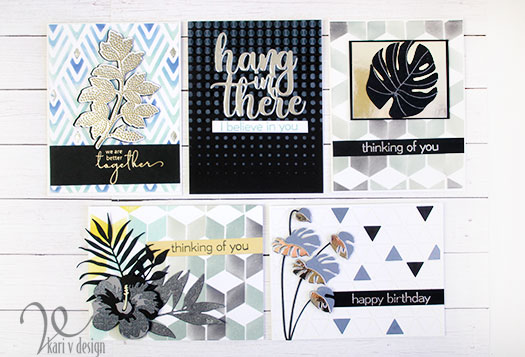
For my second card I die cut a cover die and adhered it to a white card panel…then I filled in a few of the spots with colored cardstock to get that geometric look!
Layered Monstera Leaves give this card a 3D look
I die cut some monstera leaves in steel gray and silver metallic (for that shine)! Then I popped them up with foam squares. To match with the silver theme, the sentiment is heat embossed in silver. This card turned out to be my husband’s favorite card of them all!
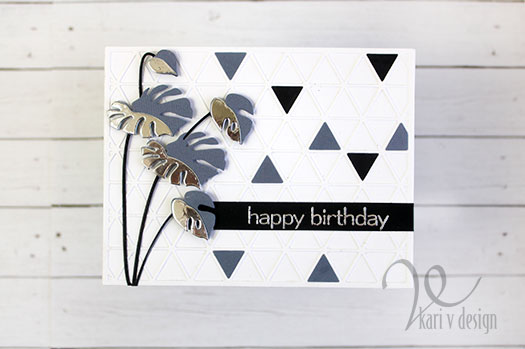
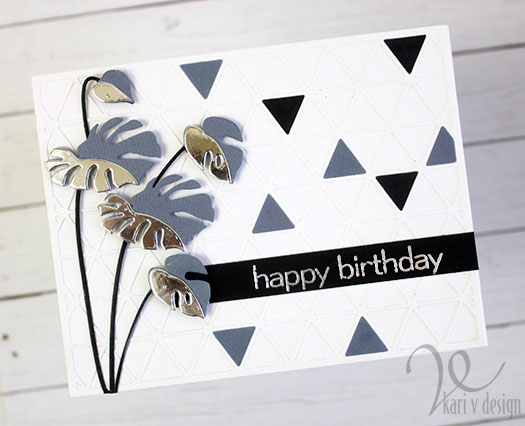
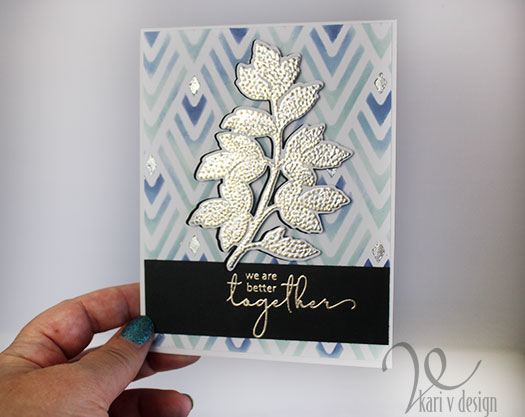
For the third card I’m bringing in some selective stenciling! First I stenciled the entire background in Speckled Egg Distress Oxide, then I added a darker blue to just a portion of the stencil. To the very smallest portion, I added some Glacier Paste in Quicksilver for some shine (it dries to look like foil)!
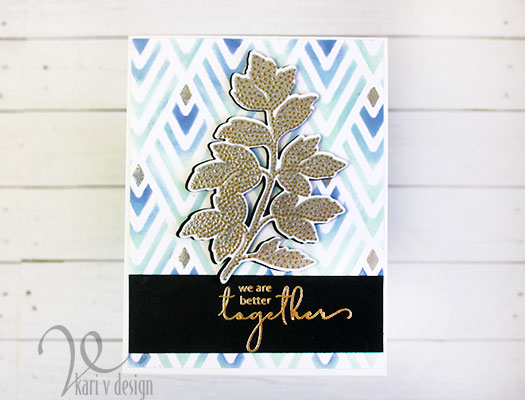
We are better together
For the leaves, I heat embossed it TWICE. Once with a silver embossing powder, then I stamped the dots in Versamark and embossed with a gold embossing powder. This is a neat technique, as the embossing powders kind of melt into each other. I think this is a great look!
Stencil techniques, Embossing techniques, and Let It Shine Techniques are glorious together!
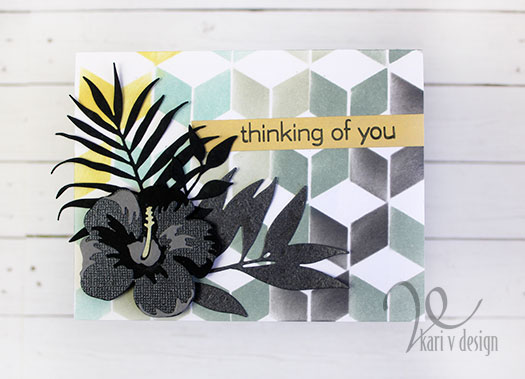
For my fourth card, I created a geometric background using the Cube Builder Stencil. I spaced the cubes apart just a little and gave them more of a “chevron” appearance, using colors I chose for the theme, but adding in a bit of Antique Linen. It turned out a little more yellow than I expected, but that just added a sunny, happy look.
Flowers and leaves in gray, black, and metallic
I die cut some leaves and one hibiscus using black, gray, and metallic papers. This adds a more masculine feeling. (Don’t you want to take a trip to Hawaii now?) I stamped the sentiment on a strip that I inked with Antique Linen Oxide to match.
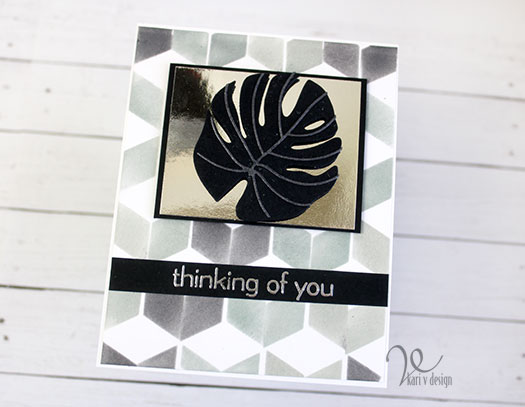
Now, if the flower is a little over the top for you (my husband does like flowers, but it’s not for every man!), I made a variation of this card omitting the hibiscus flower.
It’s the same stencil background, using only black and gray inks. Then I added a metallic paper focal point with a black frame to the middle. The monstera leaf is popped up with foam squares to give even more dimension.
So there you have 5 masculine cards, using 3 Techniques, 3 Themes, and 3 Colors (mostly)! It’s a fun challenge to take, and I hope you enjoyed the process with me.
I’m often asked what supplies I use to make my cards and projects, so I’ve put together a list using affiliate links when possible. If you make a purchase with these links I may receive a small commission. These help me to keep up with blog costs and continue bringing you fun projects. Thank you so much for your support!
I completely enjoyed my experience with the Altenew Educator’s Certification Program! I highly recommend it to you if you are interested in learning a lot of techniques, getting better at cardmaking, and teaching techniques to others.
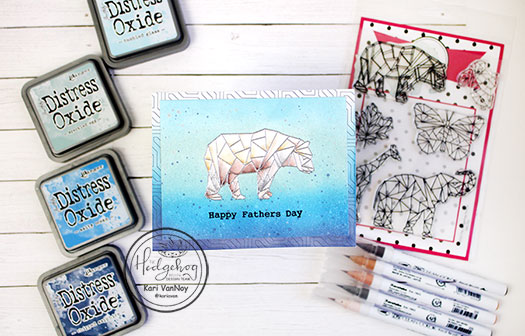
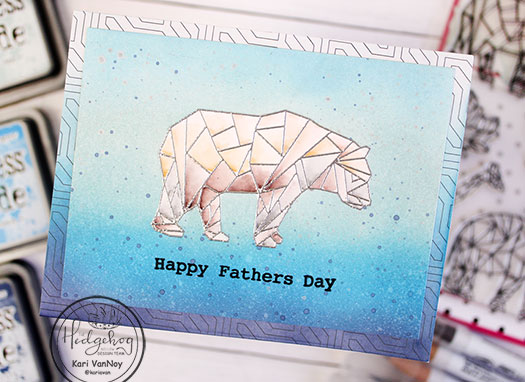
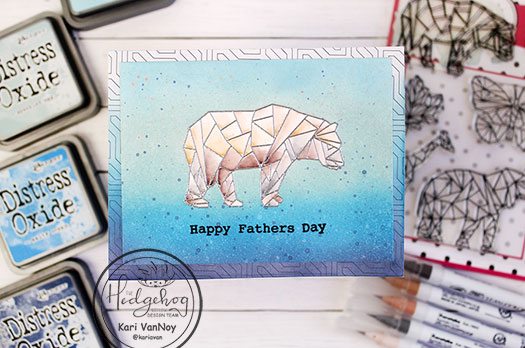
Hello again! Today I’m up on the Hedgehog Hollow blog with a masculine geometric bear card. This is perfect for Father’s Day that’s coming up soon!
Head on over to the HH blog to check out all the details. I also have a quick video that you can watch below or in HD on YouTube:
I’m often asked what supplies I use to make my cards and projects, so I’ve put together a list using affiliate links when possible. If you make a purchase with these links I may receive a small commission. These help me to keep up with blog costs and continue bringing you fun projects. Thank you so much for your support!
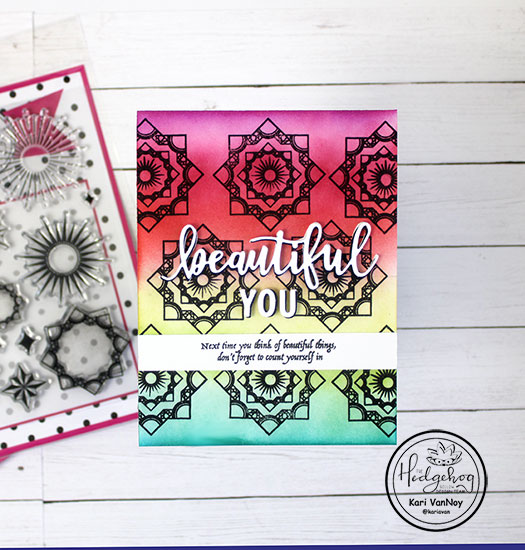
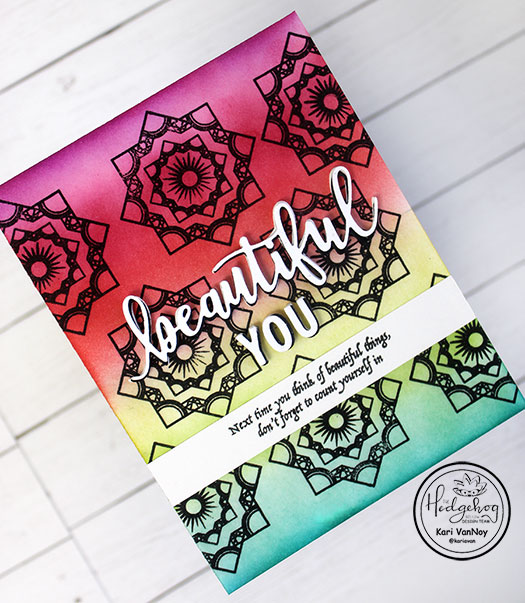
Hello, friends! I am excited to bring you this card today, using a few stamps from the Hedgehog Hollow January Kit. This kit is full of stars, moons, and sunbursts and I was so inspired by it!
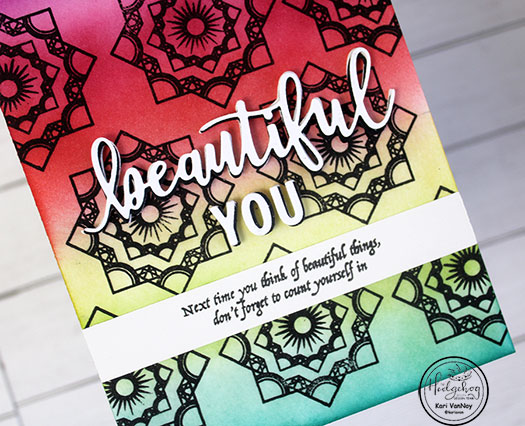
So today, I am taking 3 of the stamps from the “Given Direction” set (the one with all the stars) and stamping them inside of each other to get this fabulous geometric look! (you can see a bit of the stamp set I chose in the photo below)
I had a lot of fun stamping this background, and I began using my MISTI for the largest stamp. Then when I went to stamp the smaller stamp, I quickly changed to an acrylic block to get it done faster! I used the acrylic block to stamp the smallest stamp in the middle as well.
I have a video to show you how this card came together, watch it below or on YouTube:
After I finished all the stamping, I let this panel dry for quite a while because I used black pigment ink and I didn’t want it to smear when I inked on the color.
I chose the beautiful Catherine Pooler inks for the colors, and I used a makeup brush to blend. Well, I also used one stencil brush (LOL)…and you will see why if you watch the video!
These inks blended so well! I loved the sentiment from the kit that says “Next time you think of beautiful things, don’t forget to count yourself in”…so I stamped that on a sentiment strip as wide as the card panel itself. Then I added the die cut “beautiful YOU” (from my stash). I cut it out from white cardstock, added a black shadow, and then mounted it all onto fun foam before adhering it to the card.
I’m often asked what supplies I use to make my cards and projects, so I’ve put together a list using affiliate links when possible. If you make a purchase with these links I may receive a small commission. These help me to keep up with blog costs and continue bringing you fun projects. Thank you so much for your support!
I hope you enjoyed this colorful project today! I know I loved creating it. If you haven’t picked up a January 2020 Kit, what are you waiting for? It might be my favorite of all!
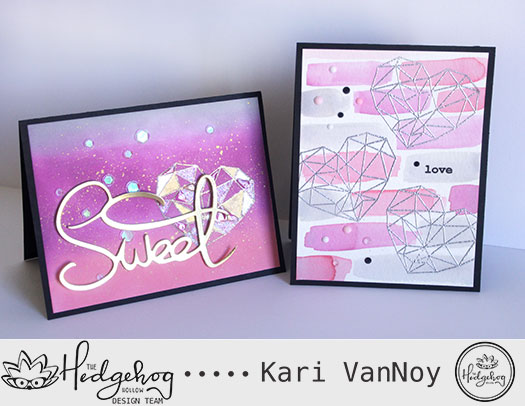
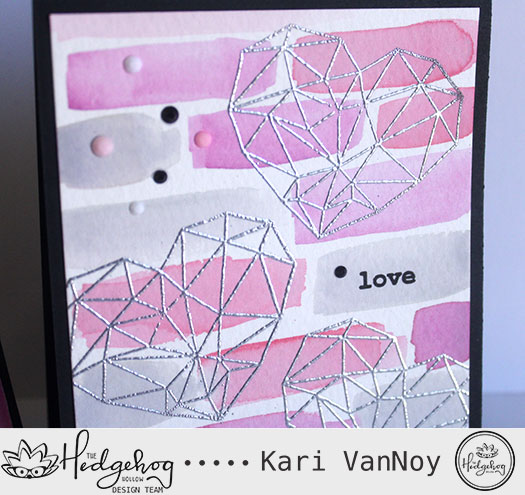
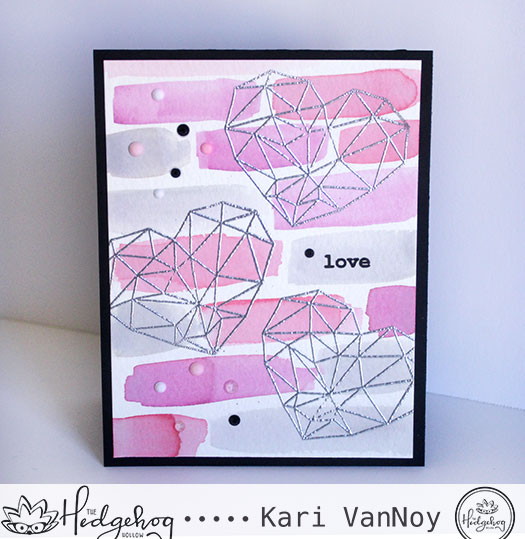
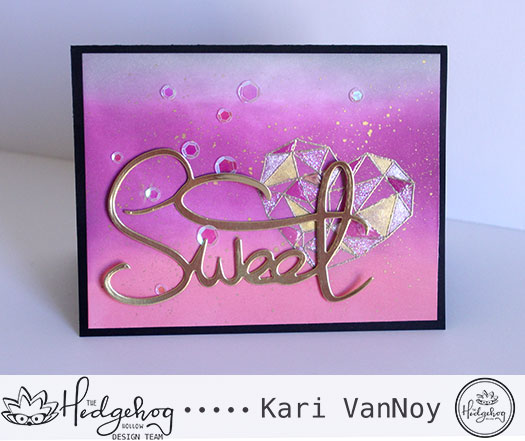
Hello! Today I have some fun Geometric heart cards to share with you. I’m on the Hedgehog Hollow blog again today to talk all about how I made them, but I wanted to give you a sneak peek here! I used the same Distress Oxide colors on both cards: Worn Lipstick, Seedless Preserves, and Weathered Wood.
Same colors, different techniques.
Check out the interest in that card on the left…in the geometric heart I added some “extras:” gold sparkle paint, Stardust Stickles for the glitter, and Glossy accents! It makes that heart look so magical in real life.
So, which card do you like better? Are you TEAM SILVER or TEAM GOLD?
Head on over to the Hedgehog Hollow blog here to read the details! Thanks for stopping by!
Hi I'm Kari. I'm a creator, a card maker, and a day maker! I am Lucky in love to a supportive husband, blessed to raise 3 kids (all moved away now!), and happy to be watched over by 2 dogs.
I originally started this blog to remind me to be happy amid adversity, and I hope it inspires you, too!