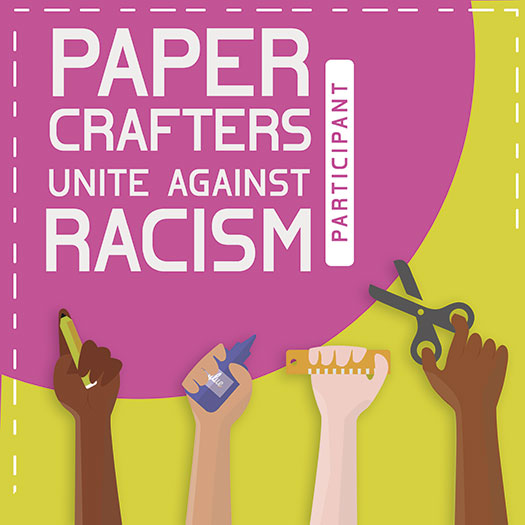
Tag Archives | Floral cards
NEW-Square-[Participant]-01

Crafters Unite Against Racism

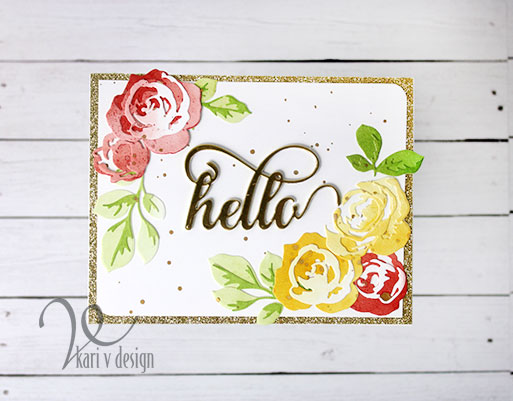
Hello! Today I am a part of a blog hop for Papercrafters Unite Against Racism. My projects today are some of my favorite flower layering stamps, with the idea that I could maybe make you smile. I’d love to send flowers to those of you who are angry, sad, upset, or discouraged during this time.

Sometimes, as crafters, we don’t know exactly the right thing to say or do. My heart hurts and I’m so sensitive to this topic, but I also don’t want to say the wrong thing. So, these flowers are hopefully doing the job making you smile today.

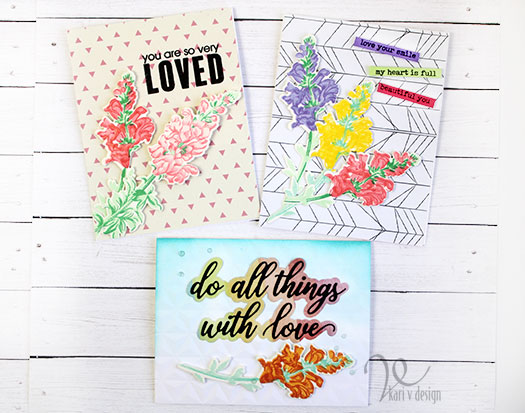
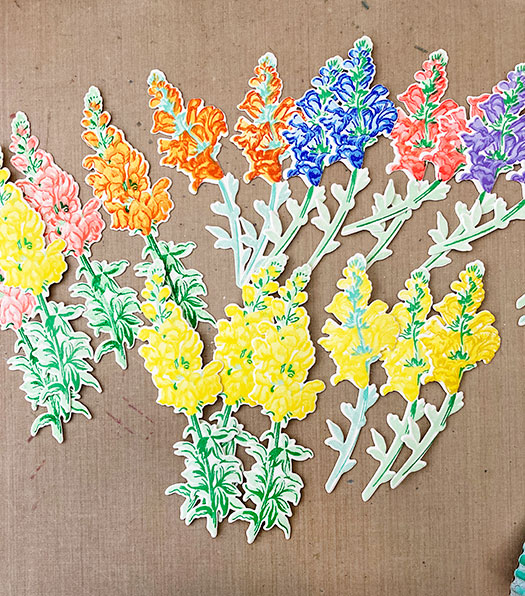
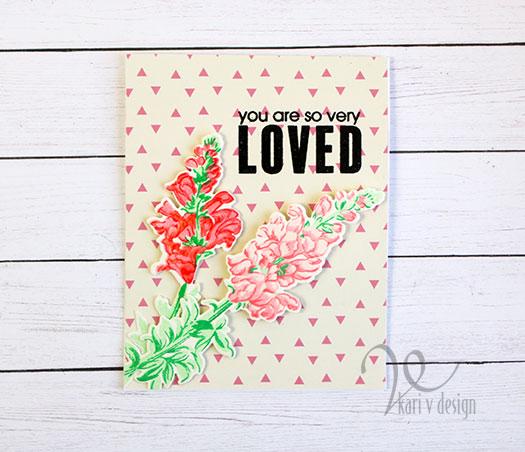
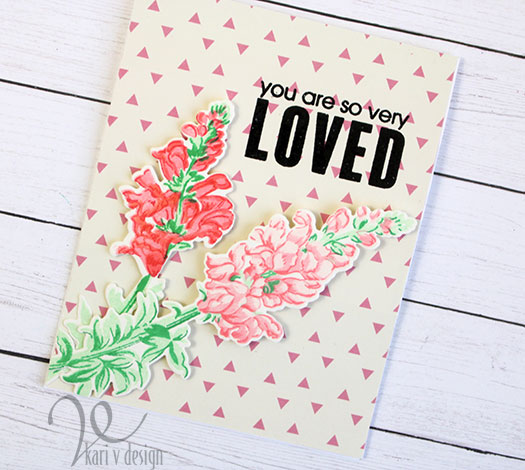
While I financially cannot send flowers to everyone, at least I can create some floral cards to share! So I have some layered snapdragon cards (some of my favorite flowers!) using patterned paper.

I love these patterned paper ideas! I have a quick video on how to make these cards, with three ideas for using patterned paper! And I share how to easily layer these snapdragons for mass production. Watch the video below, or in HD on YouTube:

Love is the best answer
using patterned paper as the shadow layer

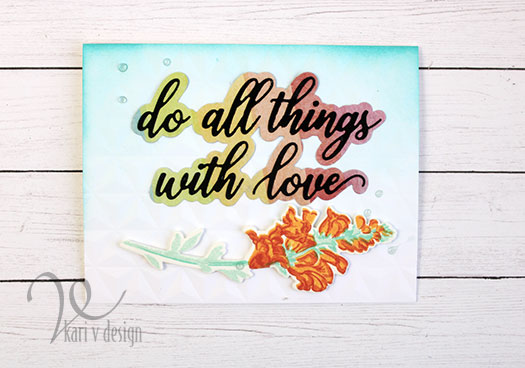
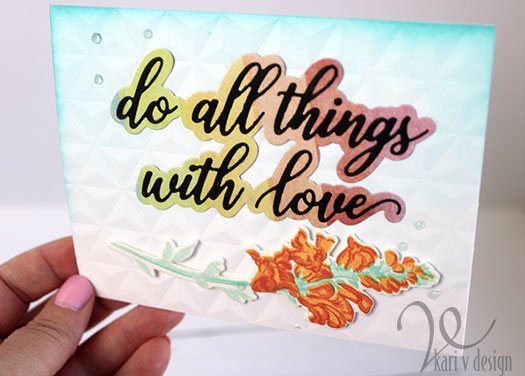
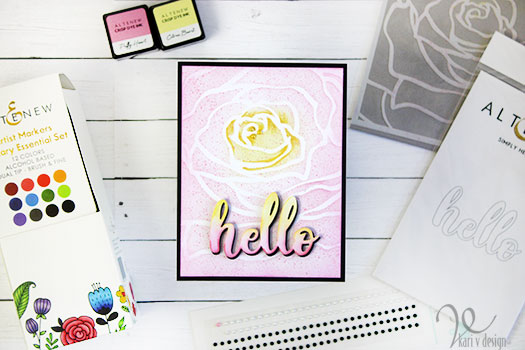
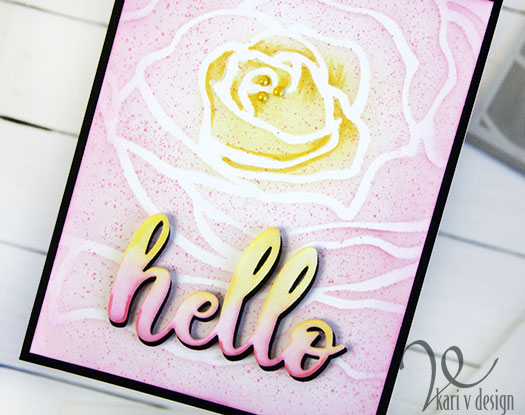
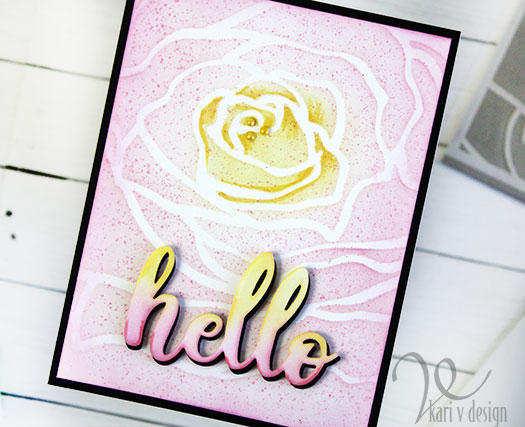
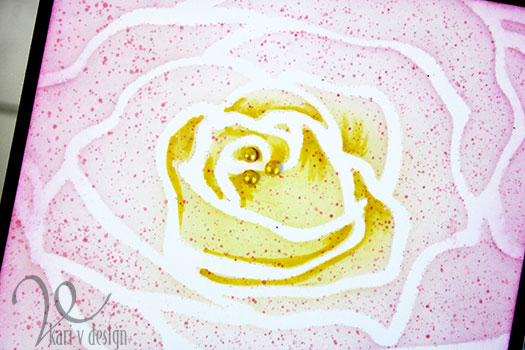
For this first card I used patterned paper as the shadow layer on this die from PinkFresh Studio. I love the variation in color. I made a simple background using ink blending and an embossing folder to get an interesting look.

Lots and Lots of flowers!

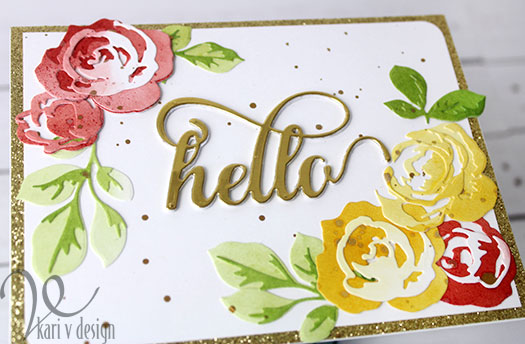
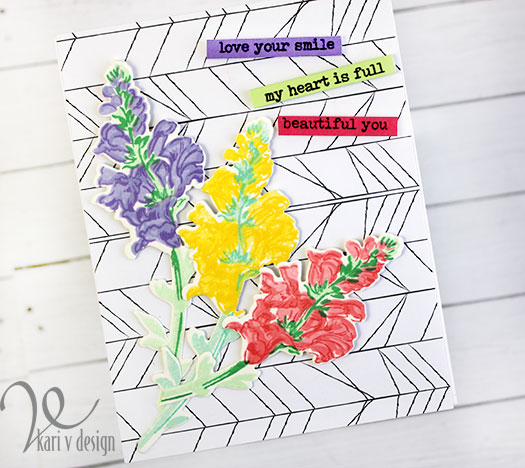
For the second card, I simply used a black and white background paper as the base to showcase a beautiful, colorful bouquet!

love your smile, my heart is full, beautiful you!

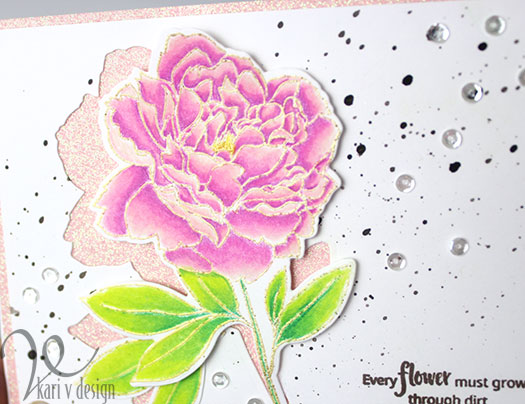
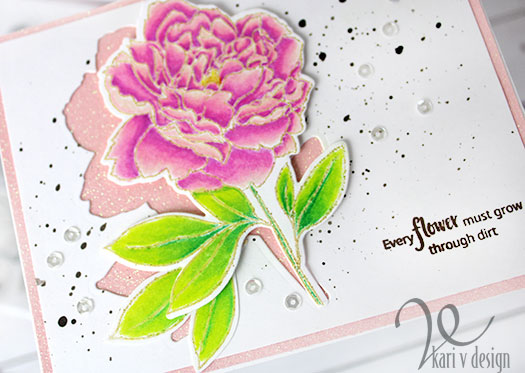
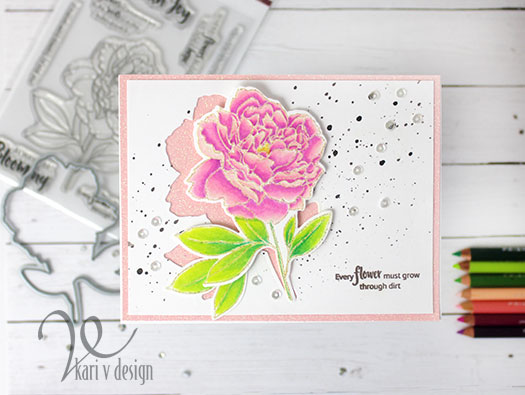
And the last card uses some heat embossing directly on patterned paper to create a pink delicious card.

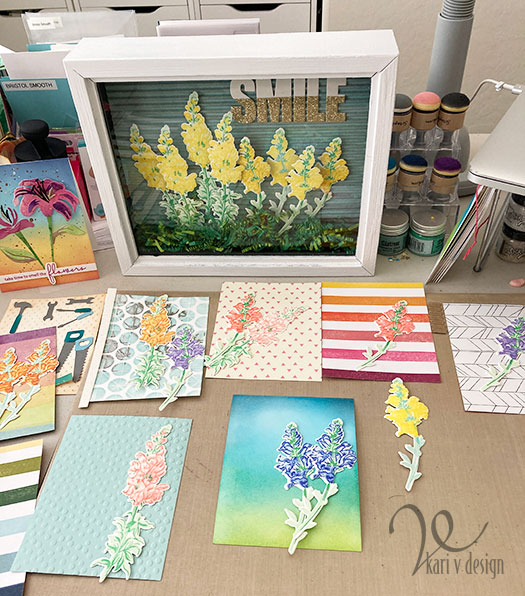
Since I love yellow snapdragons, I also made a project for my craft studio with these (pictured below..the shadow box frame)! AND I have plenty of flowers to still use on cards!! Be sure to check out the video for my tips on mass producing these flowers.

So many flowers…ready to make even more cards!

I’m often asked what supplies I use to make my cards and projects, so I’ve put together a list using affiliate links when possible. If you make a purchase with these links I may receive a small commission. These help me to keep up with blog costs and continue bringing you fun projects. Thank you so much for your support!

Which card is your favorite? Leave me a message below.

Continue on the hop, your next stop is the talented Kathya Kalinine here.
If you get lost, check out the complete list and more information at Justine’s blog here.

Comments { 7 }
three-flowers-2

Altenew Artist Markers

Hello! Today I have some cards inspired by my latest class at Altenew Academy called Magical Marker Techniques.

There were many techniques I wanted to try, so I actually made two cards! The first one features stenciling, with some marker accents. Then I splattered on the marker ink using alcohol to make it more liquid, and a stippling brush.

See the stippling?

I inked on the stencil first, then added some darkness with the markers. I also colored some pearls with the same artist marker to make them match.

This stippling technique creates such small, dainty splatters! I love how this turned out.

Then, I really wanted to use the markers to color an image. So, I first stamped the layers of this flower with ink, then I added to it using the artist markers.

Beautiful flowers
hello!

The artist markers really add such a beautiful dimension! The stamping (on the right) is beautiful on its own, but add the markers (on the left) and get a flower that really pops!

I added some soft gray stamping in the background using the leaves from the same stamp set. Then for a little sparkle, some stickles to the center of the flower, and painted onto the gray leaves. It’s subtle, but gorgeous!

I hope you enjoyed these projects today! This is my last project/class for my AECP Certification…now onto the Final! (wish me luck). Thanks for stopping by!

Comments { 1 }
fall-floral-card-2-no-supplies

Fall Floral card with Glazing

Hello there! Today I have a fall card using beautiful florals from the August 2019 Hedgehog Hollow kit. These florals designed by Alex Syberia are among my favorite florals ever and I keep reaching for them over and over!

Hello, Fall

I always find myself in need of Thank You cards, so I took the Thank you sentiment from the set and stamped it two times on patterned paper, then I backed it with gold glitter paper. I feel like Fall screams for gold glitter paper! Lol.

Deep, rich color

To get these deep, rich, fall colors I used alcohol markers in Pinks (yes! Pink) and yellows first. Then I used a technique called “Glazing”: I went over each floral petal with a light orange. All those colors together created this fall look! Try this glazing technique to see what colors you can get from your markers.

For the background, I used some patterned paper and it made this card come together so quickly!! I popped the top flower up with TWO layers of foam tape, and the smaller orange flower with one layer of foam tape. I love to get that dimensional look with different layers on my cards.

I’m often asked about the supplies I used, so here is the list using affiliate links when possible. When you purchase using these links, I may receive a small commission. Thank you for your support!

Thank you so much for stopping by!

Comments { 0 }
Altenew-badge

Every Flower Must Grow Through Dirt

Hello! Today I have some very exciting news!! I’ve been accepted into the Altenew Educator Certification Program. I’m so excited about this and today I have my first card to share from my first certification class.

I was inspired by Yana in the Easy Die Cutting Techniques class. She had so many wonderful tips and ideas, but there was one that absolutely jumped out at me. This is a technique I had never done before: die cut the image and offset the image from the die cut card base.

Peony Spray set

I loved the idea of offsetting the image to show a peek at something below. And of course I had to use a little sparkle with glitter paper! I used a blush glitter paper to match a color in my flower.

Look at that glitter paper…it’s like a promise of something good!

To create this card, I first heat embossed the peony image with glitter gold embossing powder. Then, I colored up my Peony with Prismacolor pencils in these colors: Mulberry (PC995), Process Red (PC 994), Blush Pink (PC918), Light Peach (PC927). For the leaves I used: Grass Green (PC909), Apple Green (PC912), and Chartreuse (PC 989).

I die cut the image with the matching die. I also colored up two extra leaves. I set those images aside and splattered the panel with a dark brown watercolor paint. Then I stamped the sentiment “Every flower must grow through dirt” in Rich Cocoa ink. Love that sentiment!

I attached the stamped panel piece with liquid glue to the blush pink glitter paper. The glitter paper is cut to an A2 sized card: 4 1/4″ x 5 1/2″ and the stamped panel is just smaller at 4″ x 5 1/4″.

The top flower is popped up with 3M foam tape

To attach the flower, I used 3M foam tape. (The extra leaves are glued directly to the card panel beneath that popped up flower.)

To finish it all off, I added some Sparkling Clear 4mm sequins. I hope you enjoyed this project today!

I’m often asked what products I’ve used, so I’ve included them below using affiliate links when possible at no extra cost to you. When you purchase through these links, I may receive a small commission. These help me to keep up with my blog and bring you more projects! Thanks for your support.

Thanks for stopping by!

Beautiful peony!
Comments { 1 }
roses-with-gold-hello-12

A Golden Hello

Hi there! I’m on Day 4 at the Altenew 3D Floral Focus class with a fun card share today! The topic was to use less layers of the die cuts to create a modern vibe.

Believe it or not, I was going for a modern look here, but it absolutely turned into FANCY! Lol. That happens sometimes.

Before I die cut the flowers, I ink blended some Distress Inks in ombre fashion onto some 80# cardstock, then I splattered some of the same color of paint and gold watercolor paint onto the panel. I then die cut some flowers, reserving the darker portion of the panel for the furthest back florals.

I layered them up, but I didn’t use a complete floral layer for each of them..only 2 or three layers each. After I found an arrangement I liked, I adhered them down with liquid adhesive and splattered the entire panel with gold watercolor paint.

A golden hello

I die cut the hello sentiment out of gold foil paper and adhered it to the center of the card. Only two corners got the corner-rounded treatment before I added the entire panel to a gold glitter 4 1/4″ x 5 1/2 panel. Then the whole thing was added to a 110# card base.

I absolutely love how it turned out, but it really took on a life of it’s own!

For the colors of this card, I was inspired by the photo below, so I’m also entering the June Altenew Challenge with this card.

I’ve linked the supplies below, as I get asked often about what products I used. Affiliate links are used when possible, so if you make a purchase through these links, I may receive a small commission. These help me to keep up my blog and bring you more fun projects like this one. Thanks for your support!


I hope you enjoyed my modern/fancy floral card! lol.

Thanks for stopping by!

Comments { 3 }