Tag Archives | Floral card
three-flowers-2

Altenew Artist Markers

Hello! Today I have some cards inspired by my latest class at Altenew Academy called Magical Marker Techniques.

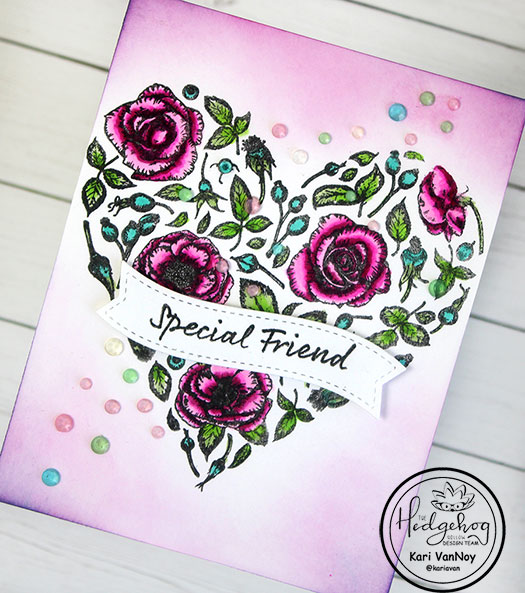
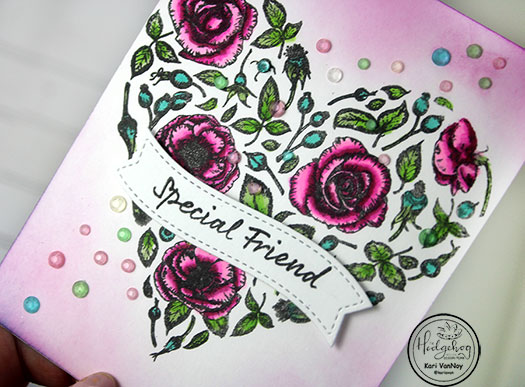
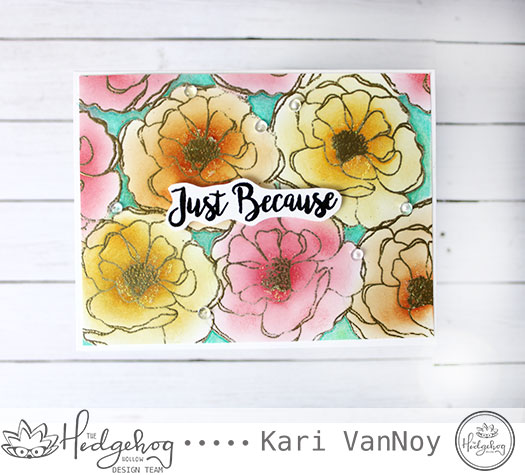
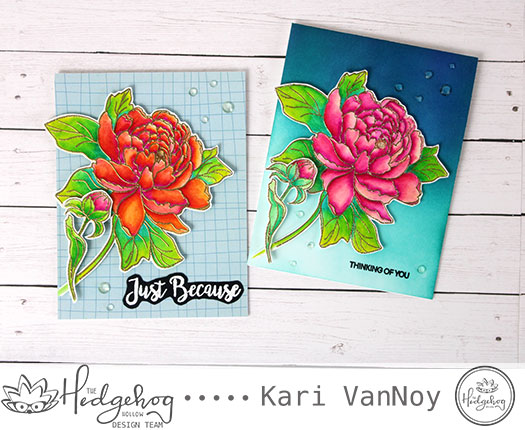
There were many techniques I wanted to try, so I actually made two cards! The first one features stenciling, with some marker accents. Then I splattered on the marker ink using alcohol to make it more liquid, and a stippling brush.

See the stippling?

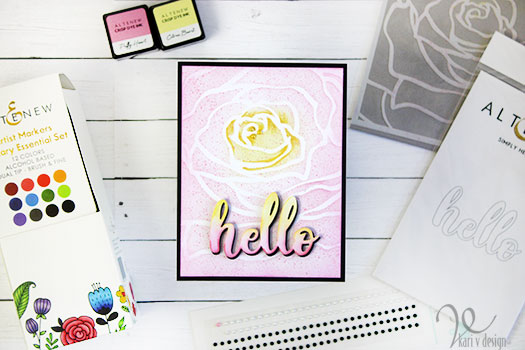
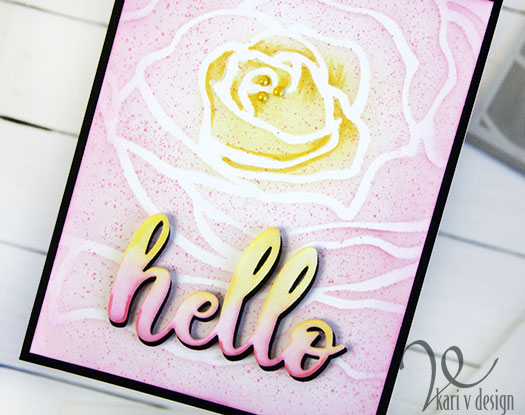
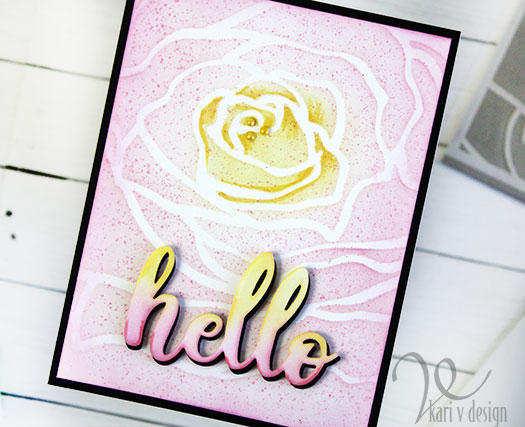
I inked on the stencil first, then added some darkness with the markers. I also colored some pearls with the same artist marker to make them match.

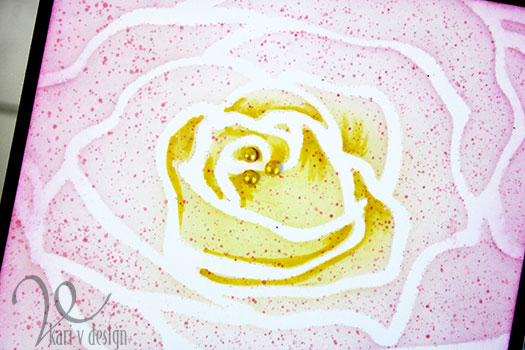
This stippling technique creates such small, dainty splatters! I love how this turned out.

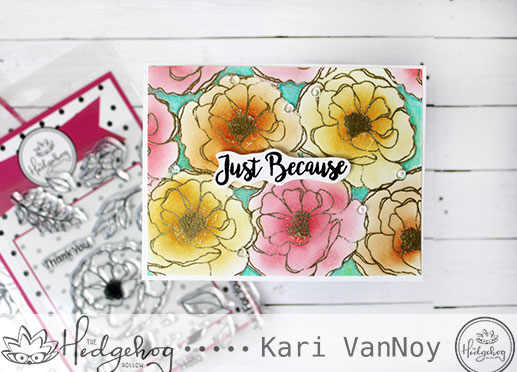
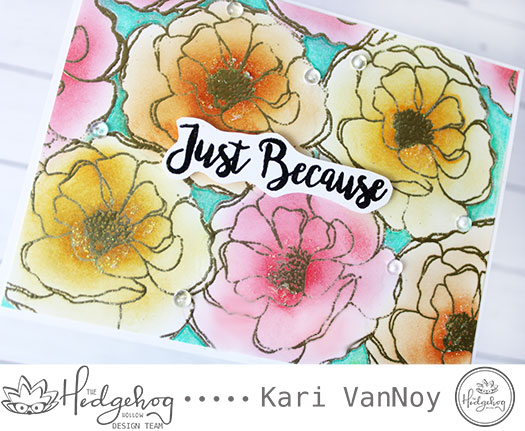
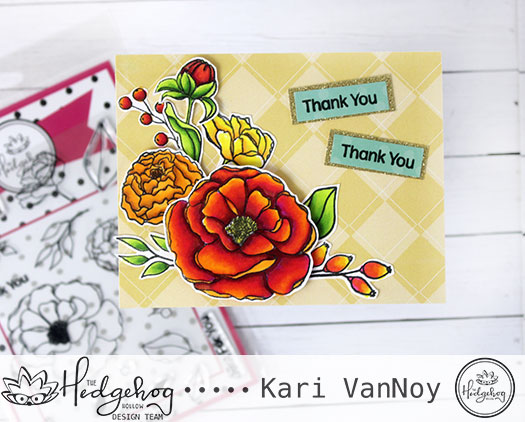
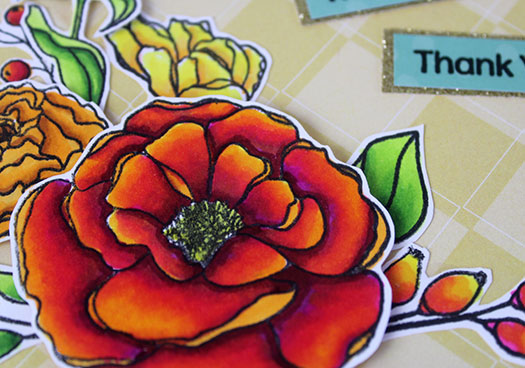
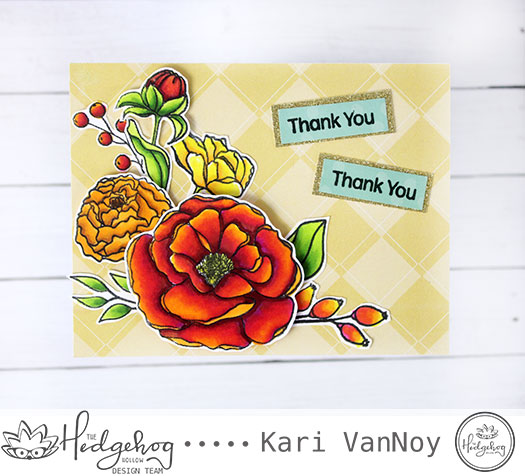
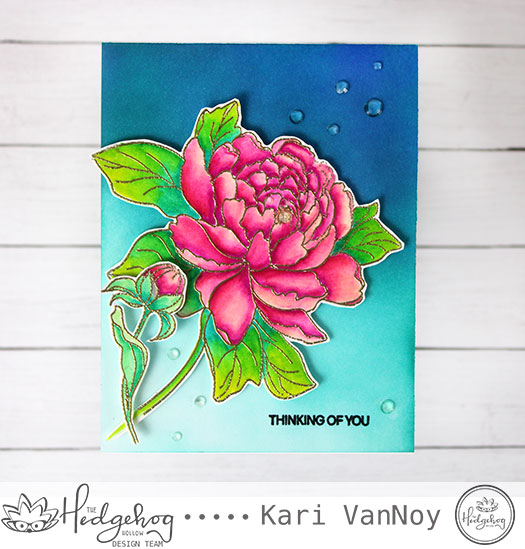
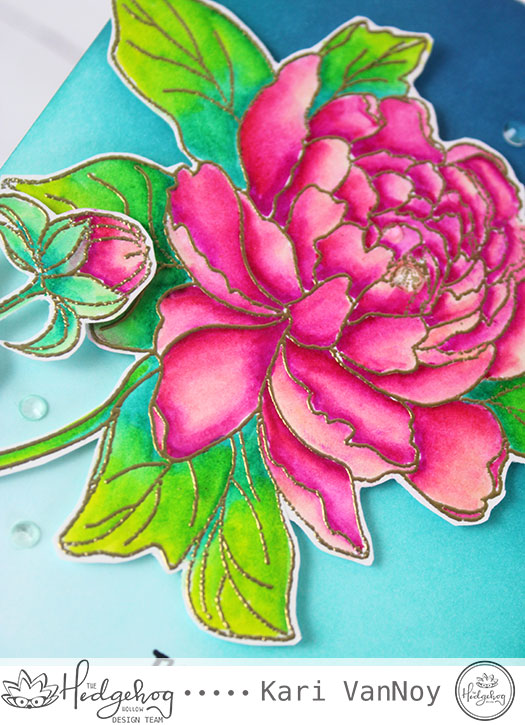
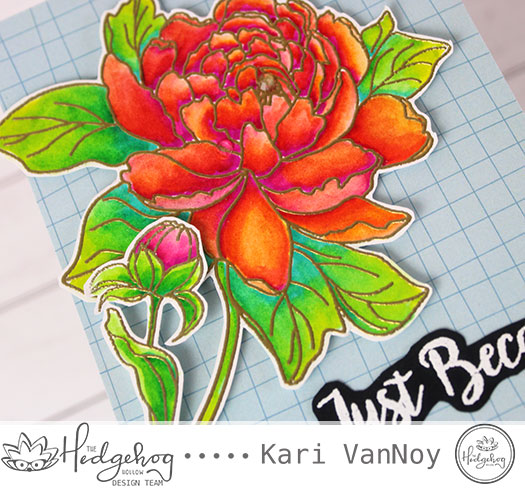
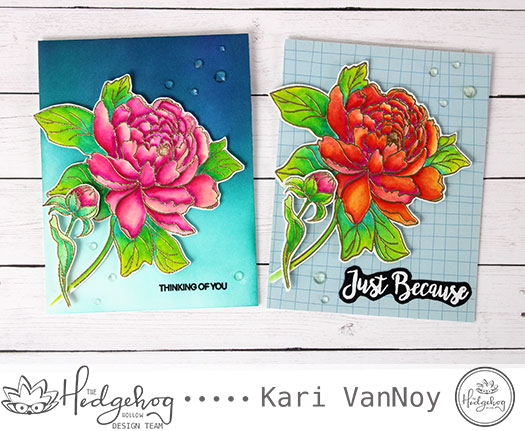
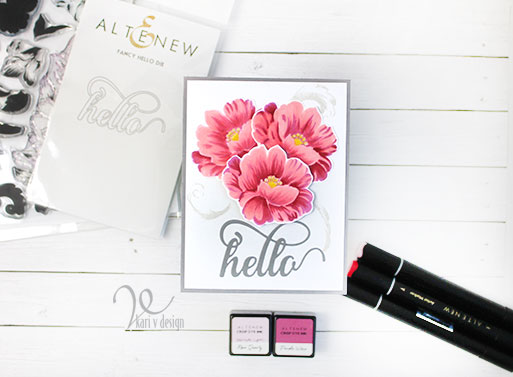
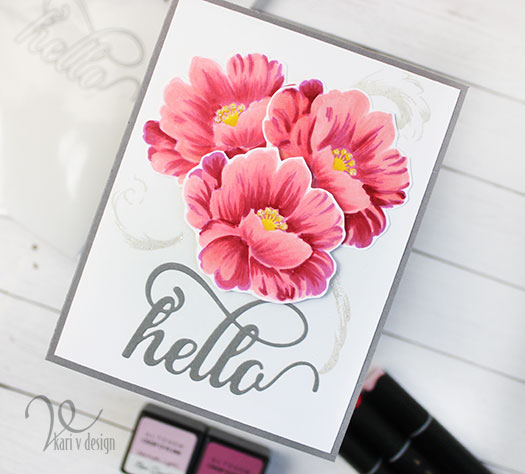
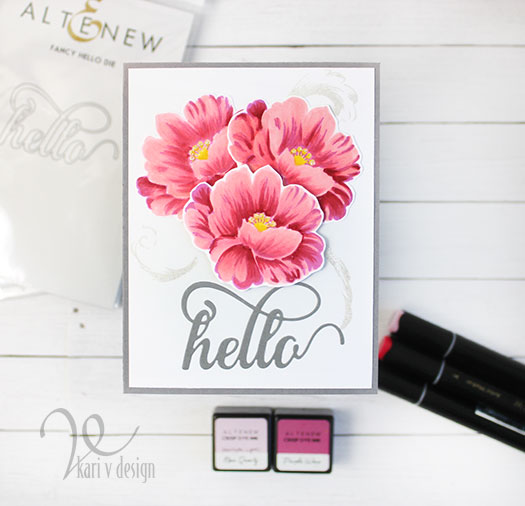
Then, I really wanted to use the markers to color an image. So, I first stamped the layers of this flower with ink, then I added to it using the artist markers.

Beautiful flowers
hello!

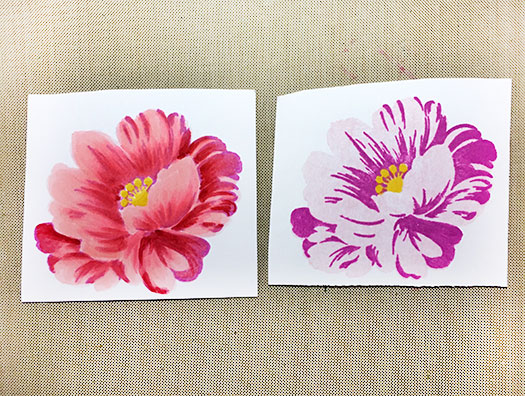
The artist markers really add such a beautiful dimension! The stamping (on the right) is beautiful on its own, but add the markers (on the left) and get a flower that really pops!

I added some soft gray stamping in the background using the leaves from the same stamp set. Then for a little sparkle, some stickles to the center of the flower, and painted onto the gray leaves. It’s subtle, but gorgeous!

I hope you enjoyed these projects today! This is my last project/class for my AECP Certification…now onto the Final! (wish me luck). Thanks for stopping by!

Comments { 1 }
Pinterest card

Floral Heart with Gemstones

Hello! I’m back with a new card using the Hedgehog Hollow February 2020 Kit. I saw that floral heart stamp in the kit and I fell in LOVE!! So of course I had to create with that first AND add some beautiful gemstones. Yes!

This floral heart was designed by Sophia Caldwell, and you already know I’m a BIG FAN of hers! So I stamped it first with amalgam ink (perfect for coloring with Copic markers because it doesn’t smear).

Flowers: RV19, RV06, RV02
Leaves: YG05, G43
Small flowers & berries: BG13, BG11

I cut the banner and added the Special Friend Sentiment on using the original Misti. I used some acetate over the banner so I could bend that stamp to fit just right on that banner. The stamp will stick to the acetate so then you can pick it up with the Misti lid. Perfect.

I added that stamped banner with 1/4″ foam tape. Then I inked up around the card using 2 colors of Distress Ink.

I added the gemstones in a sort of diagonal line across the card front using my favorite new embellishment tool! (see the supplies listed below to check it out!)

I’m often asked what supplies I use to make my cards and projects, so I’ve put together a list using affiliate links when possible. If you make a purchase with these links I may receive a small commission. These help me to keep up with blog costs and continue bringing you fun projects. Thank you so much for your support!

I hope you enjoyed this floral card with gemstones today…you know those are two of my favorite things! Lol. See you next time!

Comments { 0 }
floral-card-2

The Fastest Floral Card! [VIDEO]

Hello! Today I have a card that is so fast, you might not believe me! I’m using a technique that I’ve used for years with great results.

Let’s be honest: as cardmakers sometimes we need a FAST card and we don’t want to create any masks. Well, if that sounds like you, you are going to love this technique!

Fill a card front FAST (no masking)

I took one flower stamp and filled the card front without any masking. It’s easy and I made a quick video to show you just how it’s done. Watch it below or on YouTube:

This card took me under 20 minutes to make (and for me that is FAST!) I love that you can change this floral card up with colors and sentiments.

Just Because

Keep this technique in your arsenal for when you need a quick card. To color up these florals I used inks and a finger dauber, making them darker in the center. I used only 1 colored pencil for the background. So easy.

I’m often asked what supplies I use on my projects, so I have a list below using affiliate links when possible. When you purchase with one of these links I may receive a small commission (at no additional cost to you). This helps me keep up with blog costs and continue bringing you fun projects. Thank you!

I hope you enjoyed this fast technique today. I’ll be back with more inspiration later!

Comments { 0 }
fall-floral-card-2-no-supplies

Fall Floral card with Glazing

Hello there! Today I have a fall card using beautiful florals from the August 2019 Hedgehog Hollow kit. These florals designed by Alex Syberia are among my favorite florals ever and I keep reaching for them over and over!

Hello, Fall

I always find myself in need of Thank You cards, so I took the Thank you sentiment from the set and stamped it two times on patterned paper, then I backed it with gold glitter paper. I feel like Fall screams for gold glitter paper! Lol.

Deep, rich color

To get these deep, rich, fall colors I used alcohol markers in Pinks (yes! Pink) and yellows first. Then I used a technique called “Glazing”: I went over each floral petal with a light orange. All those colors together created this fall look! Try this glazing technique to see what colors you can get from your markers.

For the background, I used some patterned paper and it made this card come together so quickly!! I popped the top flower up with TWO layers of foam tape, and the smaller orange flower with one layer of foam tape. I love to get that dimensional look with different layers on my cards.

I’m often asked about the supplies I used, so here is the list using affiliate links when possible. When you purchase using these links, I may receive a small commission. Thank you for your support!

Thank you so much for stopping by!

Comments { 0 }
both-cards-2

Using Zigs to Blend

Hello! Today I’m excited to bring to you a couple cards using beautiful florals designed by Alex Syberia. These florals are exclusive to the Hedgehog Hollow August box and they are gorgeous! I have had a few requests to show how to blend with Zig Clean Color Real Brush Markers….and so I’m combining the two!

Here’s a look at my cards:

Vibrant Colors from these watercolor markers!

I have a video showing you the process and how to get such vibrant colors (hint: I don’t use water at all! Only the Zigs). Watch the video below or on YouTube:

This August box will sell out fast, so if you love beautiful florals that are so very fun to color, go check out this box soon!

Ink blended background

I gold heat embossed the images first, then colored with the Zigs. For this first card, I ink blended a background using Distress Inks and makeup brushes. I love this look. I used the Zigs on the flowers and fussy cut them out. Then I popped them up using foam tape.

Three colors of green, Three colors of pink

Now I know sometimes the ink blending on the background either takes too long, or maybe you don’t enjoy ink blending. This beautiful flower looks great on a patterned paper background, too!

I’m often asked about the supplies I use to make my cards, so I’ve compiled a list for you here, using affiliate links when possible. When you purchase using these links, I may receive a small commission. These help me to keep up with my blog costs and continue to bring you fun projects. Thank you so very much!

I really hope you love these cards as much as I do. Sometimes a photograph just doesn’t do a card justice, and I think that might be the case with these! I love just how much they POP in real life! Thank you for stopping by.

Comments { 0 }