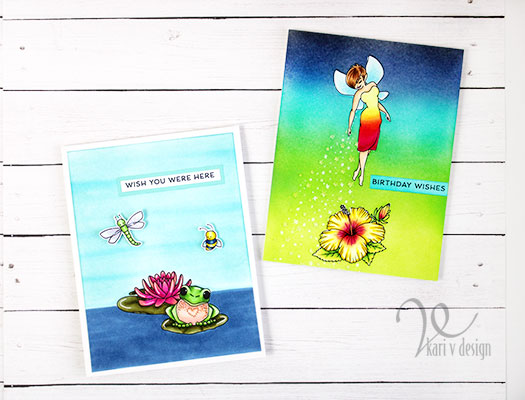
Hello! If you haven’t already, head on over to celebrate the FIFTH birthday of Three Room Studio on Instagram. Here’s a link to my instagram so you can go directly there to enter to WIN one of FIVE prizes!
Here’s my cards I created to celebrate:
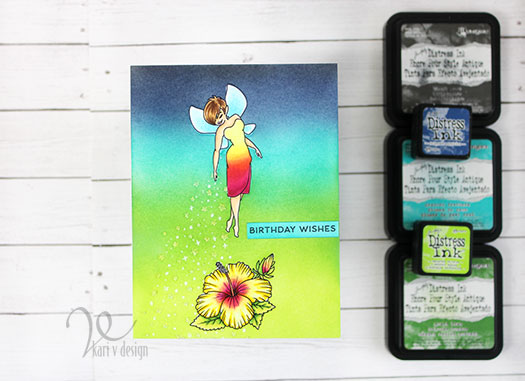
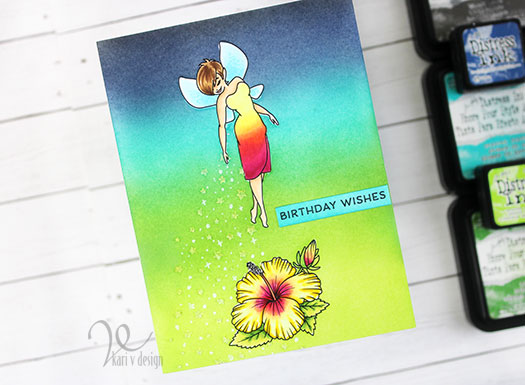
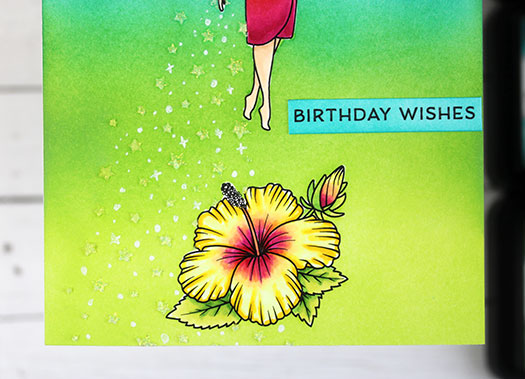
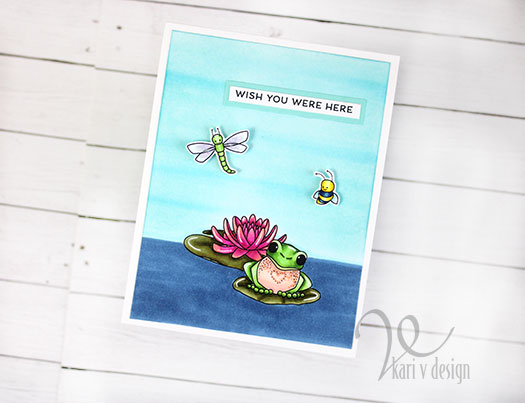
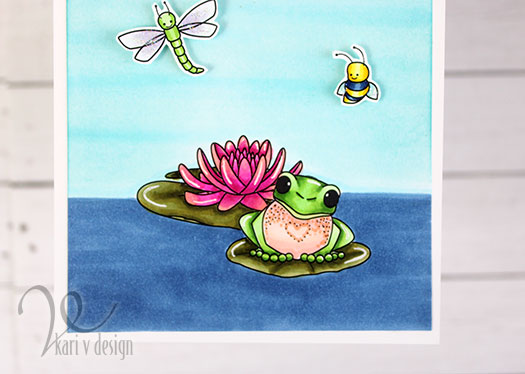
I colored up this flower inspired by my favorite LIPSTICK HIBISCUS!A little fairy dust…I colored this frog with some interesting markings…Wish you were here <3
Happy Birthday, Three Room Studio! Head on over to their website to see all the beautiful stamps Sandy has designed.
Hello! Today I’m talking about the most important two things to do when you get a new watercolor set (or any new medium)! I was inspired by Jen Rzasa at Altenew for this post, as a part of my Altenew Educator’s Certification Program.
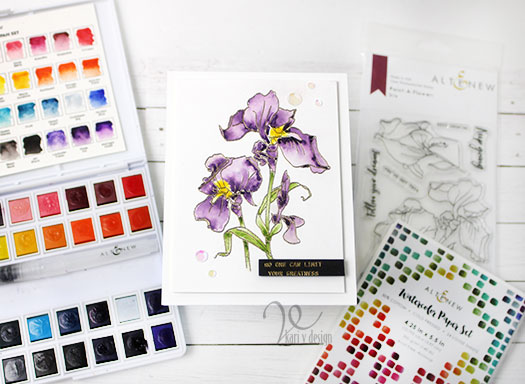
I recently purchased the 36-pan watercolor set from Altenew and I was SO EXCITED to use them! So the first thing I did was swatch them out to get to know the colors a little better.
Did you know that Altenew has a beautiful swatch page already created for you? You can watercolor your own, or print one already done. (check it out here).
Since my printer will not print on heavy watercolor paper, I printed out the blank version on regular copy paper…(I did size it down a bit so I could make it fit into my watercolor case). Then, I took it to a copy center and copied it onto watercolor paper. Then I could swatch my colors!
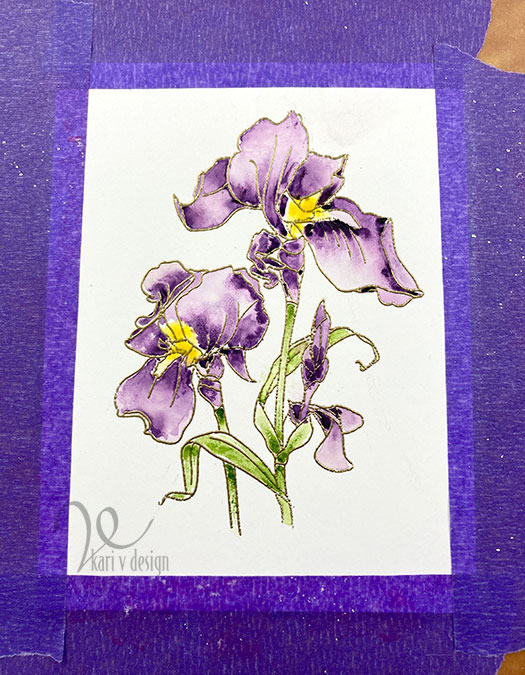
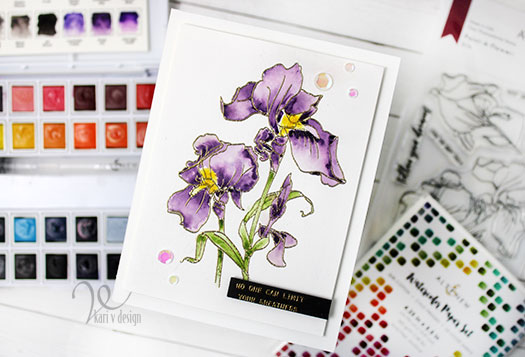
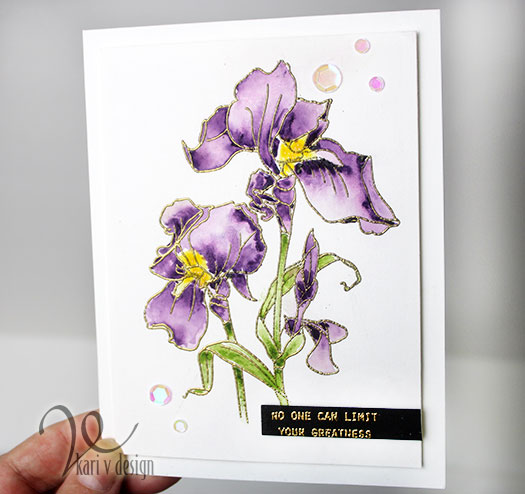
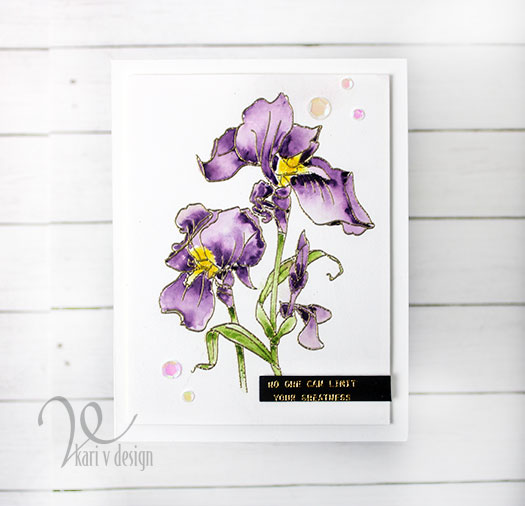
After I swatched out the colors, using a gradient technique, I painted my very first card! I chose the Iris Paint-a-Flower from Altenew as my first victim, er, I mean…first masterpiece!!
I created a short video to show you the gradient technique, and secrets for watercoloring! Watch it below or in HD on YouTube:
I stamped the image and heat embossed it in gold on Altenew watercolor paper. I love this watercolor paper…it’s already A2 card sized and it’s nice and white!
Before I began watercoloring, I taped down my watercolor panel with purple tape. This helps to keep the panel from warping. I taped it to a cutting board so I could move it around as needed.
I used Jen’s technique of using clean, clear water first on one small part. Then I dropped in some color. I started with the green stems and leaves, then added a yellow center to the flowers. Then I worked on the purple irises.
Did you know there’s a watercolor color called “Deep Iris” in this set?! How perfect! That’s the color I chose for this image (surprise). Lol.
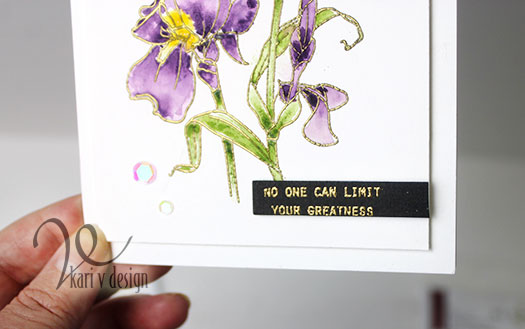
No one can limit your greatness!
For the sentiment, I chose to gold heat emboss on black cardstock. It’s a little difficult to read in the photos, it says: “No one can limit your greatness.”
I cut down the card panel to 3.75″ x 5″. Then I finished it all off with some iridescent sequins and attached it to the card base with foam tape.
I’m often asked what supplies I use to make my cards and projects, so I’ve put together a list using affiliate links when possible. If you make a purchase with these links I may receive a small commission. These help me to keep up with blog costs and continue bringing you fun projects. Thank you so much for your support!
I hope you enjoyed this and got inspired to try a little simple watercoloring! Thanks for stopping by.
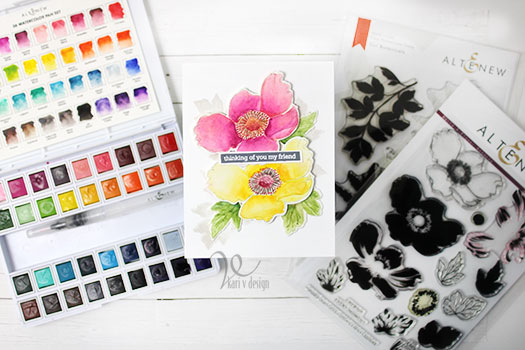
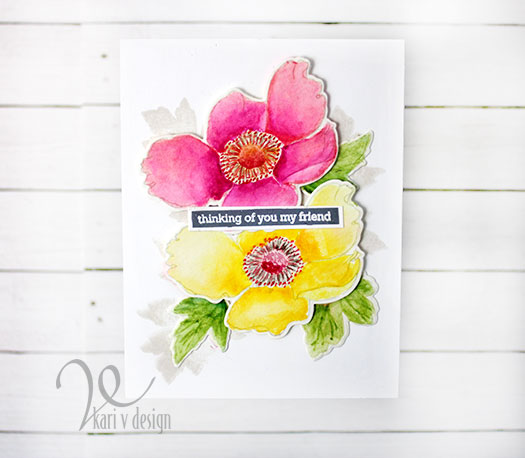
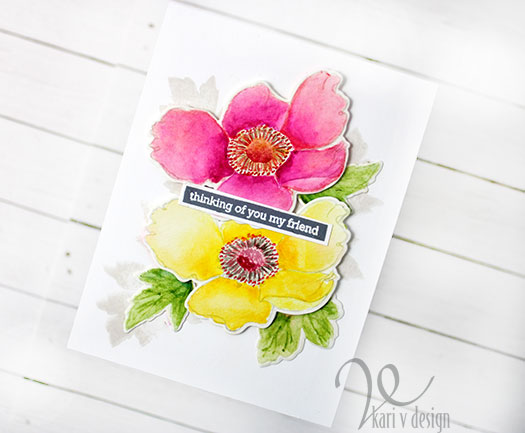
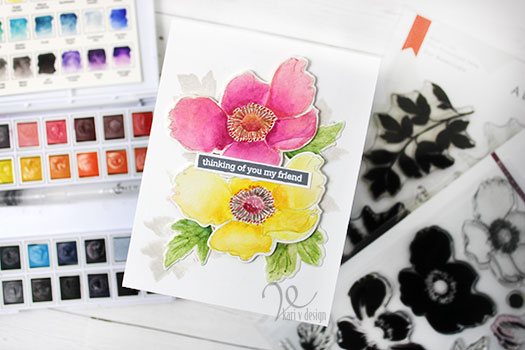
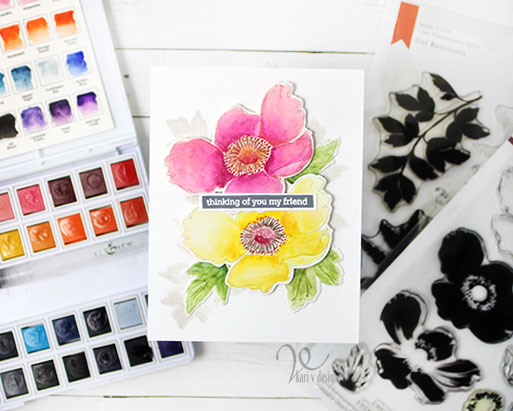
Hello! Today I was brave. I tried something I’ve always wanted to try: I attempted no-line watercoloring! I was inspired by the Altenew Class “Exploring Watercoloring Mediums” and specifically the class by Ashlea.
She gave a lot of great advice and encouragement. I first stamped the anemone outline stamp with a light ink. Then I got out my 36 pan watercolor set from Altenew and a round brush and gave it a try!
I chose to create a pink and a yellow flower. It took me a while before I felt like I was getting the result that I wanted. This flower has a center with smaller stalk-like stamens and the tops are lozenge-shaped anthers; these I hand painted in using small lines and then dots on each of the ends.
I also did the same technique on the leaves: stamping with a light ink, watercoloring them, then adding in hand-painted veins.
One of the things I also loved about Ashlea’s card was that she stamped a light grey spray of leaves behind her flowers. So I also stamped some grey leaves in the background for my card.
The sentiment is white heat embossed on a grey cardstock (to bring in the color of the background leaves); then popped onto some white cardstock to make it pop off the front of the flowers.
I’m often asked what supplies I use to make my cards and projects, so I’ve put together a list using affiliate links when possible. If you make a purchase with these links I may receive a small commission. These help me to keep up with blog costs and continue bringing you fun projects. Thank you so much for your support!
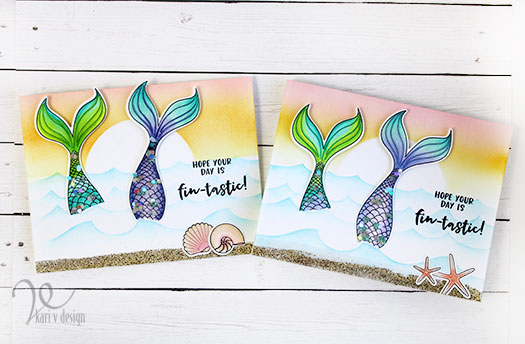
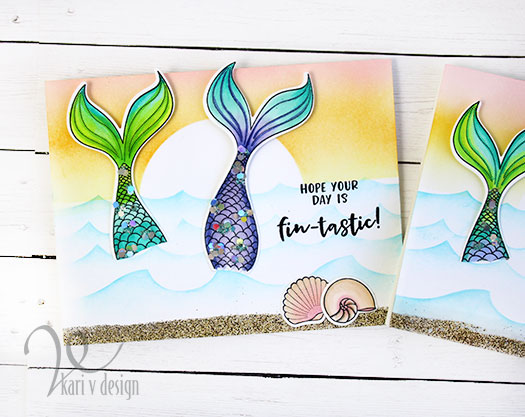
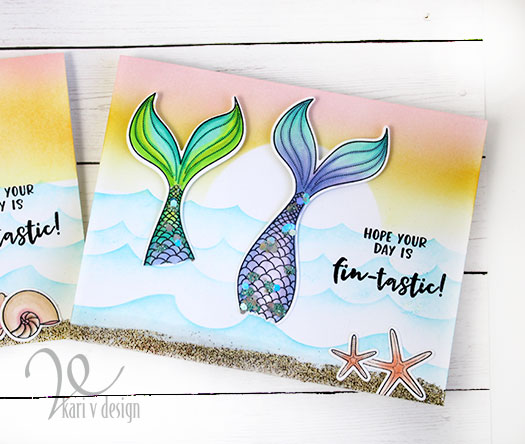
Hello! Today I have a mermaid card to share because I have been thinking about the BEACH! My favorite place to watch for mermaids is on the beach at sunset (that’s the best time, right?)
I made a video to show you the easy techniques for making that ocean and the sunset backdrop…and how to make real looking sand! And see how her tail just shimmers in that evening sun?! That’s a new favorite product of mine! Watch the video below or in HD on YouTube:
Mermaids at sunset
I’m often asked what supplies I use to make my cards and projects, so I’ve put together a list using affiliate links when possible. If you make a purchase with these links I may receive a small commission. These help me to keep up with blog costs and continue bringing you fun projects. Thank you so much for your support!
I really do hope your day is fintastic! Thanks for stopping by.
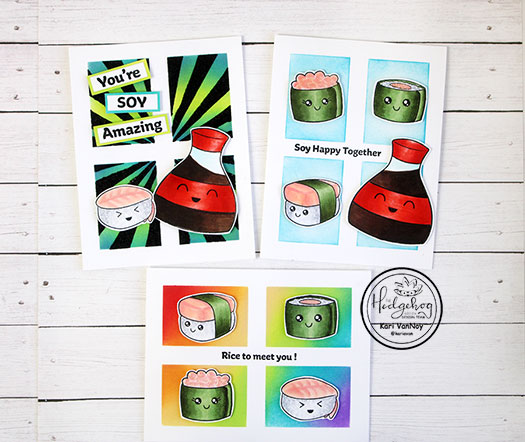
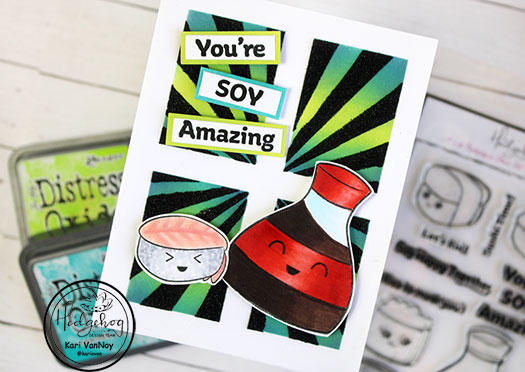
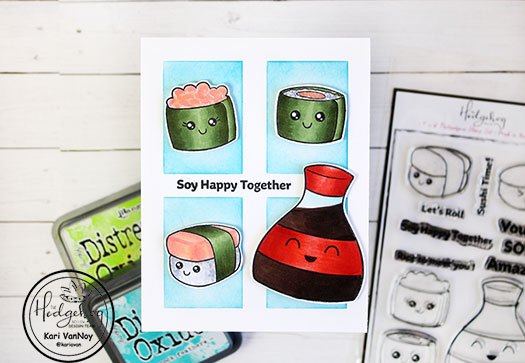
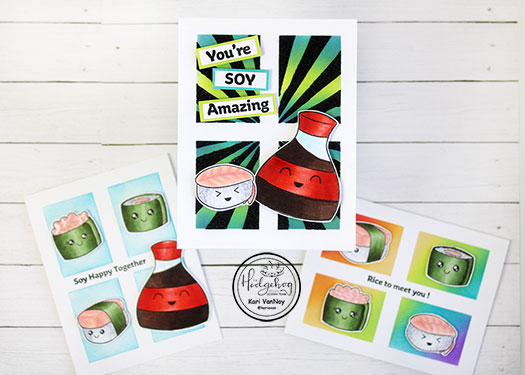
Hello! Today I am here to share some fun sushi cards with a few favorite stenciling techniques. Have you ever struggled to create a scene card? Well, here are some easy techniques to make your cards shine!
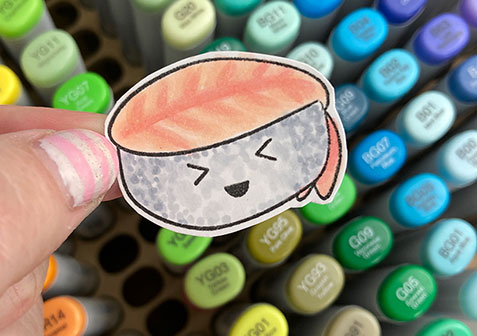
I had so much fun coloring up these images. I added some extra details where I thought it was needed: like the lines on the shrimp, and the lines on the salmon wrap (which turned out a little looking like a pink eraser! Lol). But these details are fun and give so much extra interest.
For the rice, I used Cool Greys to dot the color on…to give it a feeling of rice granules.
I’m using a simple window stencil on all three cards, then on the black glitter rays I used a DOUBLE stencil technique. (It’s sooooo easy, and yet it’s still one of my favorites!)
You may have noticed that for the way I positioned my soy sauce, I colored the liquid in the wrong direction! But most people won’t notice, and so I say JUST HAVE FUN with your coloring and don’t worry about the way it lands or the light source. You have plenty of time to worry about that later on…
I love the rainbow inking in a diagonal direction on this one. I think any way you ink the background will look adorable with these sushi characters. I mean, they are just so cute!
I’m often asked what supplies I use to make my cards and projects, so I’ve put together a list using affiliate links when possible. If you make a purchase with these links I may receive a small commission. These help me to keep up with blog costs and continue bringing you fun projects. Thank you so much for your support!
I added glossy accents to the caviar and the California roll (or is it a Vegas Roll? Who knows….) and it catches the light and adds another element of fun.
I hope you enjoyed these sushi cards today! I don’t normally enjoy sushi, but I do LOVE them on a card! Lol. See you soon!
Hi I'm Kari. I'm a creator, a card maker, and a day maker! I am Lucky in love to a supportive husband, blessed to raise 3 kids (all moved away now!), and happy to be watched over by 2 dogs.
I originally started this blog to remind me to be happy amid adversity, and I hope it inspires you, too!