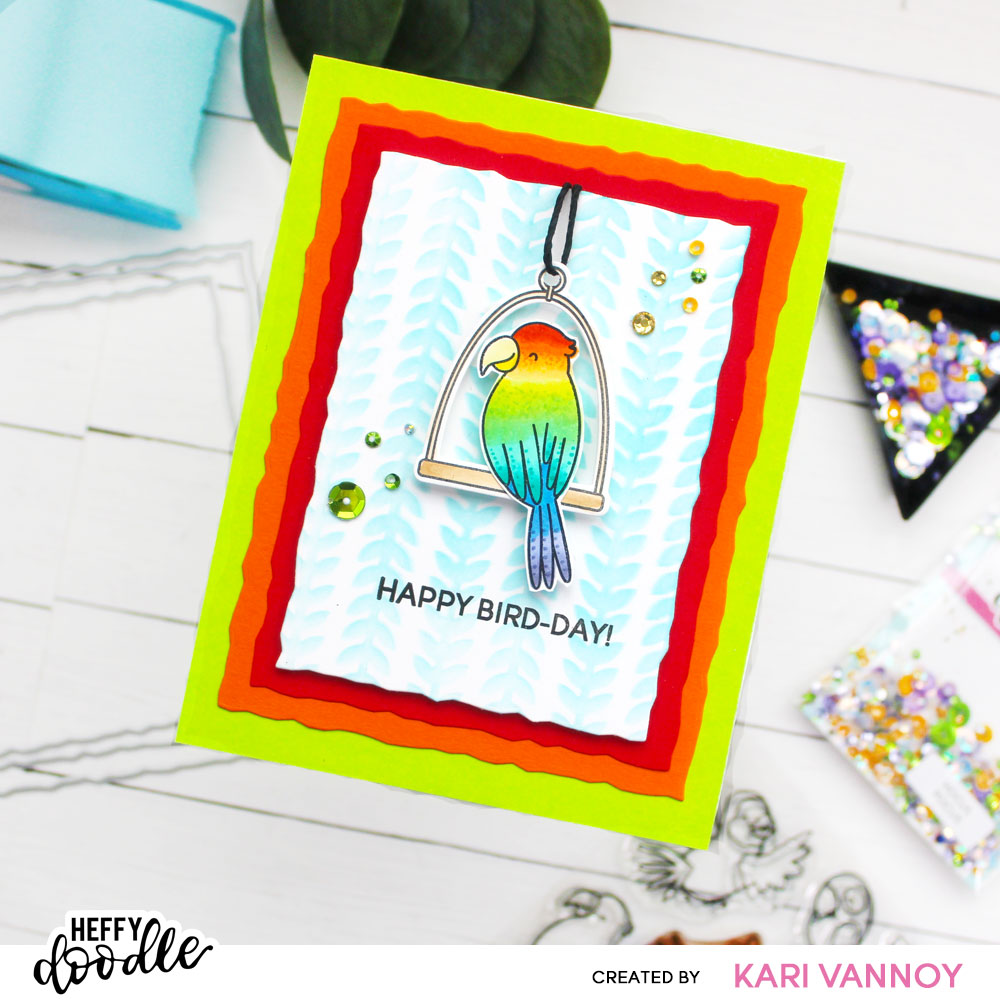
Hello! Today I have a little Bird-day card to share, with a video too! I love the bright and vibrant card with a bright and happy parrot…and I hope you love it, too.
Watch the video below or in HD on YouTube:
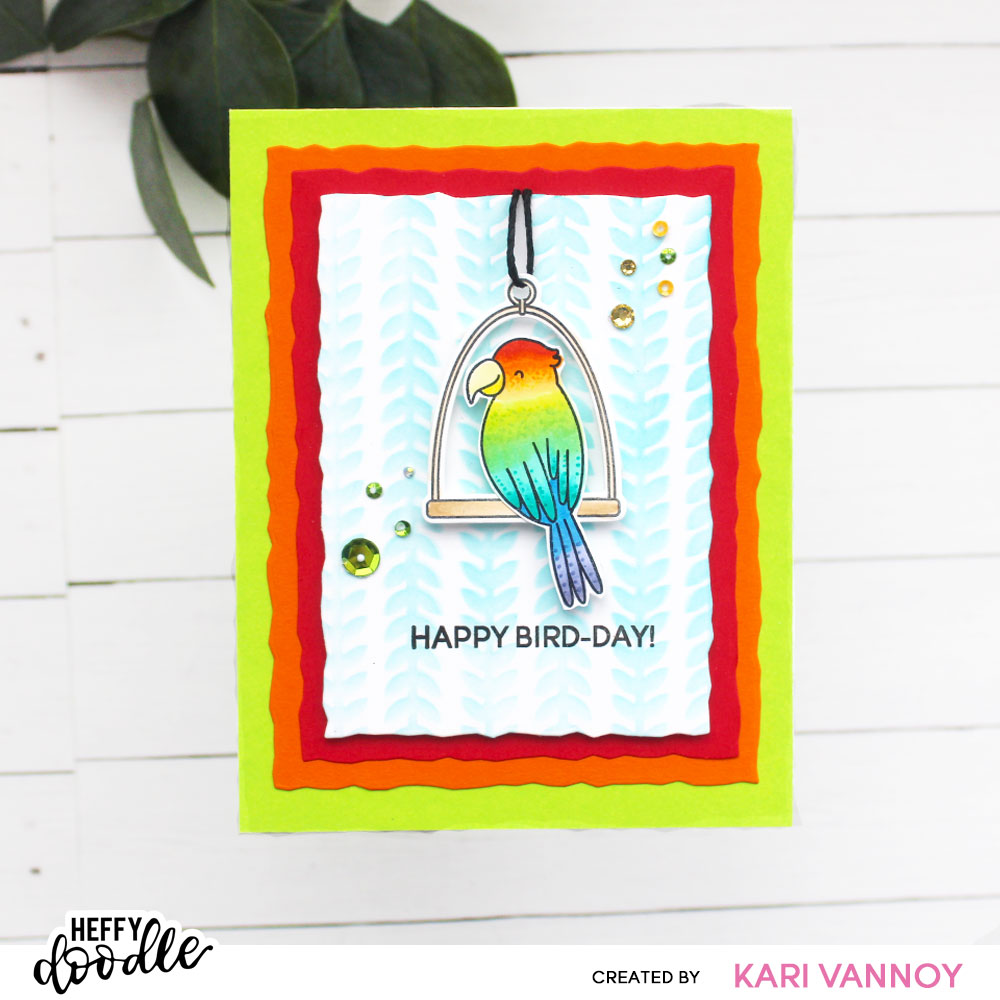
I just adore these parrots from Heffy Doodle! So when I created a nice layered focal point with the Deckled Paper Hugs die set, I knew the focal image would be this happy parrot.
I cut the Decked Paper Hugs dies with cardstock that matched my colored parrot (which I colored up with alcohol markers). I added some dots on the parrot for interest, but also to help the transition of the colors.

For the background, I stenciled on the Vertical Vines stencil with some Peacock Feathers Distress Ink. Then I popped up the parrot and perch with some foam adhesive.
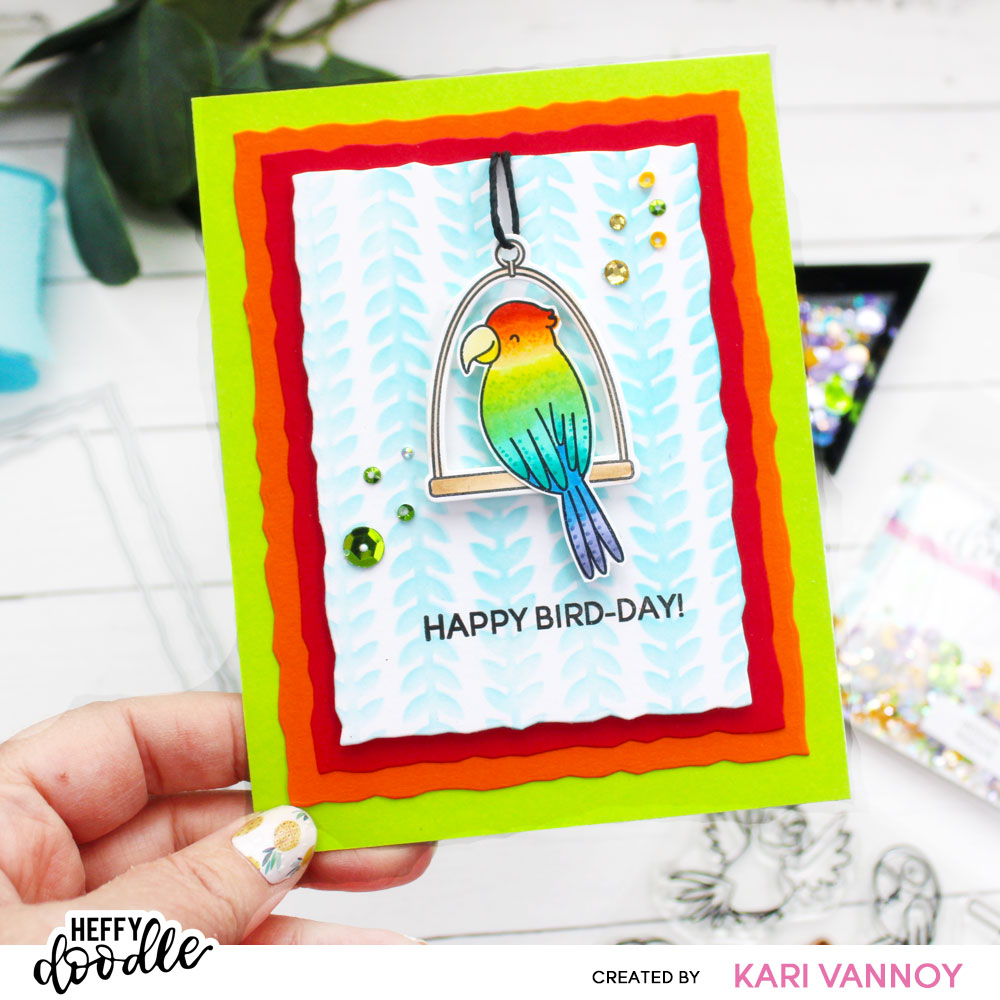
I finished off the card by layering up all the cut cardstock, then added some sequins and gems to the front. I sure love the Sparkle Mixes from Heffy Doodle!
I’m often asked what supplies I use to make my cards and projects, so I’ve put together a list using affiliate links when possible. If you make a purchase with these links I may receive a small commission. These help me to keep up with blog costs and continue bringing you fun projects. Thank you so much for your support!
I hope you enjoyed this card today! It sure is a happy, bright card! See you soon with more cards.