cones-in-a-box

Easy Paper Cones

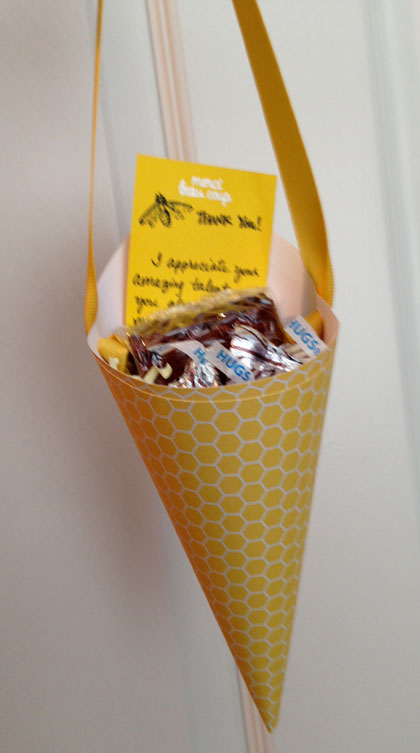
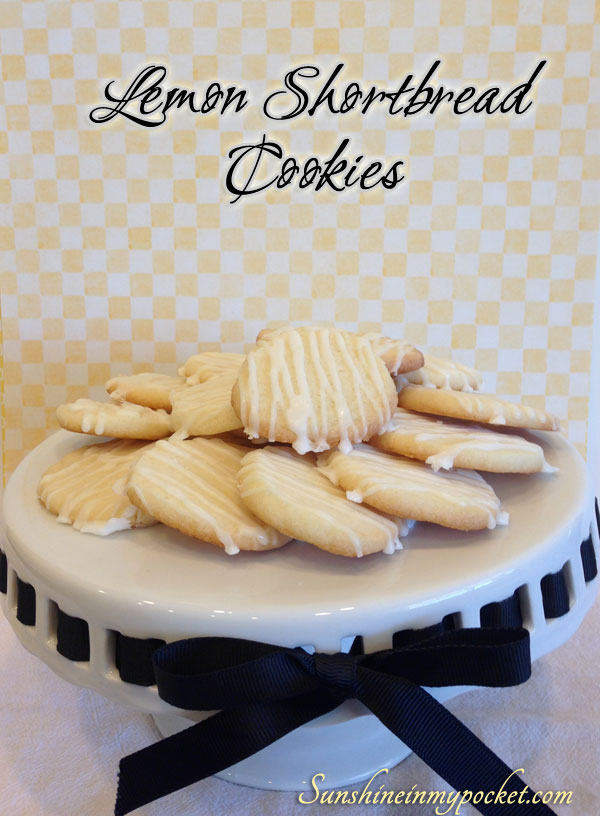
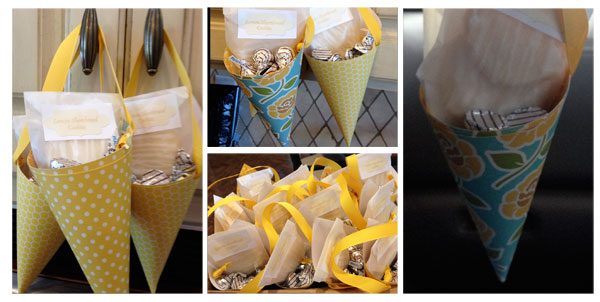
I love to make these paper cones as a container for small gifts and treats. Last Christmas, I made them in green and red and filled them with homemade caramels. For my daughter’s Sweet 16 Birthday party I made them in black and white and filled them with popcorn. And more recently I made them in a sunshine yellow color to deliver Lemon Shortbread Cookies and Hugs.

cones-in-a-box

They are simple to make and you only need 12 x 12 paper (I used paper from Michaels), red sticky tape (also from Michaels), ribbon of your choice, and a hole punch. (I also sometimes fill the bottom of the cones with shredded paper)

At first when I began making these, I couldn’t get them to look right. They were a little skewed and a little off-center. But when I took a class on piping chocolate (I know, strange)…the LIGHT WENT ON!! We made a little triangle out of parchment paper to fill with chocolate and pipe onto a plate. And that’s when I figured out I could apply the same technique to these paper cones!

First, cut the 12 x 12 paper in half Diagonally. Then tape and roll up, matching up the corners. I made a quick video to explain better:

So just take a few minutes to watch the video and you’ll be whipping up perfect paper cones in no time!

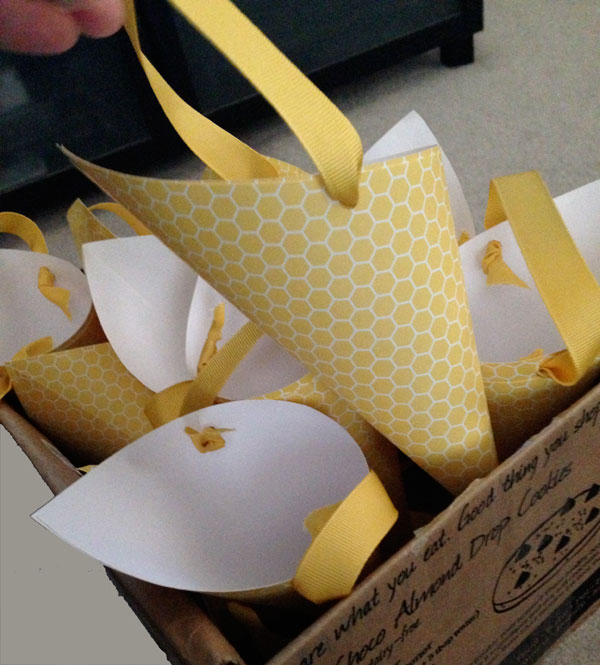
The great thing about these cones is that you can HANG them from a door knob if the recipient is not home. What fun to come home to a little treat hanging on your door! (If it’s hot outside, don’t put in anything that would melt)

And if you are the recipient of a pretty paper cone, why not enjoy the contents, re-fill with a treat of your choice and pass it on to another friend? The great Paper Cone Pass-It-On Project. That’s what we’ll call it. 🙂

Here’s some ideas of what to fill your paper cone with:

Popcorn
Caramels
Cookies
Hugs & Kisses
Hershey’s Miniatures
Small wrapped candies
Miniature Lotion or Hand Sanitizer
Nail Polishes, Nail Files
Gift Cards and Treats
Movie Passes
Flowers
Notes of Appreciation or Encouragement

The list goes on…What would you put in your paper cone?

cone-with-bee-card

Comments { 2 }
cones-in-a-box

Lemon Shortbread Cookies and Yellow Gift Cones

This past weekend was my birthday. It was a big deal because it marked a new decade for me! So I wanted to do something special…something that I could share with people who have made an impact in my life.

I decided to combine two of my most favorite things: Baking and Gifting. I started by making some of these cones in a happy yellow color. The idea was to give out as many goodies as I was old.

I gifted these throughout the week; however, I delivered the majority of these little gifts ON my birthday. Some fun reactions: “You are giving me a treat on YOUR birthday? Best. Friend. Ever.” 🙂

Since I had a bunch of lemons from my mom, I decided to perfect a recipe I have been working on! These little Lemon Shortbread Cookies are buttery and citrus-y with a little bit of a crunch. Perfect!

lemon-shortbread-cookies-2

I found that I love to add lemon juice AND zest to both the cookie and the glaze. Delicious Lemon desserts are among my very favorites and this cookie did not disappoint! They are simple to make and bake…you roll the dough and cut the chilled dough before baking. (so much easier than rolling out and using a cookie cutter!)

roll-into-logs-and-refrigerate

Then, drizzle the glaze over the top, let them “dry” for a few hours and then they are ready to wrap up!

lemon-glaze-drizzle

I wrapped them up in a little glassine bag and closed them with a sticker. Then I filled as many cones as I could with cookies and Hershey’s Hugs (I love those)! I had them hanging everywhere…all over the kitchen cabinets and even some door knobs.

cones-in-Four_Rectangles

I think everyone loved these little cookies. I got some nice texts, notes, and cards back (thanks for the love!) And my favorite reaction: “Oh WOW! These cookies are amazing!! Need the recipe ASAP.”

I love these little shortbread cookies. My last birthday gift is to share the recipe with YOU. So here you go:

[amd-zlrecipe-recipe:6]

And if you’re interested in how to make an EASY cone out of 12 x 12 paper, I’m sharing a quick tutorial here! Go ahead, make a few and see how many smiles you can inspire when you give them away filled with treats. 🙂

cones-in-a-box

Comments { 0 }
hugs-card-for-cancer

“Hugs” Card for Maddy (who is fighting cancer)

I created this card especially for a little girl named Maddy who has cancer. She lives in Tennessee and has requested lots of good energy and smiles in the form of homemade cards! So, Maddy, this one’s for you! I mailed this out today. Hope she likes it!

hugs-card-for-cancer

I had fun choosing different colors of ink pads to compliment each other for the hearts. I sure hope Maddy likes pink because pink became the  dominating color! I embossed the word “hugs” with pink embossing powder and outlined it with a thin black pen to pull it all together. Sending “hugs” to Maddy across the miles!

If you’d like to send a card of encouragement, too, get more information here.

Comments { 0 }
5-13-each-new-day-is-filled-with-opportunity

Dose of Sunshine Monday — Each day is filled with opportunity

Happy Monday once again! This week is brimming full of blessings, I can feel it. And sometimes those blessings come by way of opportunity. And sometimes there are so many opportunities available to us that we simply cannot hold onto them all!

This thought inspired me to create the following:

5-13-each-new-day-is-filled-with-opportunity

What opportunities are available to you this week?

Comments { 0 }
everythings-going-to-be-alright

“You are Loved” card

I just learned on Wednesday that a dear friend and neighbor is moving! 🙁 I know that moving is chaotic and overwhelming sometimes and so I was inspired to make the following cards in her honor:

you-are-loved

I am just enthralled with “Sunshine” cards (yes, it goes with the name of my blog!) and this one surprised me because it turned out in shades of blue, rather than yellow! I tinted the embossed sentiment with Distress Ink in Peacock and added some glitter to the “sunburst.” I will re-visit this idea later, because I think it looks more like a quilt or sky than a sunburst. Funny how things turn out sometimes.

(to be continued: see the next card in the next post…)

So, dear friend who is moving (you know who you are)…these are for you! Everything IS going to be alright. And you are loved.

Linking up with Simon Says Stamp challenge.

Comments { 3 }