front-and-inside

Celebration on a Card

Hello! Today I’m sharing a fun dimensional celebration card using the Pretty Pink Posh New Year’s products! You can find all these products in the December 2018 Hedgehog Hollow Box. I LOVE it when the matching dies are included in the kit. It makes it so easy to make a dimensional card like this:

front-of-card

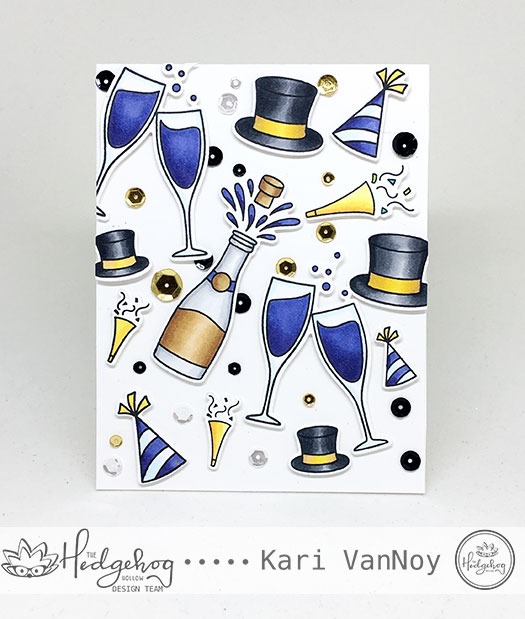
I stamped all the images in the stamp set with Gina K Amalgam ink (I’m loving this ink!), Colored them up with Copics, then die cut them all with the matching dies.

Then I popped them all up using foam tape for some fun dimension.

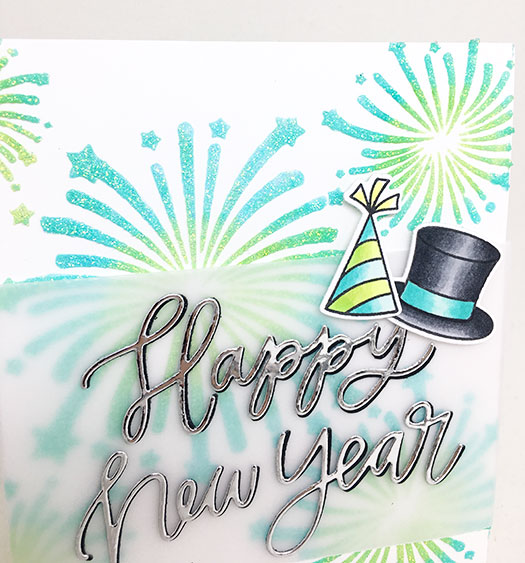
I added some of the sequins included in the kit to complete the celebration! Here’s a close up:

close-up

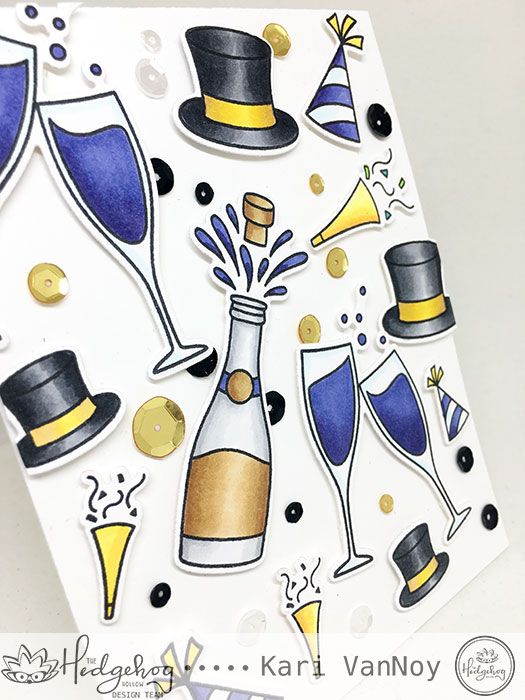
I hope you can see that dimension. This would be a very fun card to receive!

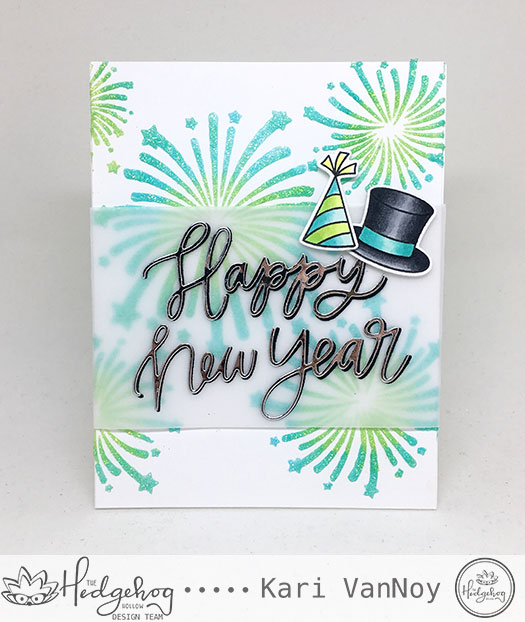
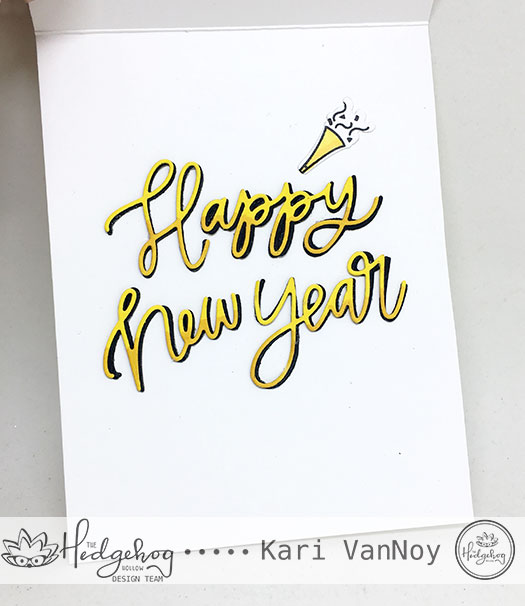
I originally planned on using the Happy New Year script die on the front, but I decided that it already had enough going on, so I added it to the inside of the card instead with a little noisemaker.

inside-of-card

In case you are curious about the copics I used on this card, here’s my color list:

Black/grey: N0, N1, N3, N5, N7
Yellow: Y35, Y15
Browns/Tan: E51, E53, E55, E57
Light Blue: B000
Purple: BV04, BV08

front-and-inside

I hope you had some inspiration on creating your own dimensional celebration on a card! Happy New Year and I’ll see you next time!

Comments { 1 }
blessed-to-have-you-as-a-friend

Blessed to Have you as a Friend

Hello! Today I have a sweet card to share featuring a new favorite stamp set from Right At Home Stamps called Cuppa Friendship! These girls are just too cute and so much fun to color.

blessed-to-have-you-as-a-friend

Just look at these sweeties. I colored them up with Copics and added some fun patterned paper surrounding them.

I finally also picked up these beautiful hand lettered sentiment stamps from Right At Home stamps that have been on my wish list for a really long time. I stamped the “blessed” on 110# paper and fussy cut it out. The remaining part of the sentiment “to have you as a friend” is white heat embossed on black paper.

Linking up to the last day of the Fall/Winter Coffee Lovers Blog Hop. (even though I’m imagining them to be holding Hot Cocoa!)

logo-clh

Thanks for stopping by!


Comments { 9 }
sunshine-snowy-trees-merry-christmas

A Forest of Trees

There’s something just so serene about looking at a forest of trees. Today I have a few cards to share with you using some new stamp sets from Our Daily Bread Designs.

My first cards uses the new set called “Seek Me” and I think it is so dreamy. I created some colorful watercolor backgrounds and splattered white ink over the top. I used the larger stamp of the line of trees in the background using gray ink, then I stamped the larger set of three trees in front in a deep black ink.

sunshine-three-watercolor-tree-cards

The sentiment says “You will seek me and find me when you seek me with all your heart.” To me that feels so comforting and I just want to stare at these cards for a while.

sunshine-one-watercolor-tree-card-green

My next card uses the stamp set called “Peaceful Wishes.” This is also a dreamy set, and I used some flocking to make snow on those trees:

sunshine-snowy-trees-merry-christmas

The sentiment comes with that line on either side of the “and Happy New Year” and I simply extended the lines around the whole picture to create a box around those trees.

The fun flock is so easy to add…just put glue where you want the “snow” to be, and sprinkle on the fun flock. In real life it adds a fuzzy, snowy, dreamy feel.

I hope you enjoyed these projects today. I really enjoyed making them. The trees are so calming and that is perfect for this time of year. But you could really use these trees for any time of year.

Thanks for stopping by!

Comments { 0 }
happy-new-year-close-up

Say Hello to the December Kit!

You might already know how much I love my kits from The Hedgehog Hollow…and today I have the December unveiling for you AND a project using items from the kit!

If you haven’t already heard, this month is filled with beautiful products from Pretty Pink Posh! There’s also an exclusive stencil from the Hedgehog Hollow.

Here’s the unveiling video, watch it below or on YouTube:


My first project with this kit uses that exclusive stencil, and I show you how to color your own Glimmer paste! Did you know you can make the clear glitter paste into any color you want? Be sure to watch the video below to see how it’s done.

happy-new-year-fireworks

That glitter paste is just so fun! I hope you can tell that I die cut the Happy New Year sentiment from silver mirror cardstock. Oh how I love that mirror cardstock!

Here’s a close up for you:

happy-new-year-close-up

Watch the video below or on YouTube for more information on how to color glitter paste, and how to put this project together! YES…I have TWO videos today (what?!?)


Thanks for stopping by! Are you still making Christmas cards or are you onto New Years cards?

Comments { 0 }
logo-clh

Christmas Joy Hot Cocoa

Hello there! Today I have a quick card to share featuring my new favorite: Poinsettias on Coffee cups (or hot chocolate cups, in my case!)

A week or so ago I shared a quick video, where I masked off the coffee cups so only the middle showed, lightly stamped on some poinsettias using the Poinsettia Box stamp set, and no-lined colored up the poinsettias using Copics.

Well, I finally put them on a card!

christmas-joy-hot-cocoa

I used some corrugated cardboard in the background as a nod to the coffee holders, added some greenery, and popped up those coffee cups using foam tape. (Most of the supplies used are from Our Daily Bread Designs.)

I white heat embossed the sentiment on black cardstock and cut it out using a fishtail end.

Linking up to the Winter 2018 Coffee Lovers Bloghop!

logo-clh

Thanks for stopping by.


Comments { 8 }