ahoy-owl-sideways-view

How to make a Wood Plank Background

Hello friends! Today I have some fun cards to share AND a video on how to make a wood plank background.

Affiliate Links are used when possible. When you click on these links and make a purchase I receive a small commission, which helps me to continue to bring you projects and blog posts! Thanks for your support.

These are some cute images from Jessica Lynn Originals. I just couldn’t resist coloring up those mermaid owls. Here’s my first card:

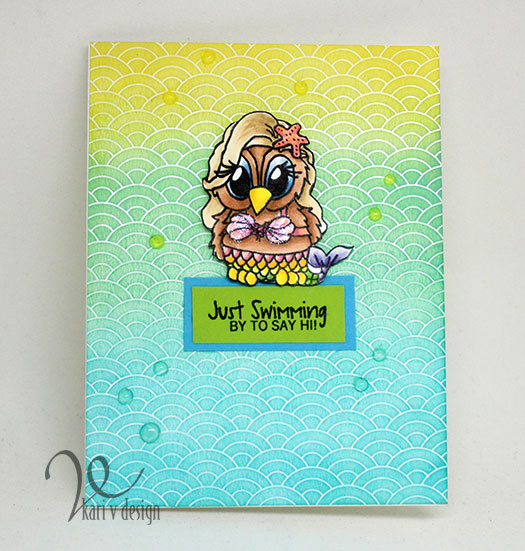
I colored up that cutie mermaid as a blonde bombshell, complete with glittery pink bikini top.

The background is called Everyday Tintables Card Pack from Concord & 9th, these are so great because they have a white design pre-printed that allows for this emboss resist look. I inked up with Distress Inks in three different colors: Peacock Feathers, Cracked Pistachio, and Fossilized Amber.

Close up of Mermaid Owl

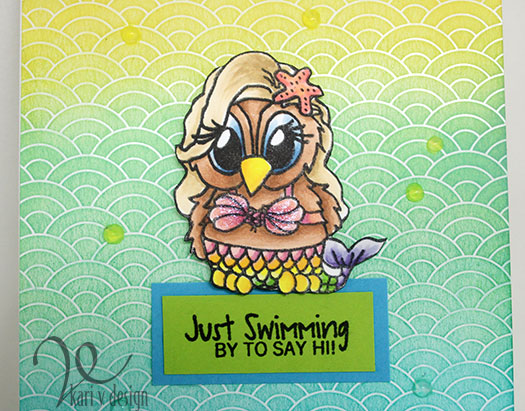
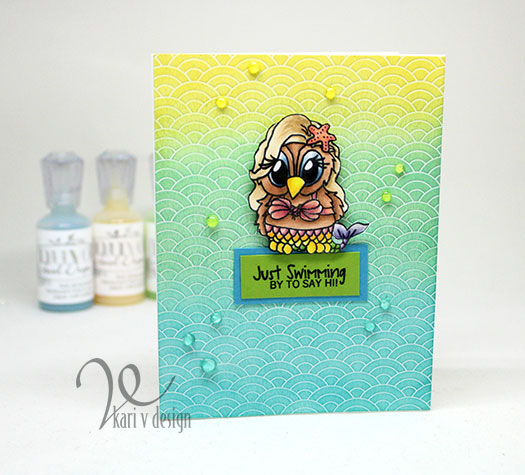
I used some Jewel Nuvo Drops to finish off this card. They are so beautiful because they are semi-transparent with just a little tint of color. These are the three colors I used: Limoncello, Key Lime, Sea Breeze.

My second card shows of that mermaid owl with some hot pink hair:

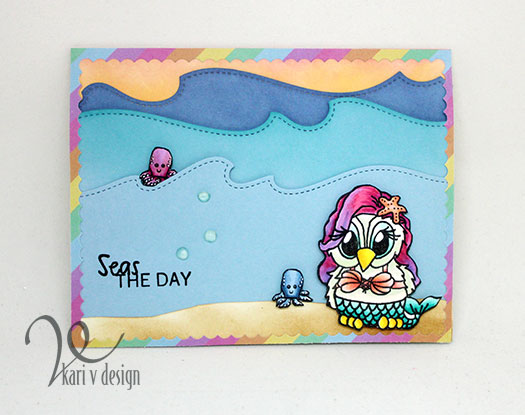
Look at her cute little octopus friend! I used Copics to color them up and added some white gel pen dots for accents. The ocean waves are a die from this set. I just love the added stitching to the edge.

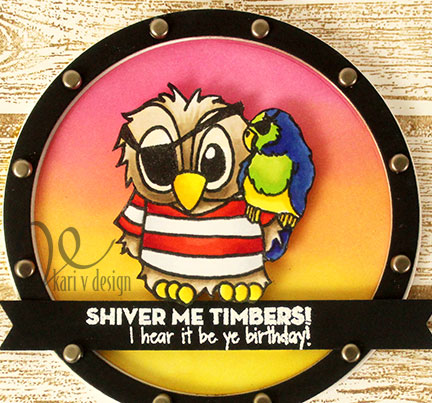
My last card features Brentwood Owl, which is actually the logo of Jessica Lynn Originals. Did you know she’s celebrating 14 years in business in April?! So this little owl is extra meaningful:

Shiver me Timbers! I hear it be ye birthday!

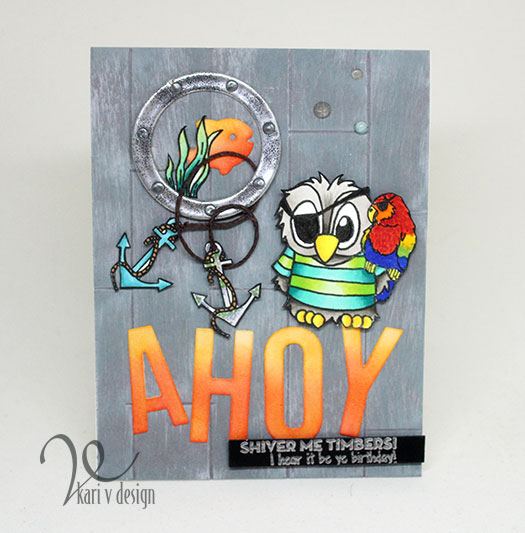
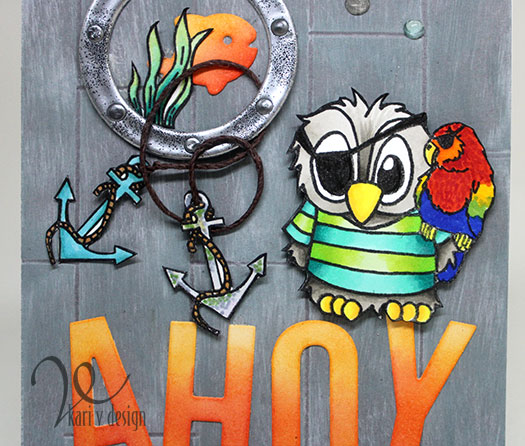
Take a look at his sidekick parrot! I used some extra lines to serve as his feathers and I think he turned out pretty cute! Here’s a close up:

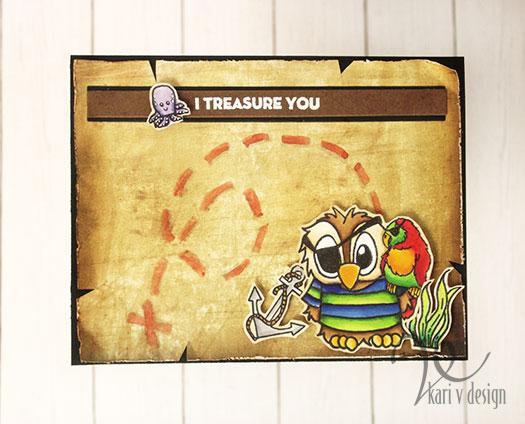
That wooden plank background is made using one of my favorite techniques! I have a video to show you just how to create that wooden plank look, as well as how I put this card together.

[Note: listen for the “guest pirate” in this video! LOL. I had a great time having a guest join in on this voiceover!]

Watch it below or on YouTube:

I love that Porthole die from Lawn Fawn. To finish it off, I used Nuvo drops in Liquid Mercury…I think it adds just the right amount of detail.

I hope you enjoyed these projects today. Check out more of Jessica’s designs at her blog here.

Ahoy!

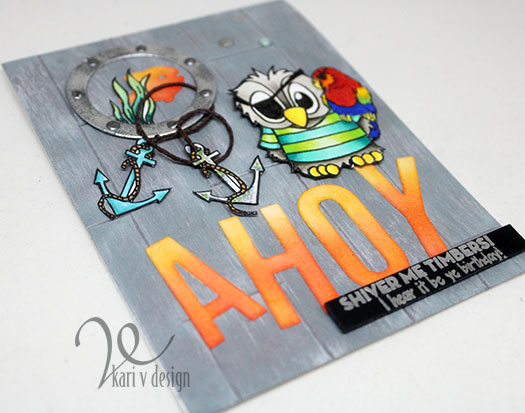
I’m loving how the wooden plank background turned out!
Until next time…Thanks for stopping by!

Comments { 0 }
wendi-close-up-of-yellow-bee

Lacy Bee Wings!

Oh, honey. Today I have a really fun glittery project to share! I’m going to share with you how to make glitter wings that look just like LACE. Eep! These are so much fun to make and so pretty on a bee. (I imagine they would be just as beautiful on a butterfly or a fairy, too!)

First, let me show you my cards. Please notice those lacy glittery wings!

Those lacy wings have me all glittery-eyed!

I’m going to show you just how to get these two-toned glittery wings. Watch the video below or on YouTube:

I hope you are inspired to try this technique yourself. I also made a tall card using two of those bees with their two-toned wings.

I hope you enjoyed this project today. I’m also up on The Hedgehog Hollow blog sharing all the information! Check it out and get more information on the HH Subscription boxes here.

Thanks for stopping by today!

Be Happy!

Comments { 0 }
shiver-me-timbers-wood-card

Pirate Owl Cards with JLO

Hello! Today I have a couple cards to share using the adorable Brentwood Owl from Jessica Lynn Originals. I love this little owl with his pirate outfit and parrot resting on his shoulder!

Affiliate links may be used when possible. When you click on these links I may receive a small commission at no additional cost to you. These assist me in keeping up my blog and bringing you new projects and ideas. I thank you very much for your support!

Here are my Pirate Owl cards:

I used this stamp for the background woodgrain using Distress Oxide ink in Vintage Photo. Distress Oxide ink really stamps nicely, but I did use my MISTI to get the best impression. Then I added the porthole die (found here) and put antique finish brads around the entire circle.

I colored up that owl and his parrot with Copics. The background is inked using three colors of Distress Oxide Ink in Picked Raspberry, Orange Marmalade, and Fossilized Amber.

Here’s a close-up:

Shiver me Timbers!

That sentiment is just so cute, and is included in the stamp set! “Shiver Me Timbers! I hear it be ye birthday!” I white heat embossed it on black cardstock and cut it out with a fishtail end.

For my second card, I created a map background using tea-dyed paper and added some inking around the edges with the Vintage Photo ink:

I cut into the edges a bit and roughed up the paper on the edges using this tool by Tim Holtz. It works like a charm! I also bent up some of the corners to give more dimension and interest.

I used copics on the Owl, the anchor, the seaweed, and the cute little octopus. I really like this sentiment too: “I treasure you.”

I hope you enjoyed these projects today! I think these are going to be perfect for my nephews. Thanks for stopping by!

For more information about Jessica Lynn Original Stamps, visit her website here.

Comments { 0 }
close-up-2

Bee Happy Rainbow card with the HH February Kit

Hello! Today I have a cheerful card for you using products from the Hedgehog Hollow February kit. It starts with a rainbow of colors of Distress Ink so you know it’s going to be cheery! I used Picked Raspberry, Worn Lipstick, Orange Marmalade, Mustard Seed, Evergreen Bough, Peacock Feathers, Denim Jeans, Shaded Lilac, and Wilted Violet. With all those colors, you are sure to smile! (at least they made me smile)

bee-happy-rainbow-3

I used some die cut hexagons that would normally just be thrown out! But they were perfect for my project today. To adhere these in perfect alignment, I put all the colored hexagons into the die cut, then picked it all up with some Glad Press N Seal. Then I turned it over and added some glue ONLY to the rainbow pieces. I attached it all to the card panel, let it dry for a minute, then removed the die cut to reveal the perfect placement of all those beautiful hexagons!

close-up-2

I used the bees, bee trails and BEE happy sentiment from the stamp set that came in the February Kit, and as an outline for the bottom layer I used the small hexagon stamp repeatedly for the border.

bee-close-up

I popped up those bees with some Scotch 3M foam tape (the mega roll!) to give more dimension. I put some craft foam between the top layer and the bottom layer for even more dimension!

bee-happy-rainbow-3

I hope you enjoyed this cheery project today! Check out how you can get the Hedgehog Hollow Kit here. And she is taking pre-orders for the April Kit (which I hear has some Art Impressions!!)

See you next time!

Comments { 0 }
woof-you-close-up

Dogs with Newspaper cards

Hello! Today I have a fun post to share with a VIDEO! I’m showing you how you can use an everyday item (newspaper) on your cards today.

I thought today would be the perfect time to share this technique because I have the cutest Bernese Mountain Dogs stamps to share from Jessica Lynn Originals.

Take a look at these cuties:

sneak-peek-at-2-dogs

I colored them up with Copics. The one on the left uses the Warm Greys (W3, W5, W7, W9) and the one on the right uses Neutral Greys (N3, N5, N7, N9). See the difference in colors?

These are super fun to color up! I thought they’d be fun to pair with newspaper! So two of my cards today feature newspaper as a design element.

In this first one I used some Gesso to give it more of a subtle whitewashed look for my card.

sorry-you-had-a-ruff-day

And in this second card, I used some Distress Ink in Hickory Smoke to ink up the paper-wrapped flowers. This sweetheart brought in some flowers for your birthday! He looks pretty pleased with himself.

happy-barkday-to-you

Here’s a close up to show a bit more of that detail in the fur. By adding small lines and dots, you give the fur more texture and I think it makes him look so dapper! (Do people even use that word anymore? Lol.)

happy-barkday-close-up

Watch my video below or on YouTube to see the tricks I share in using such a thin paper on your cards:


For my last card, I wanted to use that sitting Bernese Mountain Dog to share a message:

woof-you-card woof-you-close-up

How cute is he? He does Love You, you know. Aren’t dogs just the best for showing love?!

I hope you enjoyed these projects today. For more information about this set and her other cute stamps that are available, visit Jessica Lynn Originals here.

Comments { 0 }