Spring Crafty Haul

Spring Crafty Haul

Hello! It’s not often that I share a crafty haul video, but in the past few months I’ve found some really great stamps and dies that I want to share!

If you like to watch haul videos, this is for you! Watch it below, or on YouTube.

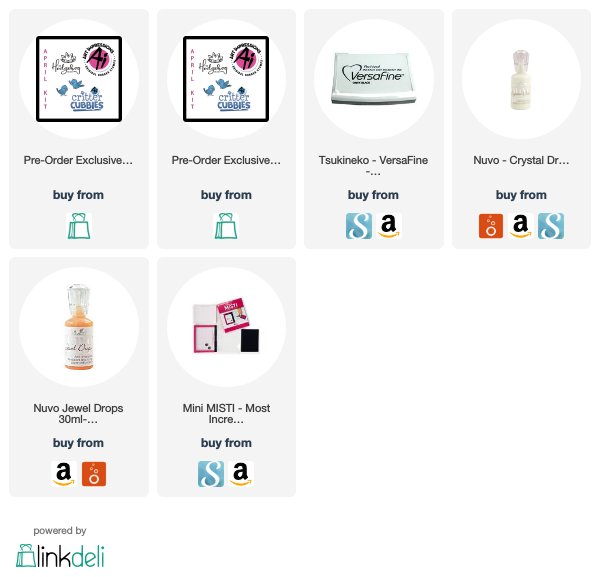
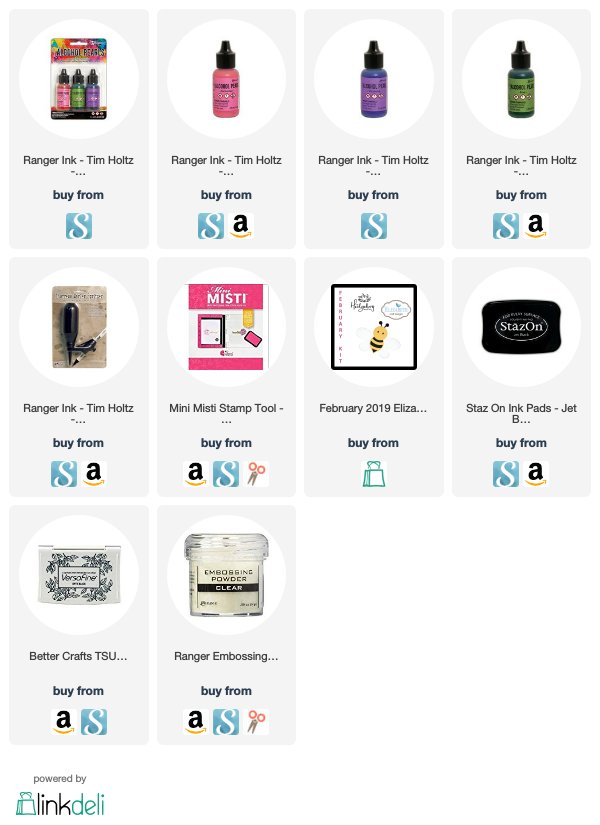
If you don’t like to watch haul videos, I have linked the items below that I’m sharing on the video…these are among some of my favorites right now! Some I found at Creativation, some I just couldn’t live without….Lol.

When possible, I am using affiliate links. When you purchase items using these links, there is no additional cost to you and I may receive a small commission. These help pay for blog costs and help me to bring you fun projects and videos! Thanks so much! Enjoy!

I hope you love these all as much as I do! It’s sure to keep me busy for weeks on end…:)

Comments { 0 }
both-cards-with-m&ms

Hoppy Easter Cards

Hello! Today I have a video showing you some cute Easter Bunny cards using the Lil Inkers Design Peek-A-Boo bunny die.

I love this die and just picked it up a few weeks ago. I definitely wanted to get some Easter cards made before the holiday came and went, but this die is great for cards ALL SPRING long!

Hoppy Easter
Hi there!

Aren’t these bunnies just the cutest? I have a process video showing you just how easy these cards can come together. Watch it below or on YouTube:

I hope I inpsired you to make some cute Easter cards of your own. Hoppy Easter to you and your Family!

I often get asked what supplies I used and where to get them. So I’ve included a list of supplies below, using affiliate links when possible. When you purchase a product using one of these links, I may get a small commission. This helps to bring you more projects and upkeep on my blog. Thank you!

I hope you enjoyed these cute bunny cards! Oh, and those white chocolate M&Ms…I bought those purely for photo purposes. *Wink 🙂

Hoppy Easter!

Thanks for stopping by! Happy Easter to you and your family.

Comments { 0 }
purple-green-close-up

Watercolor Resist Technique

Hello! Today I have a favorite technique to share called watercolor resist. I am using some images and dies from the April 2019 Hedgehog Hollow Kit.

It’s a really easy technique, but can be quite an eye catcher!

First, I stamped the birdhouse onto some watercolor paper using Versafine Onyx Black ink. Then I embossed it with some clear embossing powder.

Then, I used Gansai Tambi watercolors in rainbow colors on the first panel and overlapped them a little bit. The heat embossing resists that watercolor!

I die cut the panel down with a rectangle die cut. Then I cut the vines (also in the kit!) from the outer edges of the watercolor panel. No sense letting that beautiful color go to waste!

A Rainbow of Watercolor

To finish off this card, I used the polka dot paper from the Kit as a mat, and added a black frame. I popped up some birdies with 3M Foam tape and used some pearls for the final touch.

Green, blue, purple

I made another card using a cool color palate. The green polka dot paper was also included in the kit!

I hope you enjoyed this project! Visit the Hedgehog Hollow for more information about these card kits! Thanks for stopping by.

Comments { 0 }
birdhouse-close-up

Sweet Birdhouse Card

Hello! Today I’m sharing a card I made with the all-new April 2019 Hedgehog Hollow card kit. This kit is full of awesome supplies, including the cutest Birdhouse stamp set from Art Impressions!

I made a card today using the birdhouse stamp set, and I have a process video to share with you!

Here is my card:

Tweet Tweet!

How sweet are those images!!? The flowers and vine dies are also included as a part of the kit! I am just in love with this set.

I added the sentiment to the inside of this card, and you can see a sneak of the inside in my video.

To see the process video, watch it below or on YouTube:

Wouldn’t you love a birdhouse like this in your backyard? I would!

Check out the subscription kits to the Hedgehog Hollow, linked below.

I often get asked about supplies I use for my cards, so I have a list below. Affiliate links are used when possible, at no additional cost to you. When you click on one of these links and purchase an item, I may get a small commission. These help to pay for upkeep costs to my blog and bring you more projects and videos! Thanks for your support.

Thanks for stopping by!

Comments { 0 }
blue-glitter-hello-side-view

Pearl Alcohol Inks with Photo paper

If you’re anything like me, you have a nice stash of old Photo Paper. You know, the kind you used with an inkjet printer to print photographs? I have an entire full box of it!

So I did what any creative type might do…I put it to work in my craft room! I heard multiple times that photo paper doesn’t really work so well with alcohol inks…that the ink just soaks right in and doesn’t move.

But I found a trick!

Using Pearl Alcohol Inks with Photo Paper

In fact, I found a way to make it work that is so much fun…I just couldn’t stop making card panels!

Pearl Alcohol ink Flowers!

I have a video to show you all the details, watch it below or on YouTube:

I can see many Alcohol ink panels in my future…after all…I still have the big box of Photo Paper!

Thanks for stopping by! I can’t wait to see your Alcohol Ink cards! The bees and sentiments I used for these cards are from the Hedgehog Hollow February Kit. For more details about the February 2019 Kit, visit the Hedgehog Hollow shop.

I’m often asked what products I’ve used and where to get them, so below is a list of supplies I used. When possible, affiliate links are used at no extra charge to you. These links may pay a small commission that helps me to keep my blog and YouTube channels running. Thank you for your support!

Comments { 0 }