Archive | Recipes RSS feed for this section
two-cookies-with-orange-slices

Orange Blossoms (a favorite recipe)

two-orange-trees

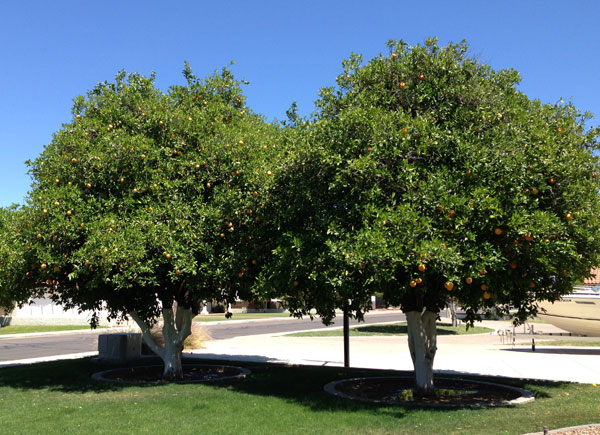
We have four beautiful orange trees and today they were calling to me. One of my favorite things is to enjoy the fruit from our CITRUS trees here in Arizona. We have a new lemon and lime tree, too, and I’m hoping soon they will produce! But now, it’s time to harvest the rest of these sweet oranges and MAKE something. I went to pick some low hanging fruit and came in with a basket just full of oranges ready to juice, zest, and slice.

sweet-oranges-in-bowl

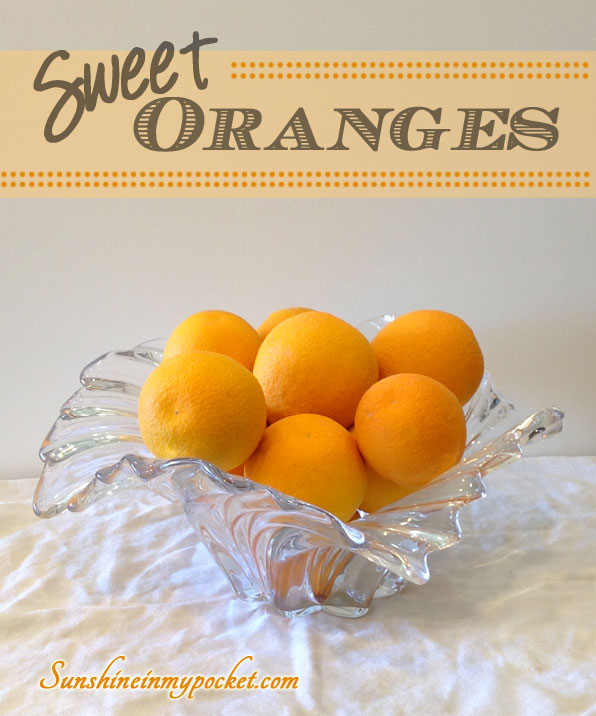
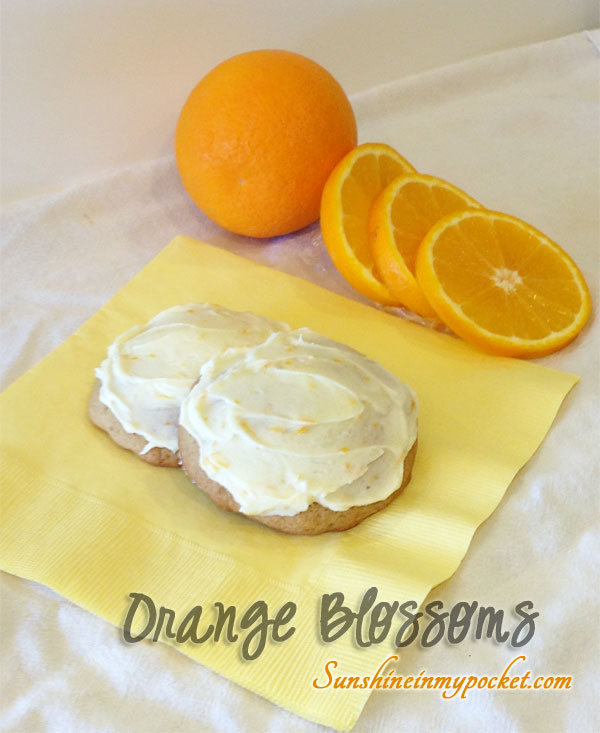
Aren’t they beautiful!? Of course, we love our fresh-squeezed orange juice, but today I’m thinking my very favorite orange cookies: Orange Blossoms. My sister, who lives in Utah, made these the other day and sent me a picture…she said “These cookies always remind me of you!” So thank you, dear sister, for the inspiration!

I will warn you now: this post has a lot of pictures! I couldn’t help it…these darlings made such a photogenic subject and I got a little carried away. I even got my husband in on the picture taking (you will see his picture at the end of the post).

orangy-ingredients

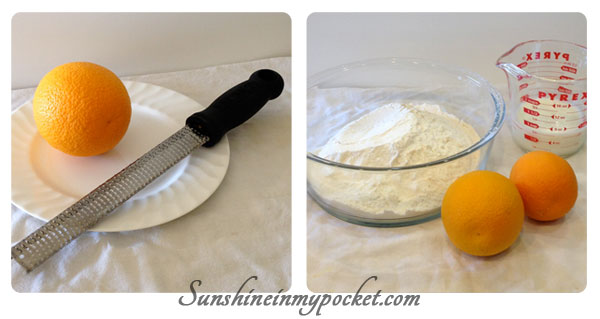
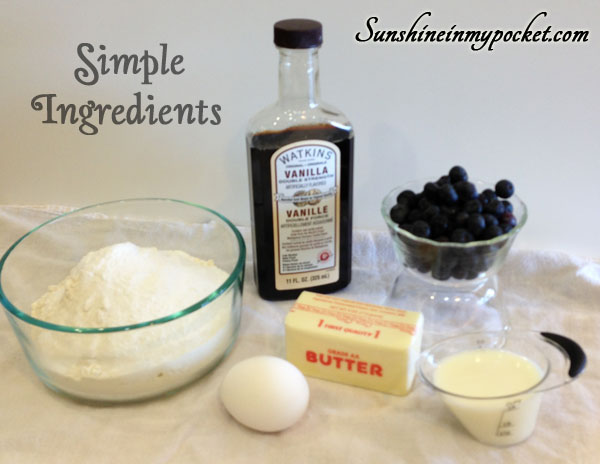
I love the simple ingredients: oranges, flour, baking powder, baking soda, salt, brown sugar, eggs, butter, and buttermilk. We just happened to have some buttermilk on hand that I needed to use up, but if you don’t have buttermilk you can add a little lemon juice to regular milk (see how to do this here).

{Have you used one of these microplane zesters? It’s one of my favorite tools in the kitchen, especially when I’m working with citrus!}

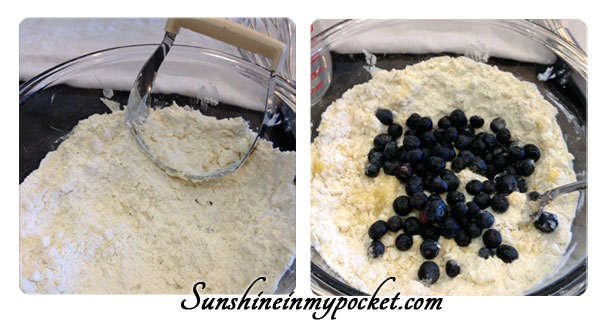
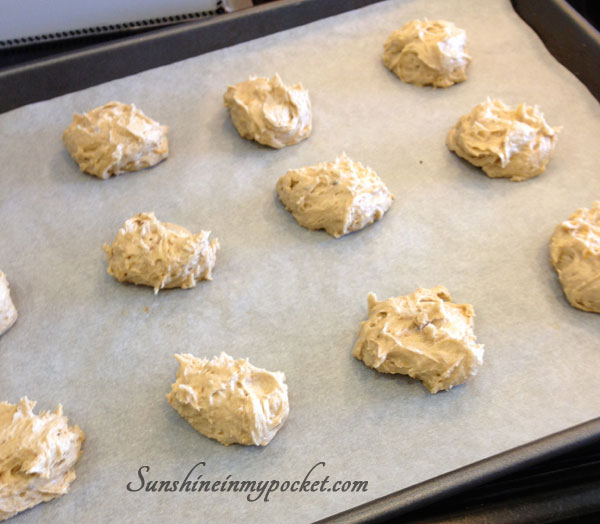
Mix up the ingredients and drop by tablespoons onto a cookie sheet. Today, I made them regular sized, but if I’m having a ladies’ lunch or tea party, I will make them half this size. And they turn out so cute!

on-cookie-sheet

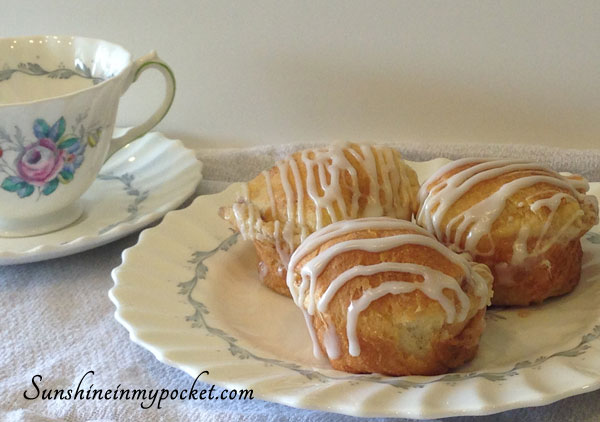
Bake them up and while they are baking, make the orange glaze. It’s a simple mixture of butter, powdered sugar, orange zest, and orange juice. You will want to frost these cookies while they are still warm because the frosting melts and enrobes the cookies a little bit.

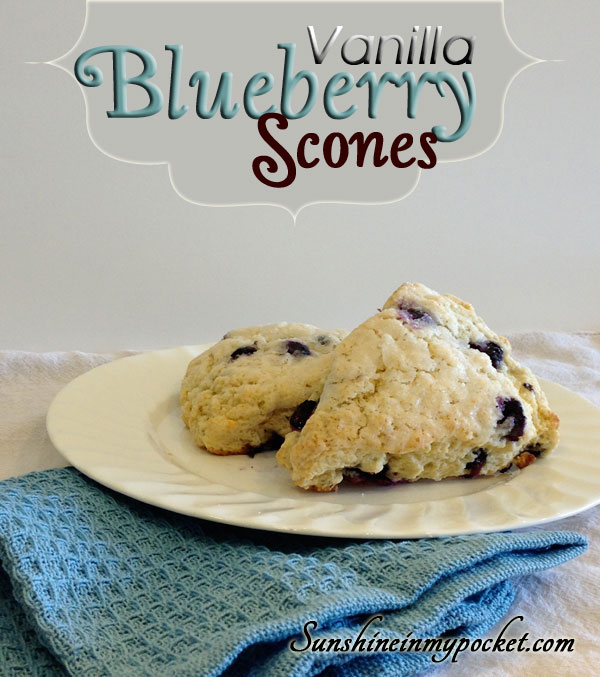
I love these little cookies. They are more cake-like and when you bite into them it is just. like. heaven.

frosted-cookies-on-sheet-with-oranges

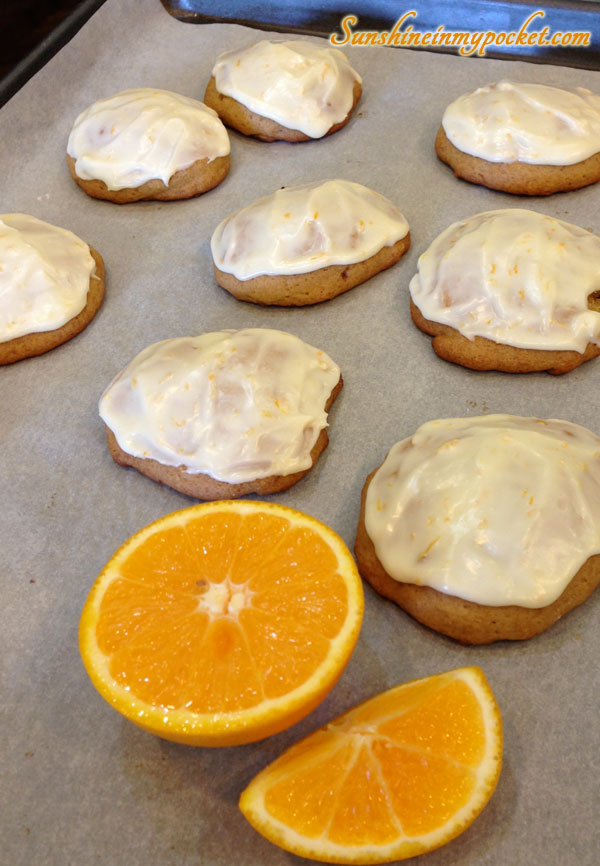
Can you see the bits of orange zest in the frosting? There is zest in both the cookie dough AND the frosting, which adds up to a great citrus-y kick of flavor!

cookies-orange-slices-and-glass

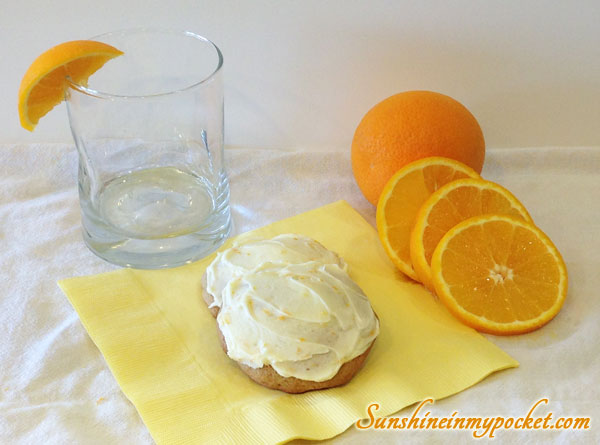
Doesn’t this make a pretty picture? It screams luncheon (or tea party) to me! Or the next best thing: which is to wrap them up pretty and take them to some of my favorite people.

wrapped-cookies-with-note

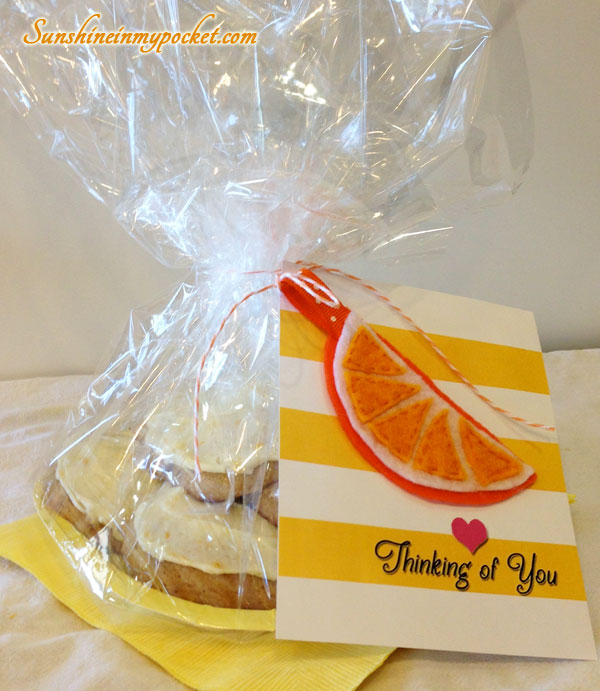
OK. That orange slice (out of felt!) and printable is so cute for this little gift! Click here to get instructions on how to make it AND get the free printable!

cookie-plates-and-oranges

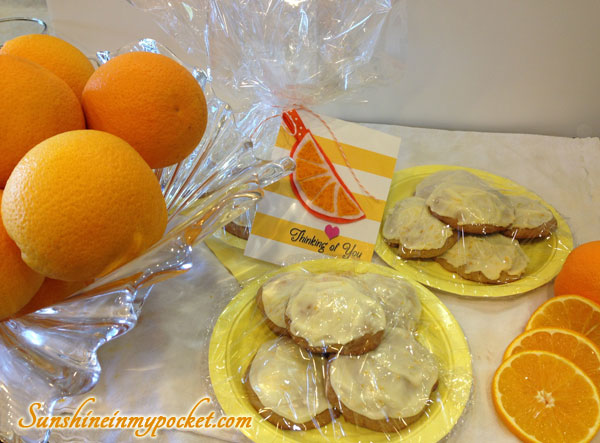
This is the fantastic photo my husband captured with all the prettiness and citrus colors! I love it.

So, will you go try this recipe and just see if you love these delicious Orange Blossoms as much? And then let me know what you think! Enjoy!

[amd-zlrecipe-recipe:2]

two-cookies-with-orange-slices

Comments { 2 }
flowers-and-a-scone

Vanilla Blueberry Scones for Nonny

vanilla-blueberry-scones

This post is inspired by my grandma, Nonny. She is a fantastic cook and she shared her love for cooking (and baking) with me. She taught me to make orange rolls (from scratch) and sugar cookies. She taught me to love tea time with the girls — complete with dress up clothes and hats and gloves. She always cooked an amazing Sunday dinner with homemade rolls and creamed peas…oh, how I loved those creamed peas. And always, always there were pansies from the garden as the centerpiece!

Right now my grandpa, Poppy is in the hospital. And since I feel so sad and a little helpless, I thought I’d make some scones for Nonny and send her these pictures across the miles! So, Nonny, this post is for you…I wish we were enjoying tea together as we devour these scones.

Vanilla Blueberry Scones

First, gather the ingredients: they are simple and few.

simple-ingredients

Flour, sugar, baking powder, butter, blueberries, milk, vanilla and an egg. (full recipe at the end of this post)

Mix together the flour, sugar and baking powder. Add the butter and cut it in with a pastry knife (if you don’t have one of those, you can use a knife or a fork). Then add the blueberries and carefully fold into the flour mixture.

cut-in-butter-add-blueberries

In another dish, mix together the milk, egg and vanilla. Add the wet ingredients to the flour and blueberries and mix together until the dough comes together. You may need to add a little extra milk to bring it all together. Dough should be a little sticky.

Turn the dough out onto a parchment lined baking sheet and form it into a circle, about 1/2″ high. Brush a little milk onto the circle of dough, and sprinkle with sugar. Some of the sugar will melt into the milk, keep adding sugar until you can still see it on the top. (I like a lot of sugar…it cooks up a little crispy on top and makes the scone SO delicious!) Cut the circle of dough into 6 wedges. Then separate the wedges a bit before you put it into the oven.

shape-milk-sugar-cut

Bake at 400 degrees for 10-12 minutes. Do not overbake! That makes the scones crumbly and dry…and you don’t want that! When they are done, the edges should be just BARELY turning brown. Allow to cool. (But if you can’t resist…go ahead and eat one while they are still warm! That’s one of life’s best!) Make sure they are completely cool before you package them up in adorable little bags for gifting.

trio-of-scones-with-flowers

**Recipe here —- ** Important…please note: I need to update this recipe because it leaves out the part where you cut in the butter. Make a note:

Cut in the butter BEFORE you add the blueberries to the flour mixture. 🙂

[amd-zlrecipe-recipe:1]

I love to eat these with butter and cinnamon/sugar or even whipped cream (my favorite)! But they are delicious even just plain…the blueberries add just a little sweetness and the sugar on top makes a fantastic coating when you cook it.

{This one’s for you, Nonny, complete with purple pansies! I love you}

flowers-and-a-scone

Oh. My. Doesn’t that look yummy?!

You might decide to enjoy these scones for Mother’s Day. But believe me, you really don’t need a special occasion for these beauties. When you make them, won’t you invite me to tea?

Comments { 4 }
for-the-glaze

Easter Surprise Rolls

Easter-surprise-rolls

These Easter Surprise Rolls are simple to make and delicious! I made these growing up and I think since they are SO easy to make, we actually made them more often than just Easter time! They take only minutes to put together, and are so fun to make with kids (I know, I made them when I was a kid!)

gather-ingredients

First gather the simple ingredients: Crescent Rolls, Marshmallows, Cinnamon Sugar, Melted butter.The next steps are super easy, and I will show you how to assemble them in pictures:

butter-and-cinnamon-sugar

roll-up-in-crescent-roll

seal-edges-and-put-in-pan

Seal those crescent rolls well…you don’t want the marshmallow to escape! Dip just the bottom of the roll in butter and place it in a muffin tin. Now just bake them at 375 for 10-12 minutes! But be sure to put a cookie sheet underneath your muffin tin. The marshmallows tend to seep out a bit and they like to drip. {You will thank me later!} While the rolls are baking, prepare the glaze.

for-the-glaze

Just 3 simple ingredients: powdered sugar, milk, and vanilla. I used my Watkins vanilla for this one. (Read the vanilla taste test here). After I made the glaze, I realized that I could have used my CLEAR vanilla and it would have kept the glaze a nice white color.

Allow the rolls to cool a bit, then drizzle on the glaze.

The surprise comes when you bite into one of the warm rolls and find they are EMPTY! What happened to the marshmallow?!

the-roll-is-empty

Easter Surprise Rolls

1/4 c. sugar
1 t. cinnamon
2 pkg. crescent rolls (refrigerated)
16 large marshmallows
1/4 c. melted butter

Dip large marshmallow into melted butter and roll in cinnamon and sugar mixture. Place in wide end of crescent roll, fold corners over and roll to point. Seal edges well. Dip point side into butter and place down in greased muffin tin. Place pan on cookie sheet. Bake at 375 degrees for 10-15 minutes. Remove rolls from oven and allow to cool for a few minutes. Glaze while warm.

Variation: Place spoonful of canned apple pie filling in crescent roll and then put a large marshmallow on top of the pie filling. Fold, roll and bake.

Glaze:

1/2 c. powdered sugar
1-2 T. milk
1/2 t. vanilla

Whisk ingredients together. Spoon over warm rolls.


sweet-surprise-rolls

Aren’t they beautiful? Enjoy!

Linking up here: Somewhat Simple

Comments { 0 }
rainbow-fruit-salad

Dose of Sunshine (and Rainbows) Monday — Rainbow Dinner Party

I hope you all had a wonderful St. Patrick’s Day. We had a birthday dinner celebration for my Mom’s birthday! And it turned out bright and cheerful. So for this Dose of Sunshine, I decided to share the Rainbow Dinner Party we had. I hope it brightens your day!

rainbow-dinner-party-storyboard

fruit-salad-table-2-picts rainbow-skittles

I was challenged to decorate for this dinner party with only dishes I already had! (Shop for dishes much? I guess my husband thinks I have too many! What? Is that even possible?) So I started out with some rainbow skittles in mini glasses and added a bit o’luck tags…can you see the gold (rolo) at the end of the rainbow? I used the “Little Bit o’ Luck” printables from here.

The gold chargers I already had, as well as the white plates (they are the buffet plates from Crate and Barrel). Other items I already had: the silverware, goblets, vases. I did supplement with some shamrock papers for the runner (from JoAnn’s), and flowers (daffodils and carnations from Safeway). I colored the water in each flower vase in a different color of the rainbow.

I love the way the individual fruit salads turned out! Strawberries, Clementines, Pineapple, Green Grapes, and Blueberries make for a happy rainbow fruit salad. (And delicious! I made a vanilla pudding sauce to go with the fruit salad, but I found that the fruit was so sweet on it’s own that we didn’t even use the pudding sauce).

rainbow-fruit-salad

For dessert, I made Texas Sheet Cake Cupcakes (a favorite around here)! And I found these sour rainbow candies at WalMart, so we of course had to make a rainbow on our cupcakes. I used a little stabilized whipped cream (from Trader Joe’s) as the clouds, cut the rainbow sheets in half and put them into the cream. My nephews loved this part! I even let them make their own rainbows on the cupcakes.

Four-cupcake-pict

We had some cupcakes to deliver to a friend who also has the same birthday, and so we wrapped them up in this cute cupcake box, tied with a green bow, and added a “Little Bit o’ Luck” tag to the top. I decorated only 2 of her cupcakes with the rainbows…since they are a little sour. Those chocolate cupcakes are so delicious on their own, but those rainbows are just adorable. So which one wins…adorable or delicious? I will let her decide! {Note: my nephews LOVED the sour rainbows…it might be a kid taste?}

flowers-and-luck-sign

We decorated with LOTS of flowers…a dinner party is made even more amazing with flowers! The ones on the left were a gift to my mom from a good friend (thanks, Erin, she loves them!) And I printed out the Luck printable in the frame from here.

place-setting-with-fruit

It was a colorful and fun dinner. And I used *mostly* everything I already had on hand.  I love that!

Have a happy Monday!

Comments { 0 }
yakisoba-veggies-in-pan-sm

Food to Make you happy — Easy Yakisoba

We are celebrating around here for making our goal of 100 likes to our new Facebook page! Thank you, friends and dear readers! And what could be a better way to celebrate than with VEGETABLES!?! I’m serious! If you know me at all, you know that I LOVE my vegetables and I drink (yes, drink) them every morning. I will be sharing my delicious breakfast drink soon!

But I have been getting SO many requests for my Yakisoba recipe that I decided to post it today. I have to keep my favorite people happy!

Easy-Yakisoba-small

Truth is, this recipe makes me so happy…and I think you will agree when you try it out. It’s easy…it’s delicious…it’s filled with color. That is celebration right on a plate, friends! (Can we please officially change the title of this recipe to “Celebration on a Plate”?)

Let’s get started with the Yakisoba.

First, assemble your favorite veggies. I like to use all the colors of the rainbow (except maybe blue, I can’t even think of a blue vegetable!) My favorites for this dish are:

Onion, Carrots, Zucchini, Summer Squash, Red pepper, Broccoli, Red Cabbage, Garlic

Slice your onion (I use yellow onion). In a large pan (or stir fry pan), warm 2 T. of olive oil on medium high. Once oil is hot, add onion. Let this cook for 5-7 minutes or until the onion is soft and browned.

While the onion is cooking, cut your other veggies. Cut them in similar sizes for even cooking. When onions are browned, add carrots and zucchini. Cook for 4-5 minutes. I like to let the zucchini and squash cook without stirring for a few minutes. This allows them to get browned on one side. Oh! My mouth is watering just thinking about it! Turn them over to brown on the other side.

yakisoba-veggies

Once zucchini is browned, add peppers and broccoli. Allow those to cook for a bit, then add the cabbage.

While that is cooking together, get your meat ready. I used chicken for this recipe, but you can also use beef or pork, or keep it vegetarian! I cut my chicken (3 chicken tenders) into bite-sized pieces. Then warmed a small amount of olive oil in a separate skillet. Add chicken and cook, stirring occasionally. Add a couple cloves of garlic (minced) with the cooking chicken, if you like. (I like!)

When chicken is done…it only takes a few minutes! Add to the vegetables. Then, add your noodles, water, and seasoning mix from the package. I usually include 2 packages of noodles, both seasoning packets, and 1 cup of water. Here are the noodles I like to use:

yakisoba-noodles

[Note: If I don’t have these on hand when I crave Yakisoba, I have also used angel hair pasta or spaghetti…and I make sauce using a bit of soy sauce, cornstarch, and water!] You have to coax these particular noodles to separate, but please be careful and don’t break them. It just doesn’t taste the same with broken noodles!

Now, dish up and enjoy! (here’s another secret: I sometimes add a bit of low-sodium soy sauce to mine)

yakisoba-veggies-in-pan-sm

How’s that for a celebration!?

Comments { 0 }