Hello! Today I am sharing my Hot Foil Press cards from my previous blog post…these cards were so fun to make, and I just HAD to create a video to share the process.
I am also sharing some new paper I found that works great for the Hot Foil Press. Hope you Enjoy! Watch the video below or in HD on YouTube:
I’d love to hear your adventures with the Hot Foil Press! Have you found a paper you love for this technique?
Hello and welcome to the Altenew Glint & Glimmer Blog hop! Today I am excited to join in to share the NEW foil plates and other product newly released from Altenew! CLICK here to check out the entire new release.
I have SIX cards to share, so let’s get started:
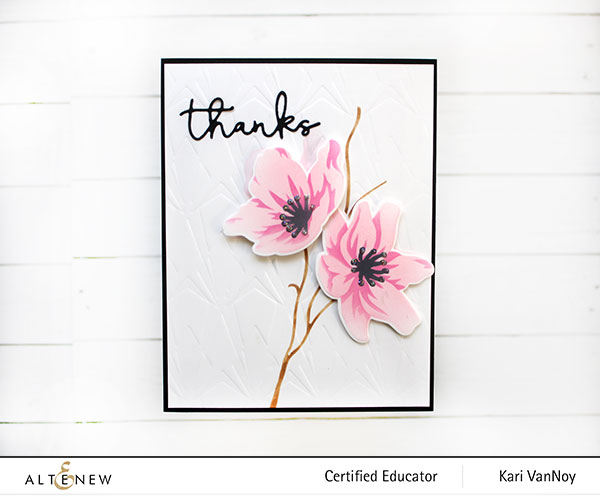
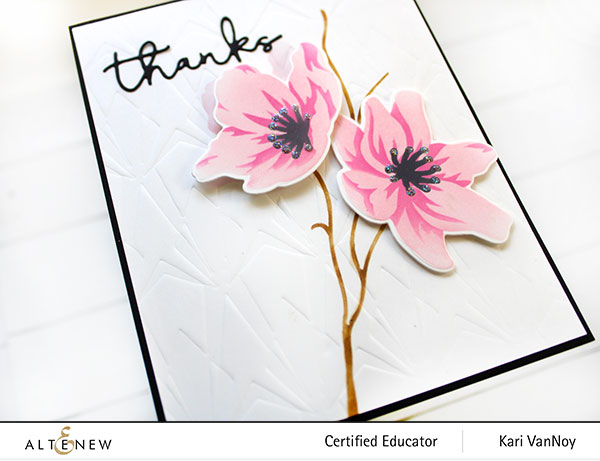
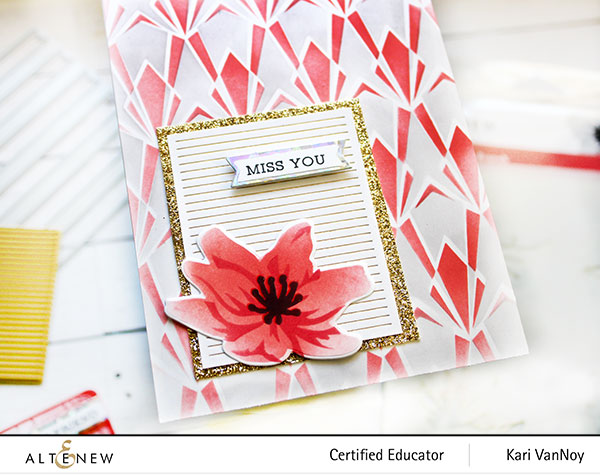
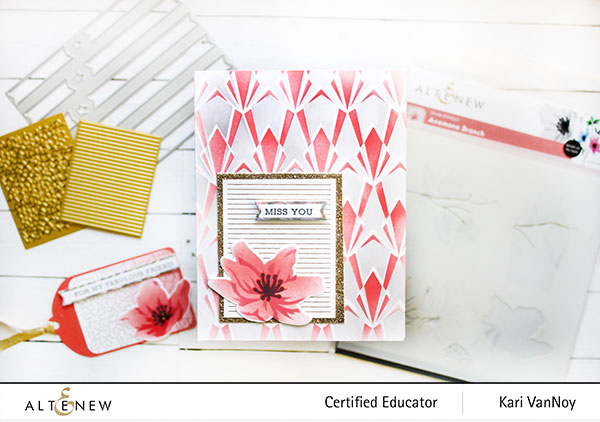
Card 1: Anemone Branch & Die with Deco Diamonds Stencil Embossing
I fell in LOVE with the Anemone Branch Stencil & Die….you can stencil on the branch, and stencil the flowers separately to die cut. Then POP them up for a simply stunning look!
The Deco Diamonds Stencil is gorgeous and here I used it for dry embossing on the background panel. Want to see it in use with inks? Check out my next card.
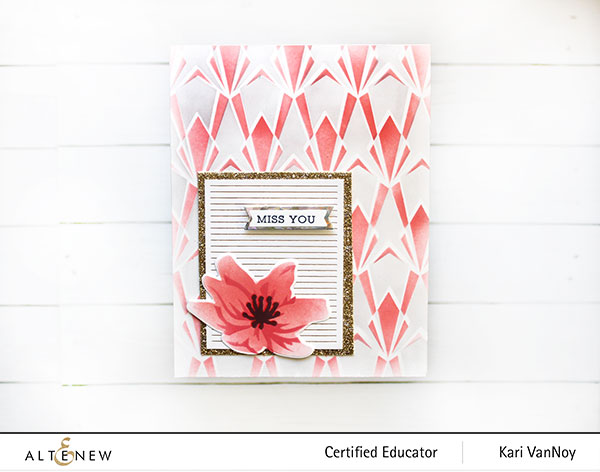
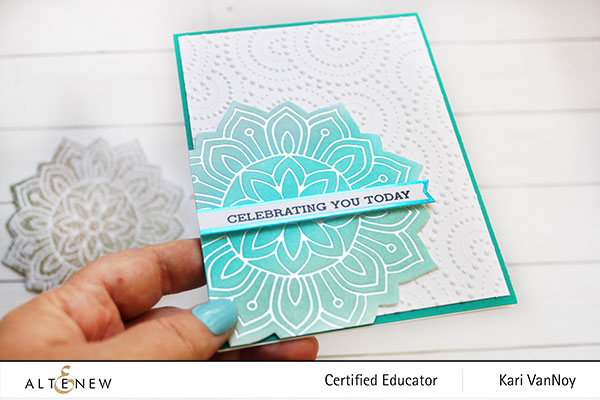
Card 2: Deco Diamonds Stencil Inked with Tiny Patterns Hot Foil Plate
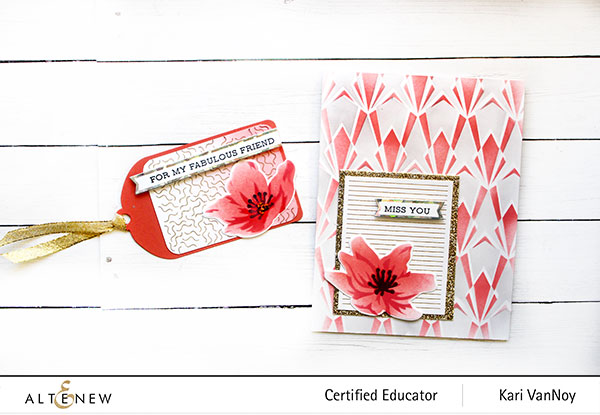
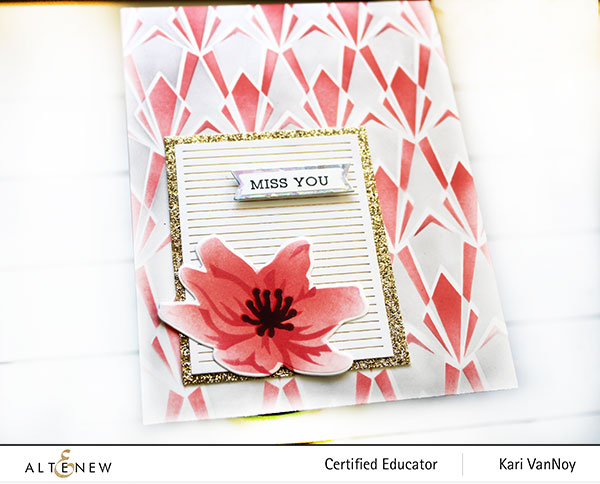
I inked up the background with the stunning Deco Diamonds Stencil…this is a 2 piece stencil so it’s easy to add 2 different colors. Here I used a coral and a grey ink on the background.
The small lines are FOILED using the new Tiny Patterns Hot Foil Plate. It is so simple and fun to use. I added a flower from the previous anemone stencil & die (which quickly became a favorite of mine).
The Tiny Patterns Hot Foil Plates are the perfect size for a tag also! I used another one of the patterns on this tag.
With the extra foil, I hot foiled a white sheet of cardstock and cut it into a shaped card! (card on the left)…Foil is notoriously difficult to photograph, so I hope you can see how gorgeous this Sunburst Doily is foiled.
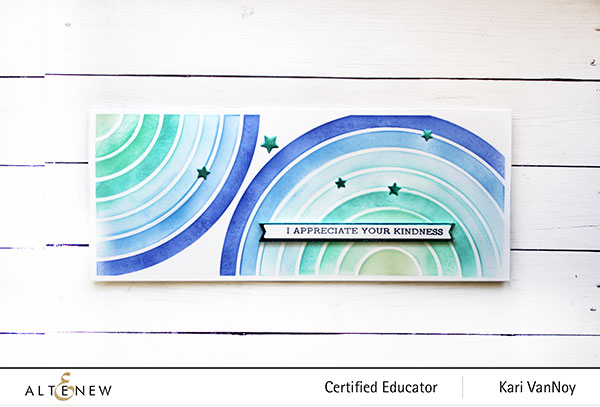
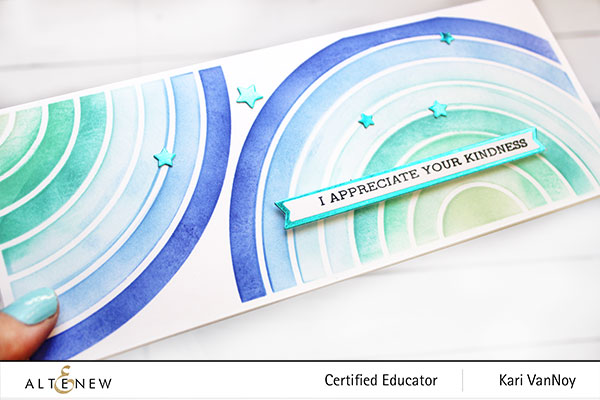
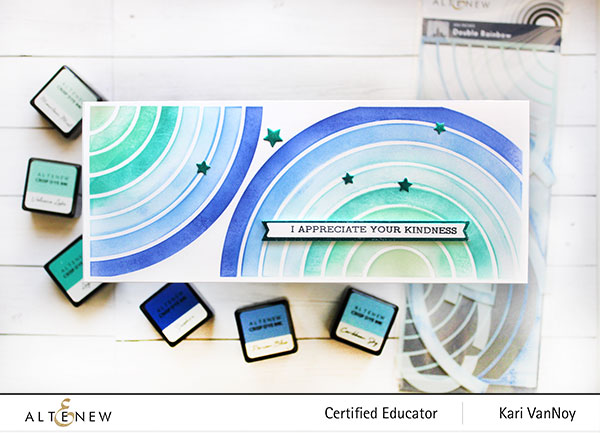
The Double Rainbow Stencil creates a beautiful slimline card with multiple rainbows. You could, of course, cut it down to an A2 size card as well. I used the remaining turquoise banners for the sentiment on this one. Those stars are ALSO from the Sentiment Banners Hot Foil and Cover Die…they are like a little happy bonus!
Have you used a Hot Foil Press before? Watch my video below to see the hot foiling process and these cards come together!
Giveaway Prizes
$300 in total prizes! To celebrate this release, Altenew is giving away a $50 gift certificate to 2 lucky winners and a $25 gift certificate to 8 winners! Please leave a comment on the Altenew Card Blog and/or each designer’s blog post on the blog hop list below by for a chance to win.
Altenew will draw 10 random winners from the comments left on each stop of this blog hop and announce the winners on the Altenew Winners Page on 11/24/2021.
Your Next Stop is the talented Therese Calvird HERE.
Thanks for stopping by today! Let me know which products caught your eye…and if you are shopping, I really appreciate if you use my affiliate links! Check out the entire new release HERE. See you soon with more cards.
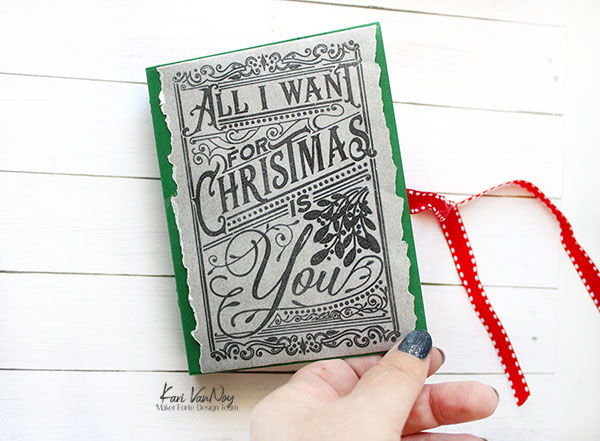
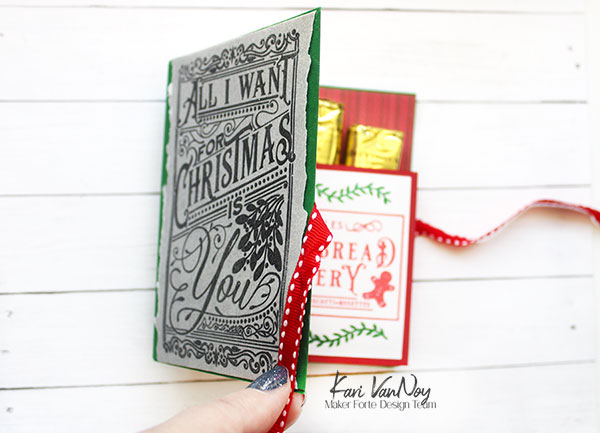
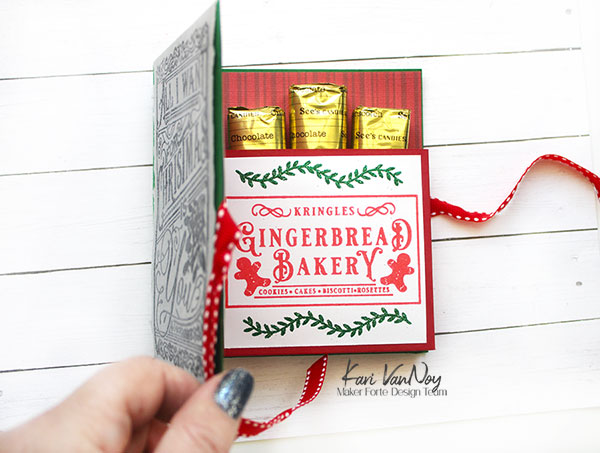
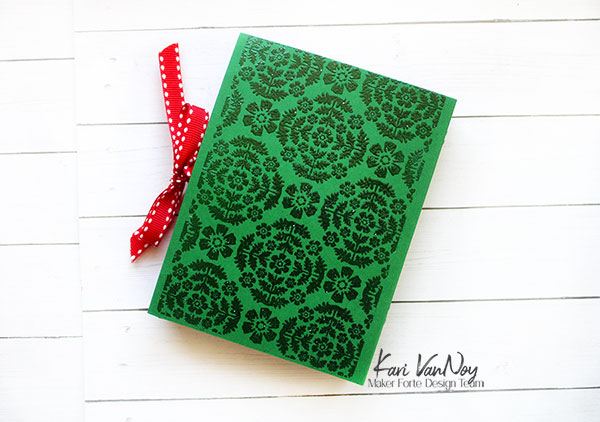
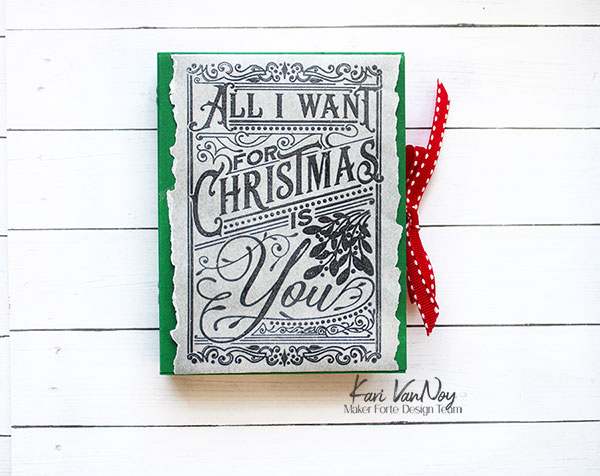
Hello! I am excited to share this project with you today….we are making Candy Books from cardstock! Remember those lifesaver books that made an appearance this time of year? Well, that’s kinda the idea with this project.
I have a video with ALL the details of how to make this, watch it here or in HD on YouTube:
For the front cover I created a book jacket with silver vellum (I love this stuff!). I heat embossed the stamp from “All I Want for Christmas” on the vellum and I really love how it turned out.
For the inside, I stamped in red and green using the Tough Nut to Crack stamp set.
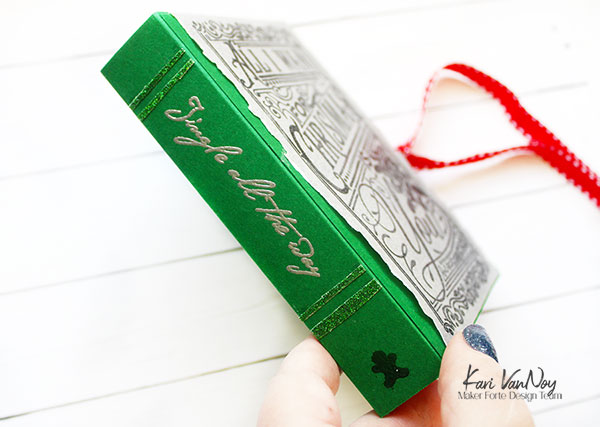
On the spine, I added some details with stamps and glitter tape. I love the font of the scripty “Jingle all the way.”
For the back of the book, I wanted some interesting texture, so I used the Damask stamp to clear heat emboss a design.
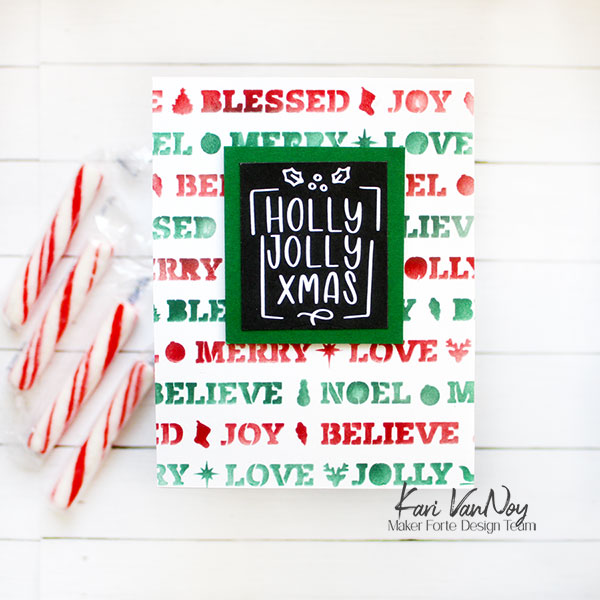
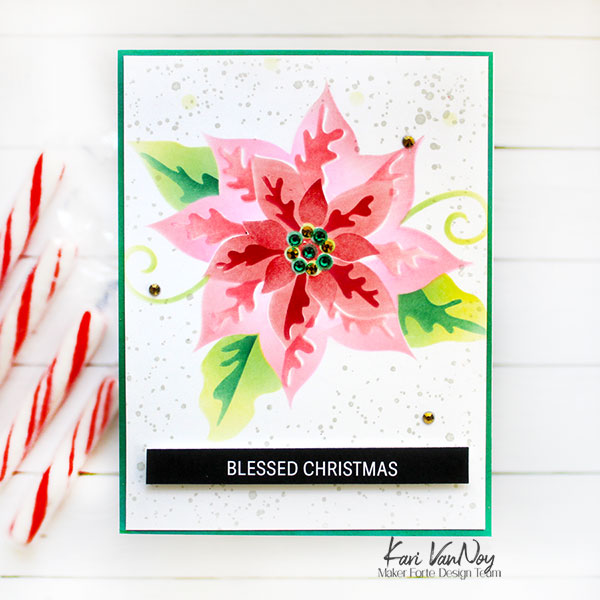
I have a few other ideas for the book front cover, too. You could easily change out this book jacket cover for a stenciled front cover. Here’s my favorites from the newest Maker Forte release:
Stencil this one up in reds and greens for a festive look!A pretty Poinsettia!Make them all have red glittery noses…or just one!
I hope you enjoyed these projects today…these are definitely favorites of mine!
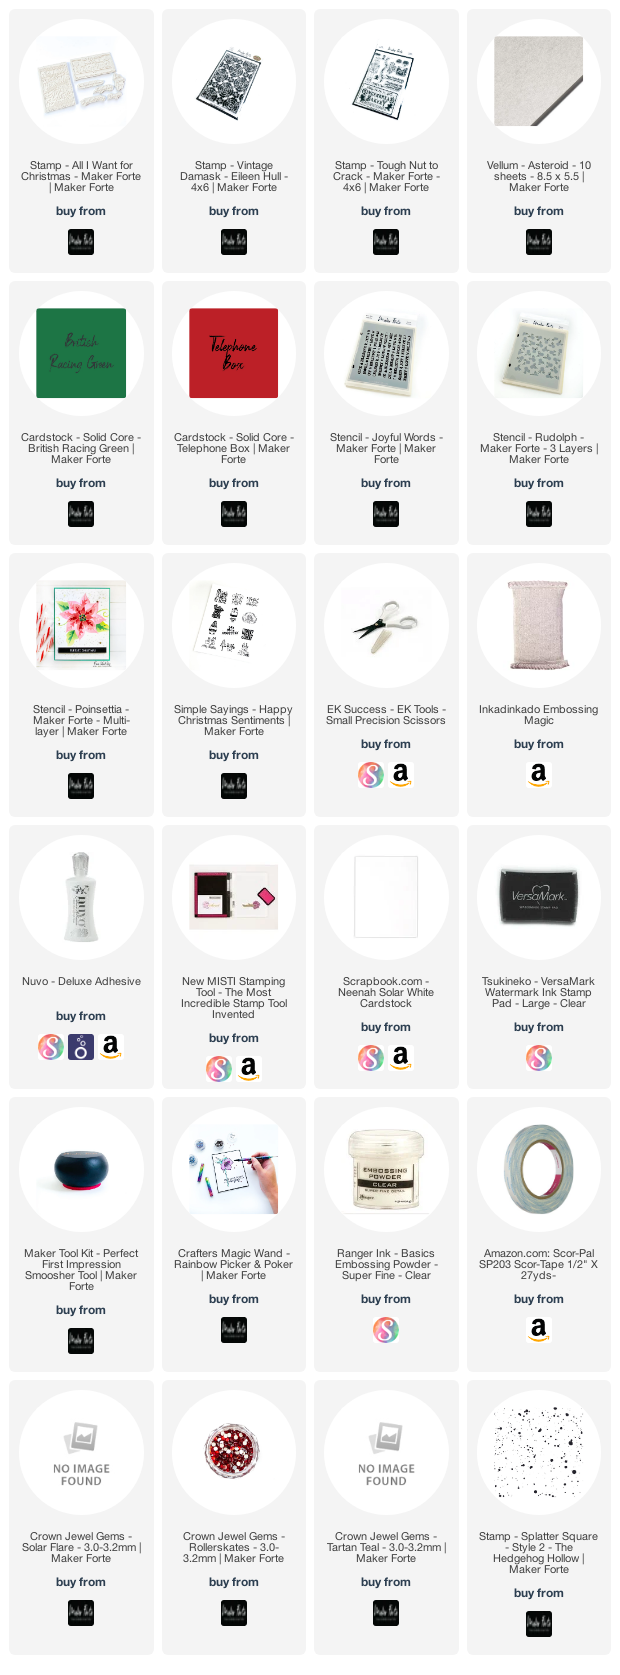
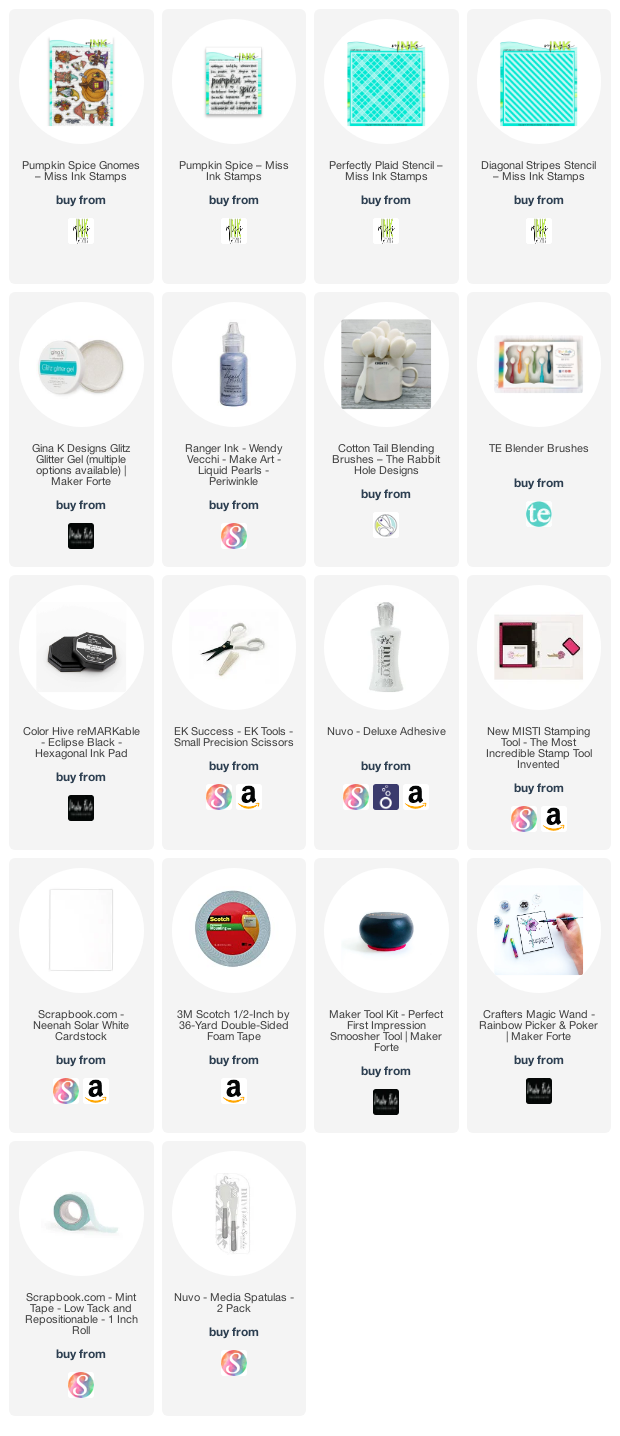
I’m often asked what supplies I use to make my cards and projects, so I’ve put together a list using affiliate links when possible. If you make a purchase with these links I may receive a small commission. These help me to keep up with blog costs and continue bringing you fun projects. Thank you so much for your support!
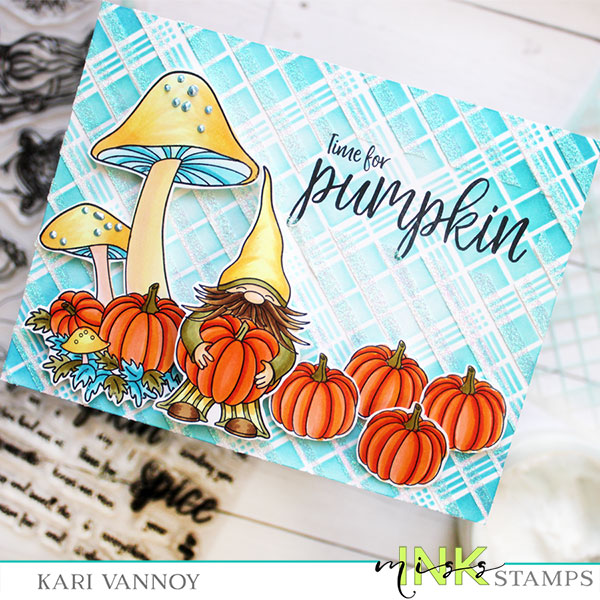
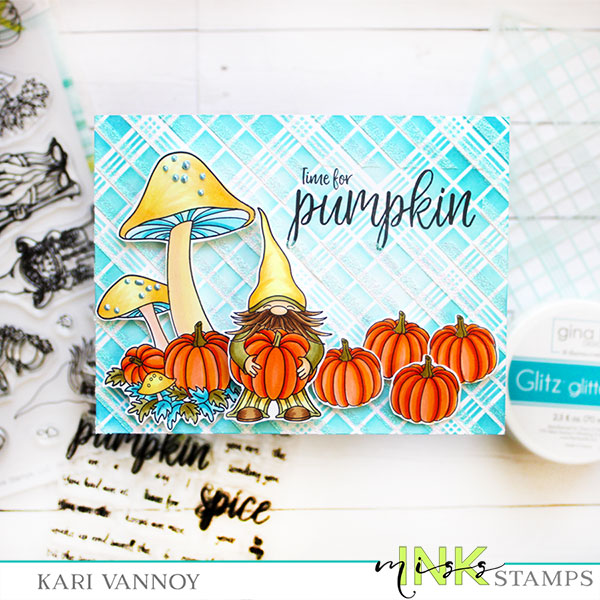
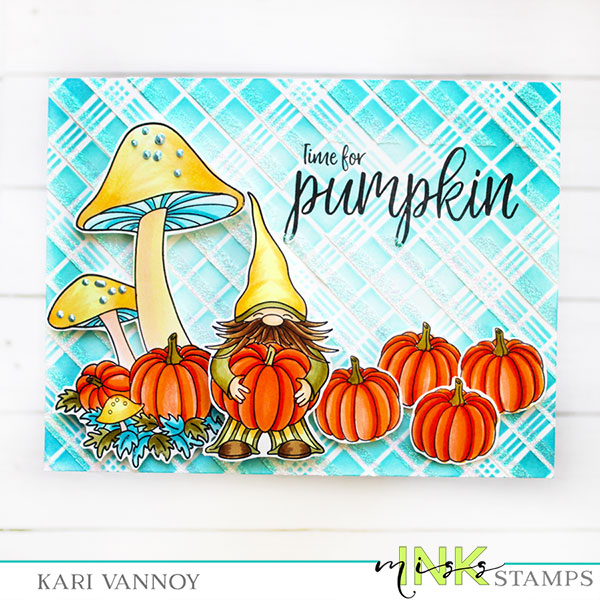
Hello, I am so happy that it’s pumpkin time…I have a pumpkin patch card to share with you today. I’m using some new stencils from Miss Ink Stamps with some of my favorite stamp sets!
I have an ALL-TIME favorite pumpkin dessert that is only available this time of year. It is from Vito’s Italian Restaurant and is called Pumpkin Crunch Cake. It is so so good! I’ve tried to re-create it several times with no luck. So I just have to settle for eating it while it’s available this month only! I couldn’t stop thinking about it while creating this card.
For the background, I added some glitter gel (I love a bit of glitter on my card!) I share all the details in the video!
I’m often asked what supplies I use to make my cards and projects, so I’ve put together a list using affiliate links when possible. If you make a purchase with these links I may receive a small commission. These help me to keep up with blog costs and continue bringing you fun projects. Thank you so much for your support!
Thanks for stopping by! Do you have a favorite pumpkin or fall snack?
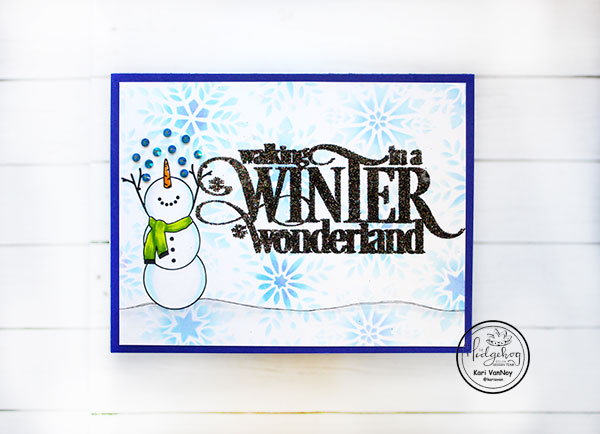
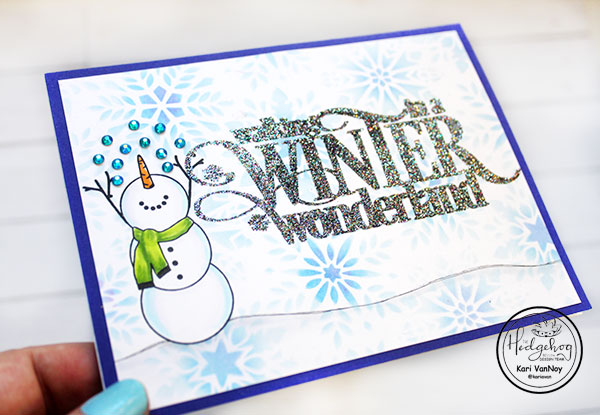
Hello! Today I’m thrilled to be sharing the new November subscription kit from the Hedgehog Hollow. It’s a winter wonderland of products, with lots of great stamps, stencils, and other crafty goodies!
I have prepared a short video sharing what is included in the kit, and a card! Watch it below or in HD on YouTube:
Isn’t that snowman so happy!? I love him.
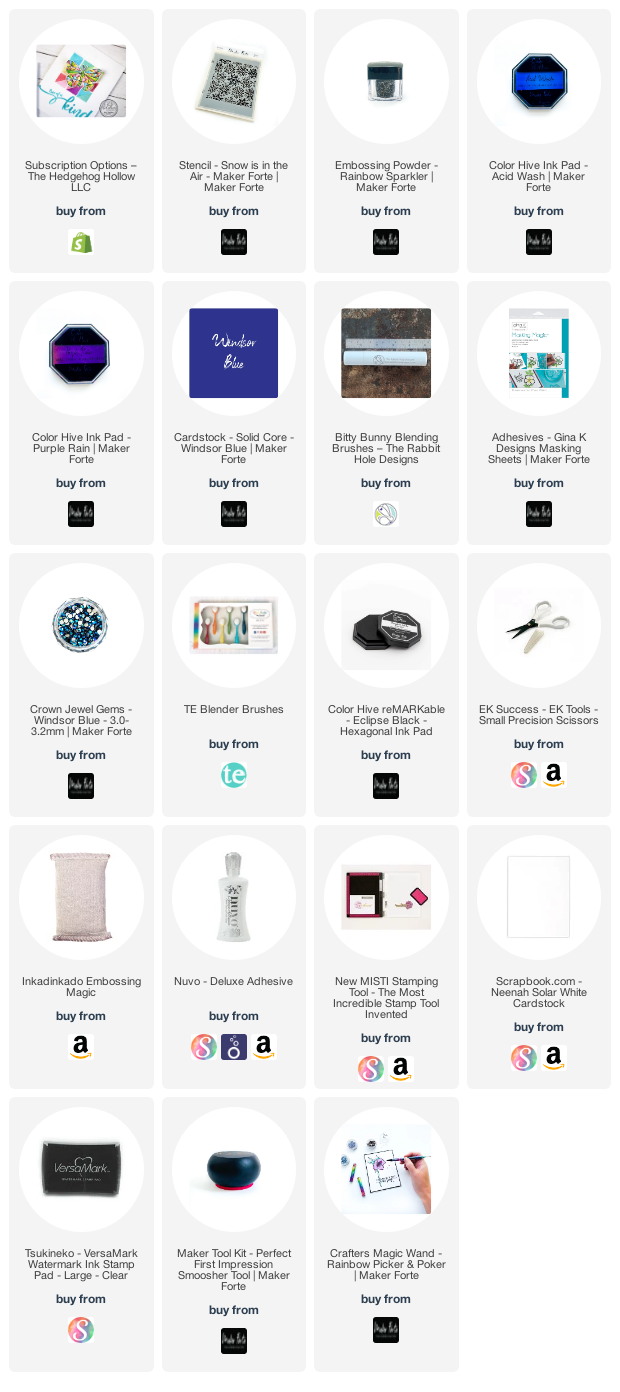
Rainbow Sparkler embossing powder
Today I only used the stamps from the kit, but there are also many awesome stencils that I can’t wait to use!
I’m often asked what supplies I use to make my cards and projects, so I’ve put together a list using affiliate links when possible. If you make a purchase with these links I may receive a small commission. These help me to keep up with blog costs and continue bringing you fun projects. Thank you so much for your support!
Hi I'm Kari. I'm a creator, a card maker, and a day maker! I am Lucky in love to a supportive husband, blessed to raise 3 kids (all moved away now!), and happy to be watched over by 2 dogs.
I originally started this blog to remind me to be happy amid adversity, and I hope it inspires you, too!