Archive | Paper Crafting RSS feed for this section
both-gc-pocket-cards

Pocket Gift Cards for Father’s Day

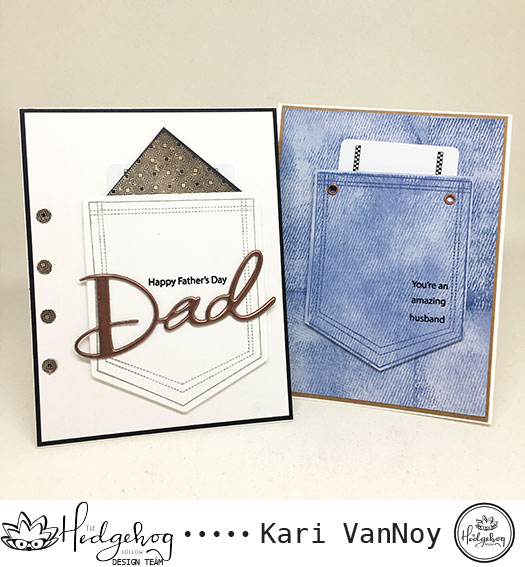
Hello! Today I’m excited to share with you my first set of cards for The Hedgehog Hollow! When I opened this month’s box, I was delighted to see a pocket stamp AND die…and I was immediately drawn to creating a GIFT CARD pocket for Father’s Day.

If you haven’t seen what is included in this June 2018 Hedgehog Hollow box, click here to see my unboxing video!

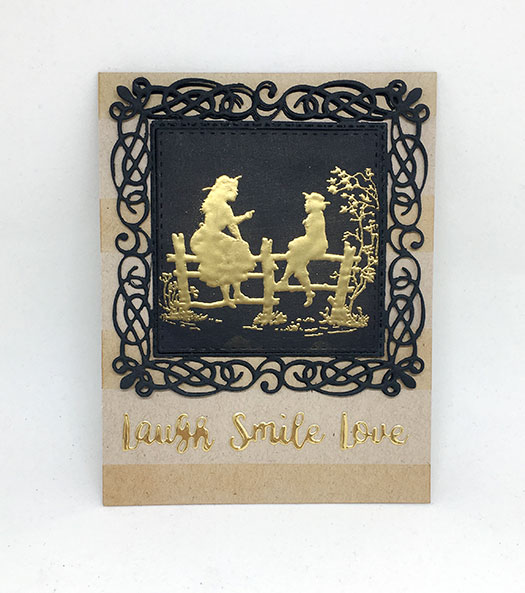
The first card is a more formal card, with a white shirt and handkerchief sticking out of the pocket. I used the papers included in the box for the handkerchief! My dad LOVES chocolate so a gift card to See’s Candies was just the thing! A gift card fits perfectly inside the pocket.

white-shirt-gift-card-pocket

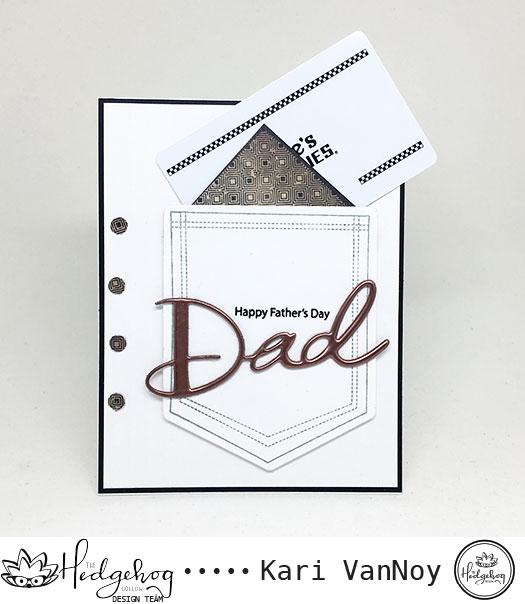
The “buttons” are punched out of the same paper to match the handkerchief. And that BEAUTIFUL “dad” die is just the right size for a card. I used the embossing powder included (when you are a regular subscriber to the box) to create a metallic die cut. I love this technique.

white-shirt-close-up-of-embossing

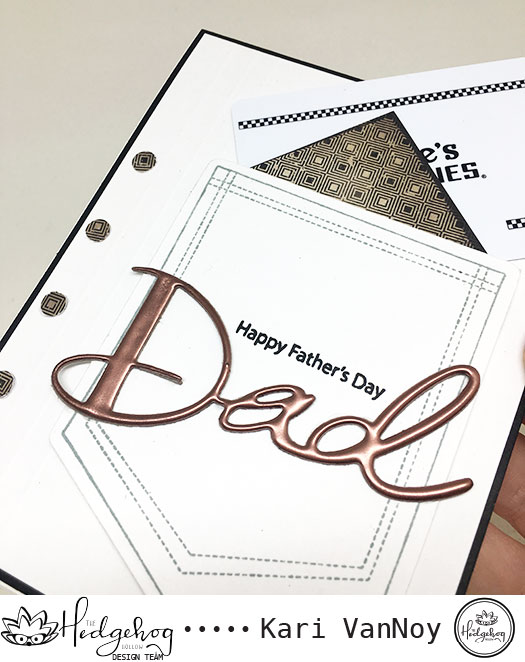
Here you can see that beautiful color of the embossing powder!

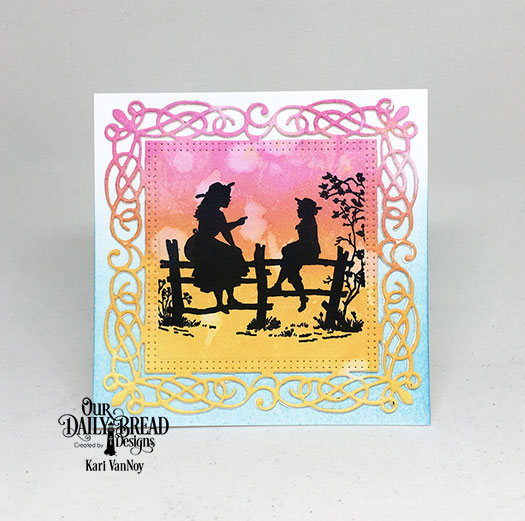
Of course I had to create a separate card using the DENIM stamp that is included. I used Distress Oxide ink in “Faded Jeans” (isn’t that just the perfect name for this color and project?!) to ink up the panel and then I stamped over it using the same color.

denim-card-for-hubby

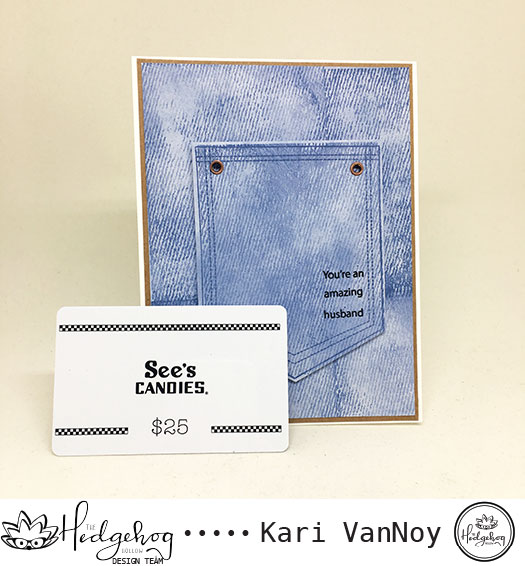
On this card I used some copper eyelets to add to that pocket. So easy and adds the real look of jeans, doesn’t it?

I created a video for you to see the process below, or watch on YouTube:


both-gc-pocket-cards

I hope you enjoyed these projects today. They are fun and easy to put together. Add a gift card and you have a perfect Father’s Day card and present!

For more information about the June 2018 Hedgehog Hollow box, visit here. Thanks for stopping by!

Comments { 1 }
gold-embossing-new

3 Ways to use a Silhouette Stamp – Sister cards

Hello! Today I am excited to share with you 3 Ways to Use a Silhouette Stamp using the set “Sister Time” by Our Daily Bread Designs.

I have my absolute favorite go-to for using silhouette stamps, and that is to Distress Ink the background, then stamp over it in black ink. But today I have THREE ways to show you!

Disclosure: Affililate links used when possible, at no extra cost to you. By clicking on these links you are supporting my blog just a little and I thank you very much!

  1. SISTER ADVICE

The first way is Distress Inking a panel, and then using a die to cut it out. I used the Flourishy Frame Die and Distress Oxide Inks in Picked Raspberry, Spiced Marmalade, and Fossilized Amber ink here.

sunshine-sister-advice

I did splatter some water over that background, then I allowed it to try before I die cut the frame. I masked off the edges before adding the stamp from Sister Time in my favorite crisp black ink.

Doesn’t this just look like an older sister giving advice to the younger sister? I love that.

2. LAUGH SMILE LOVE GOLDEN ADVICE

Another way to get more out of your silhouette stamps is to GOLD emboss them. Here I used black paper to gold emboss, then I cut it out using the Double Stitched Square Dies. I added it onto black fun foam before attaching it to the Flourishy Frame Die. I love that die and have used it a lot this month. I used two layers of the frame to give it more dimension and pop!

gold-embossing-new

I cut those words out of gold foil paper. But you could also heat emboss them using the same gold embossing powder to make them completely match. My gold colors were just close enough!

The stripes are made using a clarity brush and Tea Dye Distress Ink…I masked off the stripes using Post It tape!

3. OMBRE INKED SISTERS

The last way I have to share with you today is to ombre ink the stamp! Here I used different colors and a Misti. I inked up the first color, then stamped. Added the second color further down the stamp, then stamped. And then the third color at the bottom of the stamp, then stamped again. Having a MISTI really helped with this technique!

sunshine-sisters-make-the-best-of-friends

I could’t resist turning this into a shaker card using all the matching colors of sequins. I cut out the top layer with the Double Stitched Square Dies, then added two layers of foam tape. Be sure to add the sequins before you tape the panels together!

I can think of a few more ways to using silhouette stamps, but those will have to wait for another day! (How about a watercolored background or Sponge inking inside a shape?) Lol…I could go on.

If you have any other suggestions for a different way to use your Silhouette stamps, please let me know in the comments below. Thanks for stopping by!

Comments { 0 }
lawn-fawn-birthday-giveaway

Lawn Fawn Giveaway!

june-technique-class-birthday-giveaway

It’s my birthday month and I’m celebrating so many things! So today I’m hosting a very special giveaway to share some with YOU! I actually have multiple giveaways this month, and this is just the first one!

Here’s what I’m celebrating:

  • My new website for registering for my card classes is live!! (check it out here)
  • Just had a wonderful birthday and I love the month of June!!
  • Have been a Guest Designer for multiple companies so far this year!!
  • Designing for a few of my favorite companies right now!!
  • Nearly 2,000 followers on Instagram! (help me get there…@kariavan)
  • Almost 1,000 Subscribers on YouTube! (please help me get there…subscribe here)
  • So many helpers for putting my card classes together!
  • Family who is there for me, even during trying times!
  • And so many blessings….

Here’s what you can win!!

  1. A spot in my Lawn Fawn Card class coming up on June 20th in Arizona!!
  2. AND a Lawn Fawn stamp set of your choice (choose from You are Sublime, or Coaster Critters!)

Not in Arizona? Don’t worry, you can also win a stamp set of your choice!! (2 winners)

lawn-fawn-birthday-giveaway

Here’s how to win:

  1. Comment here on my blog and tell me which stamp set you would like to win! Also, tell me if you are in Arizona to win the card class spot!

For additional entries (these entries are optional, but increase your chances at winning!)

  1. Subscribe to my YouTube channel here and comment that you have done so with your YouTube name
  2. Follow me on Instagram here and comment with your IG name so I know
  3. Like my Facebook page (Sunshine In My Pocket) and let me know in the comments
  4. Subscribe to my blog (see right hand side of my blog to subscribe) and comment here to let me know
  5. Follow the instructions on Instagram for more entries!

Ends Monday, June 18 at 11:59 p.m. PST and I will announce the winner shortly thereafter.
Winners will be chosen from all entries received on this post and on IG.

Good Luck! And thanks for all the birthday wishes so far!! 🙂

Stay tuned for more giveaways and fun!

Comments { 9 }
june-technique-class-birthday-giveaway

It’s finally a reality!!

I’m so excited to announce that our *new website is up and ready!! It’s our site where you can FINALLY register for card classes online…and I am jumping up and down.

Before, all classes were paid for in person and it was all me trying to get the registrations squared away. NOW, you can simply sign up here!! I think it will be so much easier and better for my class attendees!

Check it out and let me know what you think! Please tell your crafty friends in Arizona, too.

And come back for some fun GIVEAWAYS a bit later! COMING SOON: Look for this photo to learn how to enter:

june-technique-class-birthday-giveaway

That GIVEAWAY will be announced soon….I hope you will help me get the word out!

Don’t forget to check out the new class site, go here to see all the fun classes coming up.

Thanks so much for stopping by 🙂

Comments { 2 }
Sunshine-flip-flop-lever-card-inside

Cards for Brother

Hello! Today I am featuring the new “Brother In Christ” stamp set from Our Daily Bread Designs. If you have been following me, you know that I don’t make a lot of masculine cards and so this was a fun challenge for me.

The first card was one I knew I wanted to make just as soon as I saw this new set! It’s a beautiful square card with a shaker element! I wanted the sequins to mimic the look of the water.

LIVE FOR FISHING!

Sunshine-Live-for-fishing

I used the Flourishy Frame Die to create the frame around my scene, but also used the Double Stitched Square Dies for the shaker portion. The stamp of the fishermen fit perfectly inside…and then when I cut the frame with the square dies, added a fun layer of dimension with a portion of the picture outside of the shaker! I’m not sure if I explained that correctly, but I really liked the way it turned out!

The “live” sentiment is from the Inspiration Words Dies.

SUNSET FISHING

Then, I knew I had to make a sunset fishing card. We used to love to walk around the vacation lake at sunset and I thought sunset fishing would be fun. After he saw this card, my husband said…”no, you need to go fishing in the morning!” Well, what do I know about fishing? Not much. But I know a sunset fishing CARD was a really pretty idea! Lol.

Sunshine-sunset-fishing

I masked off a circle for the “sun” and strategically placed it on the card just where I knew those fellas would be stamped. Then I sponged on Distress Oxide inks in some of my favorite colors: Abandoned Coral, Orange Marmalade, Squeezed Lemonade and Antique Linen for the sky; Faded Jeans and Peacock Feathers for the water. Then I stamped the image in my favorite crisp black ink.

For my last card today using this set, I tried my hand at a Lever Card:

sunshine-flip-flop-lever-card-front-new

Sunshine-flip-flop-lever-card-inside

My brother is definitely a beach kinda guy and he almost ALWAYS wears flip flops, so this card was just a natural. I really love the mix of fonts on these sentiments! I used the Lattice Background Die to ink on a interesting pattern on the front, and then used the By The Shore Collection Paper for the fun flip flops!

I hope you enjoyed a look at the new Brother In Christ stamp set. For more information and details, visit the Our Daily Bread Designs website here. Thanks for stopping by!

Comments { 0 }