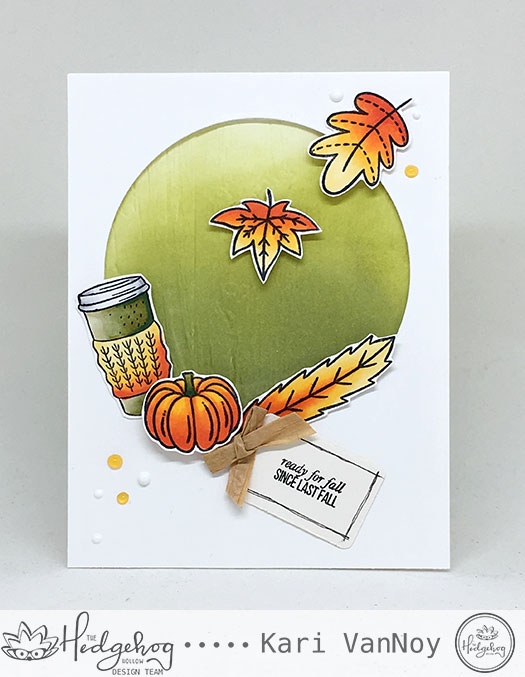
Hello! Today I’m a guest at the Hedgehog Hollow sharing how I made this fall card using the Ink Road stamps “Octobers.” These were created exclusively for the Hedgehog Hollow and they are beautiful!
Head on over to the blog post here to read about how it was created, including the faux wood background panel!
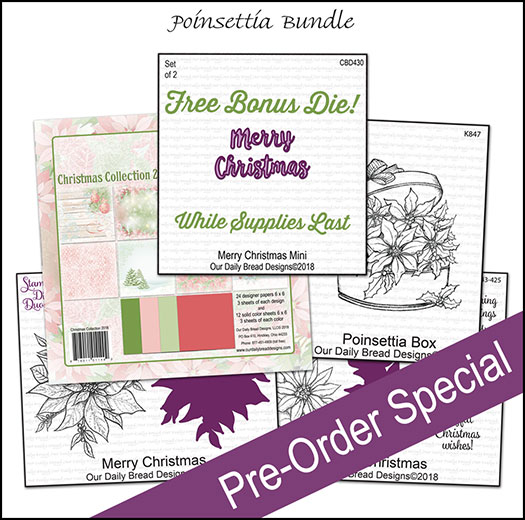
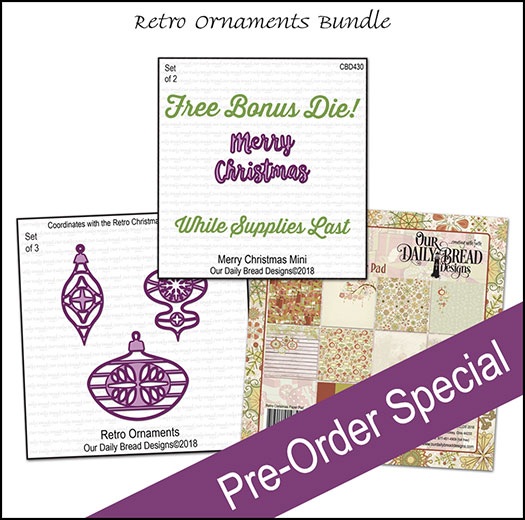
Hello…are you ready for a sneak peek of the November Release from Our Daily Bread Designs?!? I’m so excited to feature the Retro Ornaments Dies and Retro Christmas Paper Pack that will be available soon!
Aren’t they beautiful! I love the vintage feel of these dies, and I cannot wait to show you more of the release!
By the way, that “Merry Christmas” die is a special promotion when you purchase any of these bundles as a part of their Pre-Order Special:
Check out the full sneak peeks of all the products at the Our Daily Bread Designs blog here.
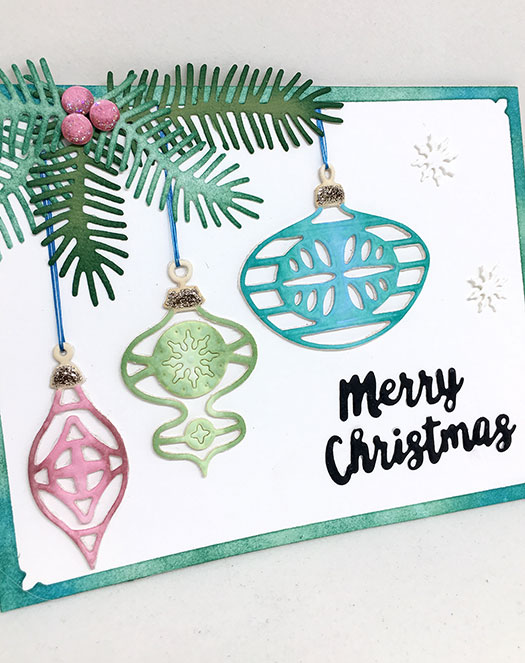
Here’s one last look at a close-up of the beautiful Retro Ornament dies.
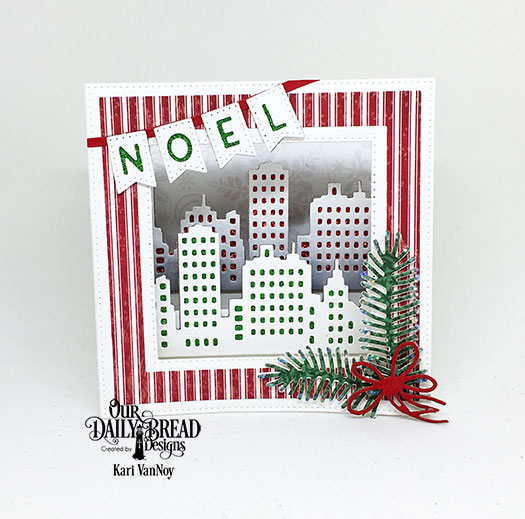
Hello! Today I am excited to share with you some Cityscape Christmas cards…One is a diorama 3D card and one is an A2 size folding card. Here’s the Diorama card:
This is a 3D card that will fold flat to fit into an A6 envelope for mailing!
How festive do those skyscrapers look all lit up in green and red?! I love that. I used glitter paper to place behind the die to get that sparkly holiday lights look.
This new Diorama Die is a new favorite of mine. It is so easy to use and to layer with Christmas paper. I added some Alphabet Flags (from a previous release) to spell “Noel” and used that same sparkle paper behind those letters. To finish off this card, I added some glitter to the Pine Branches and topped it with a big, red bow (from this set)!
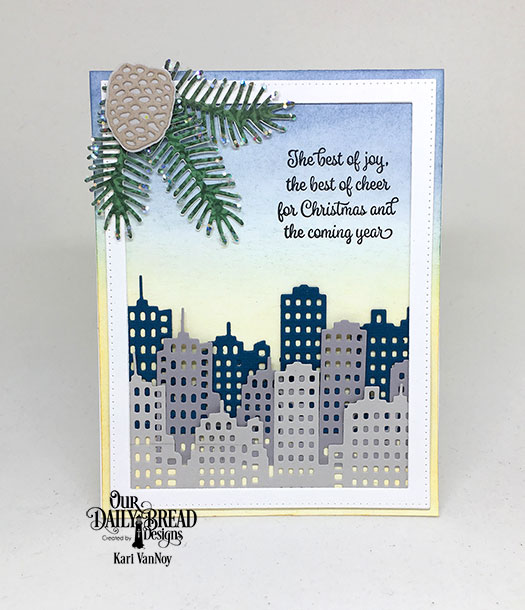
I love that you can also use these same dies to make an A2 size card:
Here I used the same City Skyline dies over an ink blended background. That beautiful sentiment is from the Christmas Card Verses stamp set. I created a frame with the Pierced Rectangles dies, and finished it all off with sparkly Pine Branches and a Pinecone from this set.
If you haven’t already seen the entire October release, head over to Our Daily Bread Designs to take a look. It’s a fantastic release and I love how versatile the dies are to use for a Diorama Card OR for a folded card.
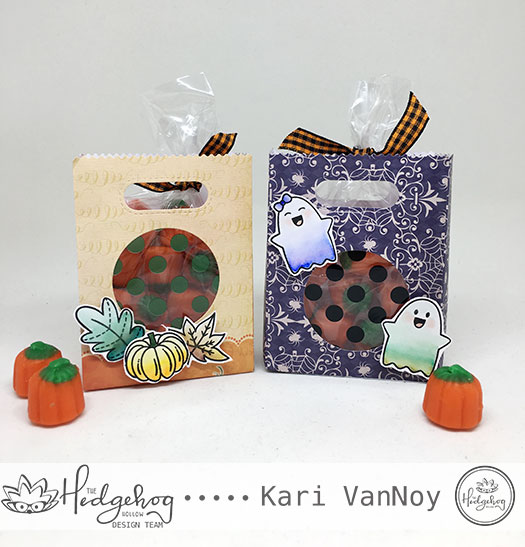
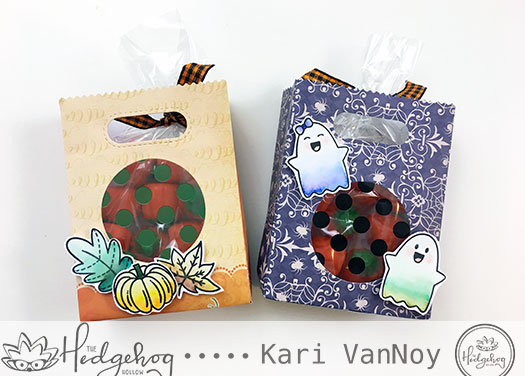
Hi there! I’m so excited to be guesting on the Hedgehog Hollow blog today, sharing a fun technique for you to try. It’s a “Dip-Dye” technique using just a few watercolor markers. Just look at these cute ghosts:
I hope you will pop on over to the blog to check out the post AND video I have linked there!
To see just how you can easily try this dip-dye technique, visit the blog here.
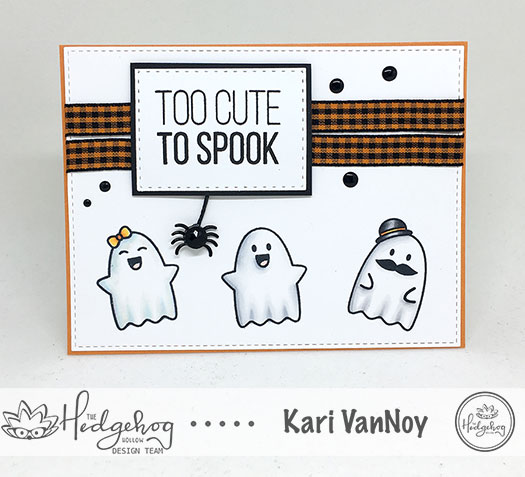
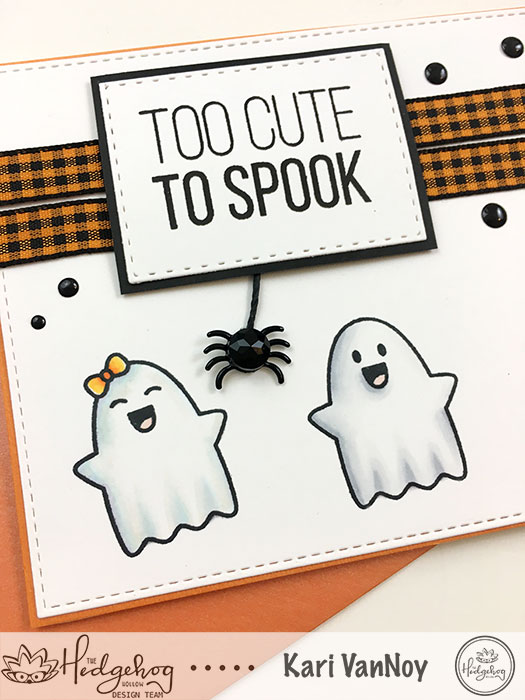
Hello! When you think of coloring ghosts, do they rank right up there with panda bears, penguins and polar bears?! Right…they are white (or clear) so they should be so easy to color!
Today I am going to share with you my very favorite…and easy….color combinations for coloring ghosts!
All the products I use today are from the October 2018 Hedgehog Hollow box, and those ghost images are an exclusive set created by the Ink Road Stamps! The ribbon, Nuvo drops, and little spider brad also come in the box!
Can you see a difference in the way they are colored? I used a different combination for each so they would each have their own look. Subtle, yes…but in real life so effective!
For that first little ghost I used these Copic colors in this order: B0000, BV00, B000. These add a slight purple/blue undertone. Then I went over all of those colors with E40.
For the ghost in the middle, I used Cool Grays in C00, C1, C3. I first went over the ghost with the C00 where I thought the shadows would be. Then I used the darkest C3 over that, blended out with the C1 and back to the C00 to smooth it all out.
The last ghost is colored up with Warm Grays: W00, W1, W3. I used the same method as above for this cutie with a mustache!
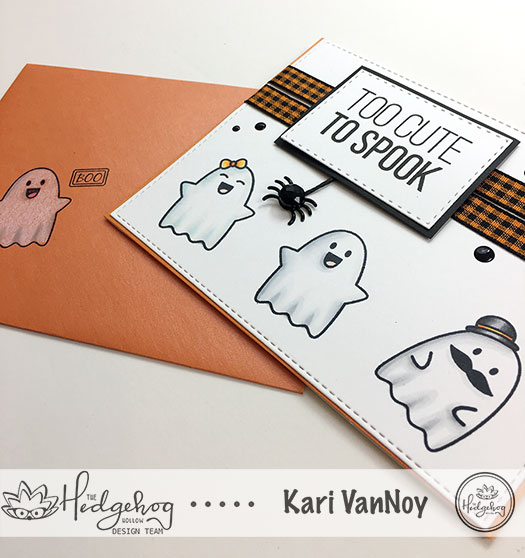
For the envelope, I simply stamped one of the ghosts and the “boo” (using Staz On ink…this envelope is a little slick so I didn’t want that ink to smear!)
I colored it using prismacolored pencils and burnished it a little with a blending stump to smooth it out.
If you are interested in seeing everything included in this box, check out my video here or on YouTube:
I hope you love these little ghosts as much as I do!! For more information or to get your very own box with exclusive stamps, visit The Hedgehog Hollow here.
Hi I'm Kari. I'm a creator, a card maker, and a day maker! I am Lucky in love to a supportive husband, blessed to raise 3 kids (all moved away now!), and happy to be watched over by 2 dogs.
I originally started this blog to remind me to be happy amid adversity, and I hope it inspires you, too!