Archive | Paper Crafting RSS feed for this section
SUNSHINE-stand-out-card-flat-1

Masked Peacock Card

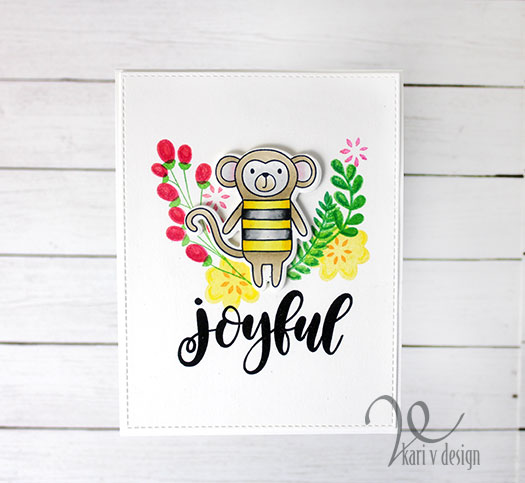
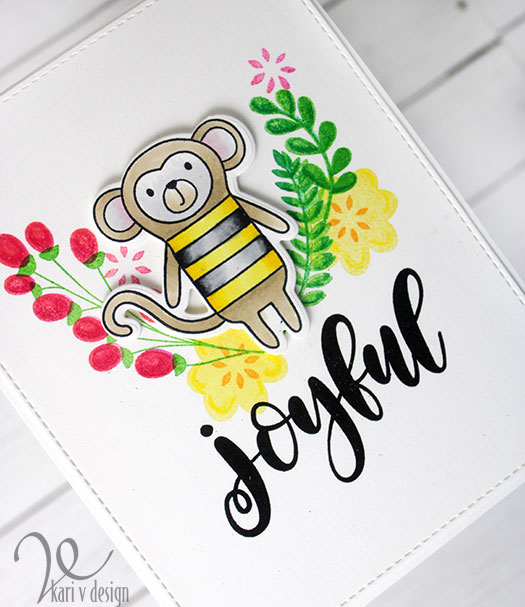
Hello there! Today as I am writing this, I realized that my title sounds like maybe you might be getting a Peacock Halloween card…or a peacock wearing a mask. Lol. Sorry, this post is not that.

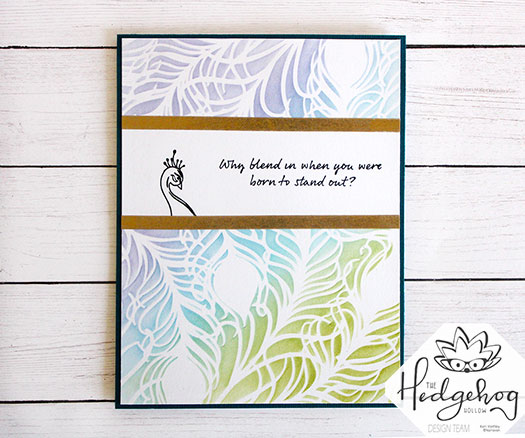
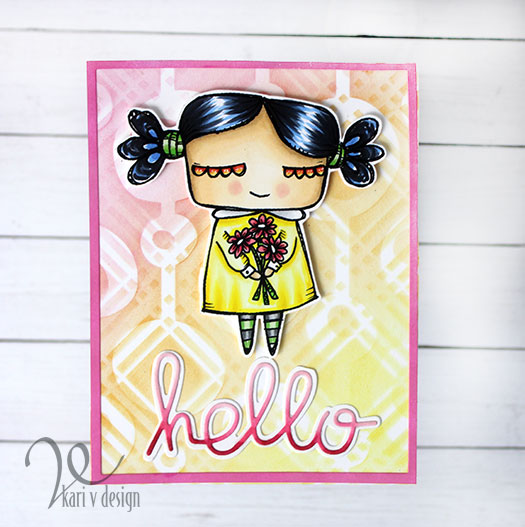
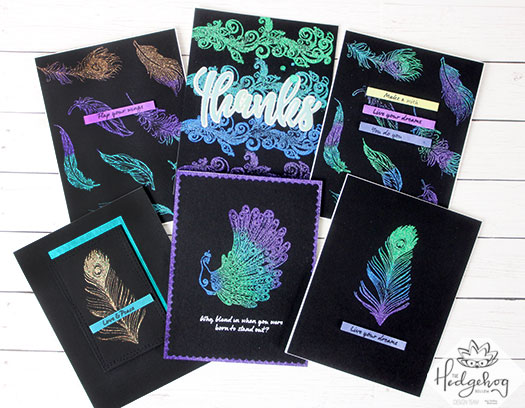
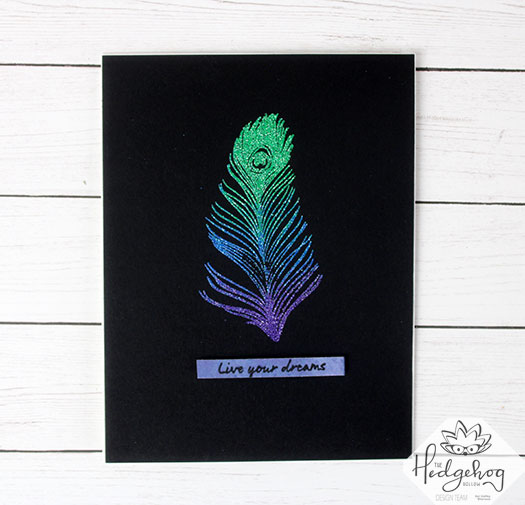
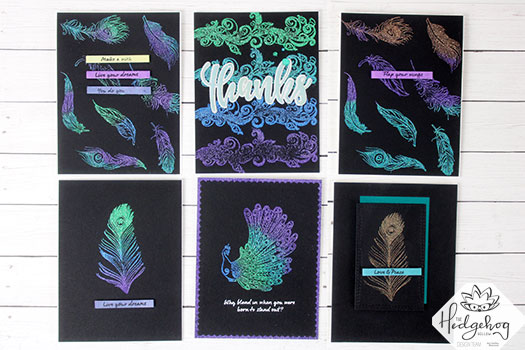
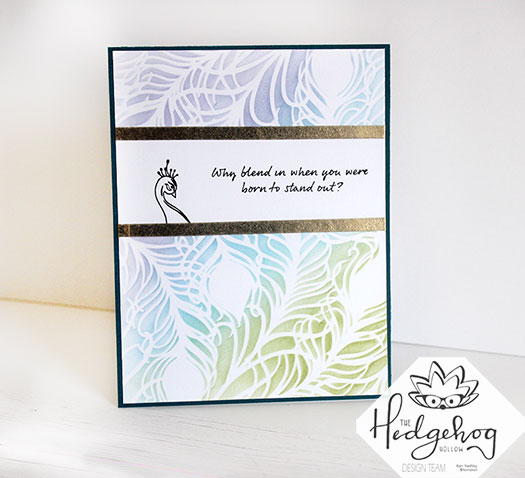
But it IS an easy to mass produce, quick card with a peacock theme, which is almost as nice. Right? This is my last card share with the September 2019 Hedgehog Hollow Kit. It has such beautiful images!

Why blend in when you were born to stand out?

Here’s the how-to:

First, I masked off a portion of the card panel using 1 1/2″ purple tape
Second, I attached the stencil with tape and blended on three colors of ink using stencil blending brushes.
Then, I removed the tape and stencil, and covered up the stenciled feathers with some scrap paper.
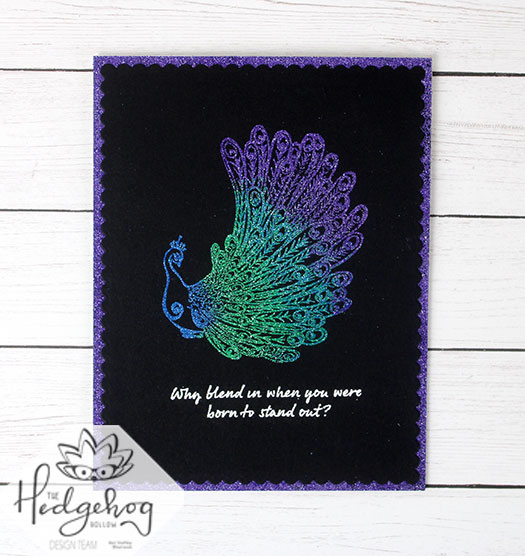
I stamped the sentiment and the top portion of the peacock with black ink, added some gold washi, and attached it to a dark blue cardstock and card base. That’s it! Done!

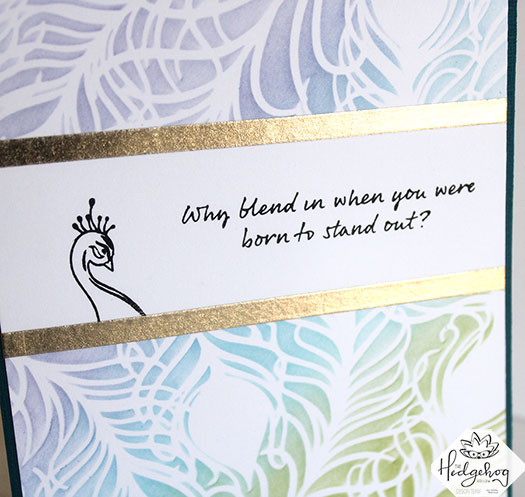
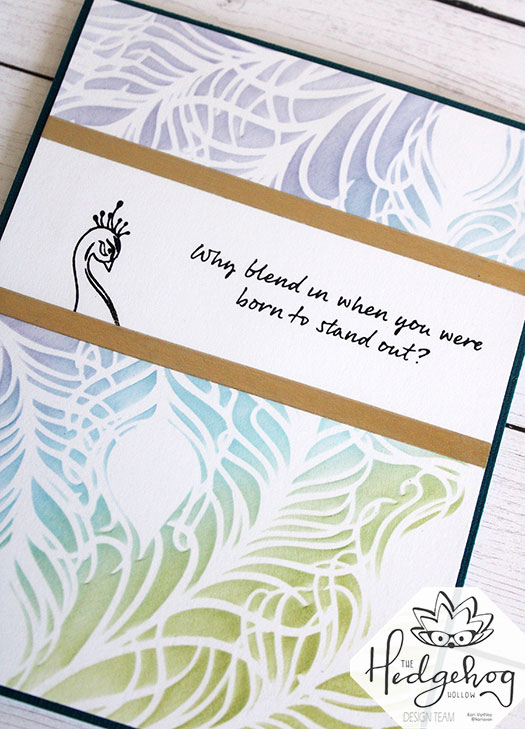
A simple card, but so striking!

I’m often asked what supplies I use to make my cards and projects, so I’ve put together a list using affiliate links when possible. If you make a purchase with these links I may receive a small commission. These help me to keep up with blog costs and continue bringing you fun projects. Thank you so much for your support!

I hope you enjoyed this project today! I’ll be back soon with more inspiration!

Comments { 0 }
crafty-hugs-card-1

Double Stencil Technique

Hello! Today I am a part of Justine Hovey’s Video hop celebrating 50K followers on her channel! This is a hop with lots of prizes and many great techniques shared.

Today I am sharing the double stencil technique, which is a favorite of mine for an interesting background. Check out my video below or on YouTube. (Be sure to comment on my video and on all the videos in the hop to enter to win one of multiple $50 gift cards!)

First I will show you a few simple cards to share the technique. This works best when you have one stencil with a larger design, and one stencil with a smaller more detailed design.

Simple cards to show the technique…

First stencil the larger stencil, then place the smaller stencil over the top and use a darker color to stencil on the second one.

This technique is much more difficult to explain in a blog post, so I hope you will go check out the video.

Here are some more examples and cards I made using this technique:

For this one, I stenciled on the plaid design first with a light blue ink, then added the medallion stencil over top and used dark blue and purple inks.

Big bear loves a bike ride
Wave stencil with a floral stencil
Circle stencil with plaid stencil

I’m often asked what supplies I use to make my cards and projects, so I’ve put together a list using affiliate links when possible. If you make a purchase with these links I may receive a small commission. These help me to keep up with blog costs and continue bringing you fun projects. Thank you so much for your support!

I hope you will give this technique a try! I really have fun with it. It’s a great way to build up some backgrounds.

Crafty hugs!

Thanks for stopping by!

Comments { 0 }
all-six-cards-1

Heat embossing on Dark cardstock

Hello! Today I have a card share with showing just how striking heat embossing can look on dark cardstock.

I used a variety of glitter embossing powders, including one from a previous Hedgehog Hollow kit. The feathers and all stamps I use here are from the current September Hedgehog Hollow kit.

Start with a dark cardbase, I used black cardstock here. Then use an anti-static powder bag to prep it. Dark cardstock is notorious for holding onto stray bits of embossing powder so don’t skip this step!

Then, using an embossing ink, stamp the image onto the cardstock and add various colors of glitter embossing powders. I used my Nuvo spoon to add a little of each color to get a smooth look.

I love how this embossing powder really pops on the dark background.

For the sentiments, I used Distress Oxides to blend the background colors. I gave it some time to dry before stamping the sentiments on with a black ink. Then, I cut out sentiment strips.

So take a look at your embossing powders and try it out on a dark cardstock base! It’s fun to see the different results.

I have a short video to show you some tricks for heat embossing and ways to get a softer blend between colors, watch it below or on YouTube:

I hope you enjoyed this project today. As you can see, I couldn’t stop making these cards once I got started!

I’m often asked what supplies I use to make my cards and projects, so I’ve put together a list using affiliate links when possible. If you make a purchase with these links I may receive a small commission. These help me to keep up with blog costs and continue bringing you fun projects. Thank you so much for your support!

Comments { 0 }
grizzly-bear-1

I’d Climb Any Mountain

Hi there! Today I’m joining in on the MFT Card Design Superstar challenge for the coloring virtuoso category. I’ve been working on fuzzy hair coloring techniques with colored pencil, so I thought I’d try that out with these polar bears!

But instead of a polar bear, I turned him into a Grizzly bear that hikes! (this cutie is from the Polar Bear Pals stamp set).

Climbing the mountains

This bear has a scarf because it’s cold on the mountain top! He would climb any mountain for you! And doesn’t he look quite fluffy?! He would give the best BEAR HUGS!!

For the background I used the Cloud Stencil from MFT (which is still one of my absolute favorite things in the craft room)! And for the mountain I ripped some paper to make a sort of stencil to create that jagged edge. I added an extra shadow below the bear to show the light is behind him.

He has planted his flag to let you know just how much he loves you! I cut the flag from the fishtail sentiment strips dienamics.

Hope you like this grizzly bear as much as I do. Thanks for stopping by!

Comments { 1 }
joyful-close-up

Joyful Monkey

Hello again! Today I’m participating in the MFT 2019 Card Design Superstar contest for the Clean & Simple category.

I was inspired by my nephew (who loves monkeys) and creates so much JOY in my life.

I used the Cheeky Monkey set and colored him up in bumblebee colors. Then I created some greenery and flowers using the In Bloom set. I love this set for some easy and beautiful floral arrangements.

Then, I added a JOYFUL sentiment from the Handwritten Holiday Set, which is another favorite of mine. Last, I die cut the panel with the Stitched Rectangle Staxs Dienamics and attached it to a top folding card base.

This Joyful monkey makes me smile!

I hope this card makes you smile, too! Thanks for stopping by!

Comments { 0 }