Archive | Paper Crafting RSS feed for this section
sweater-weather-with-stamps-and-ink-tool

Sweater Weather

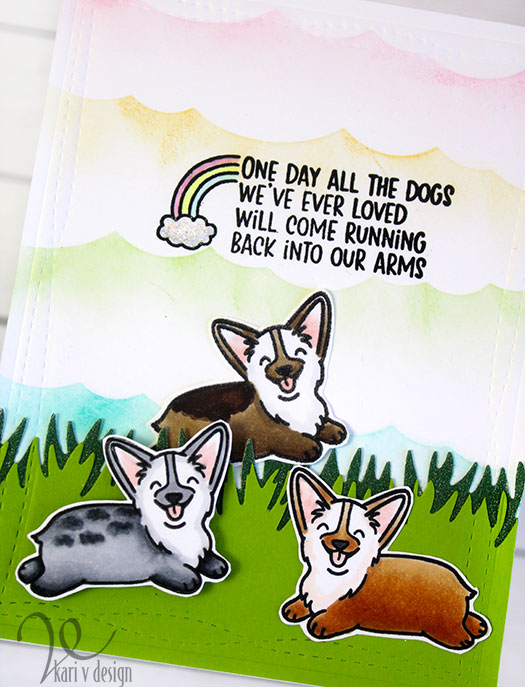
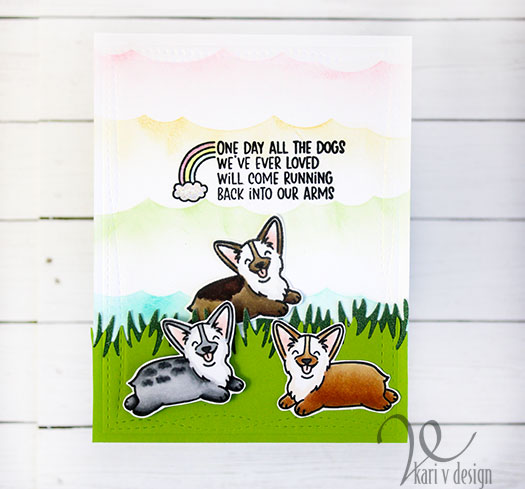
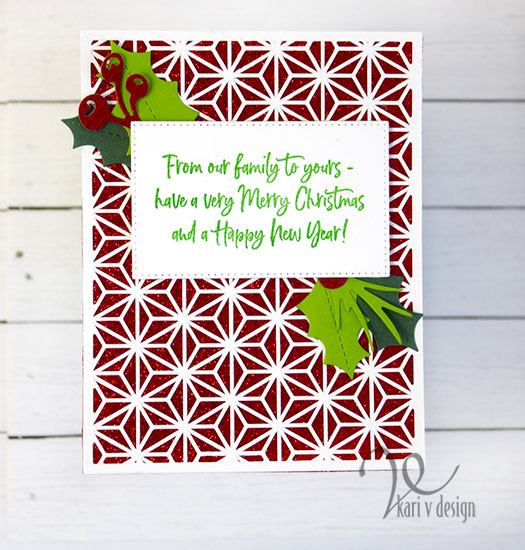
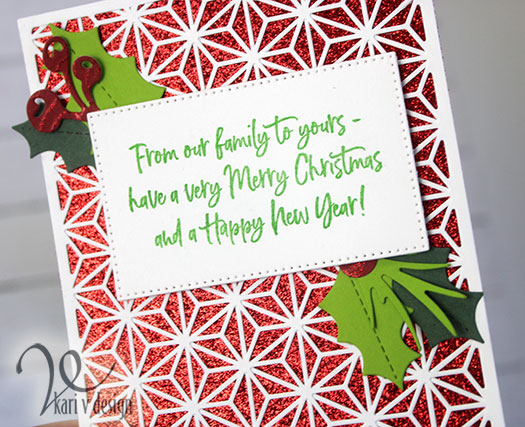
Hello! Well, it was almost sweater weather here in Arizona, and then….it warmed right up again! Lol. But I was inspired to make a few cards when I was still wearing a sweater! So I’m going to share them with you today.

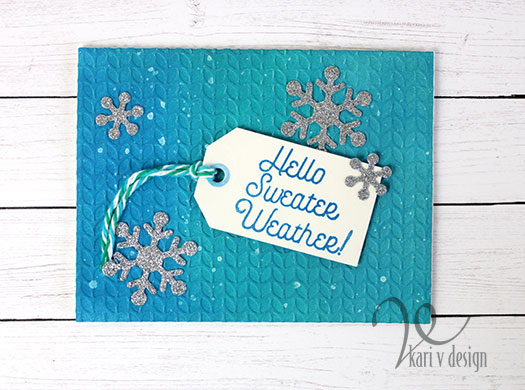
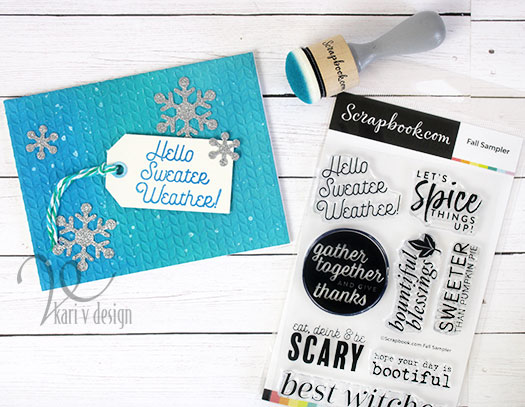
This first one features a sweater embossing folder that I love! I first inked up the background with my favorite domed ink blending tools. After it was dry, I ran it through the embossing folder and then splattered on some white paint for a bit of a snowflake effect.

Glitter embossing on the sentiment

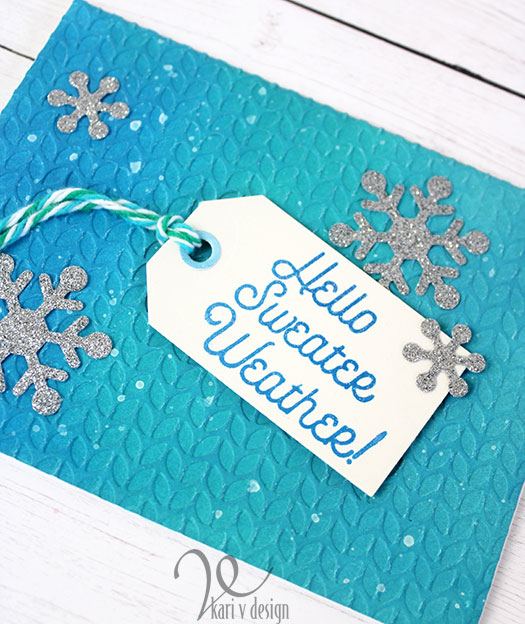
I love a silver glitter snowflake, so I added some of those, too! I stamped the sentiment onto the tag, added some yarn and that’s the card. Does it look cold to you…as in cold weather?

I also used some glitter embossing powder on the sentiment (you can never have too much glitter, right?!) I have a video on this card, watch it below or on YouTube:

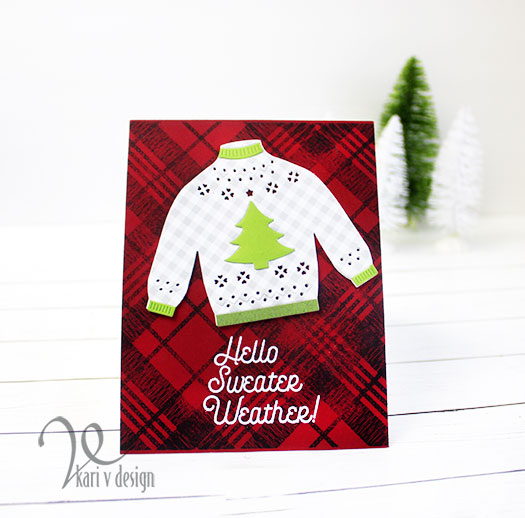
I couldn’t resist making another card with this fun sentiment. And, after all I had this cute sweater die that was begging to be on a card!

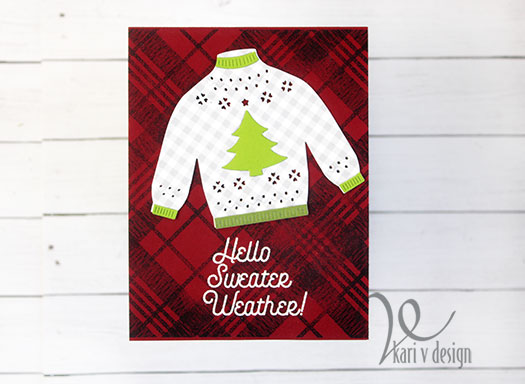
I had some plaid backgrounds I inked up earlier, and this cute sweater I put together earlier, too! So all I had to do was add the white embossed sentiment and this card was so quick!

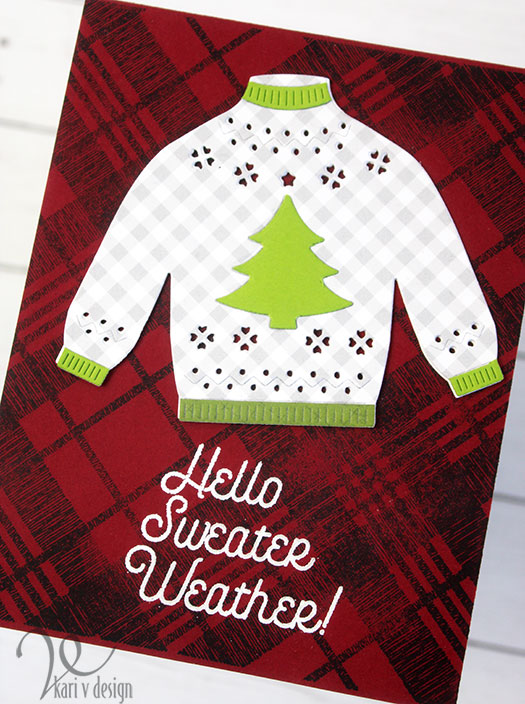
I stacked 3 die cut sweaters on top of each other to get this raised sweater look. I think some Nuvo drops would be fun on that Christmas tree!

I’m often asked what supplies I use to make my cards and projects, so I’ve put together a list using affiliate links when possible. If you make a purchase with these links I may receive a small commission. These help me to keep up with blog costs and continue bringing you fun projects. Thank you so much for your support!

I love this Fall Sampler set!

I hope you enjoyed this project. If you have been following me for a while, you might have noticed that I’ve used this Fall Sampler set on many other projects (I’m really getting some good use out of it!!) I love a set that gives so much inspiration! Check out my other posts with this set here and here!

Thanks for stopping by!

Comments { 0 }
logo-clh

You are Loved

Hello! I have a quick post today for The Fall Coffee Lovers Blog Hop. I always love to participate in these, even though I don’t drink coffee. But I do LOVE a good hot chocolate and so that is my focus for this card.

I love a good plaid background so I stamped with Distress Oxides onto red paper. Then I added coffee cups…I paper pieced those cup holder centers with my favorite red Christmas paper.

I added a garland of holly onto red baker’s twine. Then I stamped the sentiment with versafine onyx black ink.

The quickest card, and oh-so-fun to make! I hope you enjoyed!

If you are joining in, today is the last day…so hurry on over to enter.

Have a wonderful day! Linking up here.

Comments { 6 }
dogs-running-to-arms-2

All the Dogs Will Come Running

Hello! Today I have a sweet dog sympathy card to share. I’ve recently been thinking of my own little puppy who passed away just a couple years ago (I always get sentimental around Christmas time…he just loved the Christmas tree and the tree skirt made of “snow’!)

This sentiment set has me all teary-eyed and so I made a bright and happy card to counteract the sadness.

Can you just see it now? All the dogs we’ve ever loved!! Yes! I will love that day.

To make this card, I colored up a trio of Corgis with Copic Markers. I created a rainbow cloudy sky with a stencil and my favorite domed blending tools.

Then I stamped the sentiment, colored in the rainbow with Copics, and added my favorite Stardust Stickles to that cloud.

I added two layers of grass in varying green colors. Then I popped up the Corgis with foam tape! Aren’t they so cute?!

For some fun I die cut using Wonky Stitched Borders around the entire card. That’s what adds the stitching lines around the border.

I’m often asked what supplies I use to make my cards and projects, so I’ve put together a list using affiliate links when possible. If you make a purchase with these links I may receive a small commission. These help me to keep up with blog costs and continue bringing you fun projects. Thank you so much for your support!

Thanks for stopping by today!

Comments { 0 }
snowflake-cover-die-close-up

Snowflake Cover Dies

Hello there! Today I am showcasing the new Altenew Snowflake Cover Dies. I love these dies on their own, but when you layer them together: WOW! These make it easy to make a professional looking card!

This sentiment is a new holiday set from Scrapbook.com and I love all the fonts and sentiments for this time of year.

I layered up those cover dies (there are two of them and they make this beautiful snowflake design when layered!) and then adhered them to red glitter card. I added the sentiment that I stamped in Grass Skirt green ink and then attached some holly bundles.

I have a VERY quick video to show you how these cover dies work and how fast this card comes together. Watch it below or on YouTube:

These are some new favorites and I will have more ideas and examples for you coming up soon!

I’m often asked what supplies I use to make my cards and projects, so I’ve put together a list using affiliate links when possible. If you make a purchase with these links I may receive a small commission. These help me to keep up with blog costs and continue bringing you fun projects. Thank you so much for your support!

I hope you enjoyed this project today! Thanks for stopping by.

Comments { 0 }
christmas-perfect-reason-crooked

Christmas is the Perfect Reason

Hello! Christmas is the perfect reason to send cards! Yes! And today I have a fun project with a sentiment that says just that.

This sentiment is fun to remind those people in your life that they are HANDMADE CARD worthy!! Lol. I know you know what I’m talking about…if you make handmade cards that is. Only the best people get a handmade card!

For this card I did some ink blending with my new favorite domed ink blending tools. Then I splattered on some white Gansai Tambi paint. Those cute little Christmas lights were colored using Copic markers. I added silver embossing powder to the part that screws into the strand, and some glitter glue to all the lightbulbs for a bit of sparkle. You know I love my sparkle!

I popped up each individual light onto the strand using foam tape.

This is a simple enough card to make, but I don’t think it would be good for mass production with all those little lights. Maybe if you left them flat and didn’t pop them up it would be much faster.

I’m often asked what supplies I use to make my cards and projects, so I’ve put together a list using affiliate links when possible. If you make a purchase with these links I may receive a small commission. These help me to keep up with blog costs and continue bringing you fun projects. Thank you so much for your support!

Thanks for stopping by!

Comments { 0 }