Hello! Today I have 2 Postage Valentine Cards to share using more new products from Miss Ink Stamps. I love how many different looks you can get with these sets!
Watch the video below or on YouTube:
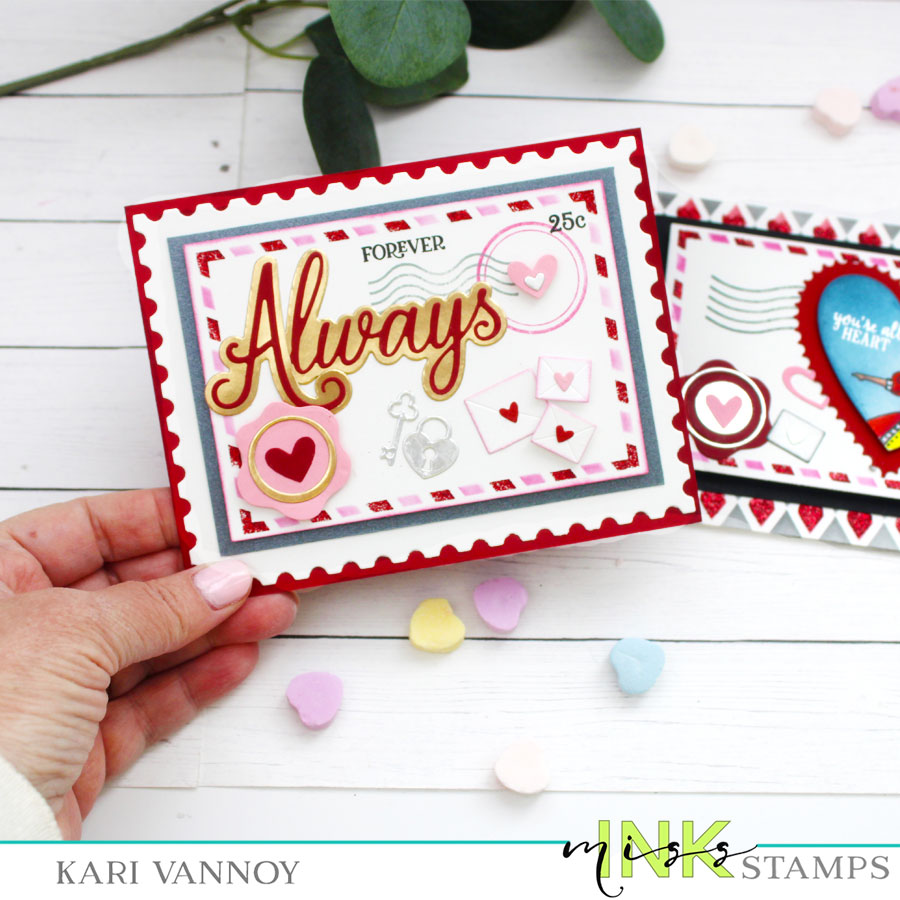
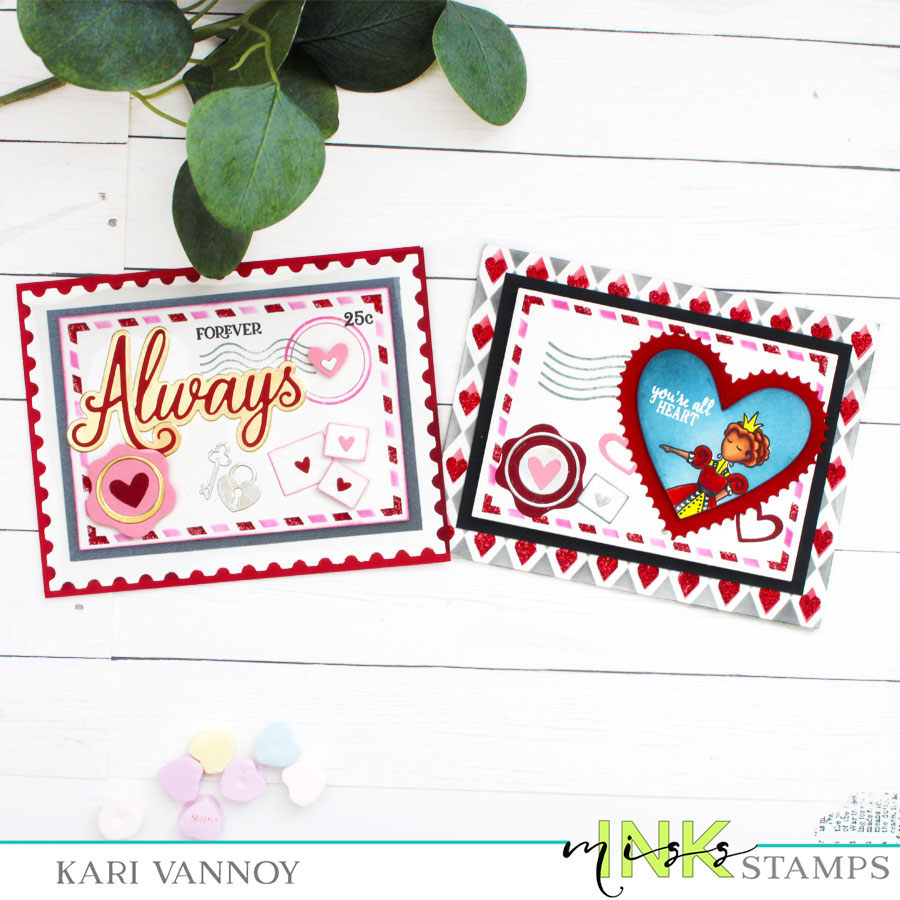
My first card brings together quite a few sets (some mini sets, too!) to create this fun postage Always card. I love all these new sets: Look at those little letters! The faux wax seal is from the Postage Seal and Shaker Collection.

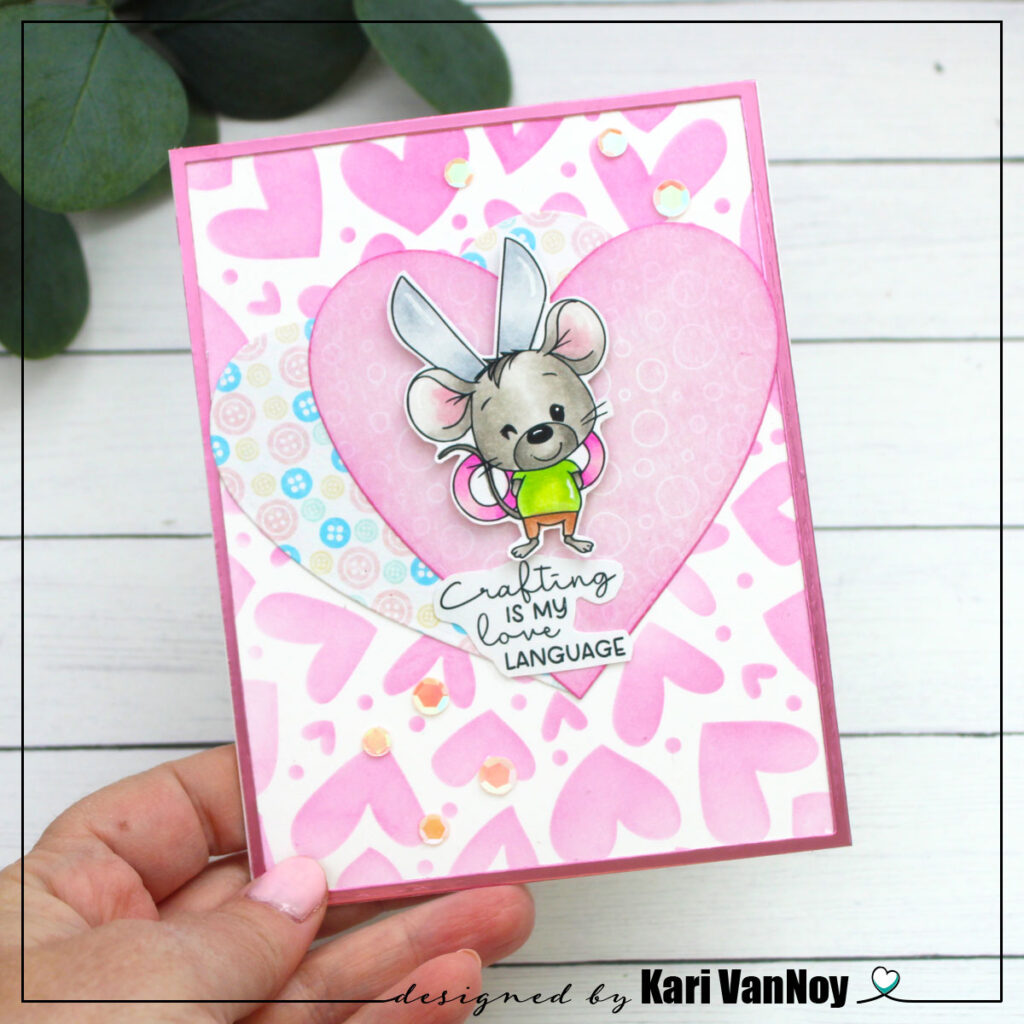
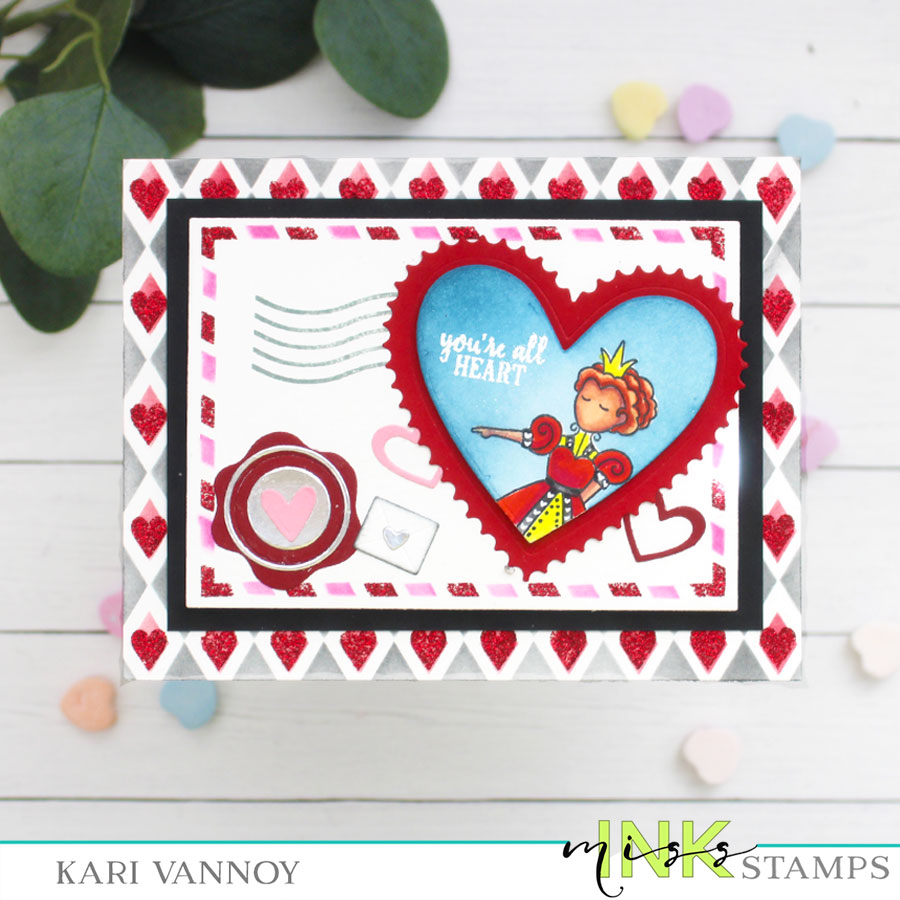
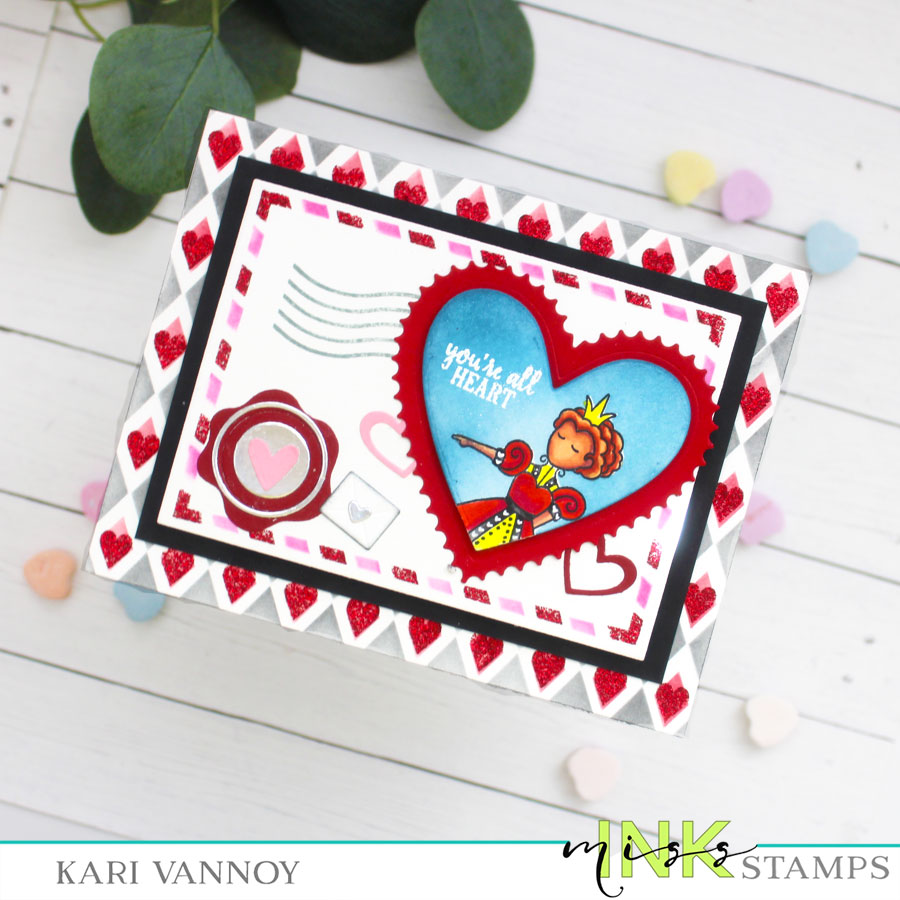
I couldn’t resist creating a second card with many same elements, but bringing in the SWAK Hearts Postage die set. It was begging to include the Queen of Heart on the heart postage! See how I masked her off for the postage heart in the video.
I’m often asked what supplies I use to make my cards and projects, so I’ve put together a list using affiliate links when possible. If you make a purchase with these links I may receive a small commission. These help me to keep up with blog costs and continue bringing you fun projects. Thank you so much for your support!
I hope you enjoyed these Valentine cards today. Thanks for stopping by!