Archive | Holidays RSS feed for this section
bee-mine-close-up

Valentine Bee card

Hello! Today I have a couple fun things to share! First is my video of the 2019 February Hedgehog Hollow Kit unveiling (and Tonic paper haul). So much goodness here, so if you haven’t seen it already, watch it below or on YouTube:

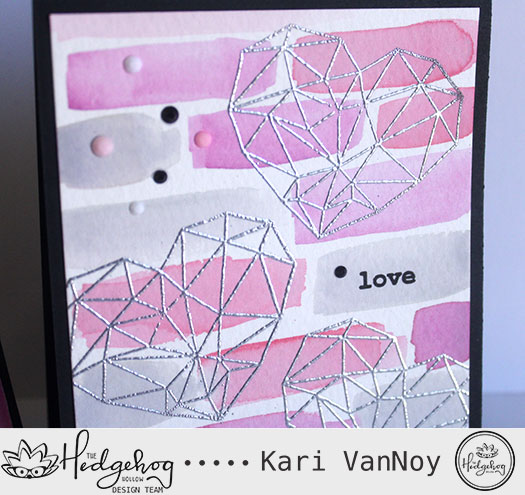
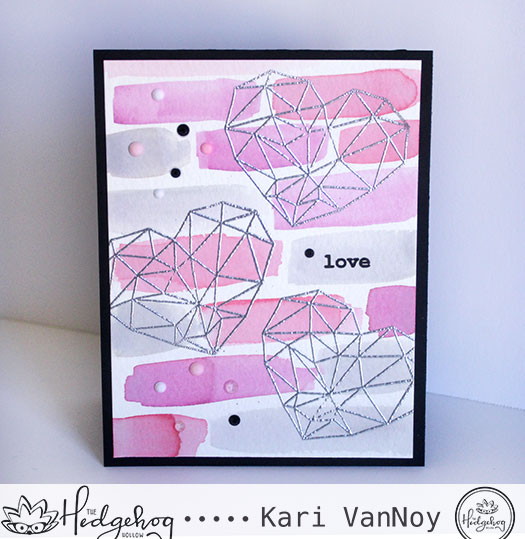
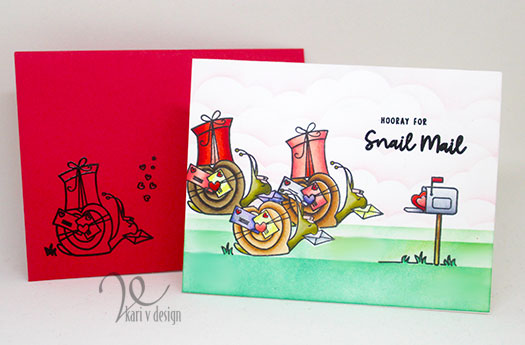
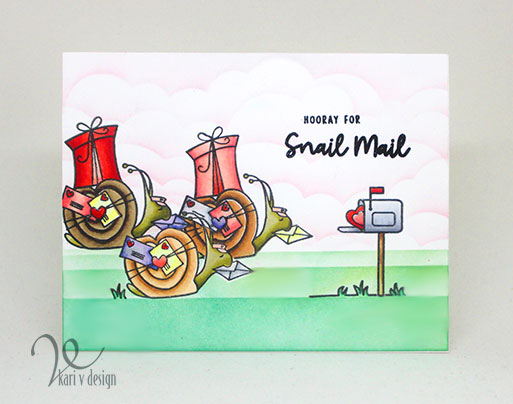
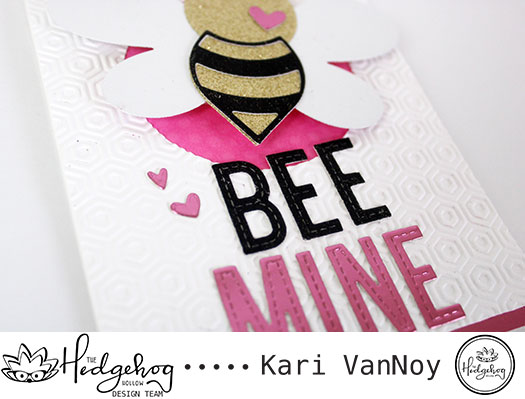
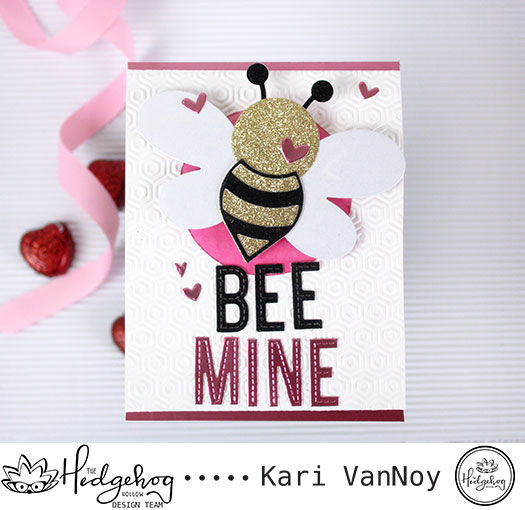
And SECOND is my first card I made using products I shared in the video above.

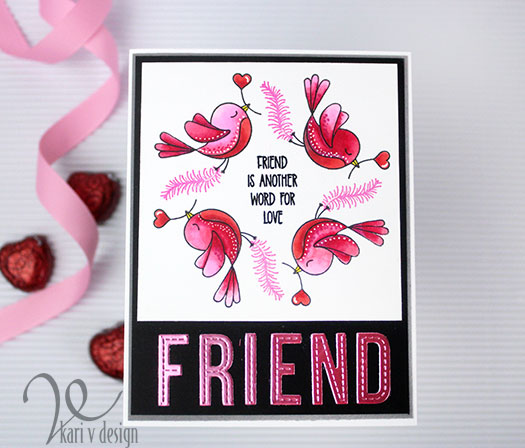
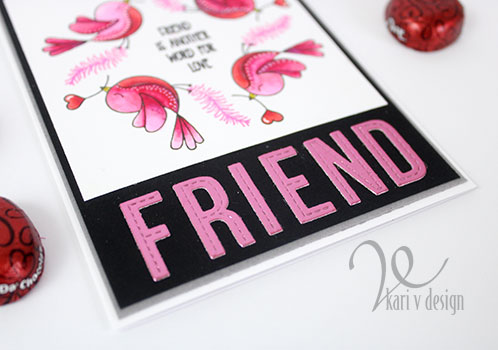
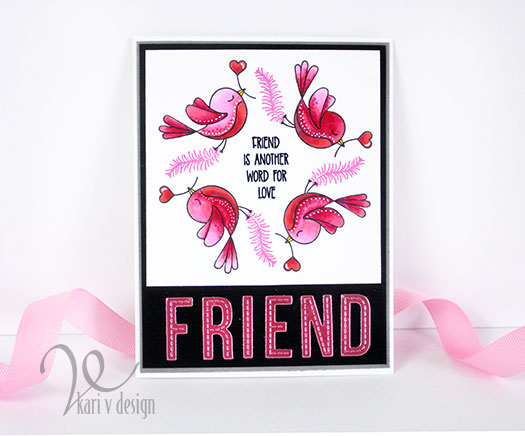
Of course, since it’s Valentine’s Day I had to make a Valentine card!

bee-mine-2 bee-close-up

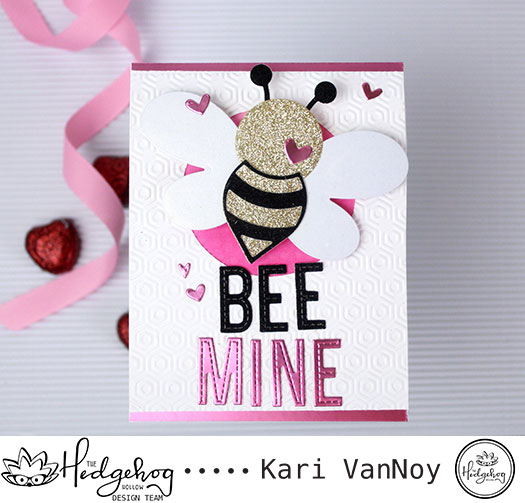
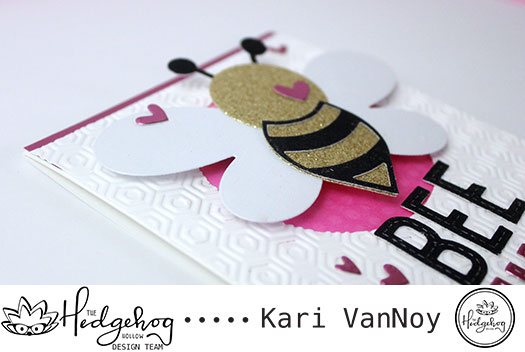
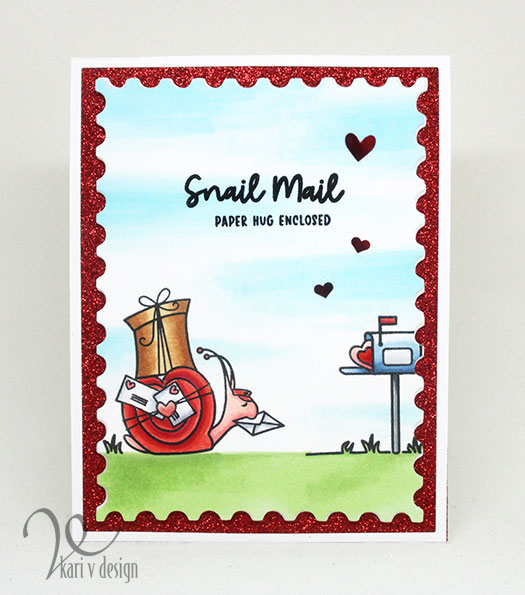
I’ve got all the details over on the Hedgehog Hollow blog HERE, or to see how I put this all together (including how to make the black glitter cardstock), check out my video below or on YouTube:


bee-mine-close-up bee-mine-1

I hope you enjoyed this project and unboxing video today! Happy Valentine’s Day!

Comments { 0 }
friend-is-another-word-for-love

Friend is Another word for Love

Hi again! Today I have a sweet little Valentine card for a friend. I used the Gina K Design Wreath builder to stamp this sweet little bird four times to create a circle. The bird is from a cute little set I got from Gina K at Creativation called “All You Need is Love”. (Thank you, Gina!)

friend-is-another-word-for-love

Originally, I was going to color the birds like a little robin and I started out with the red Copics, but then I thought I’d go all out for Valentines! Why not? Pink birds are fun, right? 🙂

The sentiment is also from that sweet bird set called “All You Need is Love.”

I die cut the word “Friend” from satin mirror cardstock from Tonic. It’s my new favorite paper! It’s not super shiny because of the satin finish, but it has a sheen to it that is just lovely! It’s difficult to get the effect in a photo. Here’s a close up:

friend-close-up

The little “feather” the bird is carrying is actually a branch from the Holiday Wreath Builder stamp set and is stamped with Catherine Pooler ink in Party Dress (love that color!) I thought this branch really did look like a feather! How perfect for my card.

Isn’t this a fun little Valentine for your favorite girlfriend?

To finish up this card, I matted the bird wreath onto black paper and then grey paper and adhered it all onto a white 110# card base.

friend-2

I hope you enjoyed this project today! Happy Valentine’s day….tomorrow!

Comments { 0 }
sweet-heart-card

You’re a Sweet Heart

Hello! Today I have some fun Geometric heart cards to share with you. I’m on the Hedgehog Hollow blog again today to talk all about how I made them, but I wanted to give you a sneak peek here! I used the same Distress Oxide colors on both cards: Worn Lipstick, Seedless Preserves, and Weathered Wood.

Same colors, different techniques.

both-cards-together

Check out the interest in that card on the left…in the geometric heart I added some “extras:” gold sparkle paint, Stardust Stickles for the glitter, and Glossy accents! It makes that heart look so magical in real life.

close-up-of-silver-hearts silver-heart-love-card sweet-heart-card

So, which card do you like better? Are you TEAM SILVER or TEAM GOLD?

Head on over to the Hedgehog Hollow blog here to read the details! Thanks for stopping by!

Comments { 0 }
three-snails-with-envelope

Valentine Snail Mail

Hello! Today I have the cutest Snail Mail to share….delivered by snails! This new set is from Trinity Stamps and I just adore this little guy.

snail-mail-with-postage-and-confetti

He’s called Mr. Snailman and in this card I made him “Valentine snail”….notice his colors. 🙂 The heart confetti is called “Skip-A-Beat” (eep…that’s too cute!) and it’s also available today.

I was having way too much fun coloring him up, so I made another card using some creative masking. I couldn’t resist a matching envelope!

three-snails-with-envelope

TIP: for your envelope…if you want your stamp to stay crisp and not smear in the transit, heat emboss it with clear embossing powder! Here I used Versafine onyx black ink and embossed in clear. I did not color up the image because that envelope is already a nice red.

three-snails-pink-clouds

I love this Snail Crew! Delivering happy hugs, no doubt. I love the pink sky…it just feels like a hug.

Hooray for snail mail! Well, that’s it for me today. I hope you enjoyed these projects.
For more information, please visit the Trinity Stamp blog. Happy Day!

snail-mail-with-postage-border

Comments { 0 }
peace-close-up

Owl Always Love you and Winter cards

Hello! Today I am sharing my last cards as a Designer for Our Daily Bread Designs. I have absolutely loved designing for ODBD, and I will certainly miss all the fun!

My first card is for my friends at ODBD, using the Winter Greetings stamp set with that beautiful owl. (I’ll always love you, ODBD friends and team! And a big thank you to Kelley for having me!)

sunshine-owl-always-love-you

I love that this set has a variety of greetings for both winter cards and other sentiments! I used the Pine branches and Pinecones dies on this card (some of my favorites).

My next card shows the beautiful snowy trees from the December release called Peaceful Wishes.

sunshine-peace-on-earth-trees-with-tag

I added some glitter to those snowy trees and used Distress ink to ink around the edges of this card. If you don’t have a tag die, never fear…you can use a rectangle die in a smaller size to make a tag! I love how it looks with some grey pine branches and a blue thread bow. The frame is from this set.

My last card is a favorite:

sunshine-peace-snowflake-sky

I cut out that PEACE word from this die, then colored it with Copic markers in a variety of violets. I added dots using a white gel pen.

peace-close-up

Then I cut out the Snowflake Sky die and used it as a stencil. To make it feel soft and dreamy, I used Clarity brushes to add the Distress ink in Salty Ocean, and Tattered Jeans. Those Clarity brushes are wonderful!

I hope you enjoyed my projects today. I hope you have a very happy Holiday season and a Merry Christmas!

Comments { 0 }