I’m often asked what supplies I use to make my cards and projects, so I’ve put together a list using affiliate links when possible. If you make a purchase with these links I may receive a small commission. These help me to keep up with blog costs and continue bringing you fun projects. Thank you so much for your support!
I hope you enjoyed this project today! Thanks for stopping by!
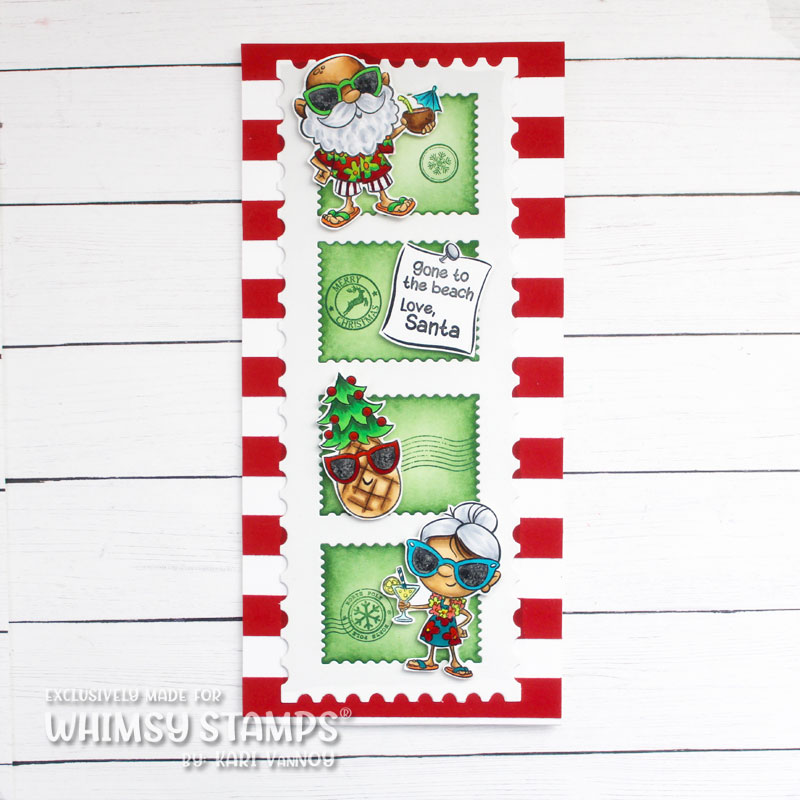
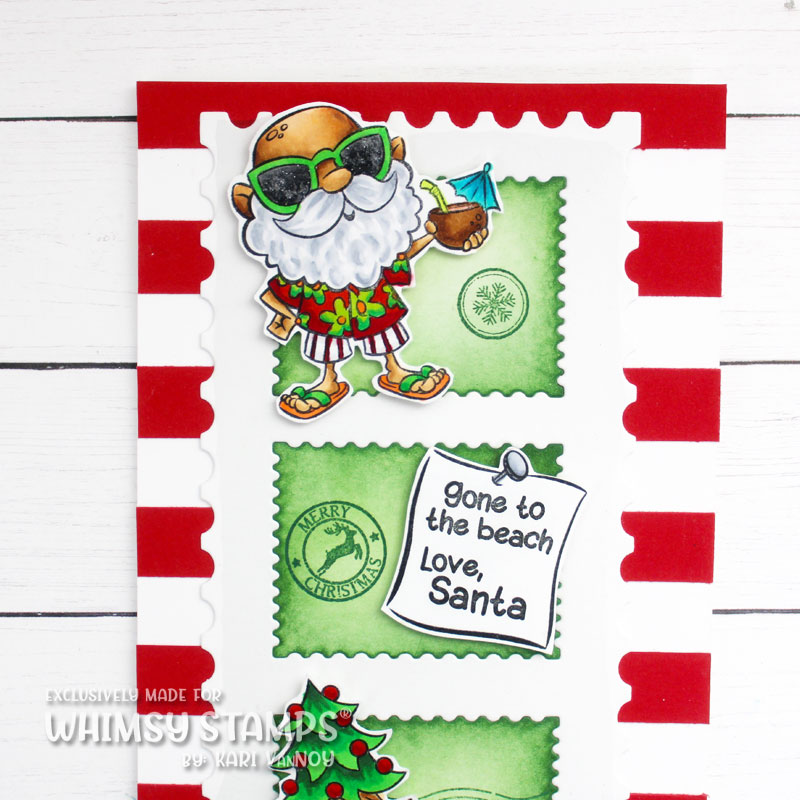
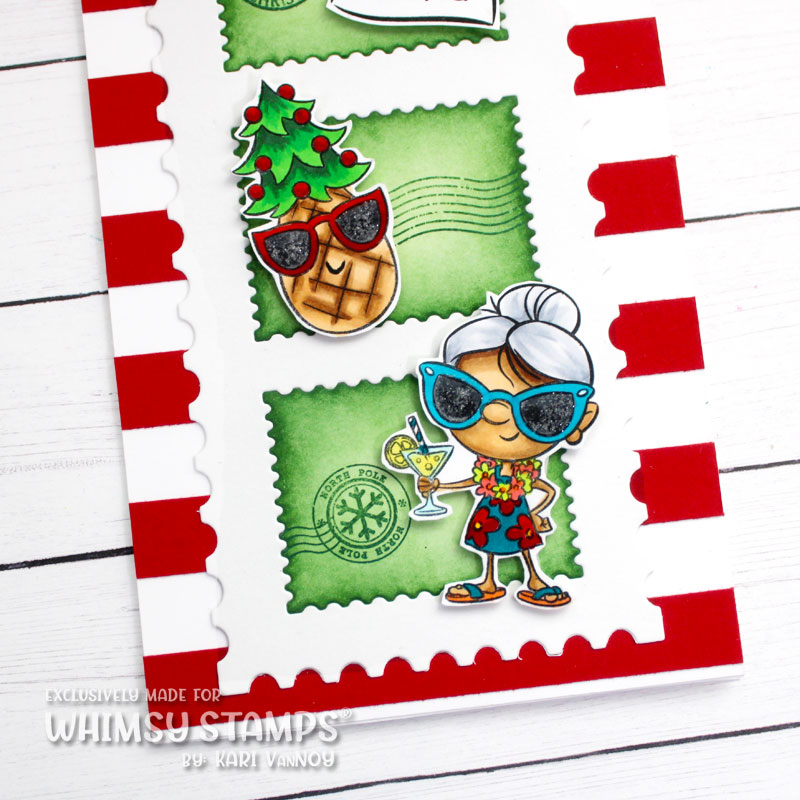
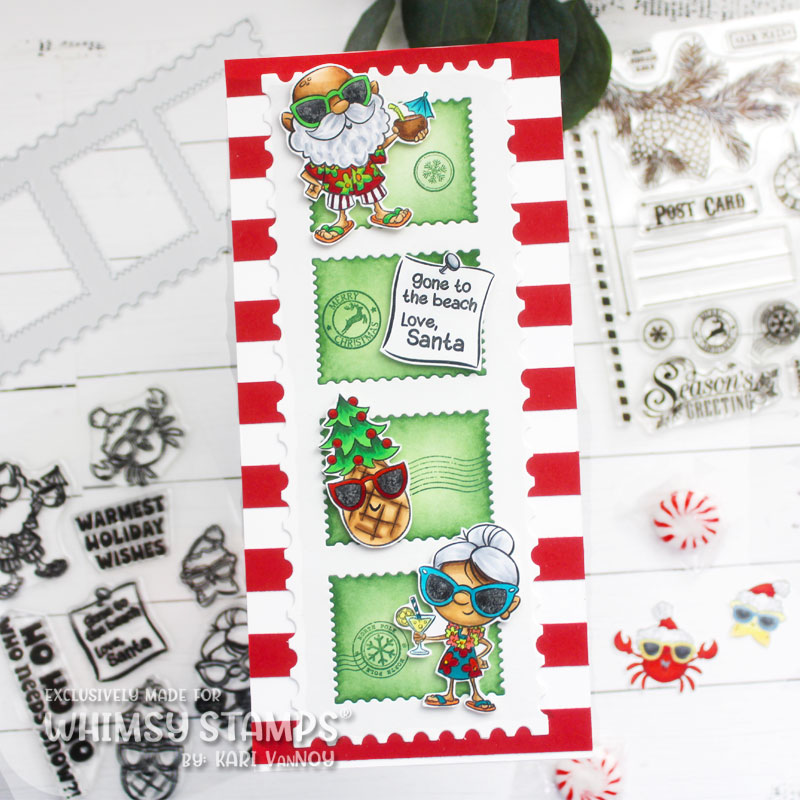
Hello! Today I have a Tropical Christmas slimline card featuring Santa and Mrs. Claus at the beach! I really loved creating this card…I pulled in a Slimline Postage die set to make it feel like a travel/postcard vibe.
I just love these vacationing Clauses! They look so happy with drinks in hand. I gave them a bit of glittery gloss on their sunglasses…movie stars!
I hope you will watch the video to see how this card came together, and to see my cardstock-saving TIP!
Does it snow for Christmas where you are? I think Santa & his wife really deserved this tropical vacation!
I’m often asked what supplies I use to make my cards and projects, so I’ve put together a list using affiliate links when possible. If you make a purchase with these links I may receive a small commission. These help me to keep up with blog costs and continue bringing you fun projects. Thank you so much for your support!
I hope you enjoyed this video and card today! Happy Christmas!
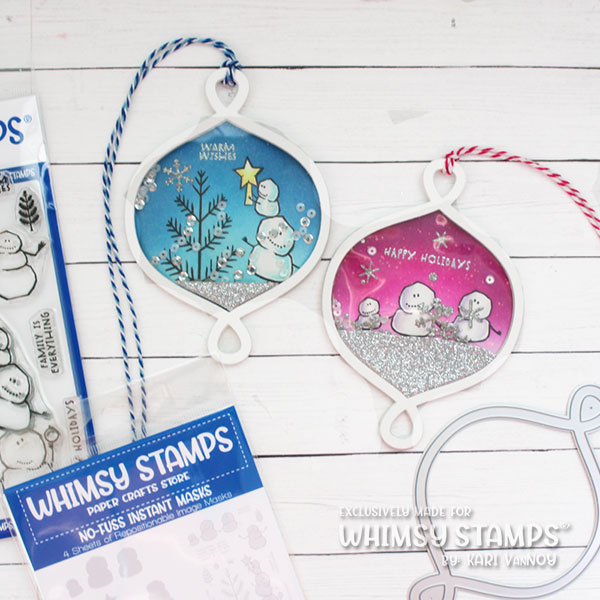
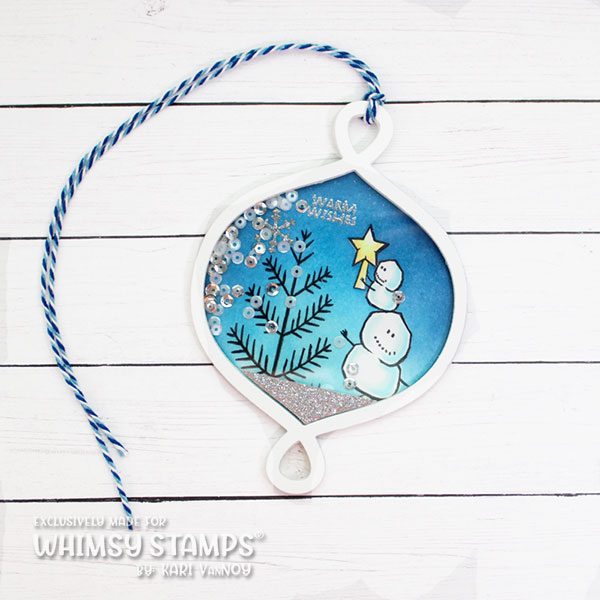
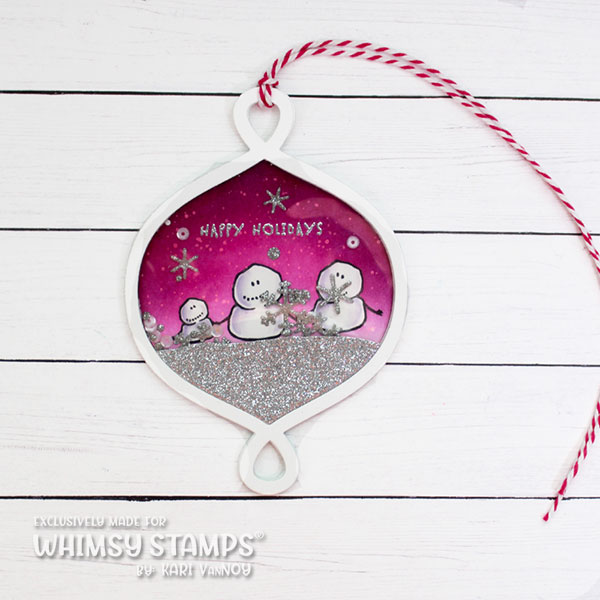
Hello! Today I’m sharing some Shaker Ornaments as a part of a VIDEO HOP with Whimsy Stamps. Head on over to the video below to see all the details and comment and hop along to win a $50 Gift Card to Whimsy Stamps!
These shaker ornament/tags are really fun to make, and with just a little imagination and creativity…work great as a SHAKER ornament or tag!
I am using the new No Fuss Masks to make this project EXTRA EASY! Watch the video to see how these come together and how ordinary clear tape makes a shaker even possible.
I’m often asked what supplies I use to make my cards and projects, so I’ve put together a list using affiliate links when possible. If you make a purchase with these links I may receive a small commission. These help me to keep up with blog costs and continue bringing you fun projects. Thank you so much for your support!
I hope you enjoyed these ornaments today! Good luck in the hop! Remember, you must comment on the VIDEO itself to be entered to win.
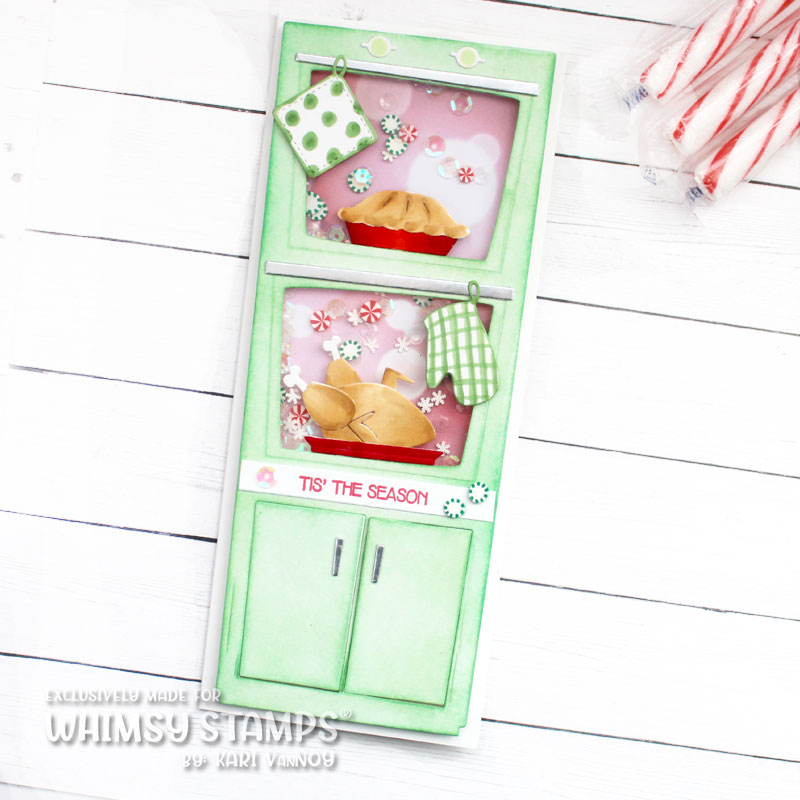
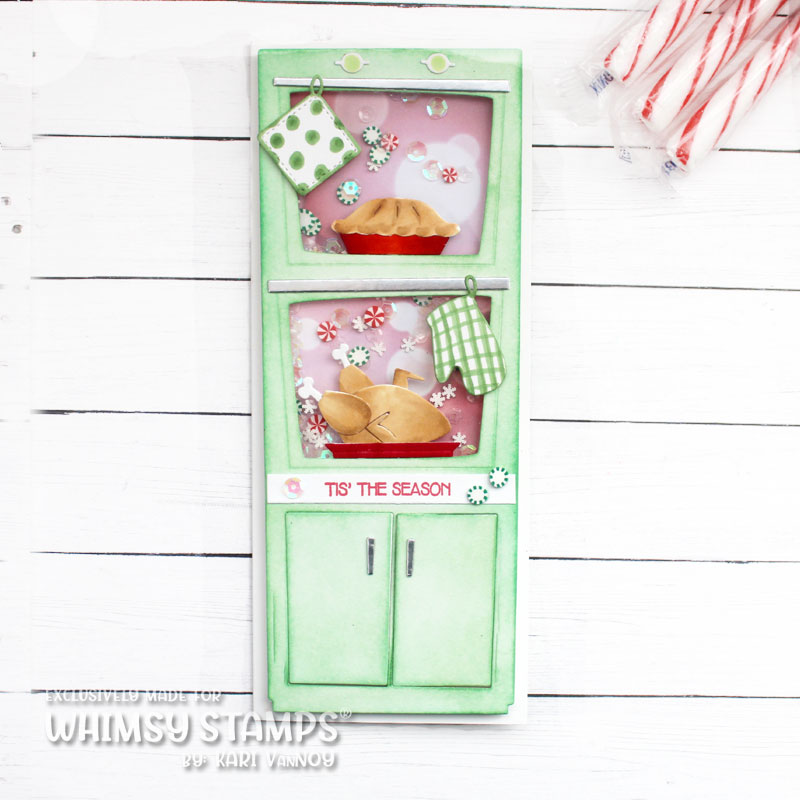
Hello! Today I have a Double Oven Slimline Shaker Card to share and Oh is it awesome! This new die from Whimsy Stamps is one of my new favorites…and I don’t think it’s hard to see why. Just take a look at the video and photos below!
I’ve share all the details and how-to in the video so it’s easy! I love the little oven mitt and potholder. I also used the NEW Baking die set to add in the pie and the turkey (how cute are they)?!?
I do think this slimline oven is the cutest as a shaker card, but you certainly don’t have to make it into a shaker. I added some peppermint embellishments to my shaker (they just remind me of the holidays)!
I just had to make a mint green shaker oven…inspired by my new mini fridge at my office! It’s so cute and retro!
I’m often asked what supplies I use to make my cards and projects, so I’ve put together a list using affiliate links when possible. If you make a purchase with these links I may receive a small commission. These help me to keep up with blog costs and continue bringing you fun projects. Thank you so much for your support!
I hope you enjoyed this project today. I sure had a great time making it. I’d love to hear your favorite holiday baking recipes! Leave me a comment below or on the video and tell me…do you make pies?!
Hello! Today I have some Quick Holiday cards to share in my latest video. This is a part of a video hop with prizes, so be sure to check out the video description for how to enter to win!
These cards are so easy to put together with these new Effortless Artistry Papers and Coordinating Dies.
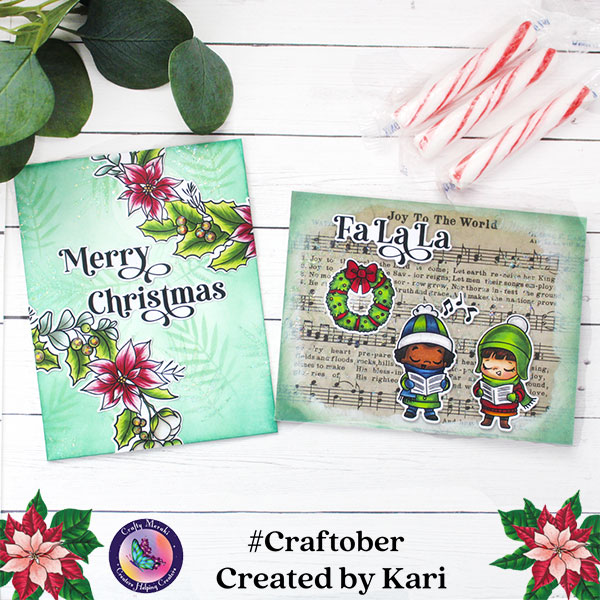
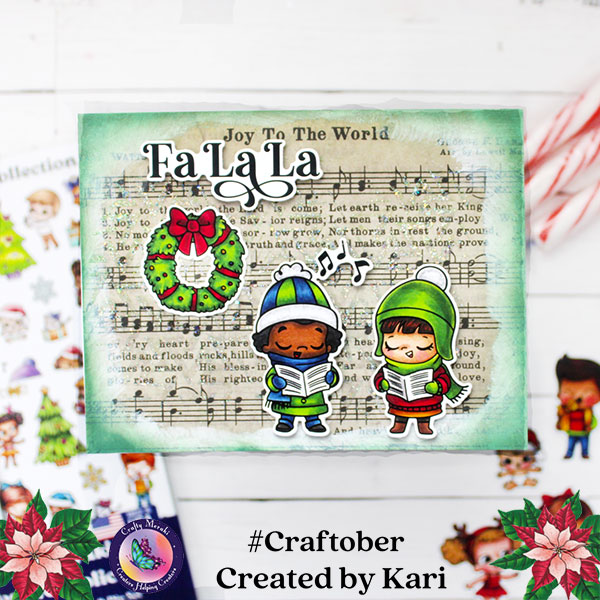
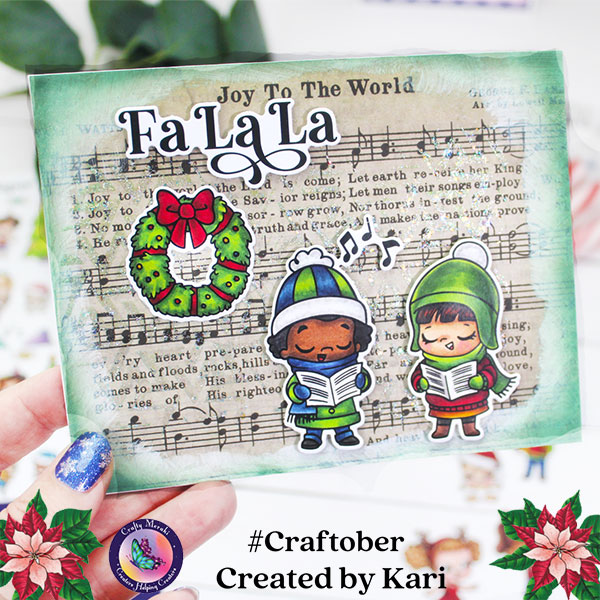
Card 1. Fa La La
For the first card I started out with some music paper for the background and added some White Gesso around the edges. Once that was dry I edged the entire panel with Rustic Wilderness ink and added some Stickles Moon Dust glitter through the Shape Shifters Stencil.
See the glitter?
Then I added the images and sentiment cut from the Effortless Artistry Paper! Voila! A very quick holiday card!
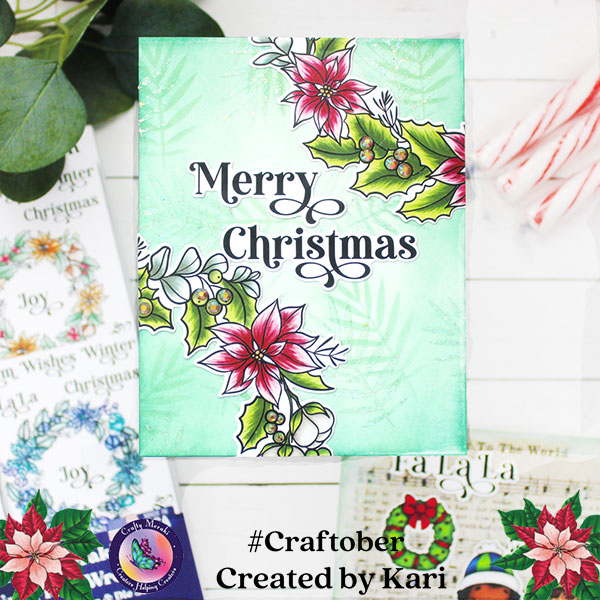
Card 2. Merry Christmas with Wreath
For the second card, I inked the background with Evergreen Bough Distress ink, and the same color with the leaves stencil. I then shifted the stencil and added some Stickles Glitter Moon Dust through the leaves stencil.
I added portions of the wreath to the upper right and lower left corner of the panel and then added the sentiment! For extra sparkle, I added some Gold Illusion Meraki Sparkle (gems) to the berries. So pretty!
I’m often asked what supplies I use to make my cards and projects, so I’ve put together a list using affiliate links when possible. If you make a purchase with these links I may receive a small commission. These help me to keep up with blog costs and continue bringing you fun projects. Thank you so much for your support!
I hope you enjoyed these projects today! Don’t forget to check out the video and YouTube video description for details on how to enter to win a prize! See you soon with more cards to share.
Hi I'm Kari. I'm a creator, a card maker, and a day maker! I am Lucky in love to a supportive husband, blessed to raise 3 kids (all moved away now!), and happy to be watched over by 2 dogs.
I originally started this blog to remind me to be happy amid adversity, and I hope it inspires you, too!