About KariV

Author Archive | KariV
dad-man-of-the-hour

For the Men in our Lives

Hello again! I’m here to share some fun cards for Dad and Grandpa! These are made with the June 2018 Hedgehog Hollow box (which I believe are now sold out!)

Affiliate links are used, when possible, at no additional cost to you. When you purchase items using these links I get a small commission that helps me to pay for my blog costs, thank you!

I couldn’t resist using the tissue paper from the box….yes: the tissue paper that all the goodies were wrapped up in! It was the cutest mustache tissue wrap and I just knew it needed to be the card panel background for my grandfather. So, I turned it into this card:

grandfather-mustasche-card-1

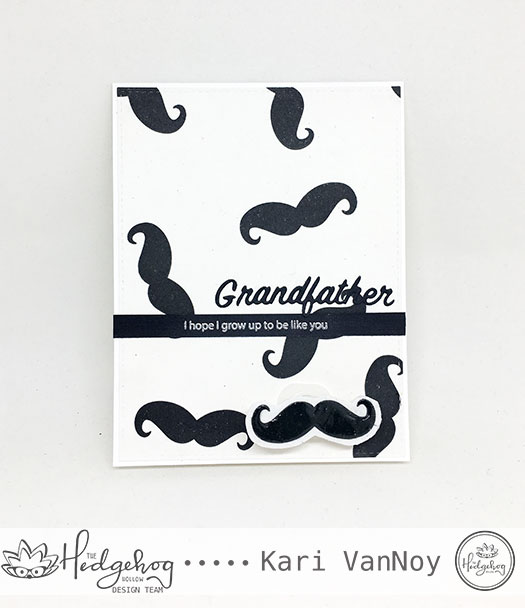
I used Stick It to adhere to the tissue paper and then I smoothed it out with my Teflon bone folder and was able to get all the wrinkles out! That made it so easy to attach to my 110# card base.

My grandfather would really get a kick out of this. But let me explain that mustache in the bottom corner…it is on an ACTION WOBBLE so it moves!! He would laugh and laugh because he really liked the “Groucho Marx” look and I can just see him wobbling that mustache for hours. This is for you, Grandpa!

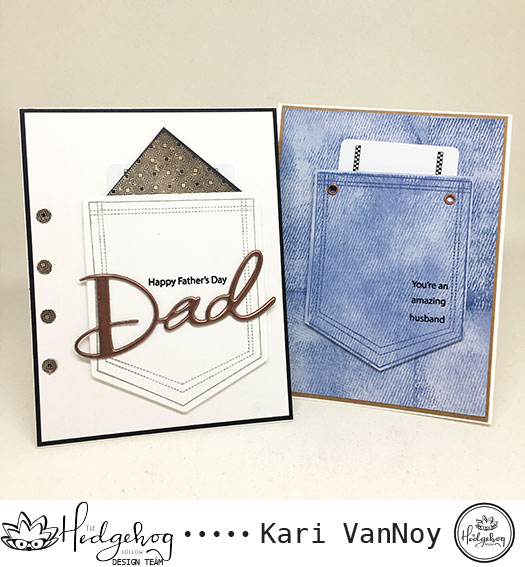
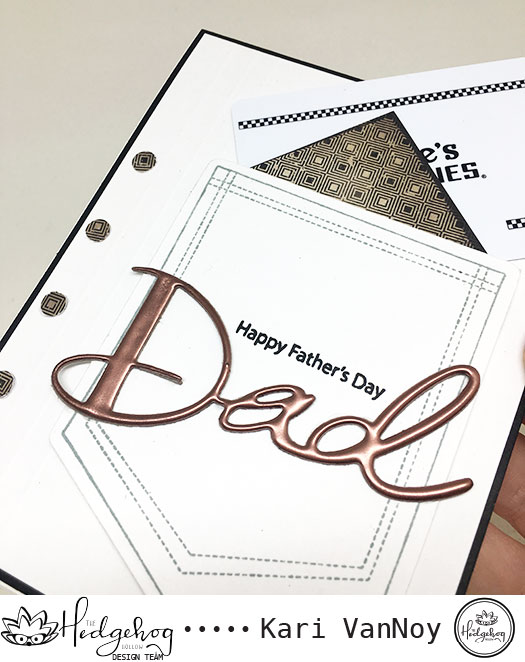
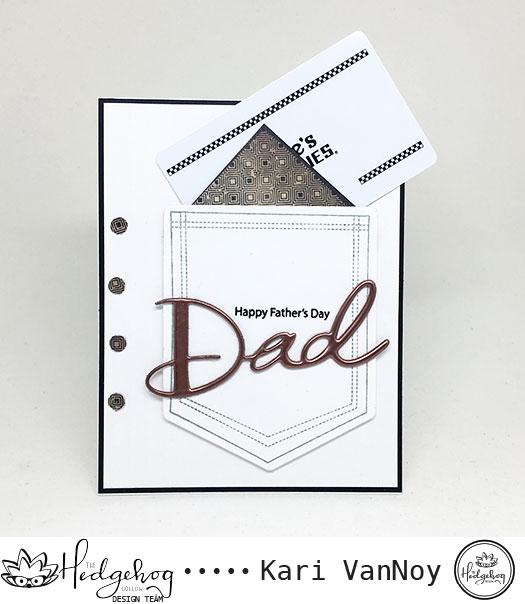
My second card features the awesome background stamp that looks like a metal tool box…I thought it would look stunning on a kraft background heat embossed with silver.

dad-man-of-the-hour

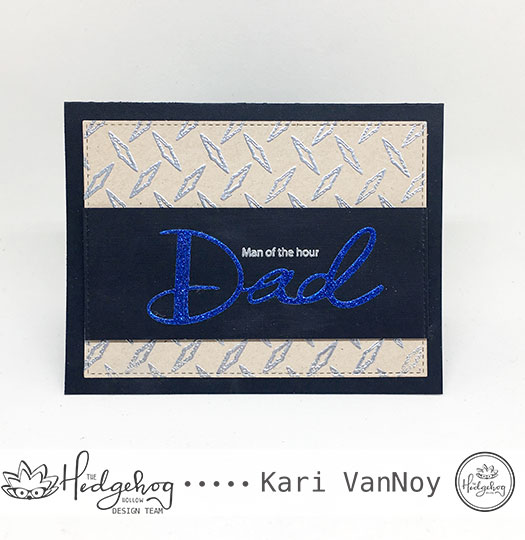
The silver embossing is just the thing to make it shine! I cut the large “dad” die cut out of blue glitter paper (blue is, in fact, my Dad’s favorite color!) I know that Father’s Day has already passed, but this could make a fun Birthday card or Congratulations card. And the black adds just another masculine touch.

I have really enjoyed making some cards for the men in my life. I hope you have enjoyed these projects, too. And I’m super excited to share the next ideas I have for this box…that’s coming up next week! Until then, I hope you get some crafty time in. 😉

To see what boxes are still available, visit the Hedgehog Hollow page.

Comments { 1 }
sunshine-anchor-color-page

God’s Beauty Coloring Pages

Hello! Today I have some fun projects to share using the new “God’s Beauty Coloring Pages” from Our Daily Bread Designs. The images are all so fun to color, and very detailed. Which gives you a lot of room for creativity in colors.

This first image I colored with colored pencils and had such a great time coloring these birds.

sunshine-love-birds-1

Aren’t they so detailed!? Wow, what a fun image. I colored the leaves in two tones of green, but you could certainly color them all the same color and add more shading. The flowers are also so beautiful and you could color these in a variety of colors!

My next coloring page uses Copic markers in only four colors!

sunshine-floral-frame-sister-friend-1

But look at all that variation you can get only using 4 colors. I added some glitter to the center of the flowers. The sentiment is from Sister In Christ stamp set.

And lastly, I wanted to try coloring the background in a darker shade.

sunshine-anchor-color-page

This one turned out so dramatic and fun!! I also used Copics on this page and still love how it turned out. I added some bubble droplets to add more interest.

These coloring pages are just perfect for the Daily Marker 30 day, and they make beautiful cards, too! I hope you enjoyed these projects…maybe give them a try yourself. If you do, be sure and tag me…I’d love to see what you do with them!

Comments { 0 }
woof-you-card-and-gc-holder

Birthday Giveaway — The Hedgehog Hollow box!

Hello! You may already know that this is my birthday month and I have a few giveaways to celebrate! Today I want to share with you one of my FAVORITE subscription boxes and offer ONE box to a lucky subscriber!

This is the box from The Hedgehog Hollow. Alexandra was kind enough to offer up a box OF YOUR CHOICE to giveaway (in stock boxes only). Check out the boxes that are available here.

To make it even more exciting, she has already announced the JULY 2018 box (hint: it has some cute beach characters in it from Sunny Studio!)

HH-birthday-giveaway-pict

I have created multiple fun cards using products from these boxes, and can I just say…I have always been so IMPRESSED with everything that comes in them! I have the latest unboxing video here, if you want to see it.

TO WIN

all entries must be received here or on my instagram account. Winner will be chosen from all comments received. Head on over to my instagram account to enter.

**OR comment here on my blog: Tell me which box you would like to receive!

Here are just a few of my projects that I’ve created with products from the May 2018 box:

cherry-tall-card-with-mouse mice-cloudy-2 sweet-striped-background-card

I love this box! And here are a couple from the most recent box, the June 2018 box:

both-gc-pocket-cards white-shirt-close-up-of-embossing

And, I think she may even have one or two boxes left of the March box (featuring the adorable LDRS creative stamps!):

woof-you-card-and-gc-holder

I will have projects soon to share with you for the brand new July box, but you can get a sneak peek now on her blog!

I hope you win. These boxes are just amazing!

Comments { 4 }
both-gc-pocket-cards

Pocket Gift Cards for Father’s Day

Hello! Today I’m excited to share with you my first set of cards for The Hedgehog Hollow! When I opened this month’s box, I was delighted to see a pocket stamp AND die…and I was immediately drawn to creating a GIFT CARD pocket for Father’s Day.

If you haven’t seen what is included in this June 2018 Hedgehog Hollow box, click here to see my unboxing video!

The first card is a more formal card, with a white shirt and handkerchief sticking out of the pocket. I used the papers included in the box for the handkerchief! My dad LOVES chocolate so a gift card to See’s Candies was just the thing! A gift card fits perfectly inside the pocket.

white-shirt-gift-card-pocket

The “buttons” are punched out of the same paper to match the handkerchief. And that BEAUTIFUL “dad” die is just the right size for a card. I used the embossing powder included (when you are a regular subscriber to the box) to create a metallic die cut. I love this technique.

white-shirt-close-up-of-embossing

Here you can see that beautiful color of the embossing powder!

Of course I had to create a separate card using the DENIM stamp that is included. I used Distress Oxide ink in “Faded Jeans” (isn’t that just the perfect name for this color and project?!) to ink up the panel and then I stamped over it using the same color.

denim-card-for-hubby

On this card I used some copper eyelets to add to that pocket. So easy and adds the real look of jeans, doesn’t it?

I created a video for you to see the process below, or watch on YouTube:


both-gc-pocket-cards

I hope you enjoyed these projects today. They are fun and easy to put together. Add a gift card and you have a perfect Father’s Day card and present!

For more information about the June 2018 Hedgehog Hollow box, visit here. Thanks for stopping by!

Comments { 1 }
gold-embossing-new

3 Ways to use a Silhouette Stamp – Sister cards

Hello! Today I am excited to share with you 3 Ways to Use a Silhouette Stamp using the set “Sister Time” by Our Daily Bread Designs.

I have my absolute favorite go-to for using silhouette stamps, and that is to Distress Ink the background, then stamp over it in black ink. But today I have THREE ways to show you!

Disclosure: Affililate links used when possible, at no extra cost to you. By clicking on these links you are supporting my blog just a little and I thank you very much!

  1. SISTER ADVICE

The first way is Distress Inking a panel, and then using a die to cut it out. I used the Flourishy Frame Die and Distress Oxide Inks in Picked Raspberry, Spiced Marmalade, and Fossilized Amber ink here.

sunshine-sister-advice

I did splatter some water over that background, then I allowed it to try before I die cut the frame. I masked off the edges before adding the stamp from Sister Time in my favorite crisp black ink.

Doesn’t this just look like an older sister giving advice to the younger sister? I love that.

2. LAUGH SMILE LOVE GOLDEN ADVICE

Another way to get more out of your silhouette stamps is to GOLD emboss them. Here I used black paper to gold emboss, then I cut it out using the Double Stitched Square Dies. I added it onto black fun foam before attaching it to the Flourishy Frame Die. I love that die and have used it a lot this month. I used two layers of the frame to give it more dimension and pop!

gold-embossing-new

I cut those words out of gold foil paper. But you could also heat emboss them using the same gold embossing powder to make them completely match. My gold colors were just close enough!

The stripes are made using a clarity brush and Tea Dye Distress Ink…I masked off the stripes using Post It tape!

3. OMBRE INKED SISTERS

The last way I have to share with you today is to ombre ink the stamp! Here I used different colors and a Misti. I inked up the first color, then stamped. Added the second color further down the stamp, then stamped. And then the third color at the bottom of the stamp, then stamped again. Having a MISTI really helped with this technique!

sunshine-sisters-make-the-best-of-friends

I could’t resist turning this into a shaker card using all the matching colors of sequins. I cut out the top layer with the Double Stitched Square Dies, then added two layers of foam tape. Be sure to add the sequins before you tape the panels together!

I can think of a few more ways to using silhouette stamps, but those will have to wait for another day! (How about a watercolored background or Sponge inking inside a shape?) Lol…I could go on.

If you have any other suggestions for a different way to use your Silhouette stamps, please let me know in the comments below. Thanks for stopping by!

Comments { 0 }