About KariV

Author Archive | KariV
you-are-loved-both-cards

You Are Loved

Hello! I have some cards to share in different colors today. I recently took the Altenew Course called “In The Mood For Color” and it was so interesting. She talked about the different feelings we get from color and how it changes the whole feeling of a card.

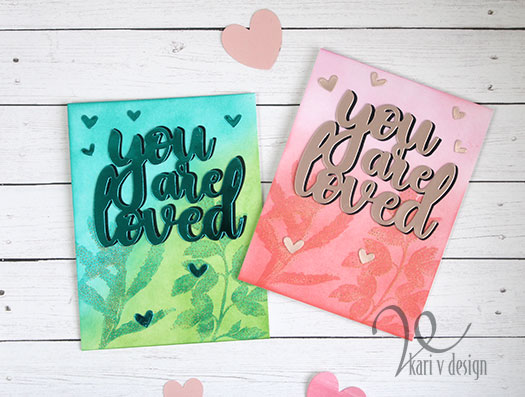
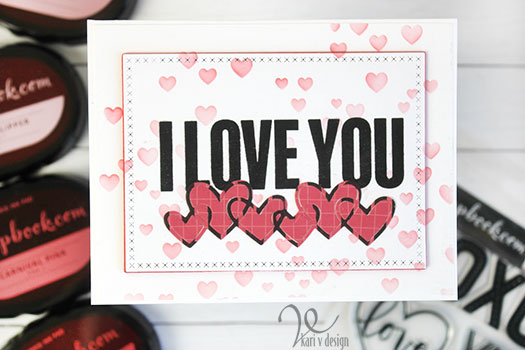
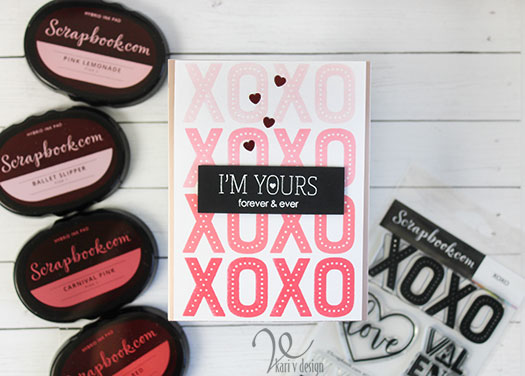
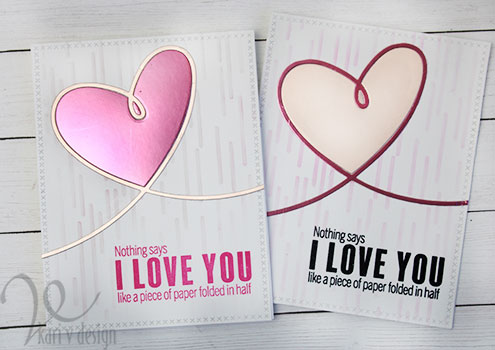
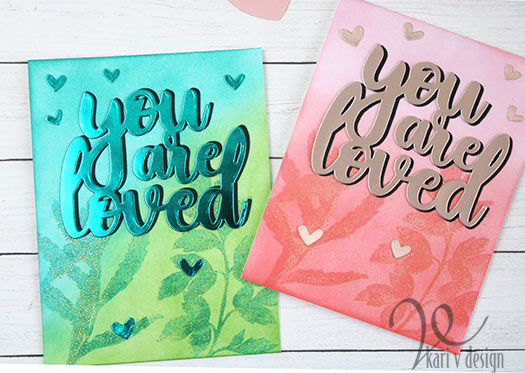
So today, I made two of the same card in different colors. First, I chose red/pink for Valentines Day! This color evokes love, passion and energy.

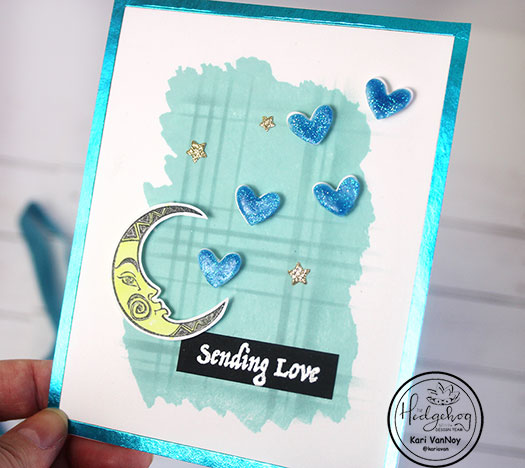
The Second color I chose was blue/green. Blue evokes tranquility and green is soothing & natural feeling. These are some of my favorites and I couldn’t resist pairing them together.

To start, I inked up the backgrounds with Distress Oxides and other hybrid inks. Then I stamped on the Leaves with a similar color. I added the dots with glitter embossing powder for more of a subtle sparkle for these cards.

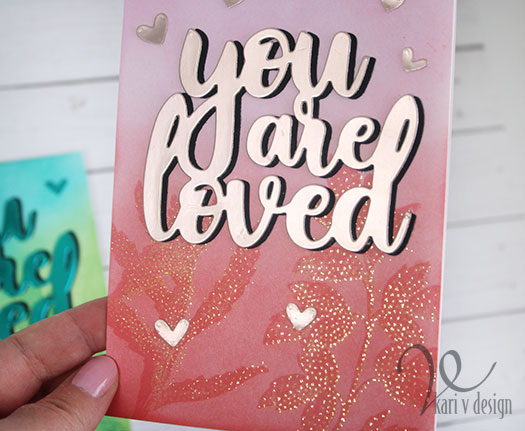
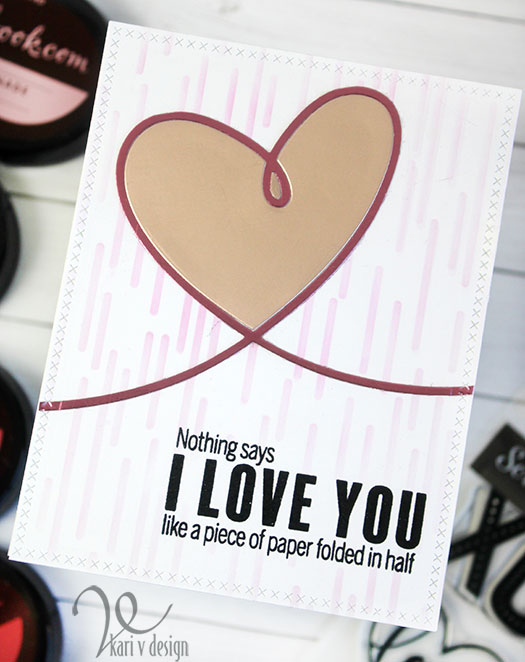
I cut the sentiment with mirror cardstock as well as some hearts. The sentiment is also backed with a black shadow.

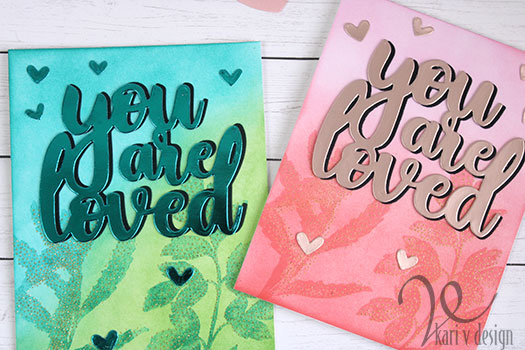
Can you tell the different feelings you get from each card? The pink card definitely has more energy, while the blue/green is more calming.

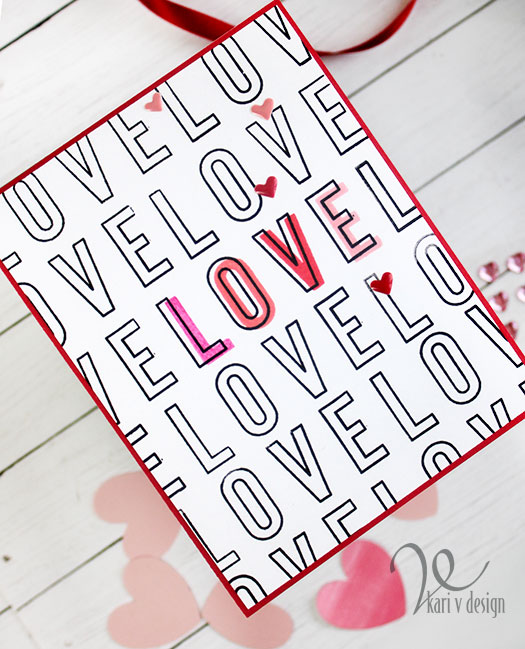
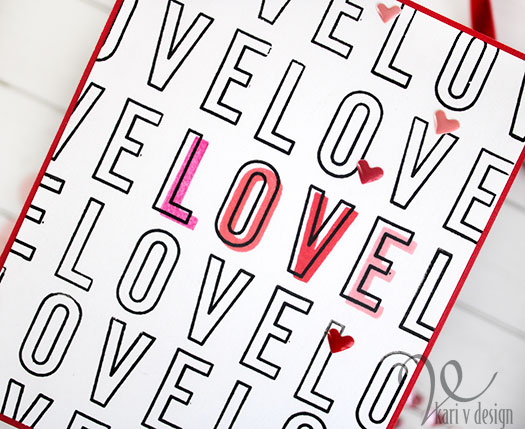
Below you can see more of the shiny mirror cardstock on the sentiment:

I’m often asked what supplies I use to make my cards and projects, so I’ve put together a list using affiliate links when possible. If you make a purchase with these links I may receive a small commission. These help me to keep up with blog costs and continue bringing you fun projects. Thank you so much for your support!

I hope you enjoyed a look at my different color cards and hearing about the feelings color gives to a card! Thanks for stopping by!

Comments { 1 }
love-love-love-close-up

Love Love Love

Hello! It IS Love week, with Valentine’s Day sneaking up on us soon. Today I am sharing a card I love with some new stamps I love!

These are the Bold Caps Outline stamps, and I offset the Bold Caps Solid stamps in reds and pinks on the top. It’s such a fun look!

I added some enamel hearts and a red glitter background frame.

I’m often asked what supplies I use to make my cards and projects, so I’ve put together a list using affiliate links when possible. If you make a purchase with these links I may receive a small commission. These help me to keep up with blog costs and continue bringing you fun projects. Thank you so much for your support!

Hope you enjoyed this project! See you soon with more love cards. 🙂

Comments { 0 }
paper-BOTH-cards-close-up

Easy Ombre Valentines

Hello! Can you believe Valentines Day is less than a week away? Today I have some Valentines cards to share with some of my favorite techniques.

I have a video of the easiest Ombre tricks to share, watch it below or on YouTube:

Which card is your favorite?

For the Ombre card I used the pink hybrid inks in four colors. These are already in Ombre order to make things extra easy. I love that! Each ink gets progressively darker, and when you use a large stamp (like the XOXO stamp) with a MISTI stamping tool, you can produce the easiest Ombre Valentine card ever!!

I’m often asked what supplies I use to make my cards and projects, so I’ve put together a list using affiliate links when possible. If you make a purchase with these links I may receive a small commission. These help me to keep up with blog costs and continue bringing you fun projects. Thank you so much for your support!

Hope you enjoyed these Valentines! See you real soon with more card inspiration.

Comments { 0 }
SUNSHINE-holding-the-card

Kissing Moon with Plaid

Hello! Today I have another card share using the January 2020 Hedgehog Hollow Kit. I love this moon image, it looks like he’s blowing kisses! So I paired him with some hearts, a simple plaid inked background, and a “sending Love” sentiment.

To make the plaid background, I first stamped the watercolor look stamp using some light blue ink. Then I chose a striped stencil to add some lines (both vertically and horizontally) with a darker blue ink. Using a finger dauber made it easy to keep the plaid lines within the stamp.

Kissing Moon

Then I stamped the moon image with black ink and heat embossed it with clear. I colored him with a yellow Copic marker and fussy cut it. I added it to the card with foam adhesive.

I heat embossed some hearts with blue glitter embossing powder and added a white heart as a shadow behind them. I added a few glitter stars.

The sentiment is white heat embossed onto black cardstock. And I finished it all off with some teal foil paper as a frame around the entire card.

I’m often asked what supplies I use to make my cards and projects, so I’ve put together a list using affiliate links when possible. If you make a purchase with these links I may receive a small commission. These help me to keep up with blog costs and continue bringing you fun projects. Thank you so much for your support!

I hope you enjoyed this project! See you soon with more inspiration.

Comments { 0 }
rainbow-pegasus-card-2

Pegasus Love

Hello! Today I’m up on the Scrapping For Less blog sharing some cards made with the Prancing Pegasus stamp set and beautiful Fairy’s Garden paper pad.

For my first card, I inked up the background with some Distress Oxides in Picked Raspberry and Dried Marigold. Then I splattered on some white pearl watercolor to give it more of a magical feel.

I stamped some of the stars from the same stamp set on the background using the same colors of Distress Oxide inks. They are a little difficult to see in the photos, but it adds a subtle detail.

I colored up the Pegasus with Copic markers and added some sparkly stickles to the wing. I die cut some clouds from my stash and added WOW! Sparkle glitter to the smaller ones. This is some WOW! glitter I got to preview at Creativation and oh…I love it!

That frame is from the diagonal paper in the paper pack and it adds just the right touch! I stamped the sentiment on strips of teal paper and popped it up with foam tape. This is for sure a “magical” birthday card that is fit for a princess!

For my second card I knew I wanted that Pegasus to be running on top of a rainbow. So I glittered up a rainbow and added it to a pink polka dot background from the Fairy’s Garden paper.

I colored the Pegasus’ mane, tail, and wing in the same rainbow colors with Copic markers. Those butterflies and leaves are cut from the paper pad as well! I was so excited to see those butterflies in there and they were so perfect for this rainbow card!

I added some clouds to the card and stamped the sentiment “For My Princess” with pink ink.

I added the Pegasus with foam tape to give it more dimension. I also folded up the butterfly wings just a little to so they look like they are flying!

I hope you enjoyed these projects today! I really loved making them. I’ll see you real soon with some more inspiration.

Kari VanNoy
Find me here: Instagram * Blog * YouTube

Comments { 0 }