About KariV

Author Archive | KariV
SUNSHINE-you-inspire-me-crooked

A Crafty Thank You card

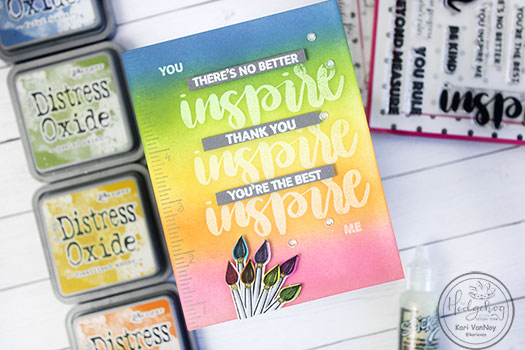
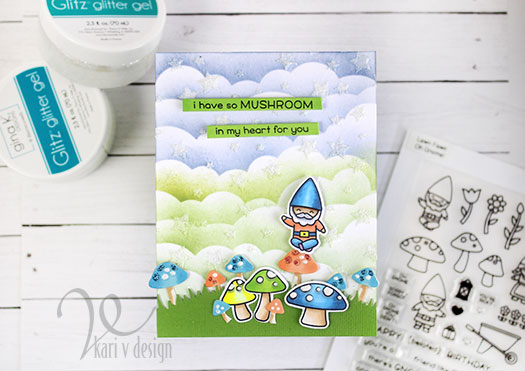
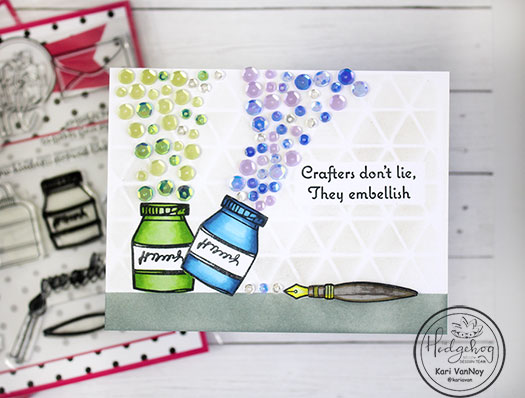
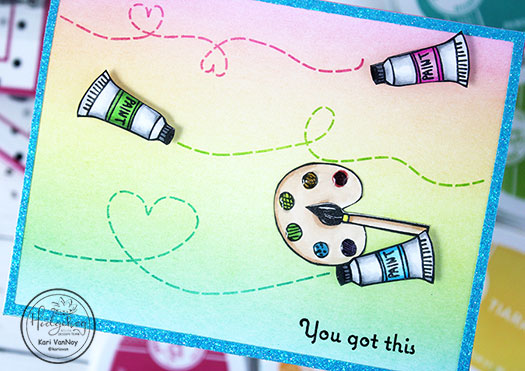
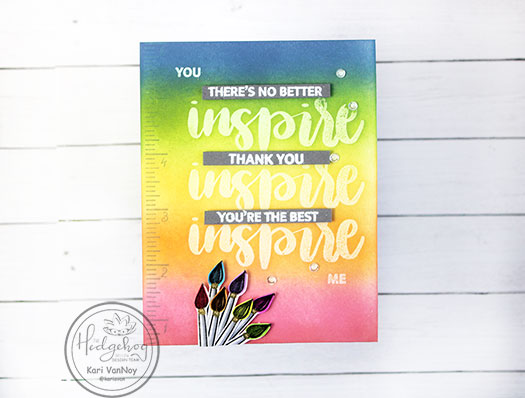
Hello again! I’m back already with another card using products from the Hedgehog Hollow March kit! These stamps got me thinking about people who inspire me, so I put together some of the sentiments for a very colorful and inspirational thank you card.

You inspire me

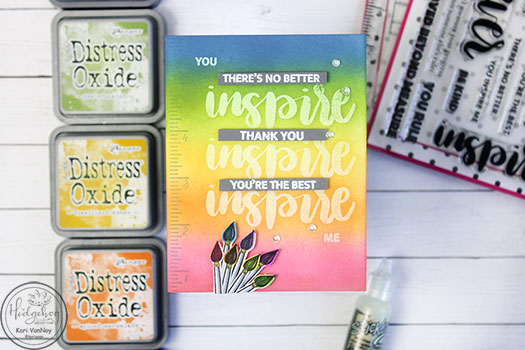
See how the first “inspire” is a light green, the second “inspire” is a light yellow, and the third “inspire” is a light orange? Well, I’m using clear embossing powder to trap the color below it to get that neat look!

For the process video and to see how this card took on a life of its own, watch the video below or in HD on YouTube:

I’m often asked what supplies I use to make my cards and projects, so I’ve put together a list using affiliate links when possible. If you make a purchase with these links I may receive a small commission. These help me to keep up with blog costs and continue bringing you fun projects. Thank you so much for your support!

Thanks for stopping by today!

Comments { 0 }
mushroom-card-with-supplies

White vs. Iridescent Glitz Glitter Gel

Hello! Today I have a video up comparing the white Glitz Glitter Gel with the Iridescent Glitz Glitter Gel. I am a part of the Save the Craft YouTubers Video Hop, with lots of prizes to be won (on every channel of the hop)!

I am also making a couple cards with the cutest Lawn Fawn images….and I’m giving away this stamp set! Check out the video below or on YouTube:

It’s a fun look at the differences between the gels on both black & white cardstock AND on a couple cards.

I hope you enjoy! Thanks for stopping by

I’m often asked what supplies I use to make my cards and projects, so I’ve put together a list using affiliate links when possible. If you make a purchase with these links I may receive a small commission. These help me to keep up with blog costs and continue bringing you fun projects. Thank you so much for your support!

Comments { 0 }
butterfly-card-2

It’s All About the Details

Hello! Today I am excited to share a video about adding fun details to a card. I first colored up my image on bristol paper using Zigs, then I added a bunch of extra details. This detail work is fun and EASY, and it adds quite a bit of interest to an otherwise fairly simple card.

I love this butterfly image…and those sentiments are ALL really good, too. Perfect for a time like this!

See all that fun detail work?! I love it. Watch the video below or in HD on YouTube:

I used four kinds of detail-adding elements: a white gel pen, a Copic multi-liner, Nuvo Jewel drops (translucent), and Zig marker. These are all great ways to add DOTS to your cards. Be sure to watch the video for the details.

Adding this kind of detail is something to try at home and see what you like! I can’t wait to see what you create.

I’m often asked what supplies I use to make my cards and projects, so I’ve put together a list using affiliate links when possible. If you make a purchase with these links I may receive a small commission. These help me to keep up with blog costs and continue bringing you fun projects. Thank you so much for your support!

Want to know a secret? That background was not going to be a stormy background. It was going to be a bright, watercolored background. But it morphed into this stormy background, with that angel butterfly staying calm amidst it all! We can all learn from this bright butterfly.

I hope you enjoyed this project today! See you real soon with another card to share.

Comments { 0 }
SUNSHINE-embellish-crooked

Add a Little Embellishment

I love a little embellishment….on a card. So when I saw the sentiment “Crafters don’t lie, they embellish” I couldn’t stop laughing. And laughter is a great medicine! So today I have a card using plenty of embellishment.

I love the look of sequins on a card…these ones are extra sparkly! To start, I first stamped on one ink bottle, masked it off and stamped another ink bottle behind it. I stamped and masked off both the sentiment and the fountain pen, as well.

The background was inked over a die cut panel (I used the Altenew cover plate to cut out a panel, then inked over it). And I taped of the “table” to ink that on with Distress Oxide in Gray.

Then I colored all the images and added PLENTY of sequins. Lol. This was fun to do using my new embellishment wand! 🙂

For the fountain pen, I stamped it again onto some wood-grained paper from my stash, then fussy cut it. I added it to the card using foam adhesive.

If I didn’t mention it before, all the stamps are from the March 2020 Hedgehog Hollow Kit. It’s a fun crafty kit this month!

I’m often asked what supplies I use to make my cards and projects, so I’ve put together a list using affiliate links when possible. If you make a purchase with these links I may receive a small commission. These help me to keep up with blog costs and continue bringing you fun projects. Thank you so much for your support!

Thanks for stopping by today!

Comments { 0 }
SUNSHINE-you-got-this-no-supplies

Airbrushed Look

Hello! Today I have a fun airbrushed looking background…but you don’t need a machine for this one!

I’ve got all the details on a short video…watch it here or in HD on YouTube:

For the written instruction, visit the Hedgehog Hollow blog here.

I’m often asked what supplies I use to make my cards and projects, so I’ve put together a list using affiliate links when possible. If you make a purchase with these links I may receive a small commission. These help me to keep up with blog costs and continue bringing you fun projects. Thank you so much for your support!

I hope you enjoyed this fun project. This background is such a soft blend..and it’s so easy! Thanks for stopping by!

Comments { 0 }