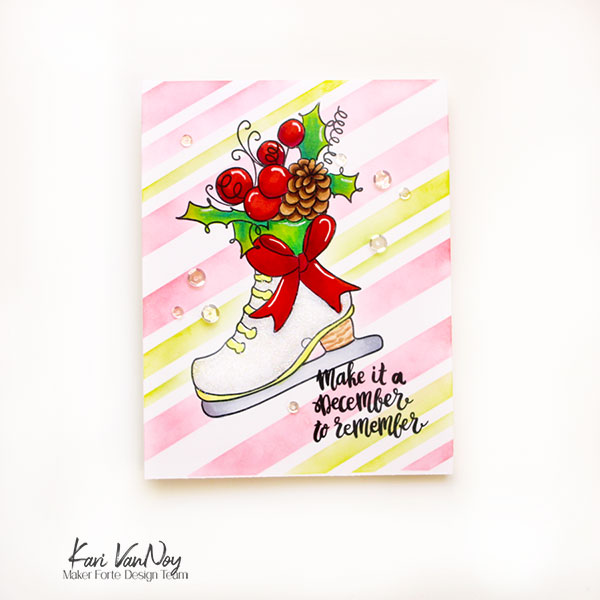
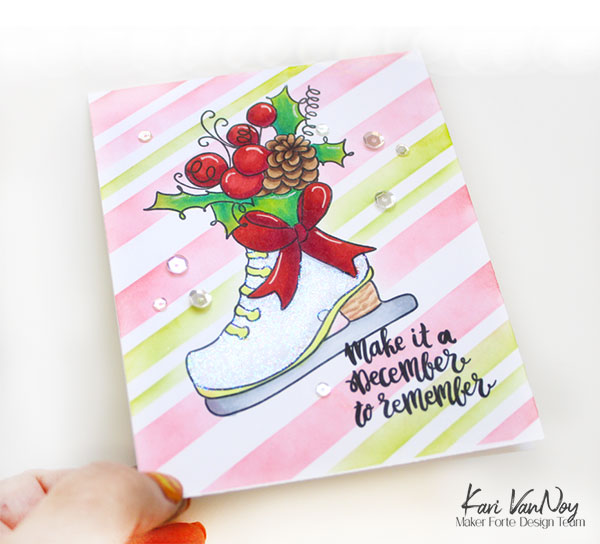
Hello! Today I have a quick holiday card to share with you. I’m using the new Ice Bouquet stamp set from Maker Forte. It’s such a beautiful image!
For this card, I stamped the image and colored it with Copic markers. Then I used the Candy Cane stripe stencil to ink on some light inks in red and green. I did not mask the image off, but I was careful to not ink over the image.
I added some Stardust Stickles (my favorite!) over the ice skate for some glittery shine. Then I finished it off with some iridescent sequins.
I’m often asked what supplies I use to make my cards and projects, so I’ve put together a list using affiliate links when possible. If you make a purchase with these links I may receive a small commission. These help me to keep up with blog costs and continue bringing you fun projects. Thank you so much for your support!
I hope you enjoyed this project today! Thanks for stopping by!
I have 3 different card ideas for this set (and that’s not all there is to do with this set), but I do hope this inspires you!
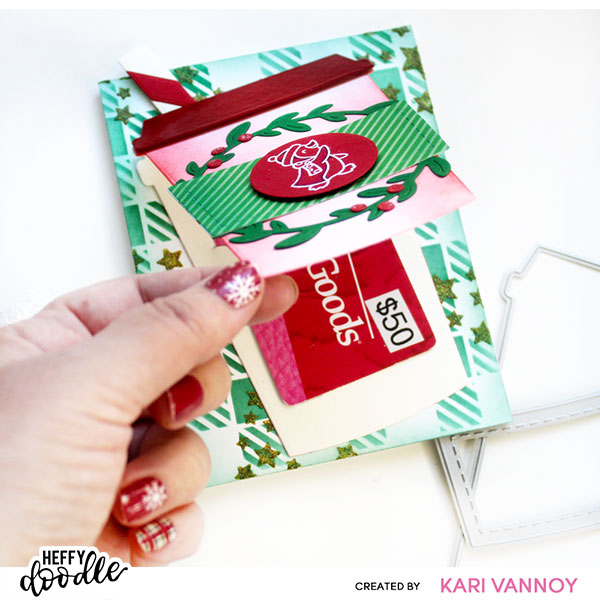
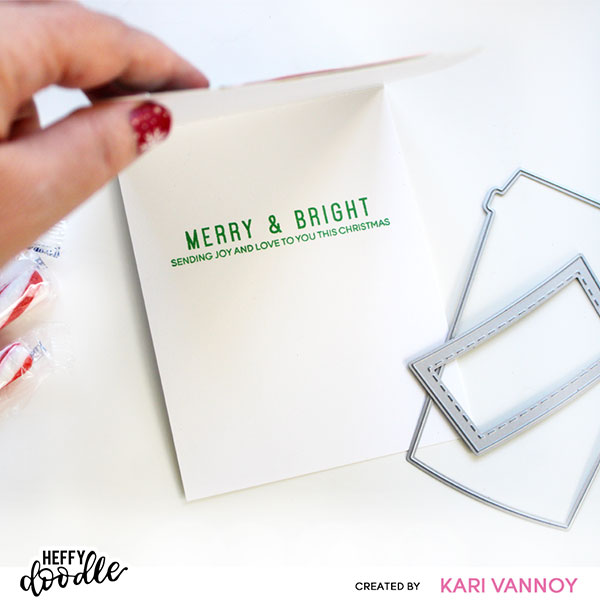
1. Front Flap Card
This first card is so fun…it has a front flap for your gift card AND you can open the card to write a sentiment too!
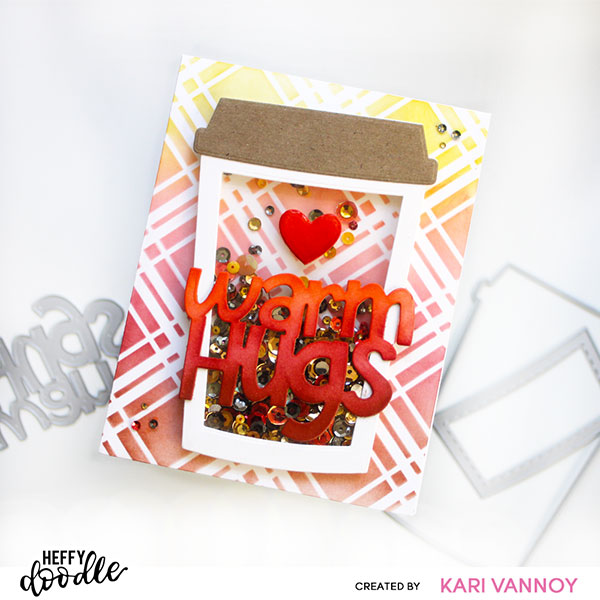
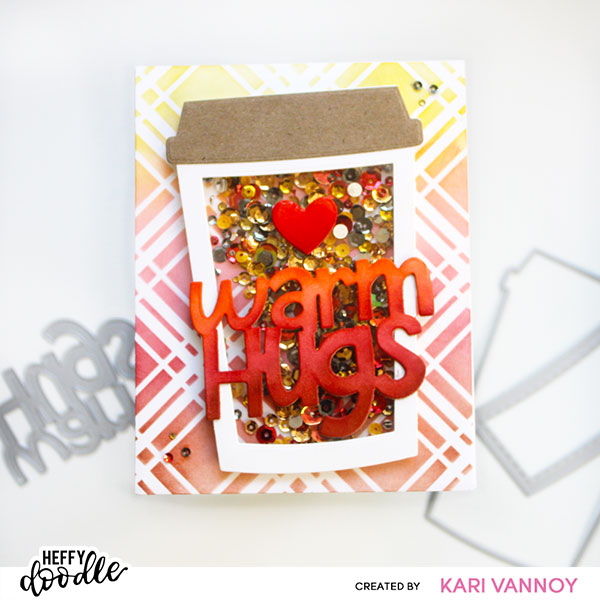
2. Fall Shaker Card
This is an easy way to make a shaker! I absolutely adore the Sparkle Mixes from Heffy Doodle: not only do they have sequins, but they also have GEMS!
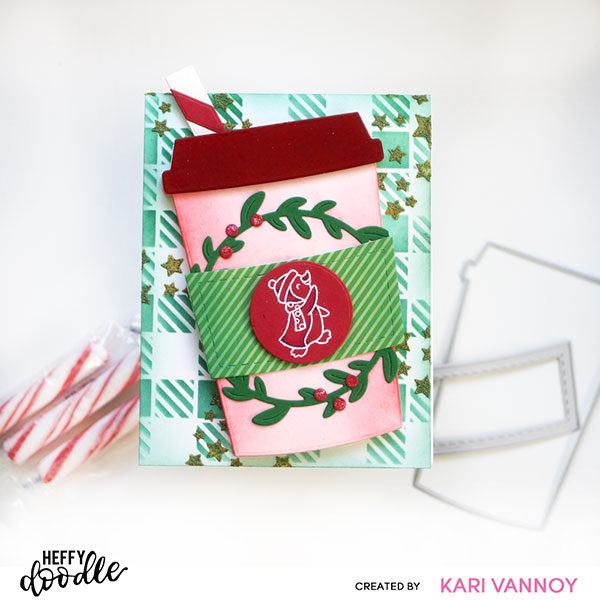
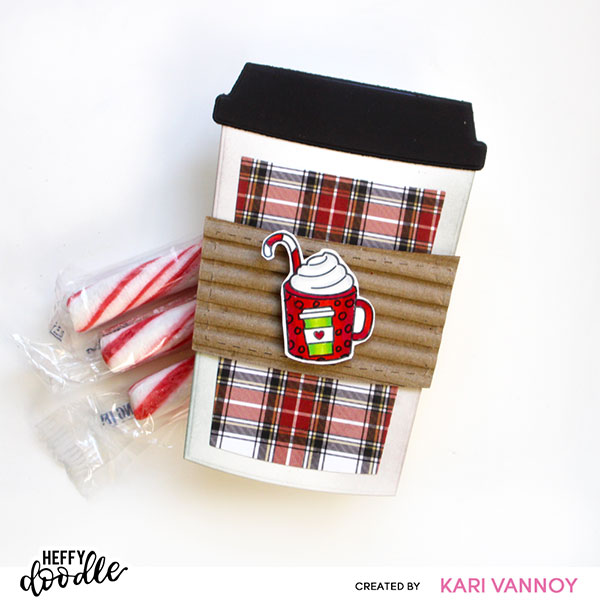
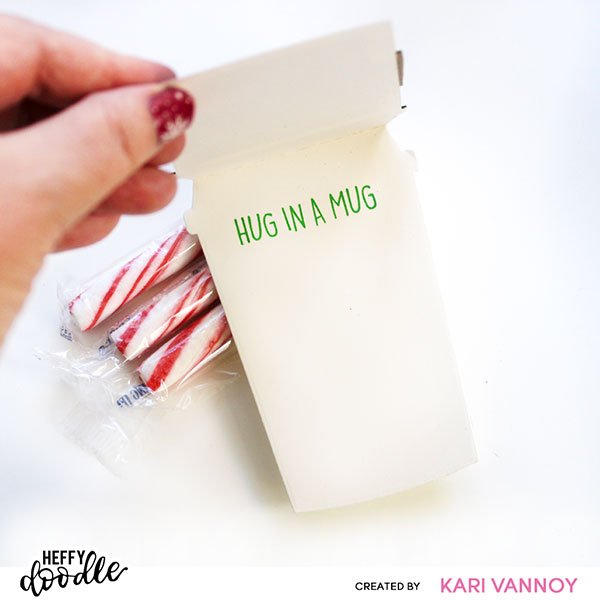
3. Holiday Shaped Card
This hot cocoa cup makes the cutest shaped card! It’s so easy when you follow my trick I share in the video. And YES, that is corrugated cardboard I die cut for the holder!
There’s still plenty of room to add a gift card inside!
I’m often asked what supplies I use to make my cards and projects, so I’ve put together a list using affiliate links when possible. If you make a purchase with these links I may receive a small commission. These help me to keep up with blog costs and continue bringing you fun projects. Thank you so much for your support!
I hope you enjoyed these projects today! I’ll be back soon with more cards to share!
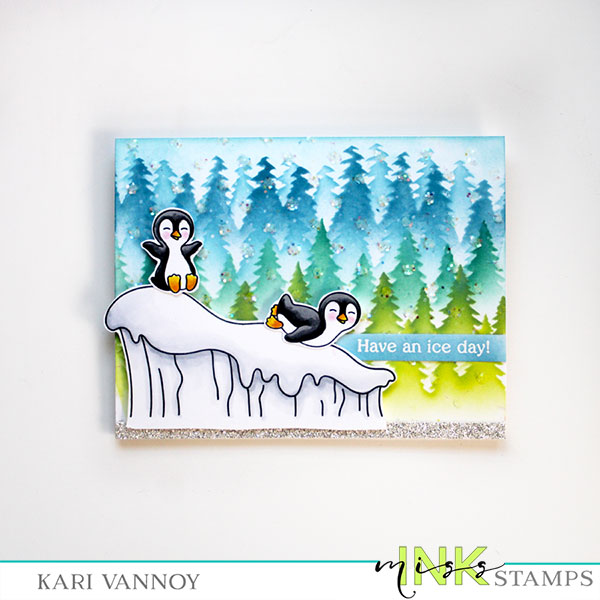
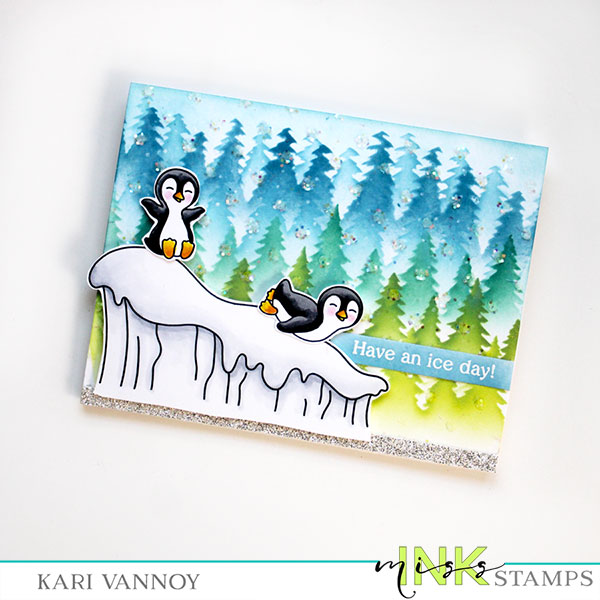
Hello! Today I’m excited to be sharing one of my favorite penguin cards I’ve ever made! I do love penguins and especially penguins that make me smile, and this set from Miss Ink Stamps is a favorite.
How cute are these penguins?!? I love them..and there are quite a few more penguin images in the stamp set, too. Today I chose 2 penguins and the snowbank for this card.
I started out by stenciling those trees using the treeline stencil. I used a variety of Distress Oxide inks: Tumbled Glass, Uncharted Mariner, Pine Needles, Peeled Paint, and Twisted Citron.
Next, I added some Grit Paste Snowfall and then added some extra glitter while it was still wet. I love a good glitter background!
While that was drying, I colored up those penguins and the snowbank. I embossed the sentiment in white and inked on some Uncharted Mariner ink for a “matching” sentiment.
When the background was dry, I put it all together with foam tape. I also added some glitter paper to the bottom of the panel for extra shine!
I’m often asked what supplies I use to make my cards and projects, so I’ve put together a list using affiliate links when possible. If you make a purchase with these links I may receive a small commission. These help me to keep up with blog costs and continue bringing you fun projects. Thank you so much for your support!
I hope you loved this project today! I’ll be back real soon with more cards to share!
Hello! Welcome to the Collab Hop with Scrappy Tails Crafts and Pear Blossom Press! As you hop along with us, you’re going to see some of the prettiest light-up holiday cards, all featuring your favorite stamps and dies from Scrappy Tails Crafts, and lights from Pear Blossom Press. Get ready for lots of inspiration, and be sure to comment as you hop along, for your chance to win a $25 store credit!
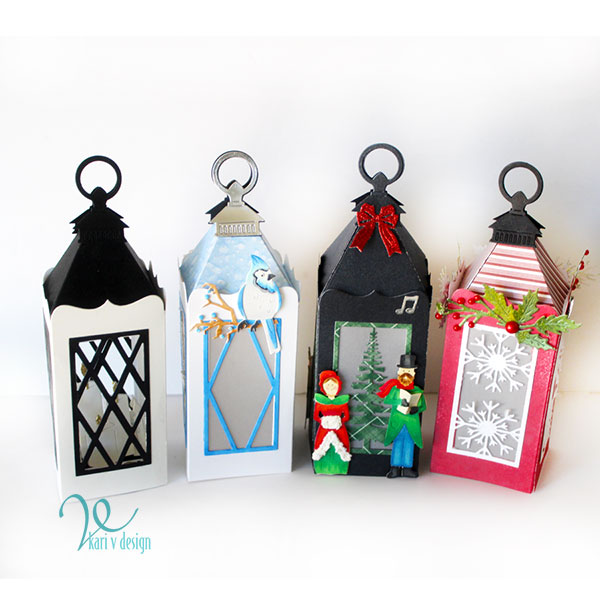
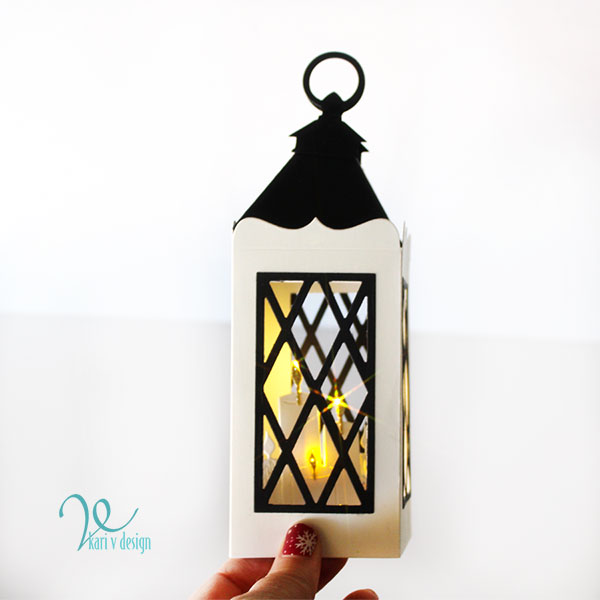
Today I’m excited to share a Light Up Lantern card that is completely mailable! This is a genius die set and I really couldn’t stop creating. I have FOUR projects to share with you today.
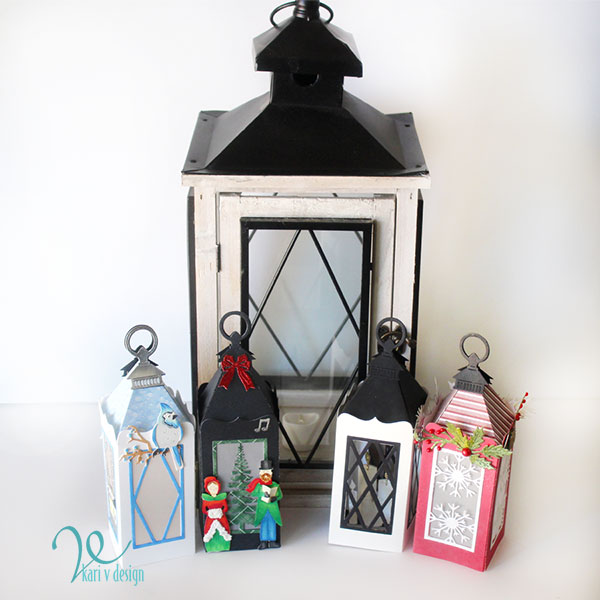
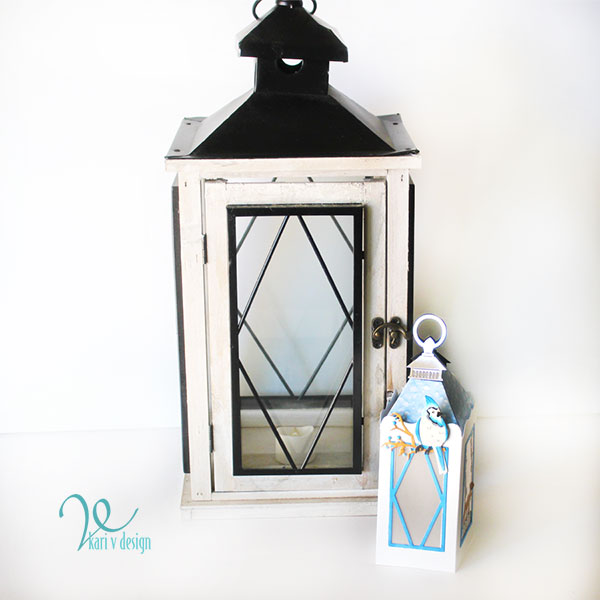
I was inspired by a lantern I have in my home (see that big one in the back?) and so I started out with a cream colored Mini Lantern with black accents. This is the one I share how to add EZ Lights to, so it becomes easy to fold and is completely mailable! You do need a larger envelope to mail it, however: it is so cool and so unique.
EZ Lights on those candles!
Next, I created a BLUE JAY lantern using the Birch Die add on panels and the Cardinal Layering Die set. Yes, I turned the Cardinals into BLUE JAYS! I love this die set so much, and look how you can change up the colors to create an entirely new bird!
You have to check out the video to see how beautiful the sides are using that Birch Tree Add-On die set! I cut the trees out of silver glitter paper and added a blue frame by simply cutting out the inside pieces of the Basic Shaped Lantern Panels. I added some vellum to the inside of each panel to diffuse the light.
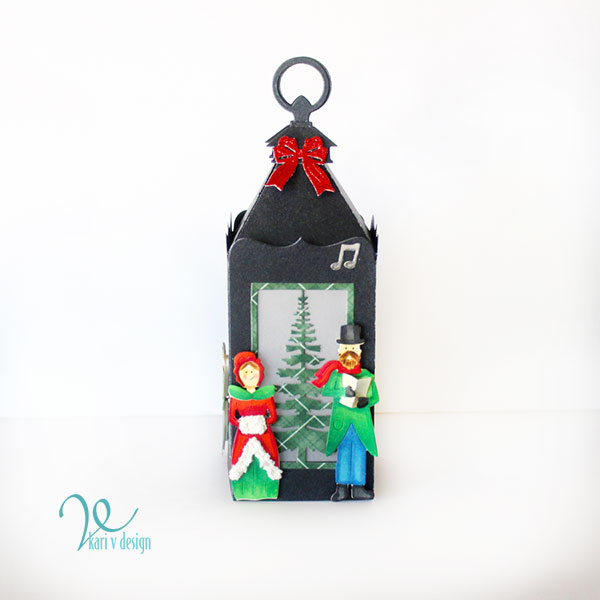
The Carolers together with the Holiday Lantern Panel (Christmas Tree) might be one of my favorite combinations! I adore the layering caroler dies…there’s even a caroling DOG in this set! LOL.
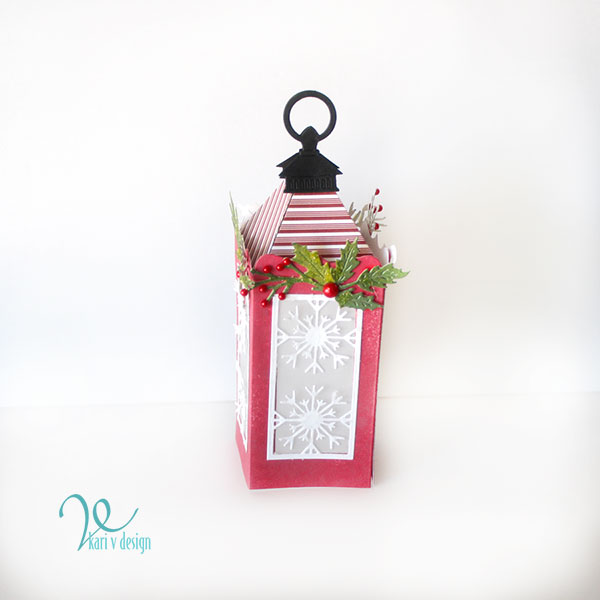
For this red lantern, I used the new Lumberjack Plaid Distress Spray Stain for the lantern itself. I cut a striped paper for the topper (hello, candy cane!). The leaves are gorgeous sprayed with Mica Spray Stains in a variety of greens. I loved adding the Red Pearl embellishments. This would also look so pretty with a Cardinal!
I’m often asked what supplies I use to make my cards and projects, so I’ve put together a list using affiliate links when possible. If you make a purchase with these links I may receive a small commission. These help me to keep up with blog costs and continue bringing you fun projects. Thank you so much for your support!
Watch the video for all the details! I hope you enjoyed these projects today. I cannot wait to create centerpieces with these…and also a Slimline card! I still have yet to use the reindeer panel and also build a cardinal. Check out the rest of the beautiful designs that are available for these lanterns, too!
Every good hop has prizes, right? So Scrappy Tails Crafts, and Pear Blossom Press are each giving away a $25 store credit! Comment on this post by November 18, 2022 to be entered to win. Winners will be posted on the Pear Blossom Press Blog on November 21st.
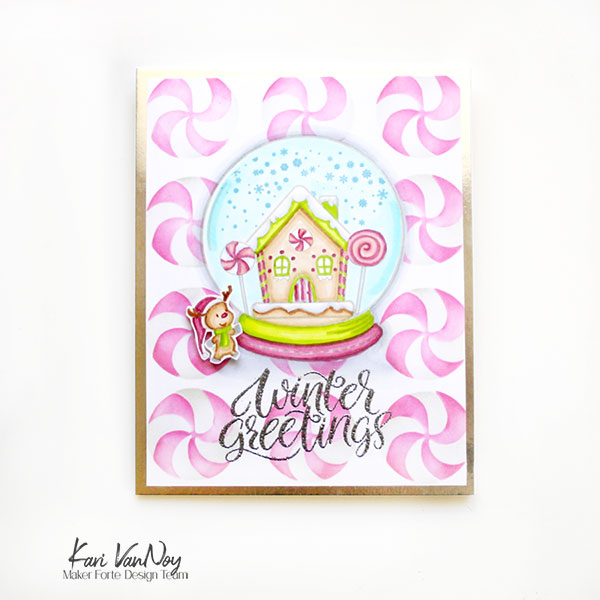
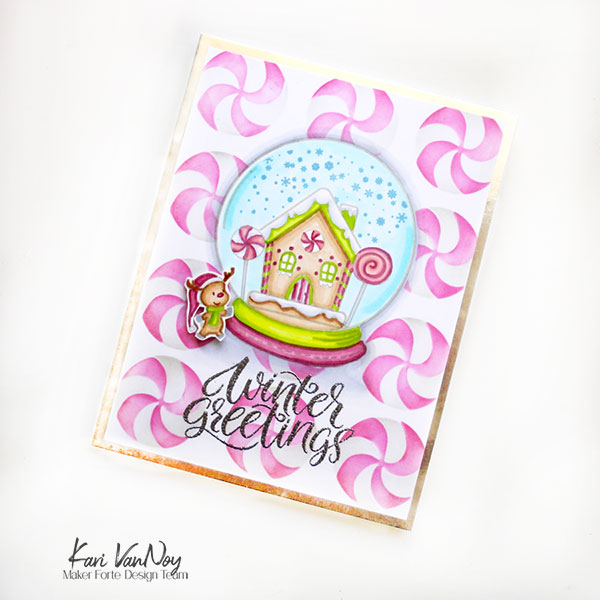
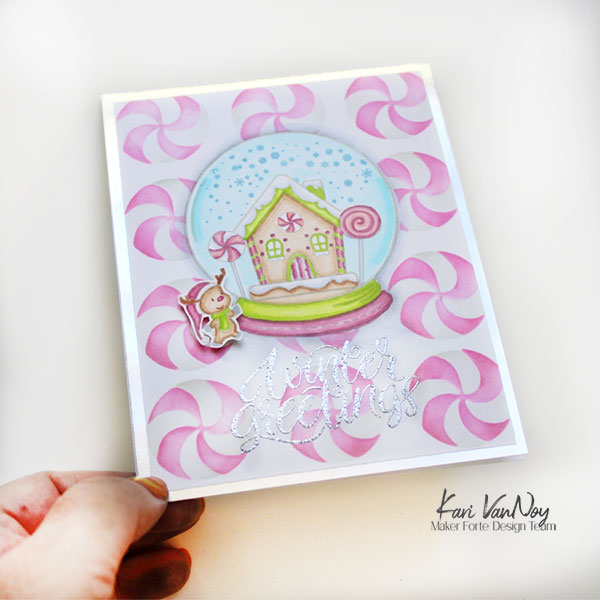
Hello! Today I have a Sweet gingerbread House in a snow globe! I just love this sweet image and I couldn’t resist coloring it up in pinks and light greens in a no-line colored look.
I used quite a bit of masking for this project…stamping one image at a time then masking off to stamp the next. I first stamped the lollipops, then masked them off. Next I stamped the gingerbread house and masked that off. Then I stamped the snowflakes.
After the scene was completely finished, I masked off the ENTIRE snow globe so I could add those starlight mints!
I love the A2 Starlight Mints stencil! I used pink and light grey ink here, but you could ink in a traditional red color OR try a light green for a wintergreen mint!
Next I heat embossed the sentiment with metallic embossing powder. I couldn’t resist adding a little deer from the What’s Up, Deer stamp set. He’s so cute!
I matted the entire panel onto some metallic silver cardstock and I love how it plays nicely with that embossing powder!
I’m often asked what supplies I use to make my cards and projects, so I’ve put together a list using affiliate links when possible. If you make a purchase with these links I may receive a small commission. These help me to keep up with blog costs and continue bringing you fun projects. Thank you so much for your support!
I hope you enjoyed this sweet project today! Thanks for stopping by.
Hi I'm Kari. I'm a creator, a card maker, and a day maker! I am Lucky in love to a supportive husband, blessed to raise 3 kids (all moved away now!), and happy to be watched over by 2 dogs.
I originally started this blog to remind me to be happy amid adversity, and I hope it inspires you, too!