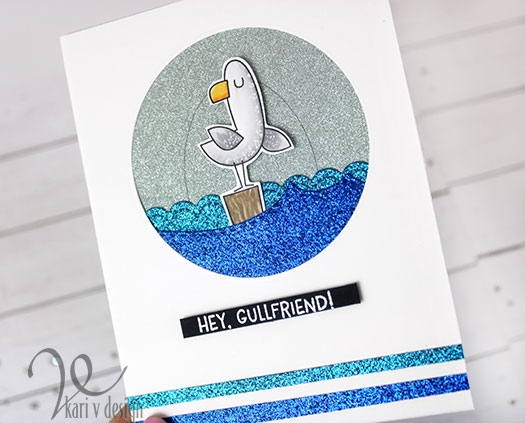
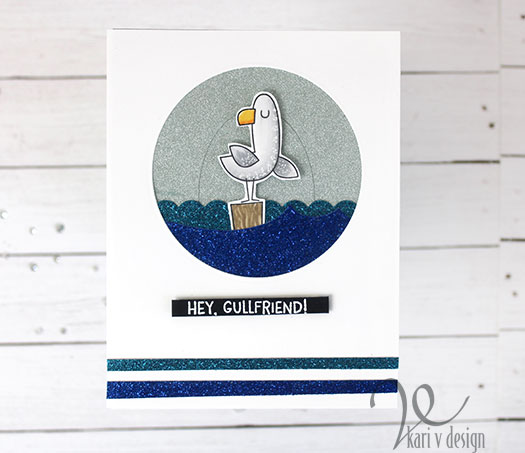
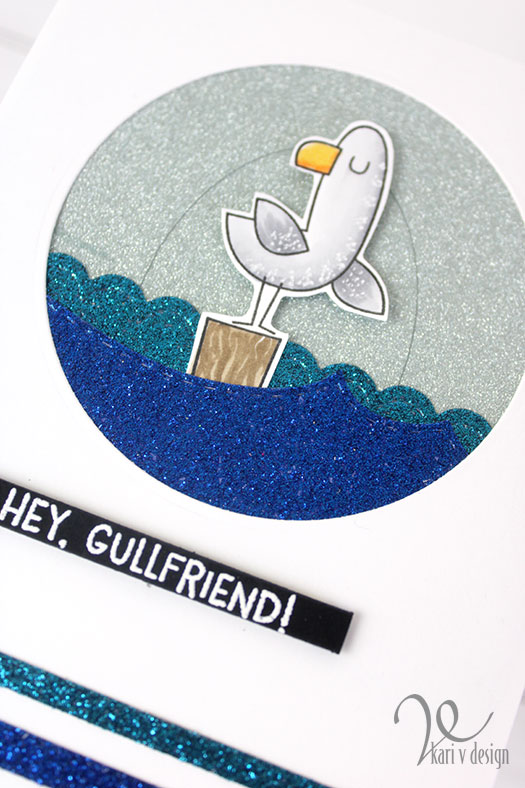
Hi there! It’s the final Day (day 5) of MFT Camp Create and the challenge is Glitzy Glitter. For this one, I pulled out my all-time favorite Seagull stamp.
Glitter Paper in two shades of blue
I love that little seagull. I colored him up with Copics and added white dots for some fun detail. The “ocean” is made with glitter paper cut into wave shapes, and behind that seagull is even MORE glitter paper in silver. I created an Oval dry embossed behind the seagull to highlight this critter even more.
Glitter is tricky to capture in photos!
I hope you have enjoyed this week of creating with Camp Create! I officially have completed all FIVE DAYS! Here’s my badge for today.
It was a wonderful week at Camp Create! A big thank you to My Favorite Things Stamps for the challenges!
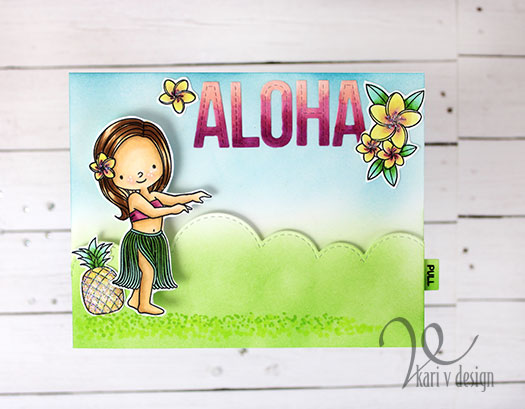
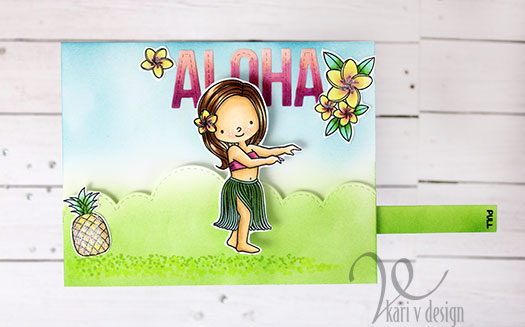
Hi there! It’s time for Day 4 of MFT Camp Create, which brings us to slider cards! I have to admit, I don’t make very many slider cards right now, but when I do make them I LOVE them!
Today I tried a new technique of a HIDDEN slider and it’s pretty slick! I learned this from the MFT video for today’s challenge.
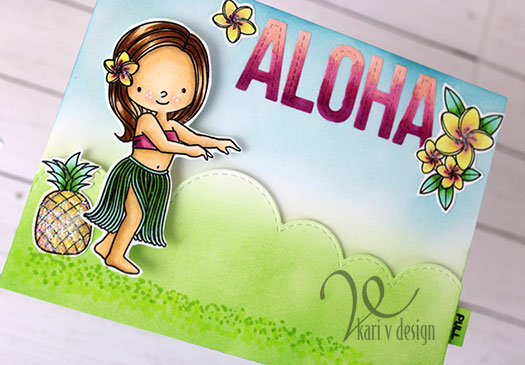
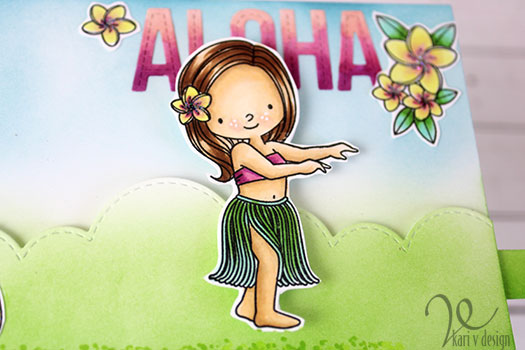
Aloha!
Don’t you like how this hula girl dances across the card! Lol. I love it. I cut out the word “Aloha” from MFT alpha dies and colored them with copics to match her outfit.
She’s good at Hula
I made the card background pretty simple on this one, with some ink blending and copics, but I wanted to concentrate on that slider element.
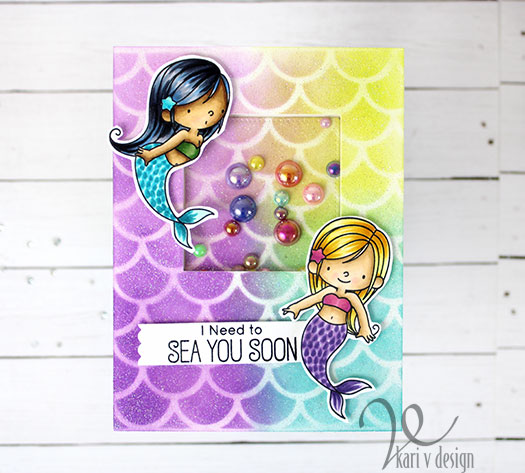
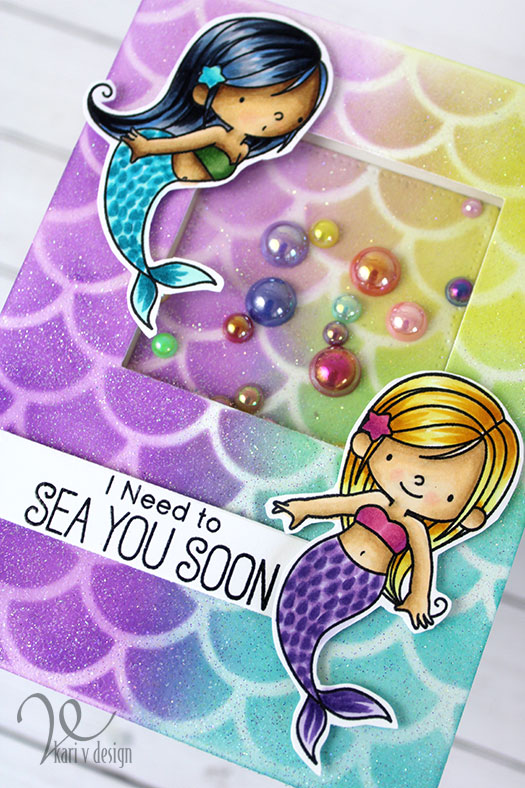
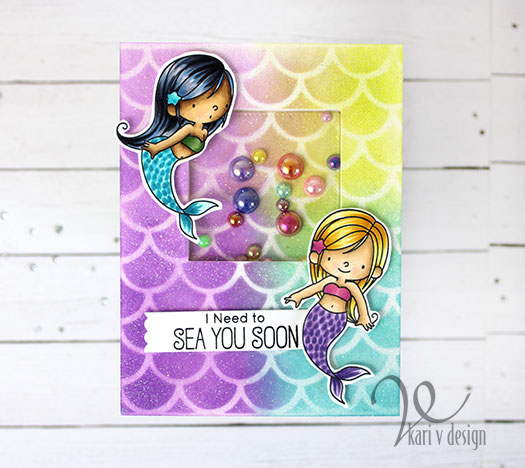
It’s Day 3 of MFT Camp Create and that means SHAKER CARDS! I love shaker cards and this time I inked up those mermaids with Copics. I forgot just how much I enjoy coloring mermaids!
I tried a new way to color up their tails and I like how it turned out…gives quite a bit of texture. For the background of this card, I used an MFT stencil to ink on some Distress Oxides in mermaid colors. Then I used some Glitter embossing powder over the entire panel! Can you see that glitter?
Glittery goodness!
Those shaker pieces are so much fun (from Trinity Stamps!) and I love the shine they have. Perfect for a shaker mermaid card!
Here’s the badge I earned for today:
I hope you enjoyed this shaker mermaid card today!
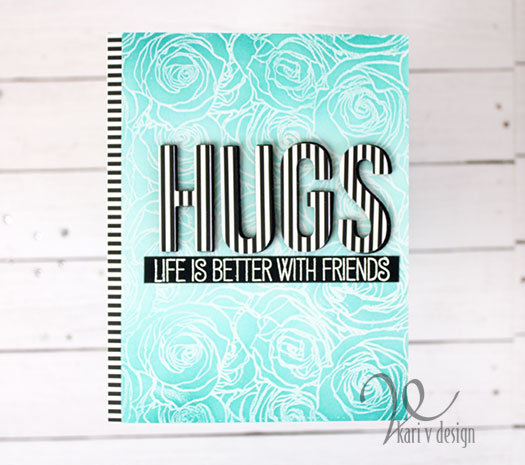
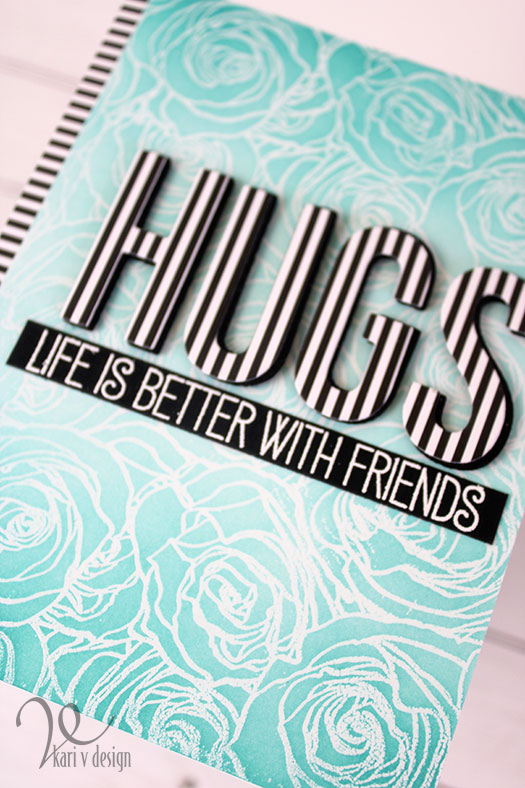
Hello! Today I’m participating in MFT Camp Create Day 2, which means emboss resist technique!! I Love this technique and I had a great time making this card.
Life IS better with friends
I used the Roses Background Stamp and embossed it with clear embossing powder. Then I used a makeup brush to ink on some Distress Ink in my favorite color: Peacock Feathers! [Side note: I was going to use a traditional rose color, but that turquoise was just calling my name!]
The striped paper is the FAMOUS paper from MFT that is all black and white. Love that paper pad!
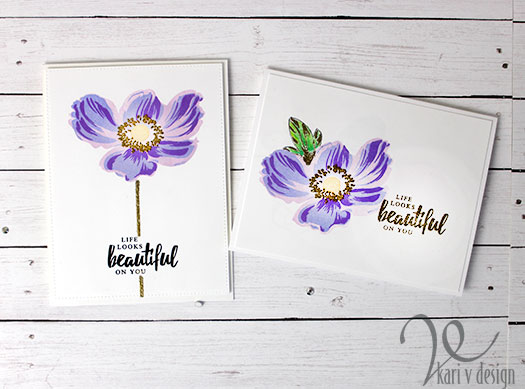
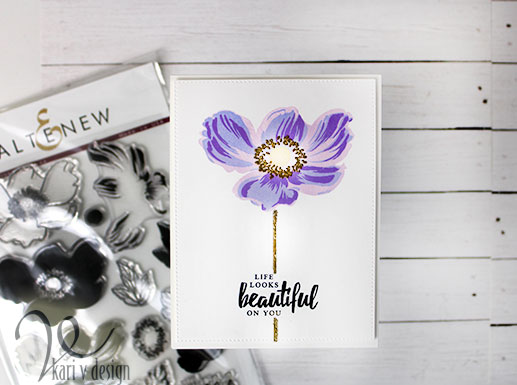
Hello! Today I have another card share for my Altenew Educators Certification Program. This time, I was inspired by Jennifer Rzasa in the Clean & Simple Boutique Cards class.
Clean & Simple definitely does not come easy for me, but Jennifer suggested adding a little something extra like foil or embossing powder. This gives the card a bit more flair and still remains clean & simple.
Here’s my take, (it is difficult to capture the shine of the gold in photos, so please keep scrolling for more pictures):
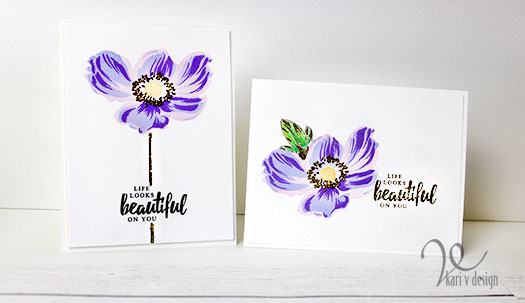
I just love the look of this stamp set (Build-A-Flower: Anemone)! I used a variety of purple inks to get this look. Since I don’t have my Altenew inks yet, I combined both Distress Ink and Distress Oxides to get this look.
The idea was to add a gold embossed stem to the Anemone, but this stamp set doesn’t have any stems, so I drew one on using a Versamarker!
Gold embossing powder adds a pop of shine
I have a video below to show you the process, or watch on YouTube:
Just imagine all the different color combinations you can try on this flower. I love the big change in colors I got here, but for a more subtle effect you could simply use one or two colors and double, even triple stamp in that color.
I hope you enjoyed this project today. I often get asked what products I’ve used, so I have a list below. I use affiliate links, when available, at no extra cost to you. When you purchase using these links, I may receive a small commission. This helps me to keep up with blog costs and continue to bring you projects like this! Thanks for your support.
Love this Anemone set! Thanks so much for stopping by.
Hi I'm Kari. I'm a creator, a card maker, and a day maker! I am Lucky in love to a supportive husband, blessed to raise 3 kids (all moved away now!), and happy to be watched over by 2 dogs.
I originally started this blog to remind me to be happy amid adversity, and I hope it inspires you, too!