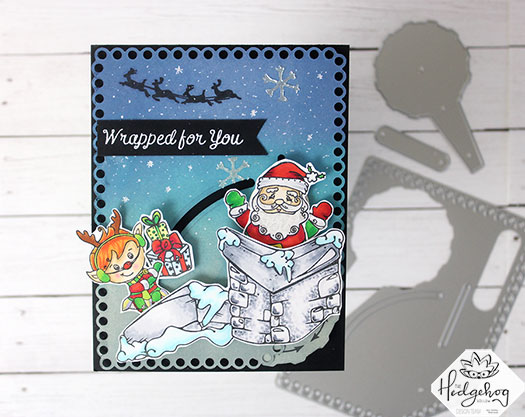
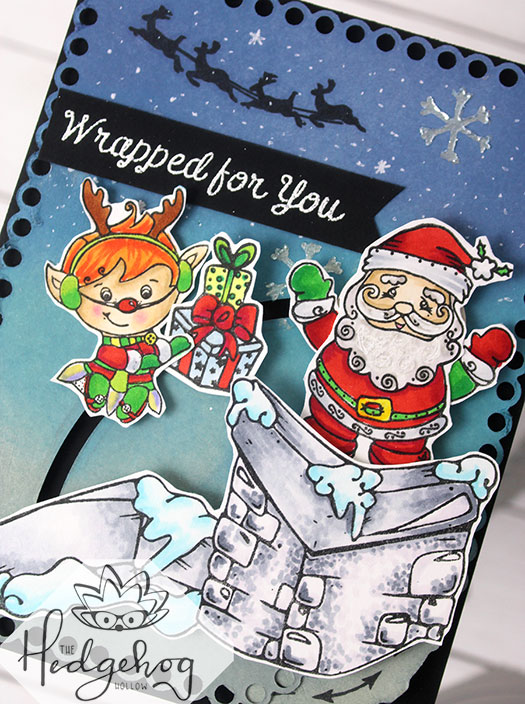
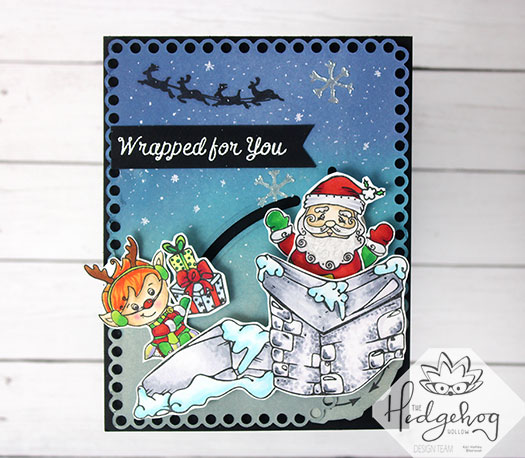
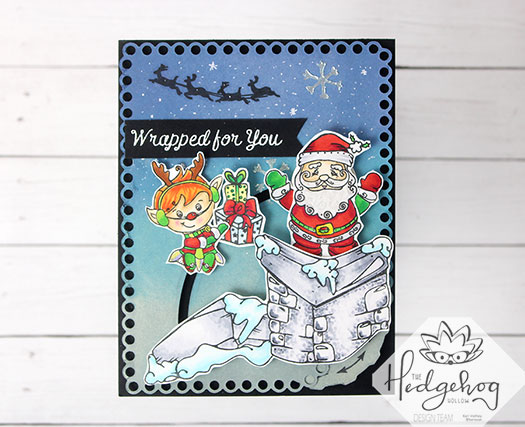
Hello! Today I am sharing an interactive card using products from the Hedgehog Hollow October Kit. There are so many holiday stamps, a stencil, and a fun interactive die in this kit.
Santa jumps out of chimney, Elf jumps up to hand Santa some presents!
This is a very fun die, and I have a video to show you just how to put it all together, with some tricks I learned along the way. Watch it below or on YouTube:
I’m often asked what supplies I use to make my cards and projects, so I’ve put together a list using affiliate links when possible. If you make a purchase with these links I may receive a small commission. These help me to keep up with blog costs and continue bringing you fun projects. Thank you so much for your support!
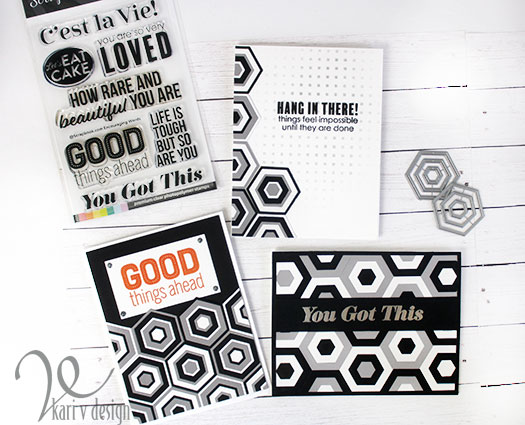
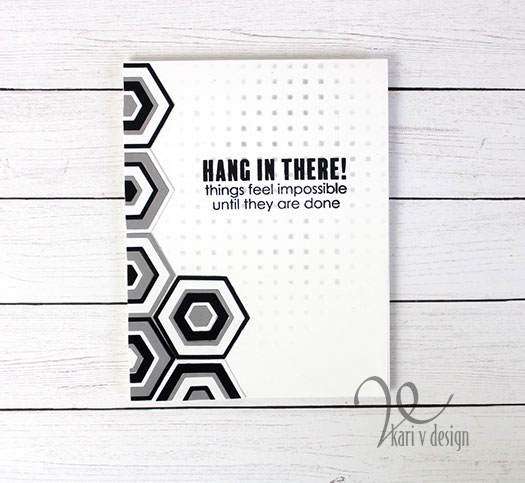
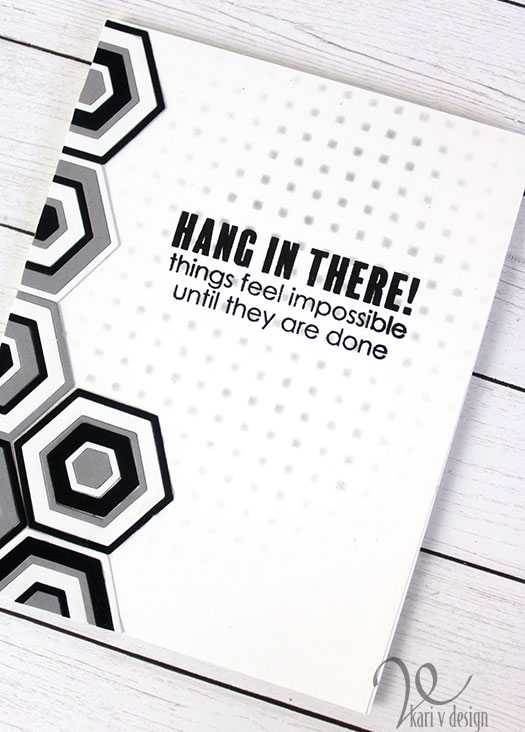
Hello! Today I have some very encouraging cards…that look like kitchen tile. These are simple to put together, but pack a punch with bold sentiments and a tiled look. These would be perfect masculine cards too!
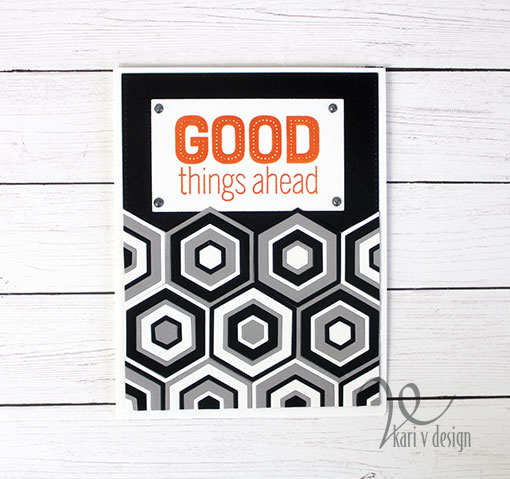
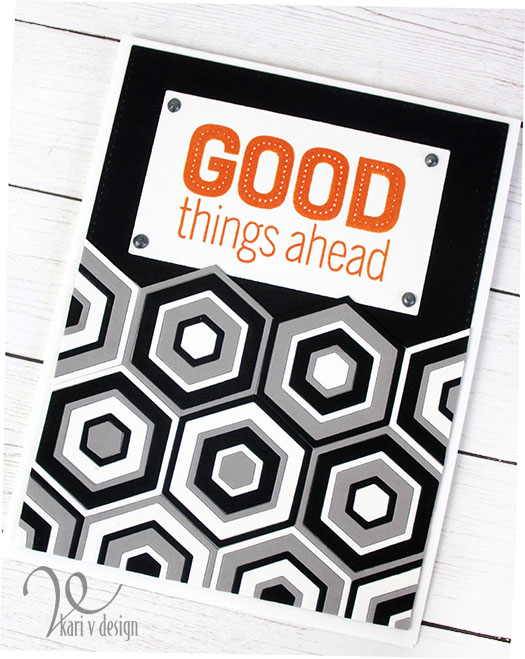
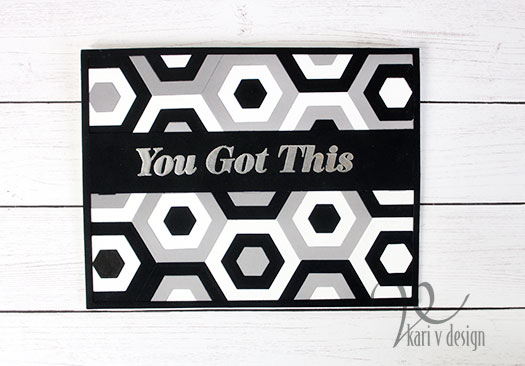
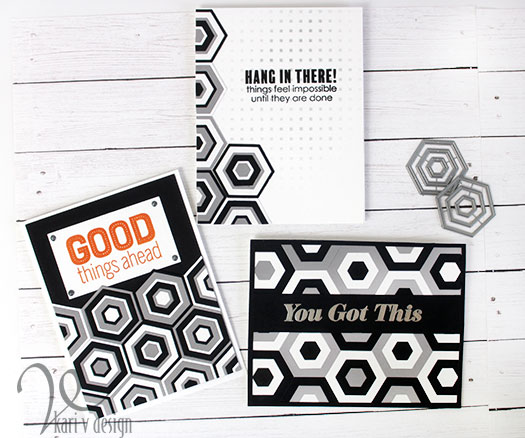
Today I made these hexagon designs with black, white and grey cardstock. but they would be beautiful in multi-colors.
I have a video to show you some tips on lining up the tiles and making them easy. Watch it below or on YouTube:
I made these cards for my husband, who is currently renovating a house and experiencing LOTS of set-backs. Ugh. So I thought a little encouragement would be in order. The tile is similar to a bath tile he picked out!
Good Things ahead!
I love the look of these tiles, with the alternating colors. For this one, I added an orange sentiment and some Nuvo drops to look like rivets.
After I put these two cards together, I had some leftover hexagons, so I made one extra card, using a small box stencil for the backdrop.
I’m often asked what supplies I use to make my cards and projects, so I’ve put together a list using affiliate links when possible. If you make a purchase with these links I may receive a small commission. These help me to keep up with blog costs and continue bringing you fun projects. Thank you so much for your support!
I hope you enjoyed all these tiled cards! Thanks for stopping by.
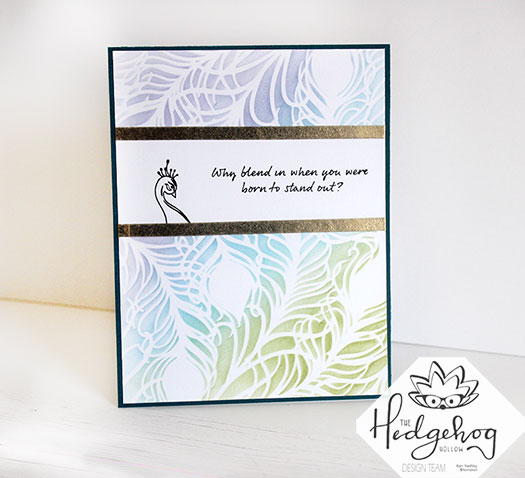
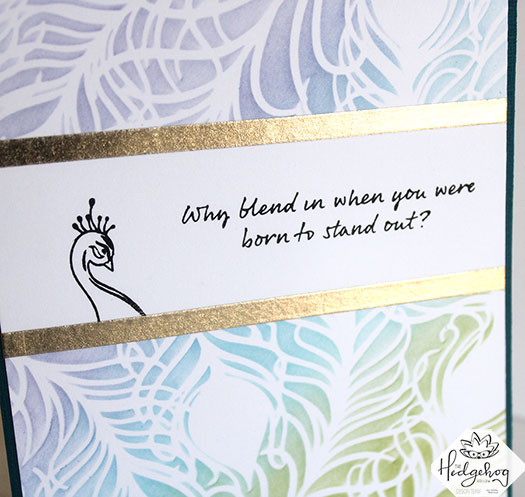
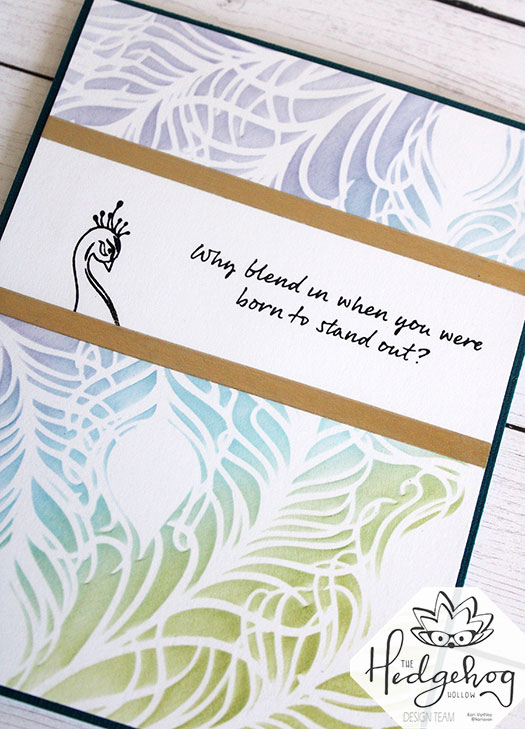
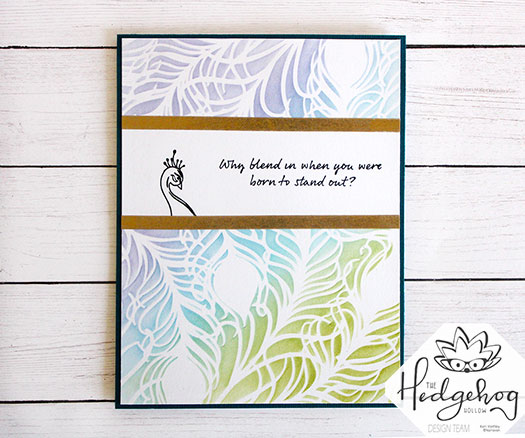
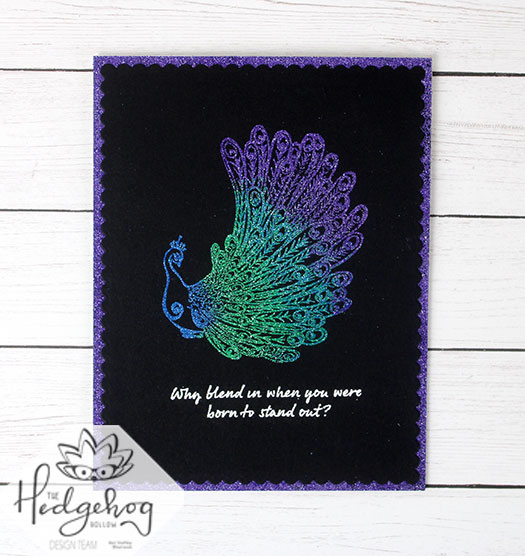
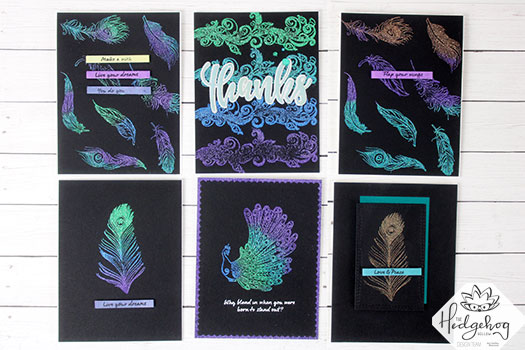
Hello there! Today as I am writing this, I realized that my title sounds like maybe you might be getting a Peacock Halloween card…or a peacock wearing a mask. Lol. Sorry, this post is not that.
But it IS an easy to mass produce, quick card with a peacock theme, which is almost as nice. Right? This is my last card share with the September 2019 Hedgehog Hollow Kit. It has such beautiful images!
Why blend in when you were born to stand out?
Here’s the how-to:
First, I masked off a portion of the card panel using 1 1/2″ purple tape Second, I attached the stencil with tape and blended on three colors of ink using stencil blending brushes. Then, I removed the tape and stencil, and covered up the stenciled feathers with some scrap paper. I stamped the sentiment and the top portion of the peacock with black ink, added some gold washi, and attached it to a dark blue cardstock and card base. That’s it! Done!
A simple card, but so striking!
I’m often asked what supplies I use to make my cards and projects, so I’ve put together a list using affiliate links when possible. If you make a purchase with these links I may receive a small commission. These help me to keep up with blog costs and continue bringing you fun projects. Thank you so much for your support!
I hope you enjoyed this project today! I’ll be back soon with more inspiration!
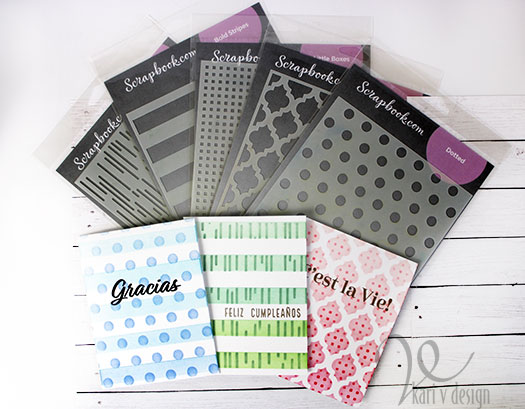
Hello! Today I am a part of Justine Hovey’s Video hop celebrating 50K followers on her channel! This is a hop with lots of prizes and many great techniques shared.
Today I am sharing the double stencil technique, which is a favorite of mine for an interesting background. Check out my video below or on YouTube. (Be sure to comment on my video and on all the videos in the hop to enter to win one of multiple $50 gift cards!)
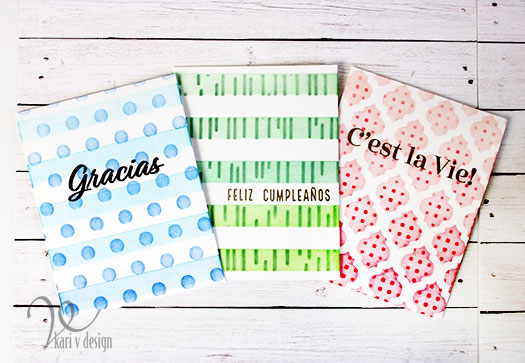
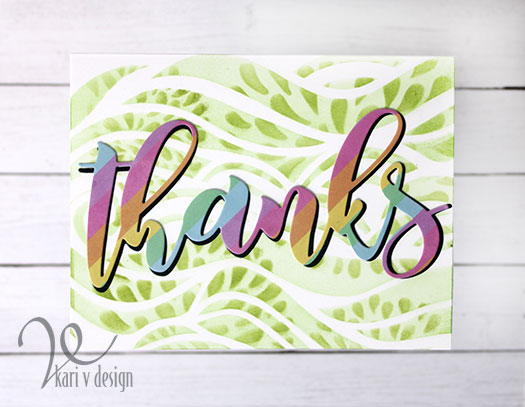
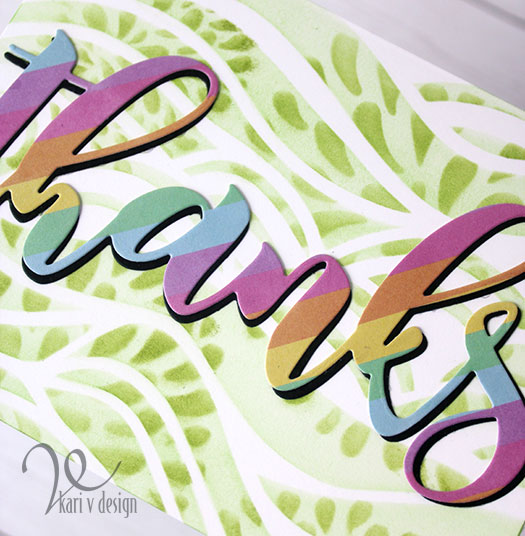
First I will show you a few simple cards to share the technique. This works best when you have one stencil with a larger design, and one stencil with a smaller more detailed design.
Simple cards to show the technique…
First stencil the larger stencil, then place the smaller stencil over the top and use a darker color to stencil on the second one.
This technique is much more difficult to explain in a blog post, so I hope you will go check out the video.
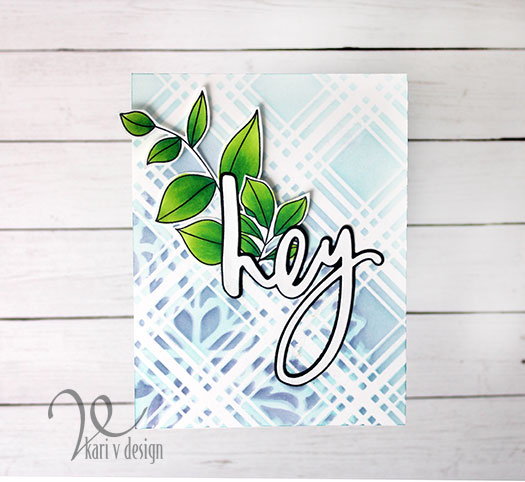
Here are some more examples and cards I made using this technique:
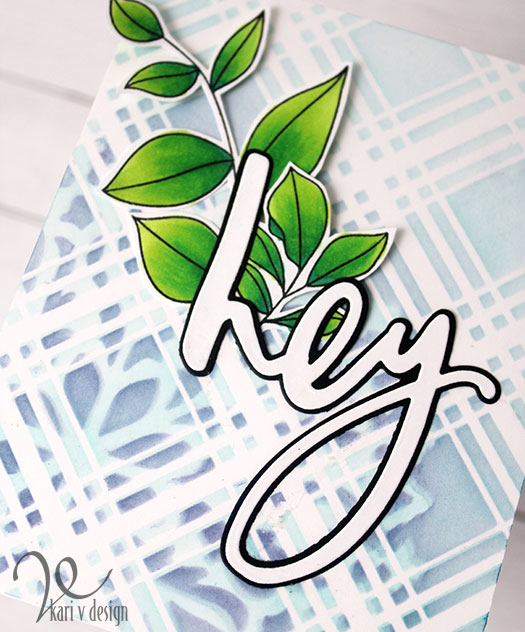
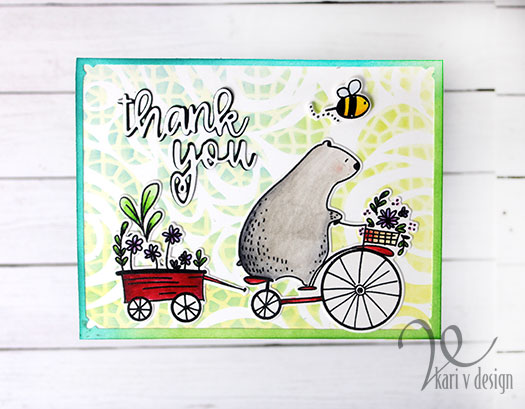
For this one, I stenciled on the plaid design first with a light blue ink, then added the medallion stencil over top and used dark blue and purple inks.
Big bear loves a bike ride Wave stencil with a floral stencilCircle stencil with plaid stencil
I’m often asked what supplies I use to make my cards and projects, so I’ve put together a list using affiliate links when possible. If you make a purchase with these links I may receive a small commission. These help me to keep up with blog costs and continue bringing you fun projects. Thank you so much for your support!
I hope you will give this technique a try! I really have fun with it. It’s a great way to build up some backgrounds.
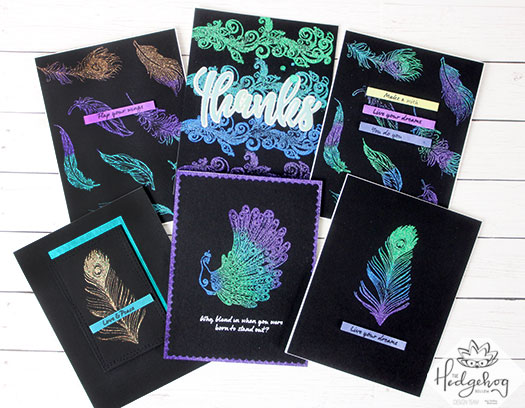
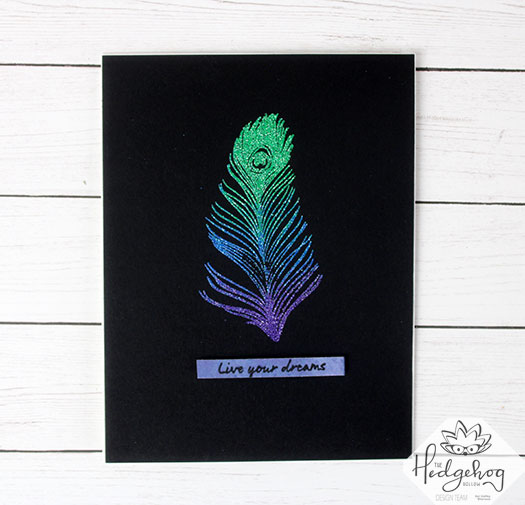
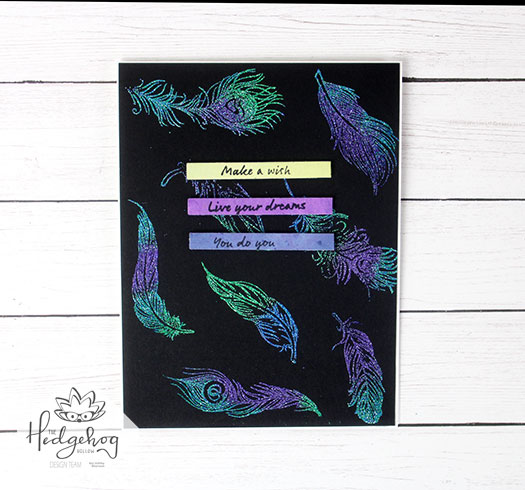
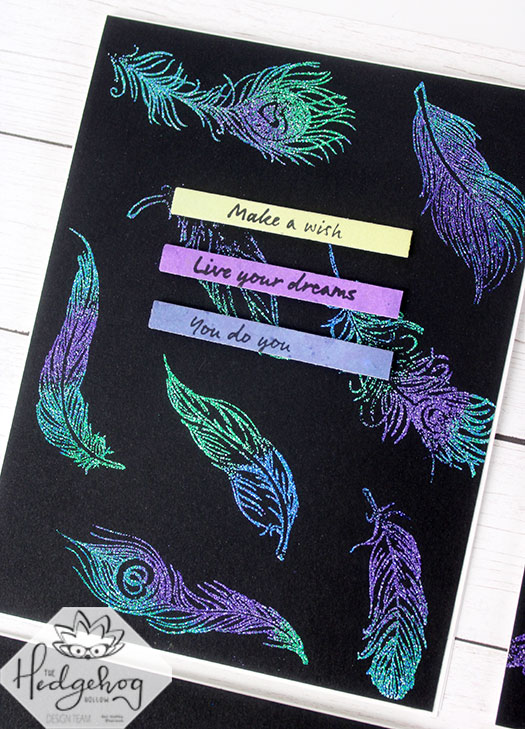
Hello! Today I have a card share with showing just how striking heat embossing can look on dark cardstock.
I used a variety of glitter embossing powders, including one from a previous Hedgehog Hollow kit. The feathers and all stamps I use here are from the current September Hedgehog Hollow kit.
Start with a dark cardbase, I used black cardstock here. Then use an anti-static powder bag to prep it. Dark cardstock is notorious for holding onto stray bits of embossing powder so don’t skip this step!
Then, using an embossing ink, stamp the image onto the cardstock and add various colors of glitter embossing powders. I used my Nuvo spoon to add a little of each color to get a smooth look.
I love how this embossing powder really pops on the dark background.
For the sentiments, I used Distress Oxides to blend the background colors. I gave it some time to dry before stamping the sentiments on with a black ink. Then, I cut out sentiment strips.
So take a look at your embossing powders and try it out on a dark cardstock base! It’s fun to see the different results.
I have a short video to show you some tricks for heat embossing and ways to get a softer blend between colors, watch it below or on YouTube:
I hope you enjoyed this project today. As you can see, I couldn’t stop making these cards once I got started!
I’m often asked what supplies I use to make my cards and projects, so I’ve put together a list using affiliate links when possible. If you make a purchase with these links I may receive a small commission. These help me to keep up with blog costs and continue bringing you fun projects. Thank you so much for your support!
Hi I'm Kari. I'm a creator, a card maker, and a day maker! I am Lucky in love to a supportive husband, blessed to raise 3 kids (all moved away now!), and happy to be watched over by 2 dogs.
I originally started this blog to remind me to be happy amid adversity, and I hope it inspires you, too!